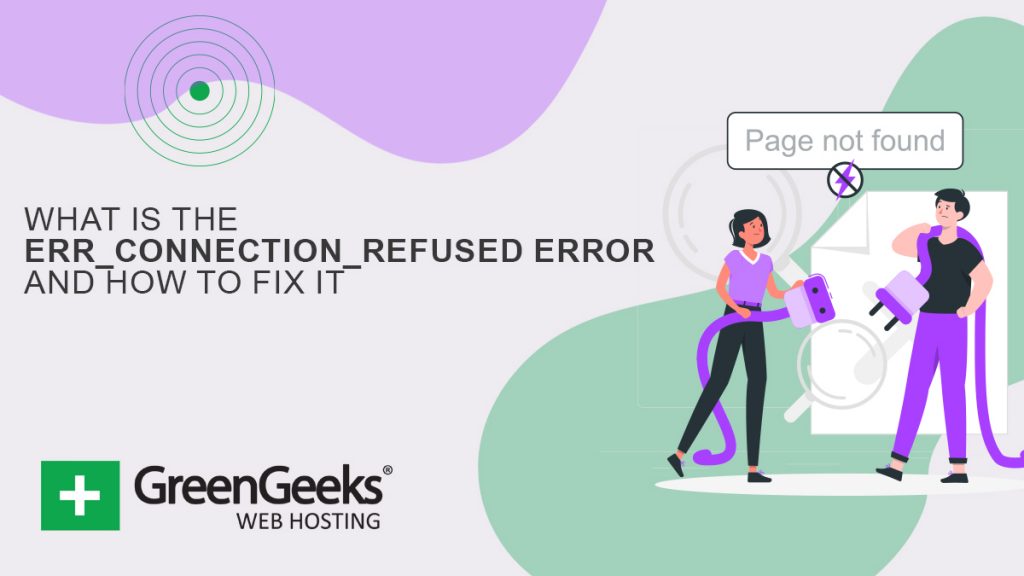
Is your browser displaying the “ERR CONNECTION TIMED OUT” error? Isn’t that an unhelpful error message? If you use WordPress regularly, it’s always a good idea to be aware of common errors like these that may prevent you from accessing your website.
A website’s inability to load can be caused by a variety of factors. So, in this article, we’ll look at the possible causes of the ERR CONNECTION TIMED OUT error before looking at possible solutions.
The Internet has grown to become one of the world’s largest networks, connecting the entire globe and facilitating data sharing. However, there are a few errors that disrupt the normal operation of the Internet, reducing users’ efficiency while working on the system.
What is the err_connection_timed_out Error?
The connection timed out error is not a dangerous problem or an infected file that can harm your system. This message primarily informs you that the system was unable to establish a connection with the server.
Let us first examine how the Internet works.
When a user enters a keyword in the search bar or the URL of a website, the system sends a request to the server to allow access to the website’s content. The connection is established after the server checks the request and grants permission to the system, and data packets are shared between the system and the server.
An ERR CONNECTION TIMED OUT error usually indicates that there is a problem with your local network connection. That is not always the case, however.
A connection timed out error appears when your website attempts to do more than your server can handle. It’s especially common on shared hosting, where memory is limited.
When you visit a website that doesn’t load, your browser will try for about 30 seconds before disconnecting. It will then return an “ERR CONNECTION TIMED OUT” error, indicating a communication failure.
In Google Chrome, this may appear as “This site cannot be reached.” Domain.com responded too slowly.”
Because of the various web browsers, operating systems, and servers, the error can manifest itself in a variety of ways.
However, the majority of them have the same or similar meanings. “ERR NETWORK CHANGED” and “ERR CONNECTION REFUSED” are two very similar errors that can usually be resolved using the same troubleshooting steps outlined below.
Another common error code that appears under ‘This site cannot be reached’ is DNS PROBE FINISHED NXDOMAIN, which is a DNS error that essentially means the requested domain does not exist.
The following are some examples of how the error might appear in different browsers.
- Mozilla Firefox
The error message in Mozilla Firefox will be “The connection has timed out.” Domain.com’s server is taking too long to respond. - Microsoft Edge
The error message in Microsoft Edge will be “Hmmm… can’t reach this page.” Domain.com responded too slowly.” It does, however, contain the “ERR CONNECTION TIMED OUT” error in Edge. - Safari
The error message in Safari will be “Safari Can’t Open the Page.” Safari is unable to open the page domain.com because the server on which it is hosted is not responding.”
What Causes the err_connection_timed_out Error?
There could be several potential causes for the connection timed out error. Some of these factors include:
- Slow Internet Connection: One of the possible causes of the error is a slow Internet connection. If the system does not have a fast and reliable Internet connection, it is possible that the server accepted the request but the system took too long to respond due to the slow Internet.
- Invalid URL: If a user attempts to access data via an invalid URL, the server automatically rejects the request.
- Server Delay or Error: There doesn’t need to be a problem at the user end only; it is also possible that there is a server delay and that a data timeout occurred before the server could release.
- Firewall Settings: It is possible that the Windows Firewall did not allow data packets to enter the system, causing the browser to display this error.
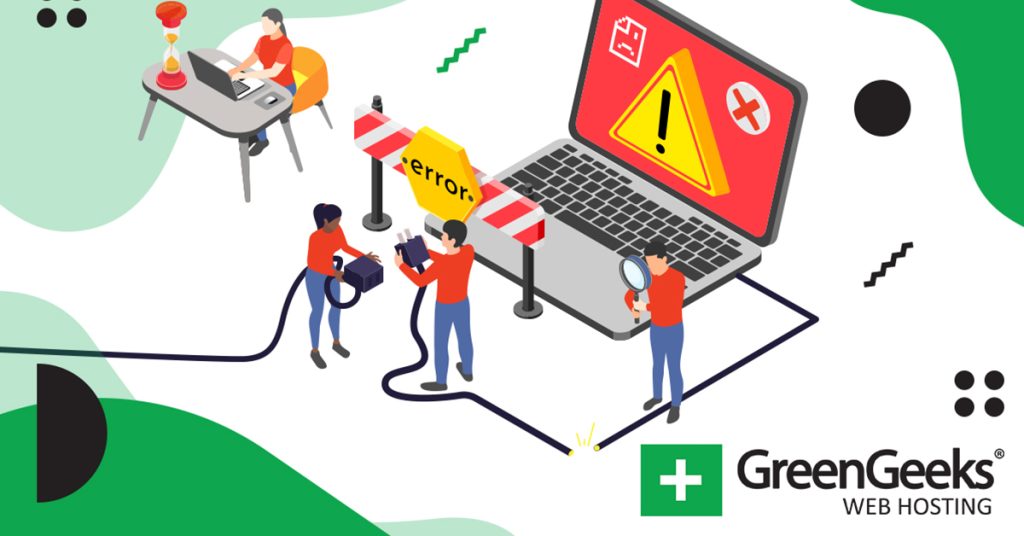
How to fix the err_connection_timed_out Error
If you see this error on your website, where should you begin troubleshooting? Without a lot of context, it can be frustrating and overwhelming to know where to start.
Typically, these are either client-side issues (problems with your network connection or firewall) or server-side issues (problems with the server where the site is hosted) (memory limits, execution times, etc.).
Let’s take a look at some solutions for ERR CONNECTION TIMED OUT. First, we’ll go over how to fix the problem if you’re getting the error while trying to load the site.
1. Examine Your Internet Connection
To resolve the ERR CONNECTION TIMED OUT error, a browser will usually recommend that you first check your internet connection. Due to poor connectivity, it may be difficult for a site to reach a computer promptly.
Google Chrome, Firefox, and Microsoft Edge all advise you to check your network connection. While this may seem obvious, they all point to first checking your connection because it is one of the most common causes of the error.
Here are a few recommendations:
- Restart your router at home or work. This takes only a few minutes and solves far more problems than most people would like to admit. Disconnect the power supply and wait 30 seconds before plugging it back in to completely power cycle it.
- Examine your wifi connection to see if it is bad or slow. This is common in crowded public wifi hotspots like coffee shops or airports.
If the problems persist, try switching to a different network or restarting any relevant devices if you have access to them.
2. Disable Any Proxy Server Settings or VPN Connections.
A proxy server acts as a go-between for your computer and the website you’re visiting. Its function is to protect the user’s IP address, control which sites can be accessed, and cache site data to improve page loading speed.
However, proxy servers may unintentionally block the website you want to visit, resulting in the ERR CONNECTION TIMED OUT error.
Reset your proxy settings to see if these servers are the source of the problem. For Windows 10 users, go to the Control Panel by pressing the Windows logo key. Select Network and Internet Options from the menu.
Open the Connections tab -> LAN settings in the Internet Properties window. Make sure to untick all of the proxy settings.
Users of macOS can go to System Preferences Network and select Advance. Uncheck each box on the Proxies tab and then click OK.
Reload the page to see if the error has been resolved. If it has, and you require the use of a proxy server for day-to-day tasks, consider reconfiguring the settings or switching to a different provider.
Those who use a VPN service may also experience the ERR CONNECTION TIMED OUT error. In that case, we recommend switching VPN protocols because your ISP or firewall may have blocked the one you’re currently using.
Alternatively, try temporarily disabling the application.
3. Turn Off the Firewall and Antivirus Software, Temporarily
Firewalls and antivirus software are designed to keep users and their systems safe. They regularly scan your device and automatically block any suspicious activity.
However, this level of security can occasionally cause connection problems.
This is because firewalls frequently block unnecessary pages or reject content that is completely safe. This has happened numerous times with software such as AVG.
To see if this is the case for you, disable your firewall and antivirus software. Of course, this is only advised if you are certain that the site you intend to visit is secure.
Furthermore, you should only disable this type of software temporarily. To avoid becoming vulnerable to attacks, turn it back on after you’ve finished checking to see if the error has been resolved.
If you keep getting errors because of your firewall or antivirus software, you should think about changing it and whitelisting the site for access.
4. Change DNS Server
The next option is to change your DNS servers. DNS servers are automatically assigned by your ISP by default. However, you could try temporarily switching to a public DNS server, such as Google or Cloudflare.
Some people prefer to use Google’s public DNS (8.8.8.8 and 8.8.4.4) over time because it is often more reliable.
Cloudflare also provides free, secure, and lightning-fast DNS (1.1.1.1 and 1.0.0.1), which we will use in this example. The steps are the same if you want to use Google; simply replace the DNS server addresses with Google’s.
If you’re already using a free DNS server and experiencing problems, removing and reverting it back to your ISP’s DNS servers may help.
Google and Cloudflare aren’t perfect all of the time, and there have been a few instances where switching back has resolved the problem. This is especially true if you’re connecting to a Wi-Fi hotspot in an airport or coffee shop.
Follow these steps if you’re using Windows 10:
- Open the Network and Internet Network and Sharing Center in the Control Panel. On the top left, click Change adapter settings.
- Select Properties by right-clicking on the current connection.
- Select whether your DNS settings should use IPv4 or IPv6 addresses. Then, select Properties.
- Substitute the following IP addresses for the originals:
Use 8.8.8.8 and 8.8.8.4 for IPv4 addresses.
Use 2001:4860:4860::8888 and 2001:4860:4860::8844 for IPv6.
- Restart the browser by clicking OK.
Those running macOS can refer to the following guide: Customize Your Mac with System Settings. On the DNS tab, in the DNS Servers section, click the Plus sign. Enter each IP address one at a time. Select OK.
5. Renew IP Address and Flush DNS
To flush DNS, you must first clear the DNS caches that your computer has saved.
The DNS cache keeps track of the IP addresses of the websites you visit. This saves the computer from having to translate the domain name to the IP address every time you visit the site.
The DNS cache, like browser data, can become out of date. The IP addresses may be outdated, causing problems when attempting to access the site.
Users of Windows 10 can flush DNS by using the Command Prompt. To access the Run command, press the Windows logo and R keys together. Then, in the dialog box, type “cmd” and press OK.
Enter the following into the Command Prompt window:
ipconfig /flushdns
If it is successful, it will display a success message.
Then add the lines below to troubleshoot the network and renew the IP address. Each time you add a new command, make sure to press Enter:
ipconfig /registerdns
ipconfig /release
ipconfig /renew
netsh winsock reset
Restart your computer and open the browser to see if the commands were successful.
For macOS:
Open the Terminal application on macOS and type the following command:
dscacheutil -flushcache
On Macs, there is no success message.
6. Examine Your Hosts File
Every computer has a file called the local host’s file. This is a file containing manual DNS entries that are associated with specific IP addresses.
This is usually only changed when you want to preview your DNS before moving domains to a new host. Alternatively, you may have a local development site running using a tool such as DevKinsta, Vagrant, or Docker.
There are numerous ways this file could have been changed or edited. As a result, it’s always a good idea to double-check that the website you’re trying to access isn’t listed. Simply follow the steps outlined below.
Windows
Additional access to the host’s file is usually required. As a result, the first step is to launch your text editor as an administrator.
Simply go to your start menu, look for your text editor, right-click it, and choose “Run as administrator.” This can be done in any text editor, including Notepad, Notepad++, Atom, and others.
Navigate to File -> Open in the top-left menu and enter the path below into the File name bar.
C:\Windows\System32\drivers\etc\
Then choose the host file.
Below the last line that begins with the “#” sign, the file will display a list of blocked websites. Delete them and save your changes by pressing Ctrl + S.
macOS
macOS clients can open the Terminal, embed this line underneath, and hit Enter:
sudo nano/private/etc/host
Eliminate the rundown of sites that are underneath the “::1” line.
7. Verify Your Domain’s DNS
You should also ensure that your domain’s DNS is correctly pointed to your hosting provider.
If you recently migrated your WordPress website to a new host, it is possible that the DNS was incorrectly cached on your computer. In that case, step 5 above should suffice.
It could also be that it is too soon and you need to wait a few hours for the DNS to fully propagate.
8. Remove Browser Cache
Web browsers cache information on your computer. This includes your browser history, stored login data, and cookies, which are all preserved to load the relevant sites faster the next time you visit them.
But, before you do anything, you may quickly determine if it’s a browser cache problem by opening your browser in incognito mode.
You might also try a different browser.
If you’re still seeing the issue, you should erase your cache. We’ll use Google Chrome in this example.
Begin by accessing the main menu (in the top-right corner of your browser window). From there, choose More Tools: After that, select Clear browser data.
Make sure that all of the stated file categories are chosen on the subsequent page. Chrome will be unable to remove the full cache if they are not. Instead, it will merely delete the most recent items, which will not provide the intended result.
Another way to finish this procedure is to type the following URL into your browser’s address bar:
chrome://settings/clearBrowserData
The subsequent screen should provide you with the same options as described previously.
WordPress-Specific Fixes for err_connection_timed_out
Sometimes, how your WordPress site is set up can cause a connection time out error. Let’s take a look at what you can check for in WordPress to clear the problem.
The remaining troubleshooting methods will concern the settings of your WordPress site or server.
Examine the Maximum Execution Time
Your site’s maximum execution time. The default time on most servers is 30 seconds. This is the maximum amount of time a PHP script may execute (after which it times out).
On shared hosts, this is usually set to a low value or left at the default.
Because the php.ini file is placed on your server, you cannot simply alter it from WordPress. To change this, we recommend contacting your hosting provider to see if they can assist.
Change the maximum execution time in the php.ini file
Some PHP programs may consume more memory than is permitted, causing the site to take too long to reply to the browser.
The memory limit, like the maximum execution duration, can be increased. However, the quantity should be within the maximum available RAM allowed to your plan by your hosting provider.
If you don’t know the maximum available RAM for your hosting plan, contact the company’s support team or read the documentation.
Open the .htaccess file in File Manager to raise the limit. Then insert the line below, utilizing the maximum available RAM as follows:
memory limit php value 128M
The code should be placed at the bottom. It should be above “END WORDPRESS” if you use WordPress. Finally, click the Save & Close button.
Change the maximum execution time in the .htacess file
Another option is to manually alter the timeout value on the website’s .htaccess file. Locate the .htaccess file in the public html directory. Edit it and paste the following code before the “END WORDPRESS” line:
php value max execution time 120
Finally, click the Save & Close button. Access the website to check if the error has been resolved.
Disable Your Plugins Temporarily
A plugin, like with most WordPress issues, might undoubtedly be the source of the issue. To see if that’s the case, you’ll need to disable all of your site’s plugins.
If you receive the “ERR CONNECTION TIMED OUT” error, this indicates that you do not have access to your WordPress admin area. This implies you’ll have to SFTP into your website. We recommend that you use FileZilla.
Connect to your website using your SFTP client and browse to the WordPress root folder. If you can’t locate it, it’s commonly named public html, html, public, www, or the name of your site.
Navigate to the wp-content directory by opening that folder. Inside, you’ll find a plugins folder, which has distinct subdirectories for each plugin installed on your site (both active and inactive).
What you’re going to do now is right-click on the plugins folder and rename it. To make it easier to identify later, we propose plugins.old or plugins.deactivated.
WordPress will now be unable to locate any of your plugins. When this occurs, the plugins are immediately disabled. Try entering your WordPress dashboard now.
If the timeout problem has disappeared, you can presume that one of your plugins was to blame. All that remains is to determine which one was causing the problem.
Return to the wp-content directory and appropriately rename your original plugins folder. Then, one by one, disable each of your plugins until you locate the problem.
NOTE: GreenGeeks customers can disable all of the plugins from the Manage WordPress dashboard of their accounts. This is perhaps easier and quicker for those who don’t know much about using FTP software.
Activate the Default Theme for a Limited Time
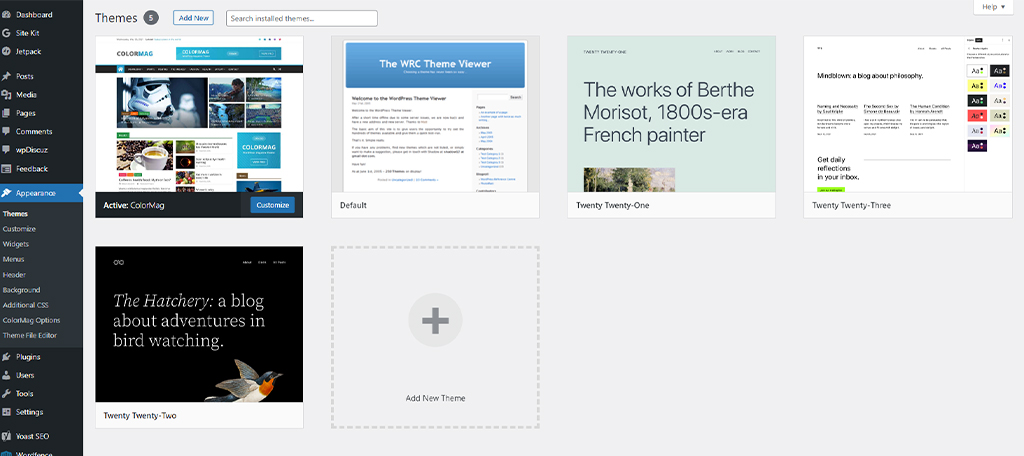
If a theme has bloated code or compatibility difficulties with a website, it may produce ERR CONNECTION TIMED OUT. WordPress suggests returning to the default theme to see whether the theme is the problem.
If the admin interface is unavailable, you can do this operation manually. This means that you must log in to phpMyAdmin to access your WordPress database.
Click on wp options in the phpMyAdmin section. Then, using the names template and stylesheet, identify two queries. They might be found on the second or third page.
When you’ve located them, double-click on the option value column and change the current theme’s name with a default one. It may be twenty-one, twenty-two, or twenty twenty-three.
You may also have a “Default” WRC Theme that comes with the installation of WordPress.
Check to see whether the admin panel and website are now accessible. If they are, consider reinstalling or changing the theme.
Increase the Memory Limit
The WP MEMORY LIMIT option allows you to determine the maximum amount of memory that PHP can utilize. If you’re using shared hosting, it’s most likely set to a low amount, such as 64M.
You can increase the memory limit by adding the following to your wp-config.php file. This must be placed above the wp-settings.php inclusion.
define(‘WP MEMORY LIMIT’, ‘256M’);
Do you know what your current PHP memory limit is? If you have access to your WordPress dashboard and are using WordPress 5.2 or higher, the PHP memory limit may be found under the “Site Health” tool.
Conclusion
Connection and timeout issues are never enjoyable to troubleshoot, but perhaps you now have a bit more information under your belt to help you address them fast.
It’s critical to understand that the “ERR CONNECTION TIMED OUT” error might be caused by a client-side issue, such as a faulty network connection, or by a problem with the server where your WordPress site is hosted.
Do you have any other suggestions for resolving this mistake or problem? Let us know in the comments section below.