GreenGeeks websites run on LiteSpeed servers, so you can take full advantage of the LiteSpeed Cache website acceleration plugin. This article will guide you through the installation of the LiteSpeed Cache WordPress plugin on a GreenGeeks hosting account.
The LiteSpeed Cache plugin is pre-installed on new WordPress installations at GreenGeeks. If you’ve just created your WordPress site, you can skip the plugin installation and go to the Configuring LiteSpeed Cache Options section.
If you have a pre-existing WordPress installation, continue to install LiteSpeed Cache.
Note: LSCache is enabled within 30 minutes of account creation. To enable it on a Reseller account, please contact our Support Staff by opening a ticket in GreenGeeks and let us know that you want to enable LSCache.
Installing the LiteSpeed Cache Plugin
Log in to your WordPress admin panel.
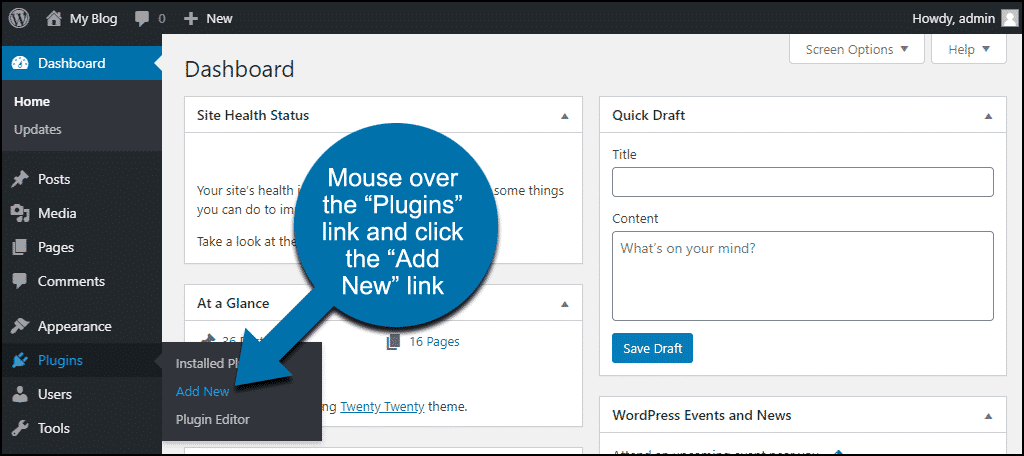
In the left column navigation, mouse over the “Plugins” link and click the “Add New” link.
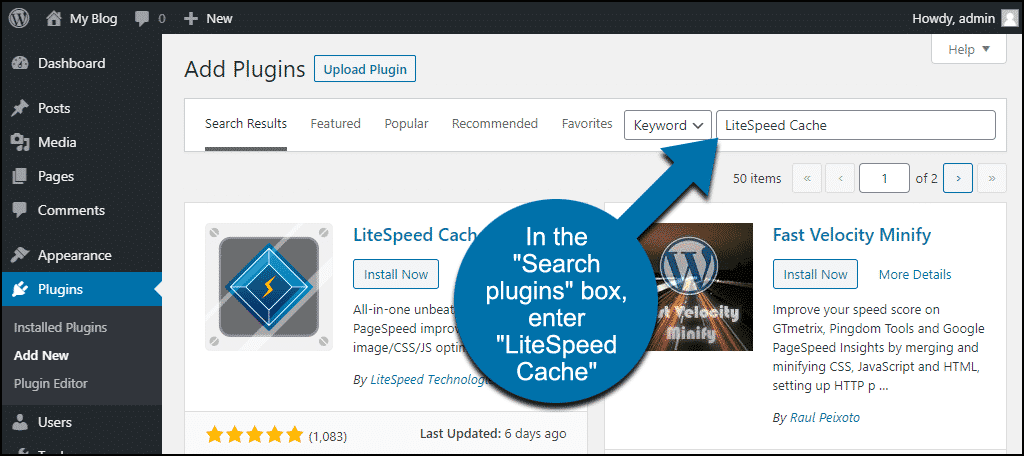
In the “Search plugins…” box, enter, “LiteSpeed Cache.”
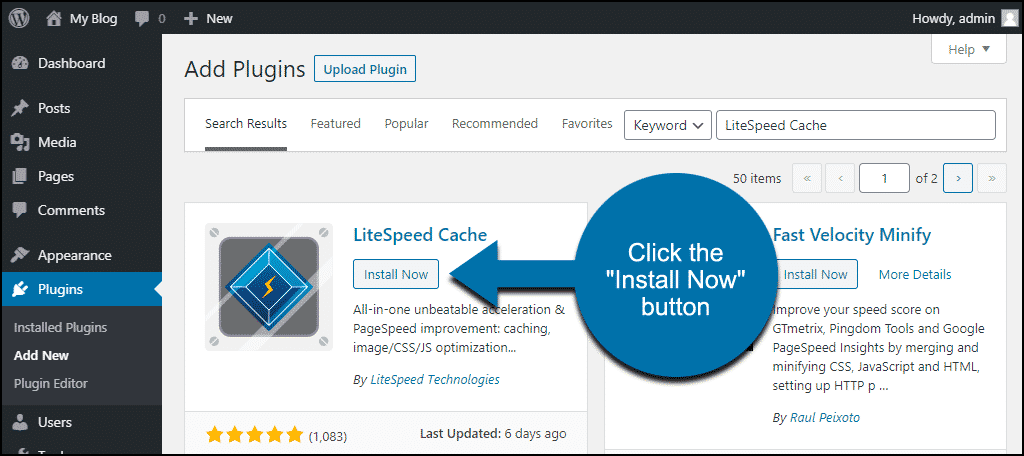
When you find the plugin, click the “Install Now” button.
Now the plugin is installed, but it has to be activated before you can use it.
Click the “Activate” button.

That’s all there is to it. As soon as you enable LiteSpeed Cache, it begins to work to improve your website speed.
While it isn’t necessary to make any configuration changes (and we can’t go into detail on all the settings), let’s take a look at some of the plugin options so you know what’s available.
Configuring LiteSpeed Cache Options
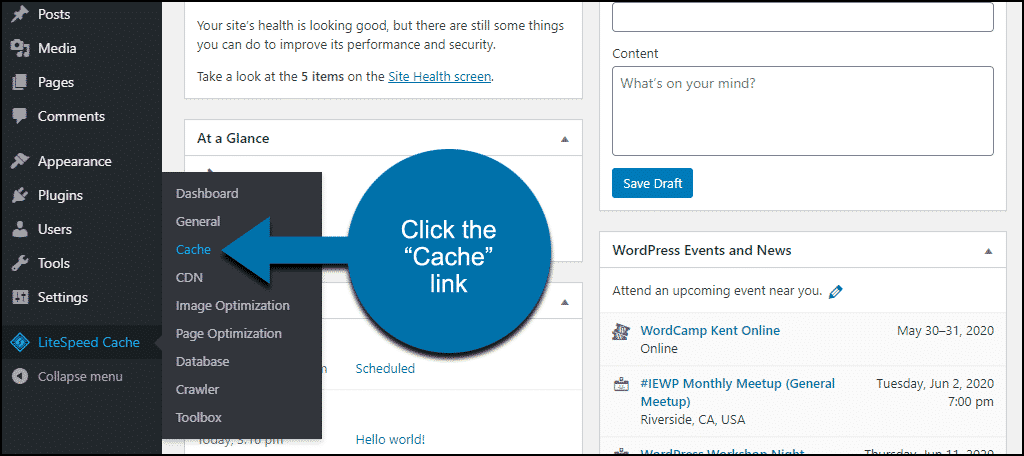
In the left column navigation, mouse over the “LiteSpeed Cache” link and click the “Cache” link.
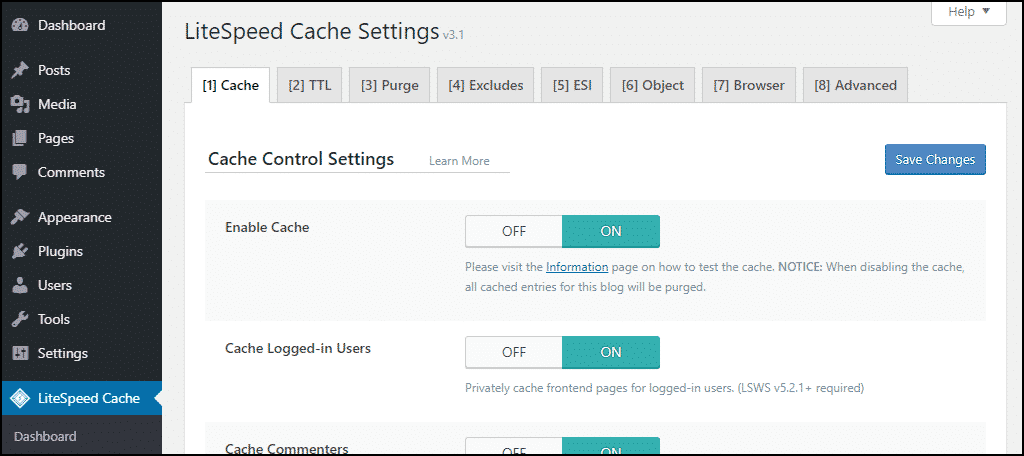
Here’s a rundown of the tabs on the page.
- Cache – settings control cache for special content types, such as REST API calls and login pages.
- TTL – (time-to-live) settings control how long certain content types are saved in the cache.
- Purge – settings for purging content from the cache. By default, the LiteSpeed Cache plugin automatically purges cache when plugins, themes, or the WordPress core is updated.
- Excludes – settings defining the types of content that you do not want to cache.
- ESI – Edge Side Includes settings. ESI is an advanced caching technique for caching portions of pages.
- Object – object cache stores the results of frequent database queries so they can be easily retrieved. That can eliminate the need to repeat some database queries.
- Browser – if you activate this your site will cache certain files in the visitor’s browser.
- Advanced – advanced settings like login cookie and link hover preloading.
Whenever you make changes to any cache options (or the page optimization options below), be sure to test your site to verify that it is still working correctly. Misconfiguration of some of these options can break site functionality.
Configuring LiteSpeed Page Optimization Options
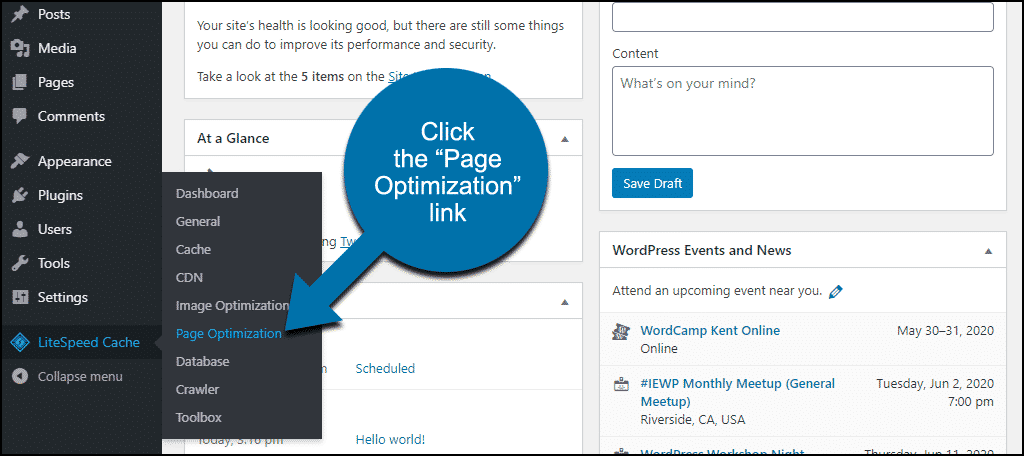
Another section you may want to take a look at is Page Optimization. Settings here can have a positive impact on page load times.
In the left column navigation, mouse over the “LiteSpeed Cache” link and click the “Page Optimization” link.
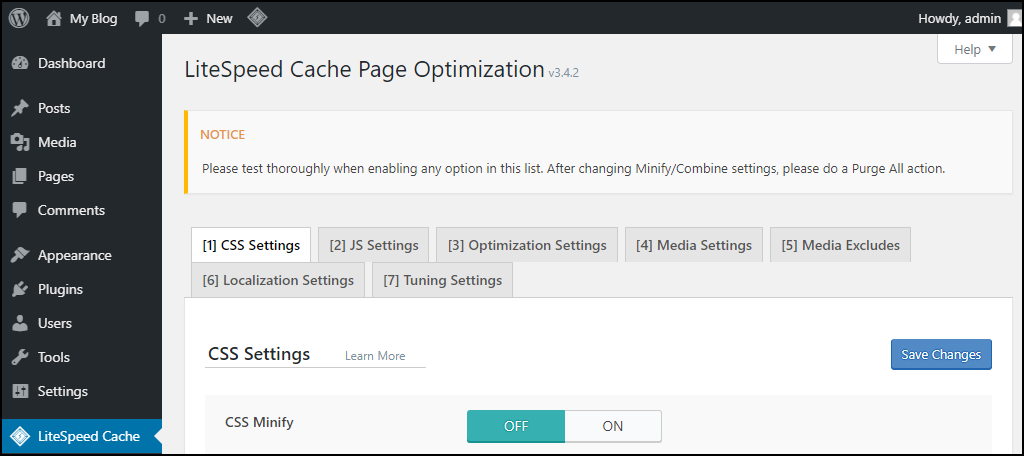
Here’s what the tabs on this page control:
- CSS Settings – including CSS minifying, loading, caching. A font display control lives here as well.
- JS Settings – includes JS (JavaScript) minifying, combining, inlining, etc.
- Optimization Settings – set the CSS and JS Cache TTL (time-to-live), minifying, DNS prefetch, Google fonts, and WordPress emojis.
- Media Settings – image placeholder, LQIP (Low-Quality Image Placeholder) settings, etc. There’s a “Lazy Load Images” setting here, but WordPress automatically began lazy loading images in version 5.4. If you run an up-to-date version of WordPress you don’t need to enable lazy loading in this plugin.
- Media Excludes – these settings are all related to lazy loading images.
- Localization Settings – Gravatar cache settings.
- Tuning Settings – for CSS and JS files.
As you can see, there are many configuration options available in the LiteSpeed Cache plugin. For a deeper dive, you can consult the LiteSpeed Cache documentation.
Using WooCommerce? If you run into any issues, check the LiteSpeed Cache documentation and blog articles for more information.
Can the Litespeed plugin for Joomla sites be used too?
“WARNING
Caching functions on this page are currently unavailable!
Please enable the LSCache Module at the server level, or ask your hosting provider.”
What if my client is already using W3 or another caching plugin? Does this work in tandem or can only one be used?