When transferring to a new hosting provider, the most important thing for you to do is to test your website before pointing your domain. This will help guarantee a successful migration by ensuring your site is 100% functional before making the switch.
What you will need:
- Your GreenGeeks service server IP. You can find this by contacting support to confirm the correct IP address you’ll need to use.
Using a Redirection Service for Testing
The instructions in this tutorial involve editing the hosts file on your local computer. As an alternative, you can use a redirection service that creates a proxy connection to the new server, like SkipDNS.
One of the advantages of using such a service is you can share the proxy URL with a client or a team, so they can view the website on the new server without editing the hosts file on their computer.
If you don’t need to share updates with others, you may find that editing the hosts file is quicker and easier than using a proxy.
Redirecting via System hosts File
The examples here use the Windows operating system. For Linux and macOS instructions, scroll down to the “Linux and macOS users” section.
The best way to test your website is by staging your domain via your computer system’s hosts file. This method avoids having to wait for DNS propagation which could take quite a while.
However, this will only work for the local system. If someone else would like to test the site, they will need to follow the same steps for modifying the hosts file.
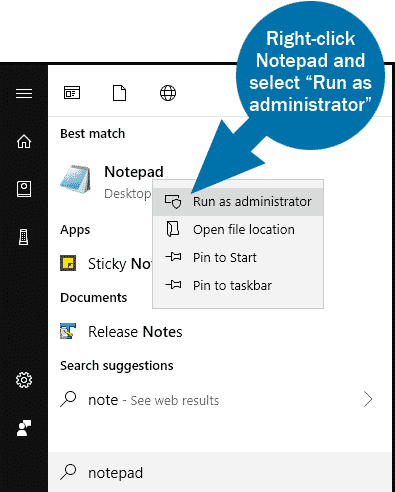
Open your text editor of choice. If you’re a Windows user, use Notepad with administrative privileges to modify the hosts file.
- Open Windows menu (click Windows icon or use Windows keyboard key)
- Type “Notepad”
- Right-click “Notepad”
- From the pop-up menu, select “Run as Administrator”
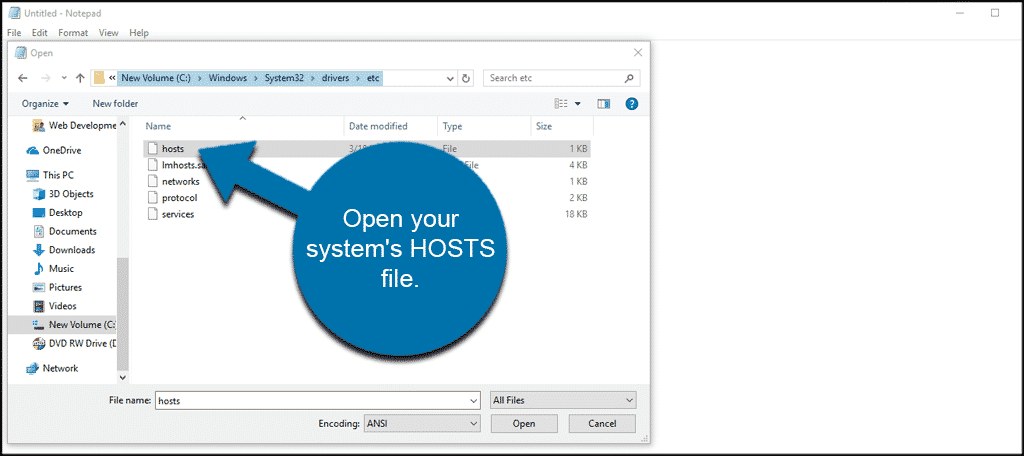
Open your system’s hosts file. The location of the file is:
C:\Windows\System32\drivers\etc\hosts
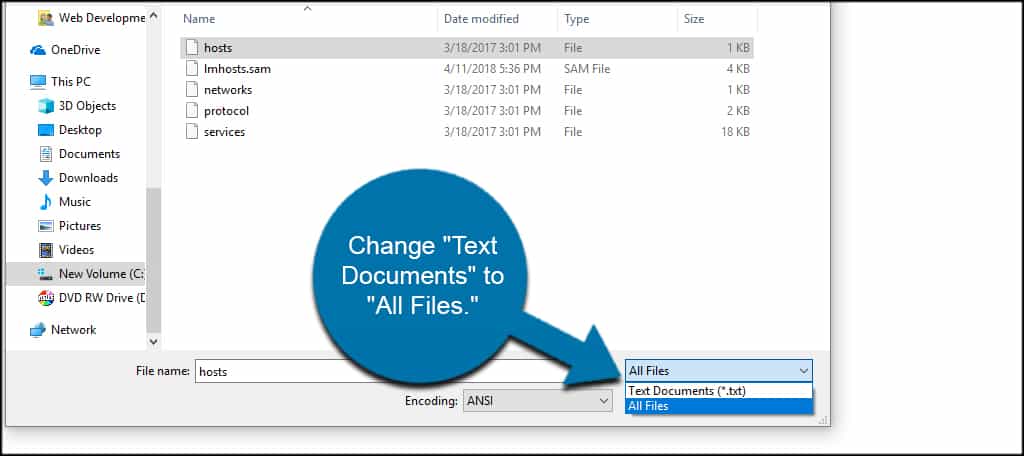
If you don’t see anything in the etc folder, change “Text Documents” to “All Files” in Notepad. This will show everything in the folder including the hosts file.
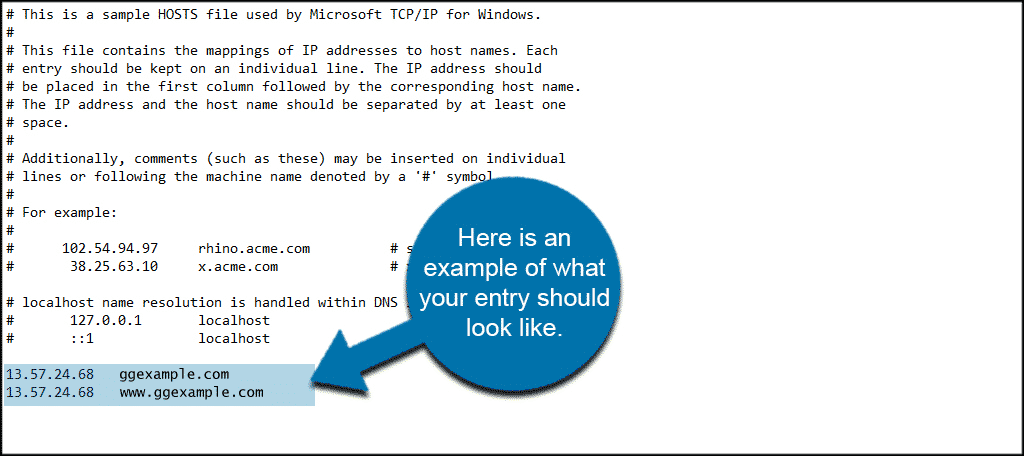
Using your GreenGeeks server IP, add the following lines to the file on a new line at the bottom of the hosts file:
SERVER_IP_HERE ggexample.com
SERVER_IP_HERE www.ggexample.com
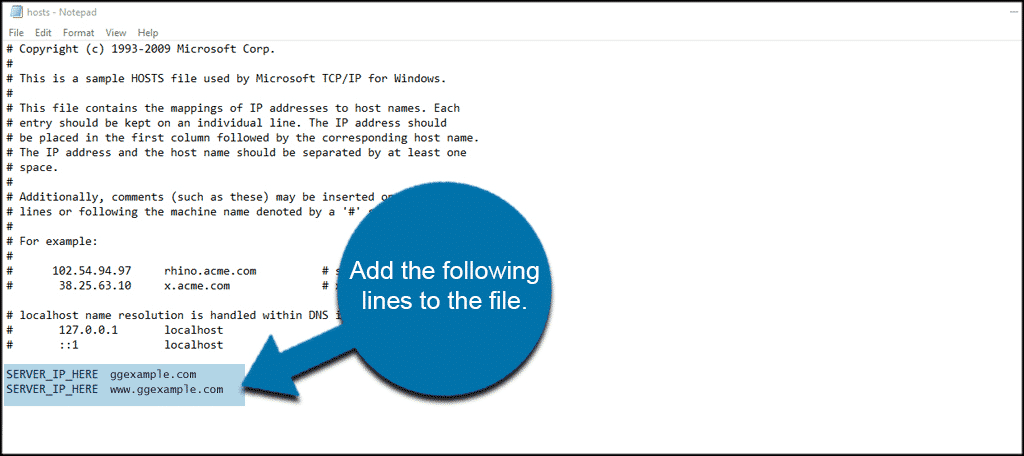
Note that SERVER_IP_HERE needs to be replaced with your actual server IP address. The ggexample.com references should be replaced with your actual domain name.
Here is an example of what your entry should look like:
13.57.24.68 ggexample.com
13.57.24.68 www.ggexample.com
Go to File and Save the hosts file. You don’t want to use “Save As” because you’re keeping the hosts file as-is with your added redirect entry.

Restart your web browser and navigate to your website. The site will now load from the GreenGeeks server.
Linux and macOS users
For Linux and macOS users, the location of the hosts file is:
/etc/hosts
You have to make changes to the hosts file as a superuser.
macOS
- Click the F4 key to access launcher
- Enter terminal in the search field
- Click the Terminal icon
To open the hosts file with Nano as a superuser, use the following command:
sudo nano /private/etc/hosts
Since you are executing a command as a superuser, macOS will ask for the password for your Mac user account. Enter your password and click the ENTER key.
Add these lines to the bottom of the hosts file:
SERVER_IP_HERE ggexample.com
SERVER_IP_HERE www.ggexample.com
Replace SERVER_IP_HERE with your server IP address and replace ggexample.com with your domain name.
Your entry should look like:
12.34.56.78 ggexample.com
12.34.56.78 www.ggexample.com
When you are finished editing hosts file:
- Click CTRL + X on your keyboard
- Enter Y to save changes
- Click the ENTER key
Linux
To edit with the Nano text editor, use the command:
$ sudo nano /etc/hosts
or to edit with the gedit text editor:
$ sudo gedit /etc/hosts
Add these lines to the bottom of the hosts file:
SERVER_IP_HERE ggexample.com
SERVER_IP_HERE www.ggexample.com
Replace SERVER_IP_HERE with your server IP address and replace ggexample.com with your domain name.
Your entry should look like:
12.34.56.78 ggexample.com
12.34.56.78 www.ggexample.com
Save the changes by clicking ctrl+X on your keyboard.
Removing the Redirect Entry
To revert this change, simply remove the lines you added and save the file again. This will direct the site back to the original host. You may need to do this before visiting your domain registrar to change the nameserver.
Thanks for this. There’s one thing you might want add at the end: “You may need to delete the extra line from /etc/hosts and restart your browser before you go to your domain registrar to change the nameservers.”
Hi James,
Thanks for the suggestion. We already had “To revert this change, simply remove the line you added and save the file. This will direct the site back to the original host.” at the end of the article, but we’ve made it a bit more clear by adding it as its own bullet point.
This doesn’t work on mac OS X because the host file is locked by the operating system and cannot be edited by any user not even an admin.
Good instructions, but…
Did not work on my laptop (W10)
I restarted my laptop – did not work
tried restarted browsers (Firefox then Chrome) – did not work
Without DNS pointed at the server though, we wouldn’t be able to install Let’s Encrypt certificates, correct?
It works on Mac. In the terminal, type:
sudo nano /etc/hosts
Then your Mac password. This will open the hosts file.
Use your arrow keys to navigate down to a blank line, and add the two lines with your server IP and the website address.
Type control+o and then hit enter to save the file, then type control+x to go back to the terminal.
In the terminal type:
sudo killall -HUP mDNSResponder
This will flush your cache. You should be able to visit your website address after that.
When you are done, make sure to do the same process and just delete the two lines with the server IP from the hosts file.
They should update this page to include Mac instructions. Thanks Crystal.
Other than the two options outlined above, does Greengeeks offer any staging solutions for building a development or replacement website while the original site remains live, perhaps elsewhere?
Hi Jeff,
We don’t have a staging system. But then I don’t know of any shared host that offers staging. There’s a way to do staging for a WordPress site, but not a traditional site you’ve built yourself.