Uploading and managing website files is a job traditionally done via FTP. Or for the more adventurous, via the command line on the server. But even if you manage your files using FTP, there are times when you are away from your computer. For those occasions, it’s good to know that there is a File Manager built into cPanel.
In this tutorial, I’ll show you how to do most of the common website file-related tasks using the cPanel File Manager. We will cover a lot of ground, so if you’re in a hurry and need to skip ahead, here are shortcuts to instructions for the cPanel File Manager functions covered in this article:
Locating the cPanel File Manager
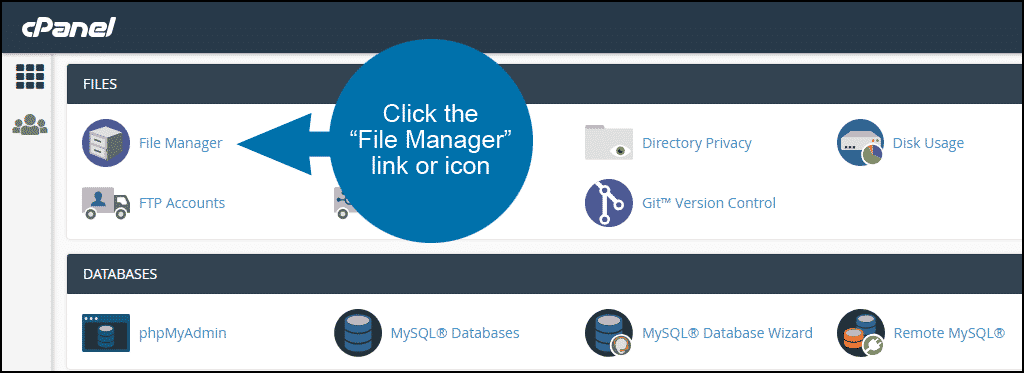
Log in to cPanel.
In the “FILES” section, click the “File Manager” link or icon.
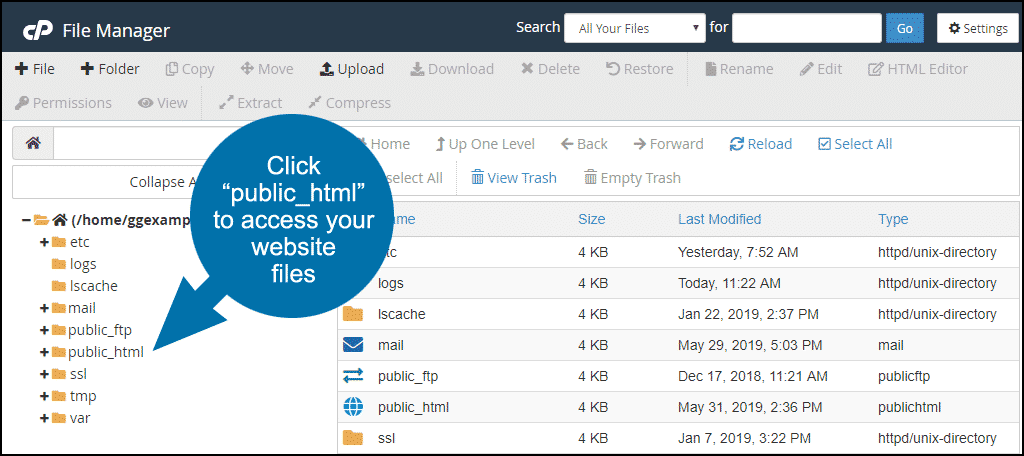
When you log in to the File Manager, you will be in the root directory for your account. Most of the time, you’ll be working with website files, and they are located in the “public_html” directory.
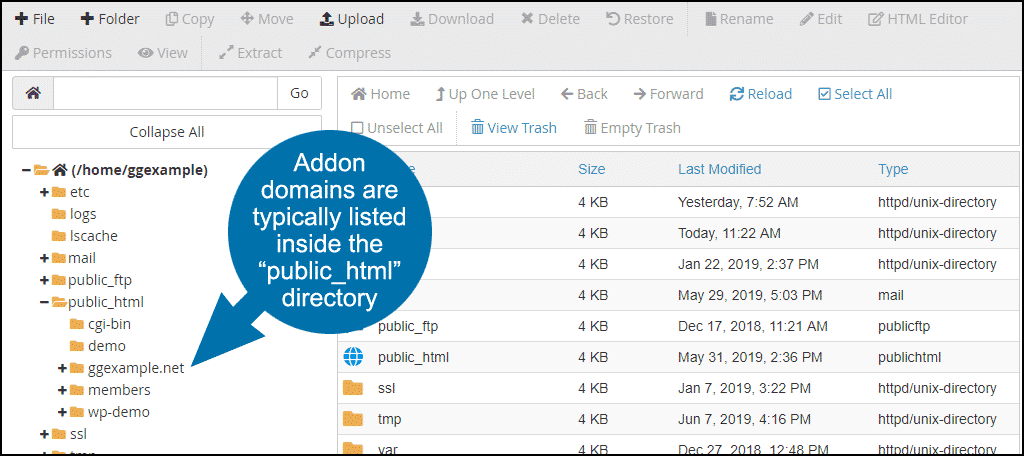
If you have addon domains in your account, their home directories will be typically be listed inside the public_html directory.
Working With Hidden or “Dot” Files
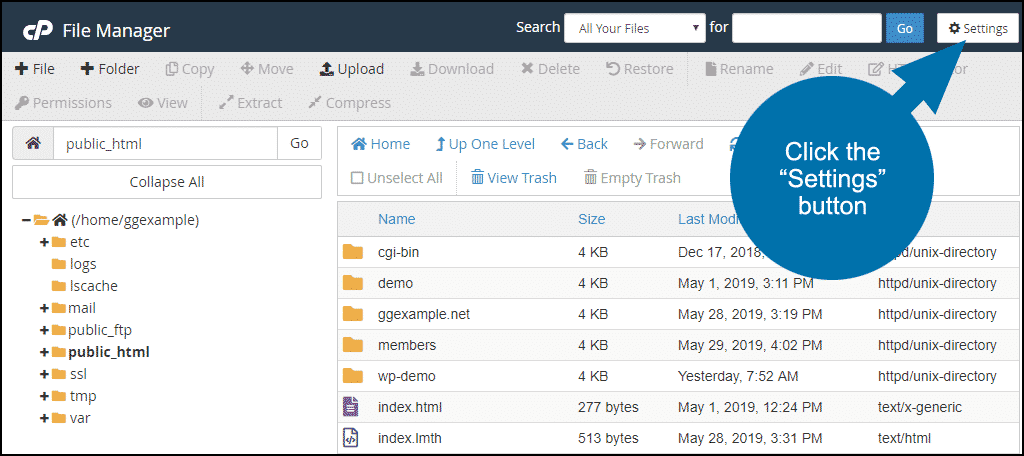
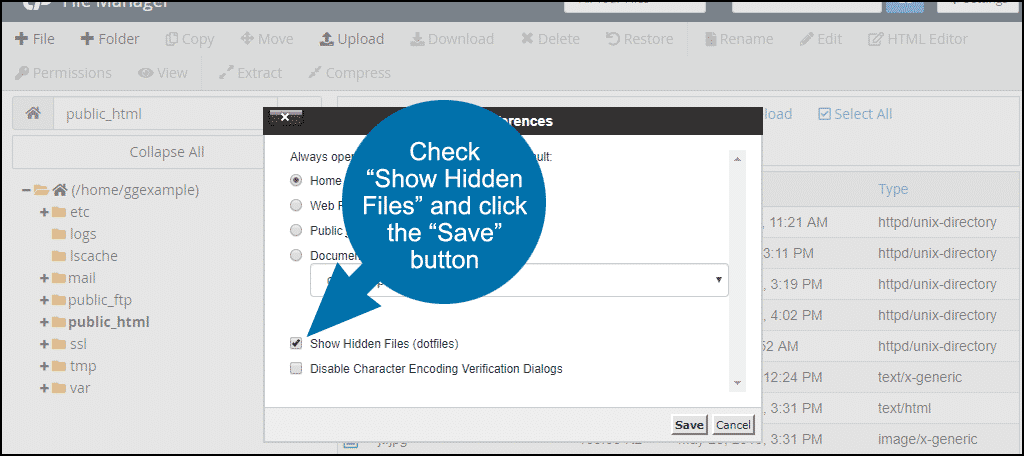
By default, the cPanel File Editor does not display hidden “dot” files. So to work with files such as .htaccess, you must first configure the cPanel File Editor to display hidden files.
In the File Manager, click the “Settings” button.
In the “Preferences popup window, check “Show Hidden Files” and click the “Save” button.
Creating a New File Using the cPanel File Manager
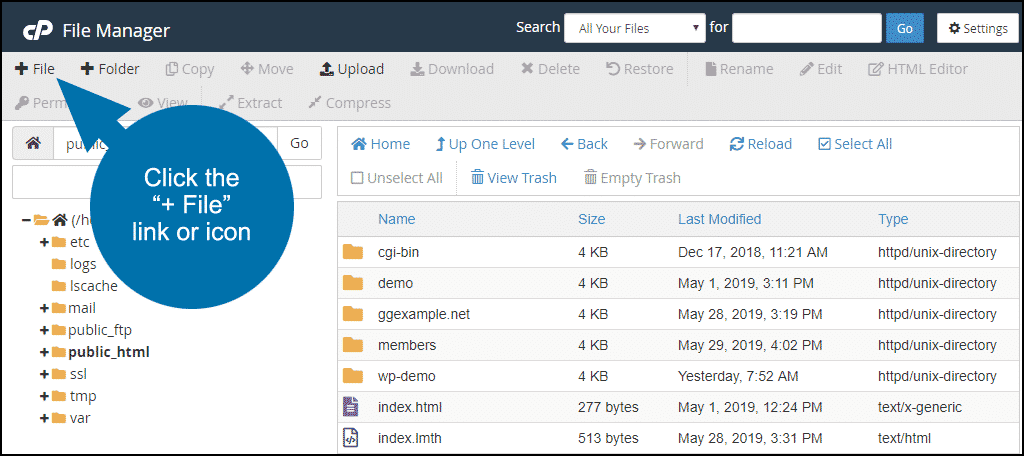
Click the “+ File” link or icon at the top of the page.
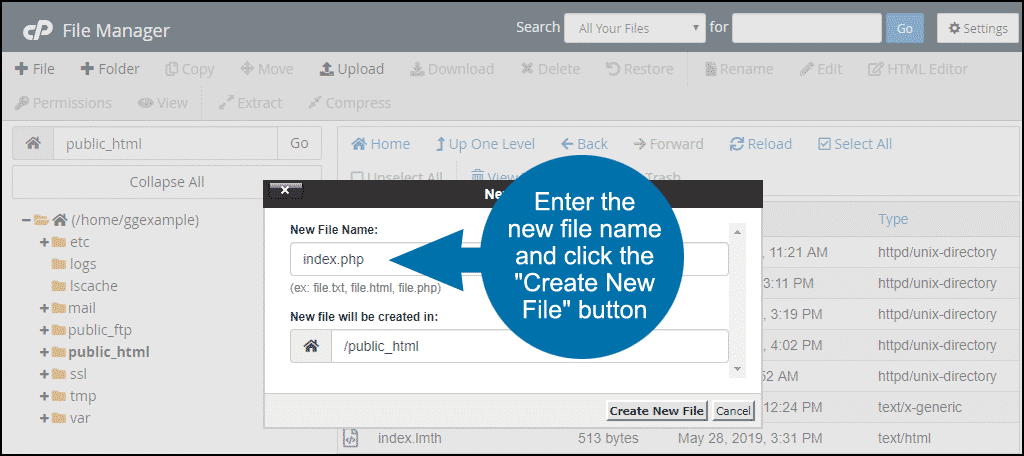
Enter the name of the new file in the “New File Name” field in the pop-up box and click the “Create New File” button.
Uploading a File Using the cPanel File Manager
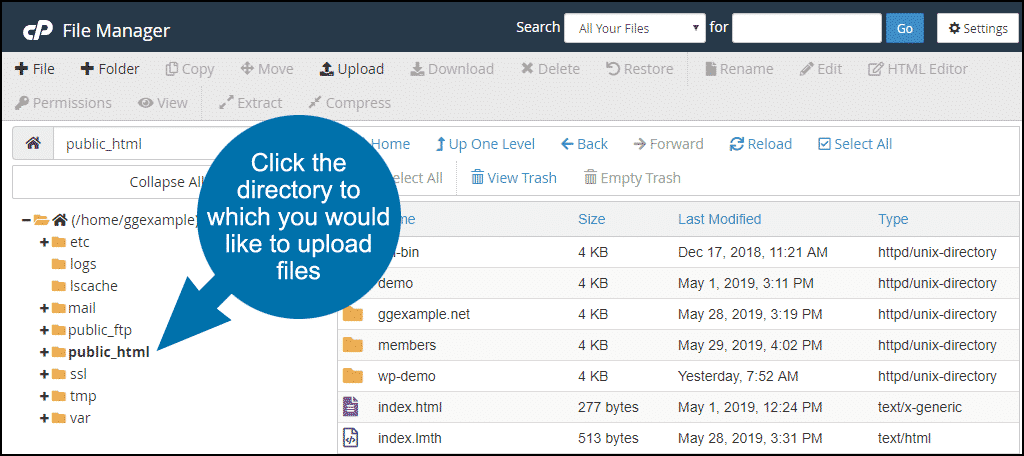
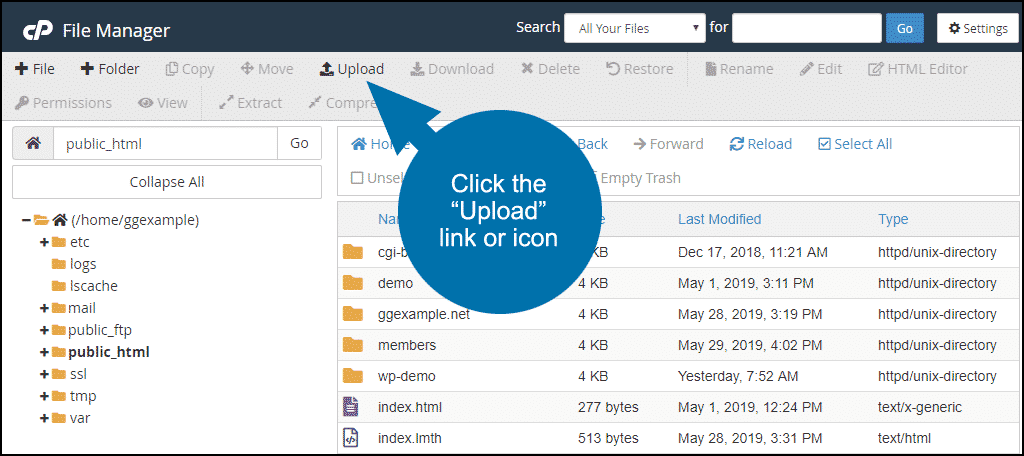
In the left side directory list, click the directory to which you would like to upload files. The directory contents will be displayed on the right side.
Click the “Upload” link or icon in the top toolbar.
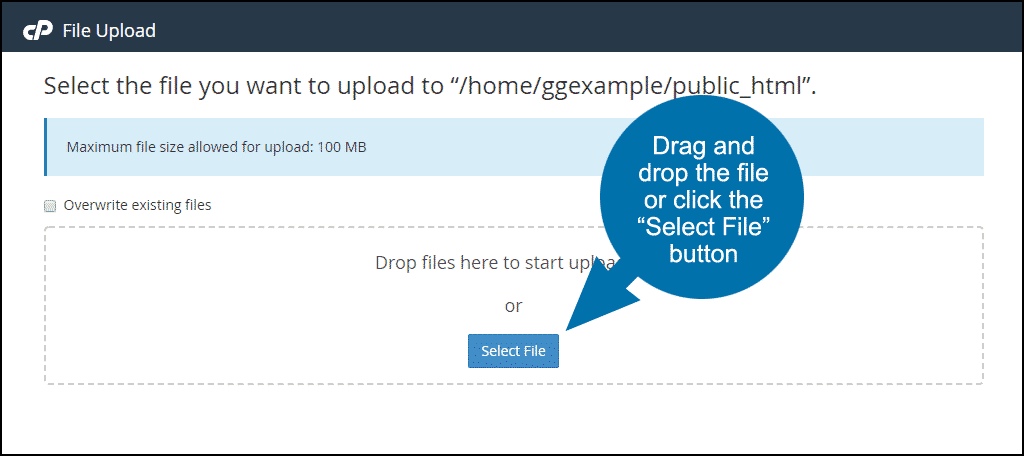
A new browser tab or window will open for file upload. Drag and drop the file to be uploaded, or click the “Select File” button.
Your host may have a file size limit. If so, it will be shown on the file upload page. To upload larger files, use FTP.
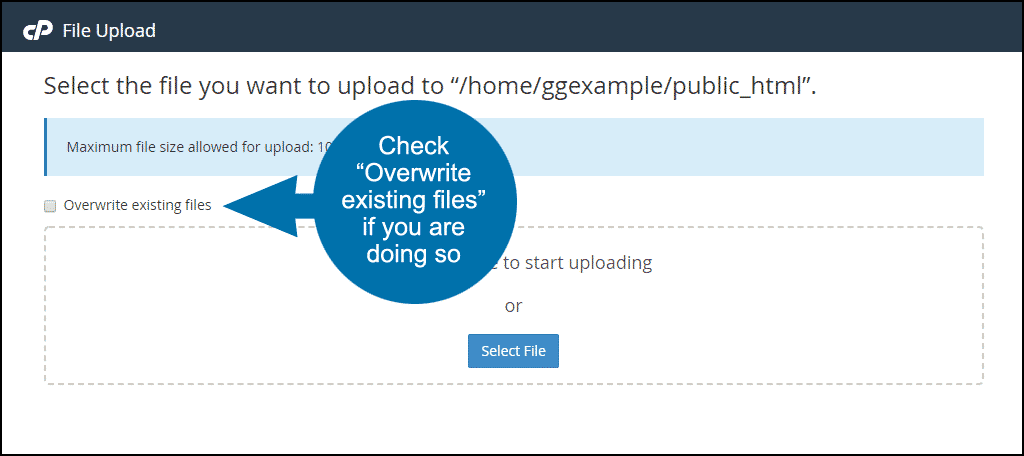
If you are replacing an existing file, check the “Overwrite existing files” box. If you don’t check the box, you will get a pop-up asking if you want to overwrite the existing file.
Moving a File Using the cPanel File Manager
There are two ways to move a file using the cPanel File Manager.
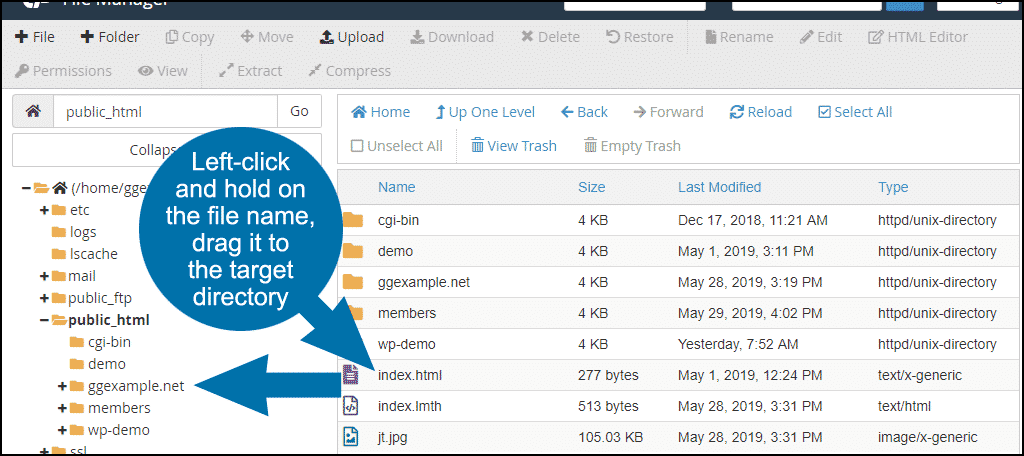
The first and easiest option is dragging and dropping the file. Left click and hold on the file name on the right, and drag it to the new directory on the left.
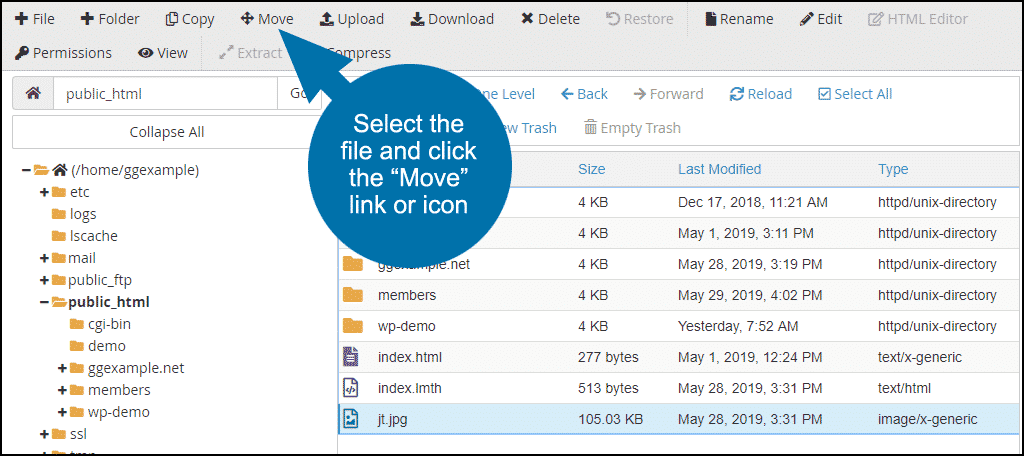
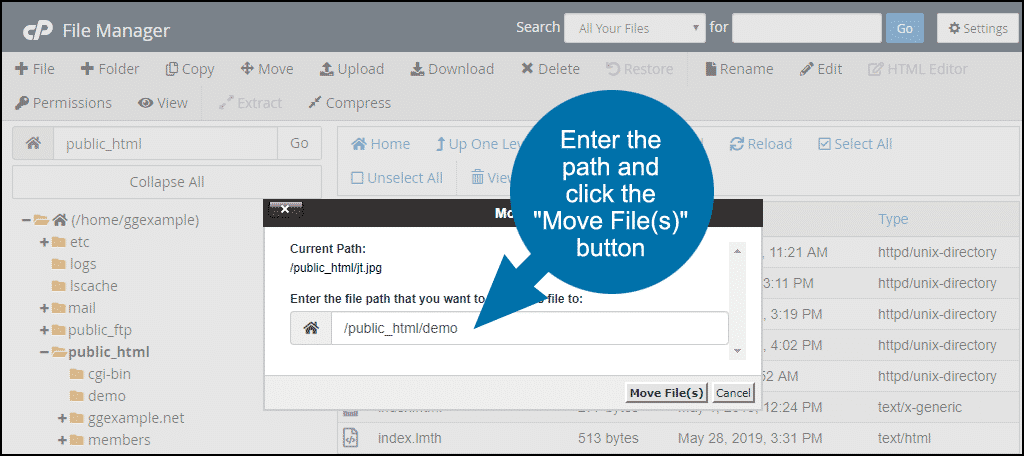
Alternately you can use the “Move” button. You have to know the path to the location where you want to move the file to use this method.
Select the file you want to move and click the “Move” button.
Enter the path to the location where you’re moving the file and click the “Move File(s)” button.
Editing a File Using the cPanel File Manager
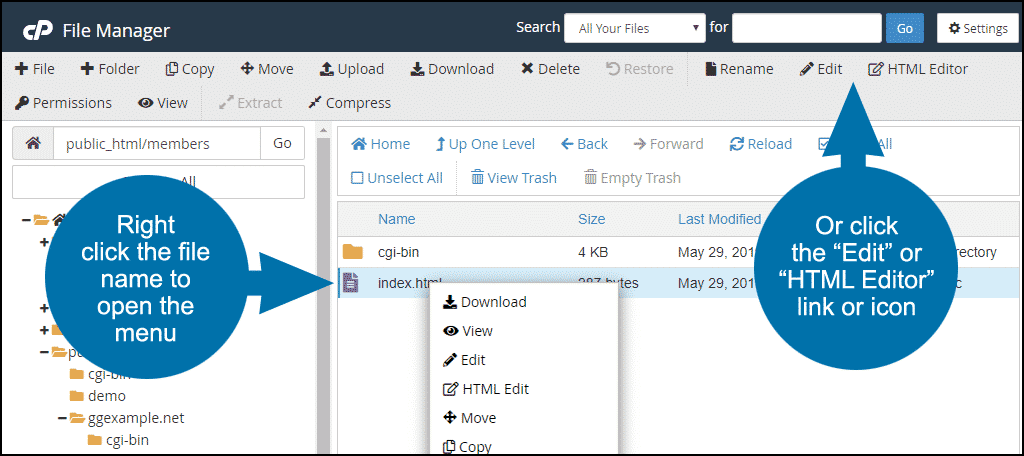
On the right side, select the file you want to edit.
Right-click the file name to open the menu, or click the “Edit” or “HTML Editor” link or icon in the top toolbar.
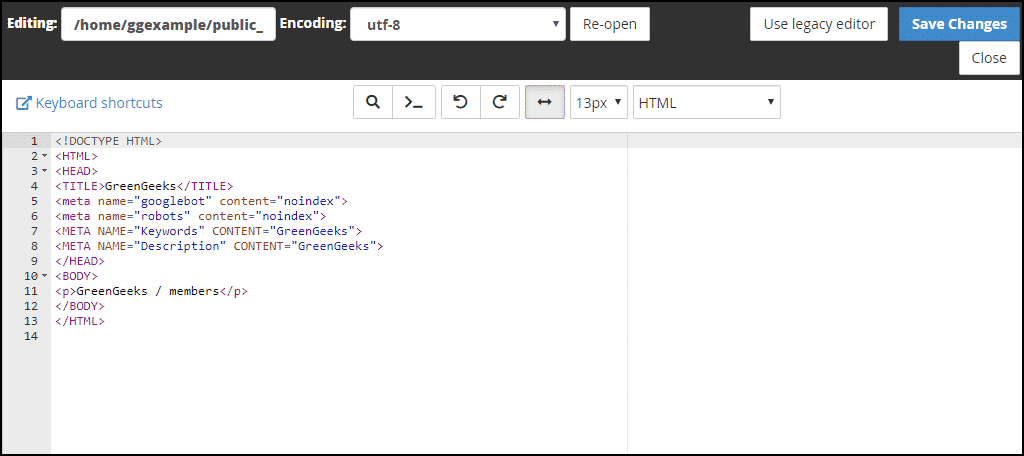
Selecting “Edit” opens the file in a window similar to a text editor.
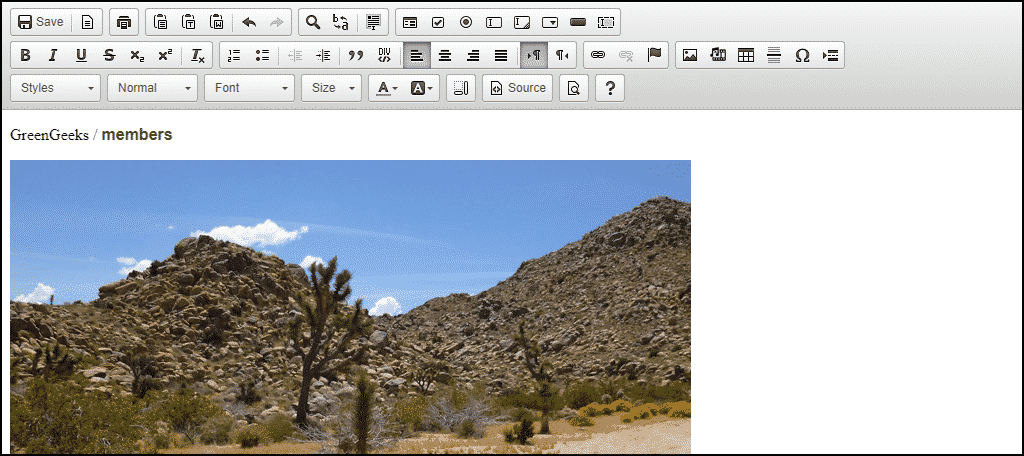
Selecting “HTML Editor” opens the file in a visual editing window.
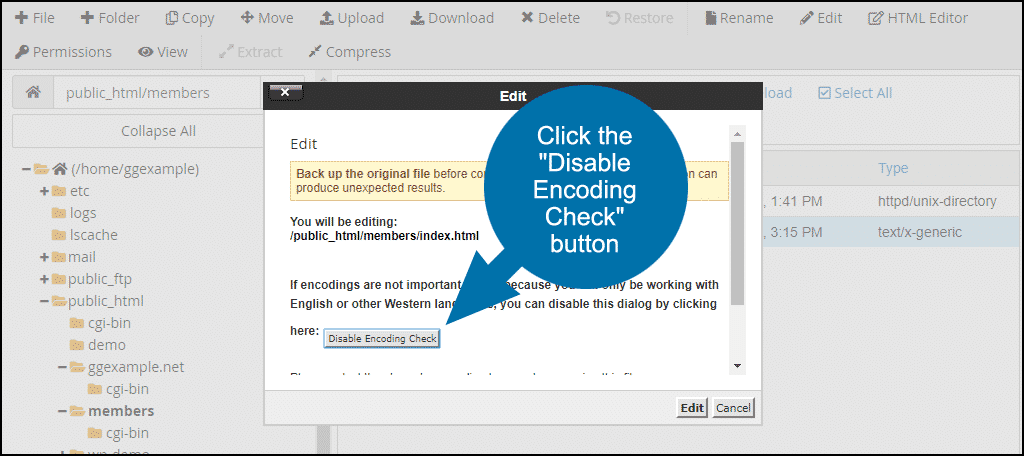
Before you get to the file editor, a file encoding popup will open. If your website uses English and standard characters, click the “Edit” button. If your site uses another language that does not use UTF-8 encoding, select the appropriate encoding, and click the “Edit” button.
You can prevent the popup from opening every time you edit a file by clicking the “Disable Encoding Check” button.
To save your file in the text editor, click the “Save Changes” button.
To save your file in the visual editor, click the “Save” button.
Deleting a File Using the cPanel File Manager
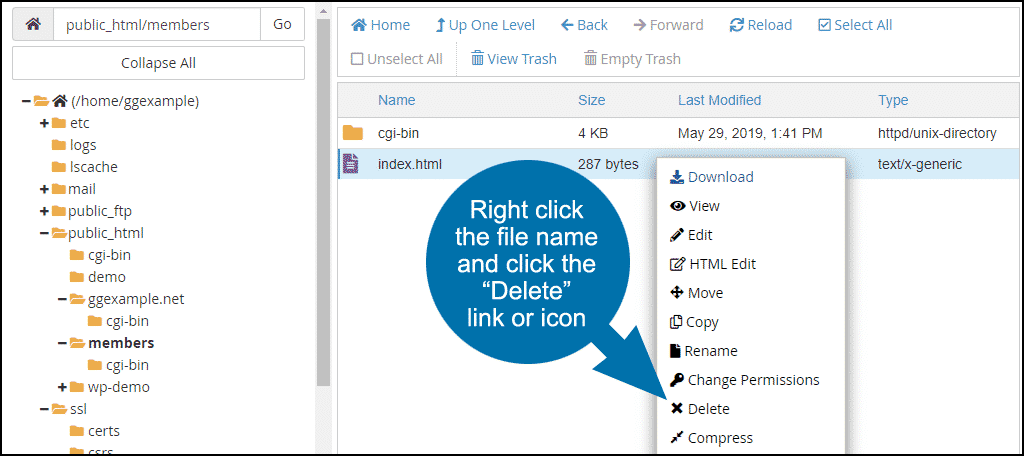
Right click on the name of the file you wish to delete, and click the “Delete” link.
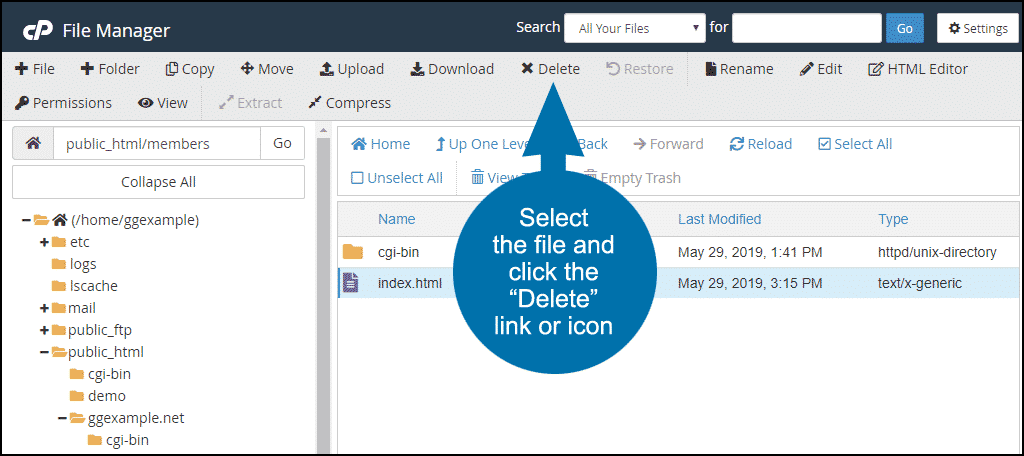
Alternately, you can select the file and click the “Delete” link in the top toolbar.
That’s It
We have gone through most of the file moving and editing that is necessary on a day-to-day basis. I hope you find this tutorial helpful next time you need to log in and move some files around but you don’t have an FTP connection at hand.
Do you regularly use a web-based file editor? Now that you know how easy it is, do you think you may take advantage of the cPanel File Manager in the future?



Is there a way to upload folders and their contents? It’s very cumbersome to manually create each folder and then upload their contents.
You could use FTP software such as FileZilla to upload files en mass. You could also try the File Manager plugin for WordPress, though, I’d prefer actual FTP when you want to upload a folder and all of its files.