What is the one thing that is king on any site no matter what the niche? Content. That’s right, content is king on any site. Good, fresh, clear, well-written content is what helps your site rank higher in Google. However, publishing content can be difficult without a plan. That is why a tool like the PublishPress Editorial Calendar can be of great benefit.
You might be a great content writer. That being said, oftentimes this isn’t enough. Having a plan in place can be beneficial because it allows you to see everything that is coming, understand what needs to be done, and do the things that will get your site ranking higher.
Just because you plan on writing a post a day does not necessarily mean you will be able to follow that plan in the long run. There are tons of benefits that come with having a solid WordPress editorial calendar on your site.
Why Should I have a WordPress Content Calendar?
As great of a platform as WordPress is, oftentimes they don’t make it easy to see when your posts are scheduled. A solid content calendar gives you an overview of your blog and when each post will be published. There are also a number of other related tools built-in that you will be able to enjoy, depending on the plugin you choose.
Despite well-intentioned planning and solid effort, content creation, edits, upcoming post drafts, and schedule can get muddled and hard to follow without a plan in-place. The need for a WordPress content calendar can’t be overstated. Here are some other solid benefits to think about:
- Helps keep you organized and on track
- Perfect for brainstorming
- Helps with consistency
- Will keep an audience engaged
- Provided visibility across departments
- Helps you stay in-the-know
- Keeps track of overall performance
Today, I am going to show you how you can use the PublishPress Editorial Calendar plugin to achieve all of the above and more. Let’s take a look at the plugin and see all that it has to offer.
PublishPress
PublishPress is a plugin that provides you with all the tools you need to properly manage WordPress content. The plugin also comes with a built-in editorial calendar, to help you plan and manage all upcoming content.
If you own a WordPress site that has even a decent amount of content filtering out, then PublishPress is for you. Don’t get bogged down with content creation and post drafts. With this plugin, you will be able to collaborate much more effectively.
The PublishPress Editorial Calendar is also perfect if your site has multiple users. As a matter of fact, the plugin is built toward that, as managing multiple users and the content they are putting out can also be difficult without a plan.
The plugin comes with a ton of functionality and features. However, even with all the built-in tools and features, the plugin remains lightweight and smooth. It will not slow your site down.
Some of the main features of the PublishPress Editorial Calendar plugin include:
- Dynamic Editorial Calendar
- Content Notifications
- Content Overview
- Custom Statuses
- Editorial Comments
- Editorial Metadata
- User Roles
- Slack Notifications
- Reminder Notifications
- Import From Edit Flow
- Bug Reports
The plugin is smooth and will give you just about any tool you need to properly manage, create, and publish content without losing your way.
Let’s get the plugin installed and operational together.
Note: There is a pro version of this plugin that will provide you even more features and benefits. If this is something you feel you need, then go ahead and take a look at that. PublishPress also has a number of other related plugins that all work together to help you create content and stay on top of things. The rest of the tutorial below is based on the free version of the plugin.
How to Use PublishPress
Step 1: Install and Activate the Plugin
In order to start using the PublishPress Editorial Calendar plugin, you first need to install and activate it. You can do this by hopping over to the Plugins page in the WordPress admin dashboard of your site.

Simply use the search field and search the plugin by name. When it pops up, go ahead and install and activate it right from there.
Step 2: Access the Settings Page
Now that the plugin has been installed and activated, you want to head on over to the settings page and configure the plugin settings. To get there, click on PublishPress > Settings, located on the left side menu area of the dashboard.
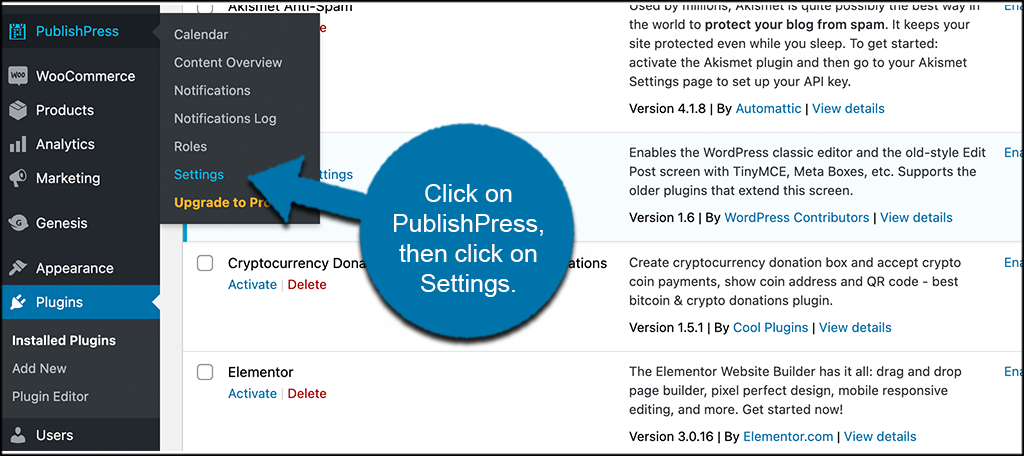
You can see that this is now an available option because you activated the plugin.
Step 3: Configure the Plugin Settings
At this point, you should be on the settings page for the PublishPress Editorial Calendar plugin. You will see that there are four main tabs to go through and configure. These include:
- General
- Calendar
- Metadata
- Statuses
Let’s go over these together real quick before moving on.
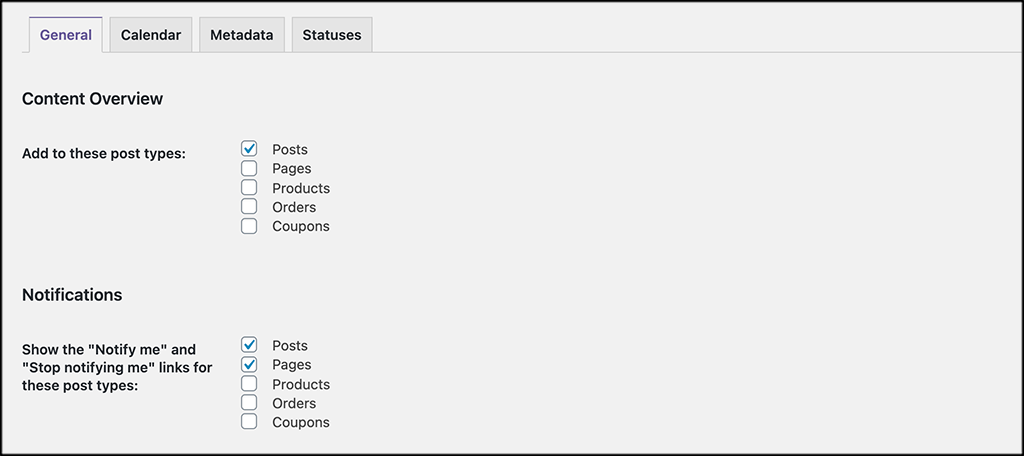
General
This is where you will set all the main and general settings for the plugin. This will include things like post types, notifications, workflows, logs, and features. Go ahead and configure all of these settings to your liking.
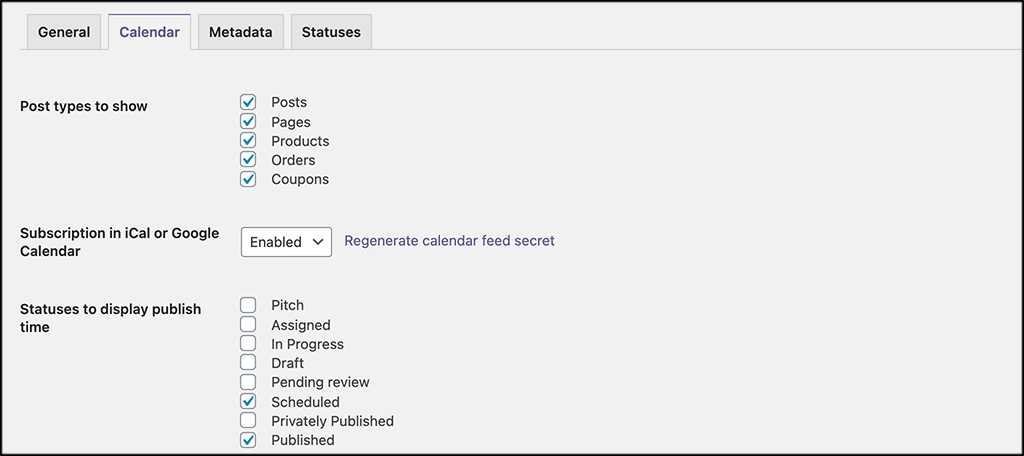
Calendar
This tab is going to house all the settings for the actual calendar. Configure these as well. These configurations will interact with the calendar layout, so you can always come back and make adjustments when needed.
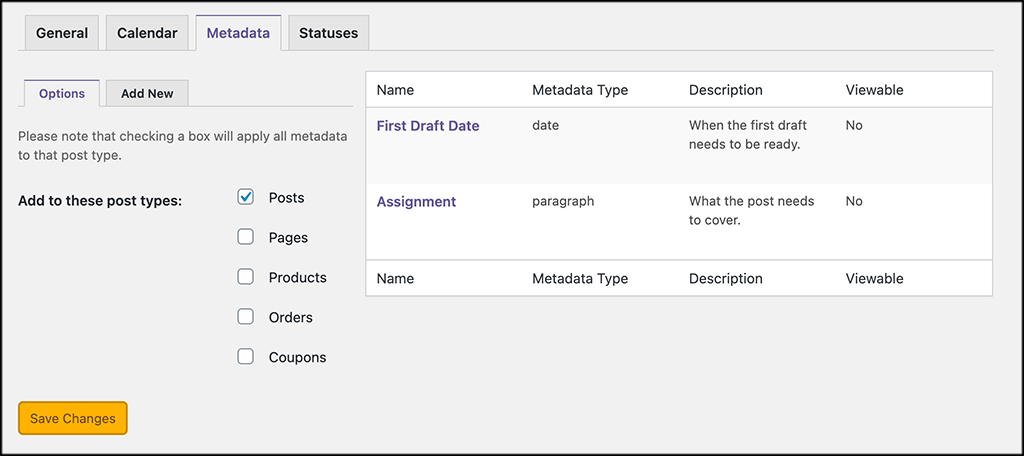
Metadata
Set all the metadata actions here and configure the options that you want to have on your calendar. You can add to post types, and configure the metadata on post drafts and assignments.
Statuses
Last but not least, edit and configure all the data you want for statuses. Change label colors, add descriptions, see what posts are assigned, in draft, in review, and published.

Step 4: Go to the Calendar
Congrats, all of the configurations for the plugin are now finished. It is time to head over to the main calendar and see how it all looks. Click on the “Calendar” link tab that is housed under the main PublishPress tab on the left side menu of the dashboard.

Note: Right now your calendar will be empty. However, when you start creating content and assignments, then it will fill out and look the way you configured it.
Step 5: Create Calendar Content
Now that you have landed on the Calendar page, you will see a blank calendar that you can start adding content to.
Click on any of the calendar dates and a popup box will appear.

Fill out all the relevant information needed within the popup box. When you are done, click on the “Create” button and your calendar will auto-fill with that piece of content.
That’s it! You are now up and running with the PublishPress Editorial Calendar. You can add as much content to the calendar as you want and start navigating your way to creating better posts.
Other PublishPress Options
PublishPress also has a few more important tabs you can click on to view important items and data when needed. You can access all of them on the left menu area, as they are all housed under the main PublishPress link tab link.

These items include things like content overview, notifications, notifications log, and roles. Again, a lot of the items will fill out over time.
Final Thoughts
Giving yourself and other publishers on your site the ability to create and manage content in a way that is not jumbled and confusing is very important. This leads to better pieces, easier navigation, and better overall results.
I hope this article was able to show you how easy it really is to get a solid WordPress content calendar running on your site. A tool like the PublishPress Editorial Calendar can really start taking your site content in a better direction.
What other practices have you put in place to help with content creation and management? Is there another editorial calendar plugin that you like better?
We run a news website with multiple authors and publishpress is the best editorial calender so far.
Thanks for the tutorial boss.