In some situations, you will want to receive emails from your WordPress website. This includes security information, plugin messages and other important mail that may need your immediate response. For example, the security plugin Wordfence often sends messages regarding issues it detects.
By default, WordPress uses its own PHP-based messaging ability to send email. However, this is something that a lot of developers would rather avoid as it can cause problems with spam filters and other elements. The mail function may not be enabled on WAMP Mac servers.
In these situations, it’s better to simply set the system to use SMTP when sending WordPress emails from the local server. Using your email server, you can set the site to send email without some of the problems that arise with PHP messaging.
In this tutorial, I’m going to show you how to use email functionality in WordPress on localhost. It’s a quick set up process that will make your site use a specific SMTP server and address other than what you use to install the system.
Using the WP Mail SMTP Plugin
Today, I’m going to demonstrate the WP Mail SMTP plugin. It has nearly three-quarters of a million active installs and is a relatively simple tool to set up and use. One of the features I like most about it is that you can set SSL mail through the system if you have a secured domain.
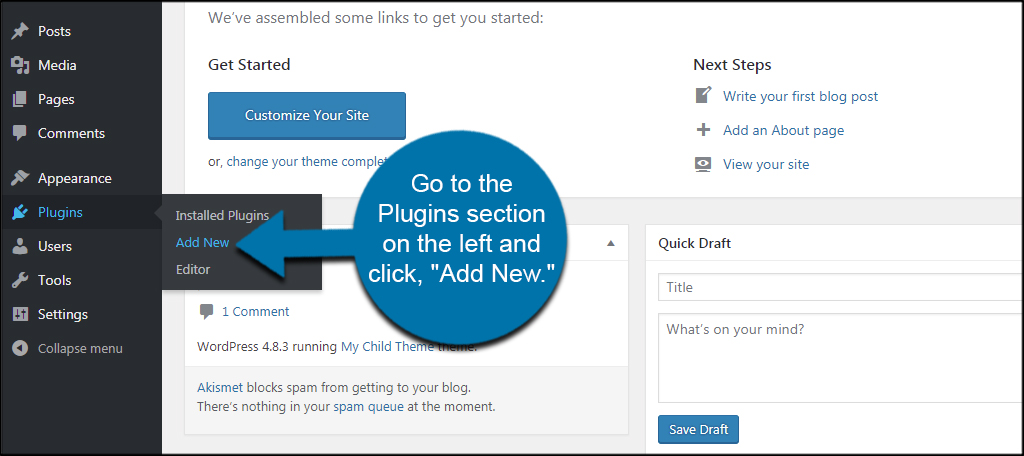
From WordPress, go to the Plugins section on the left and click, “Add New.”
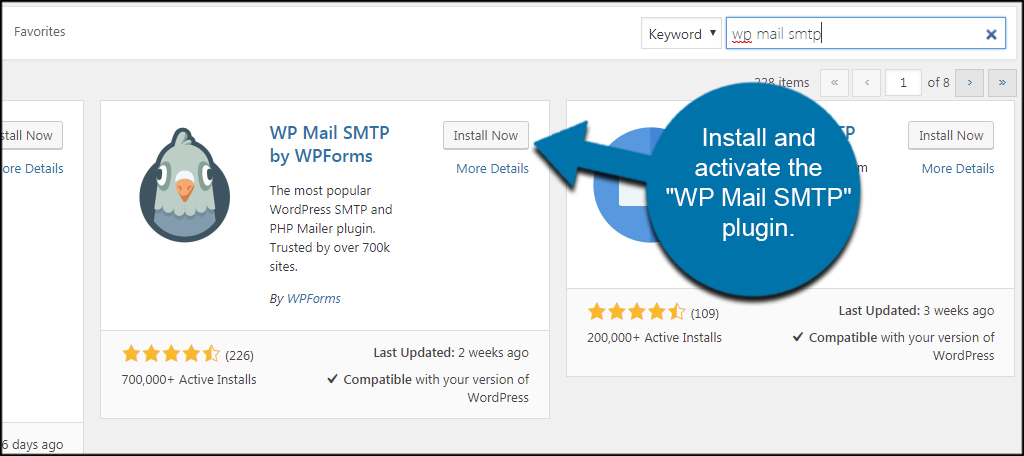
Install and activate the “WP Mail SMTP” plugin. You can find this by using the search field in the right-hand side of the screen. It’s important to note you will see several similar plugins available when searching for WP Mail SMTP. Choose the one that’s labeled, “by WPForms.”
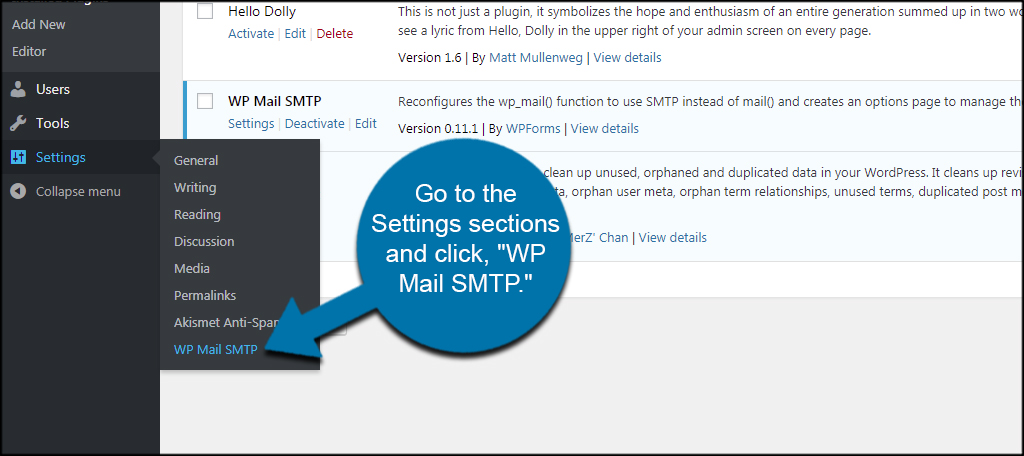
Once it’s installed, go to the Settings sections and click, “WP Mail SMTP.”
Setting Up the Mail Basics
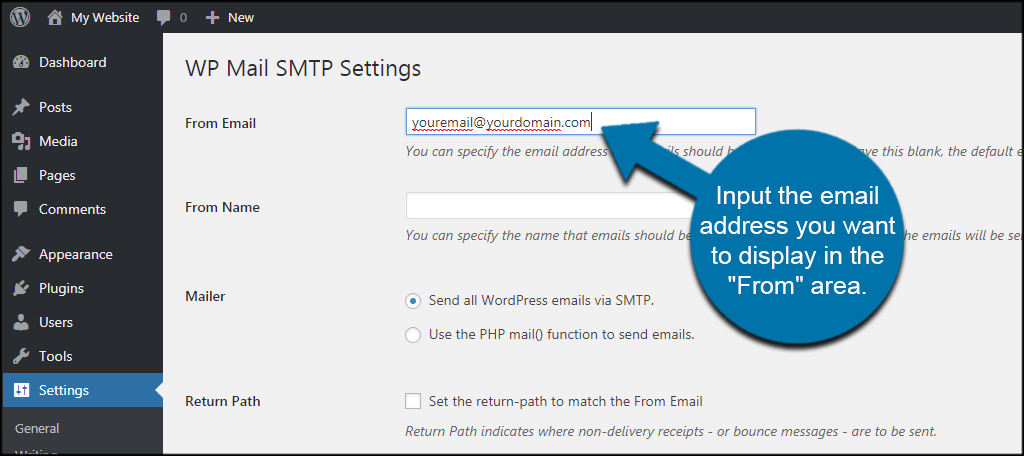
Enter the email address you want to display in the “From” area. If you leave it blank, the default email address WordPress has in the system will be used.
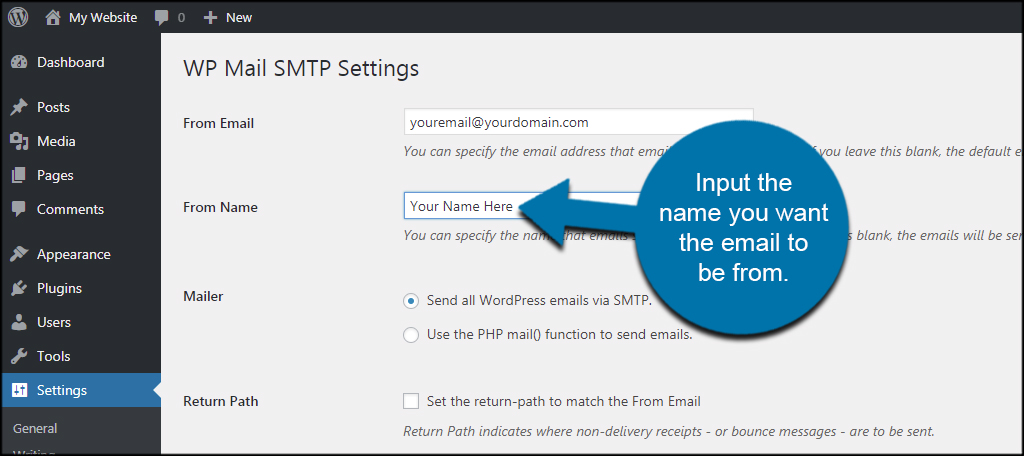
Enter the name you want the email to be from. For instance, you could put your name or the company name if you plan on using this system to interact with other users.
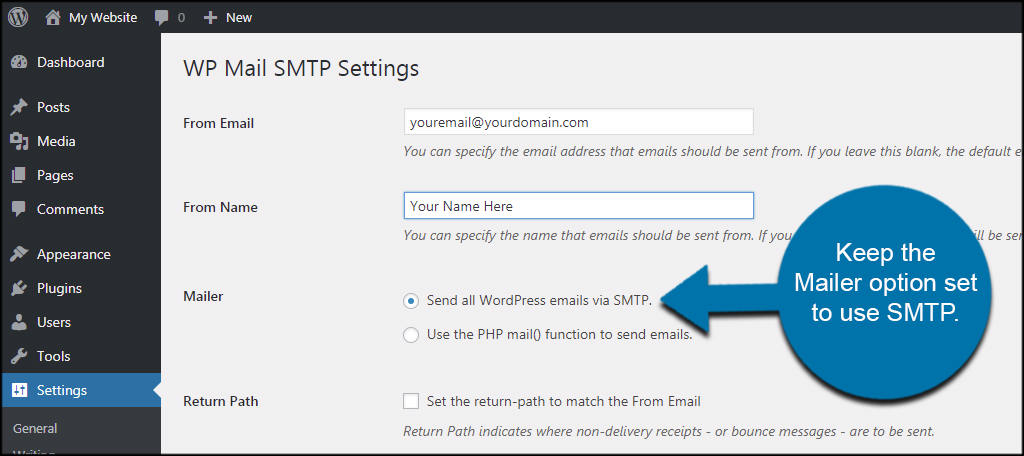
Keep the Mailer option set to use SMTP. At any point, you can revert WordPress to use the PHP mail function. For now, however, we want to use SMTP to send messages.
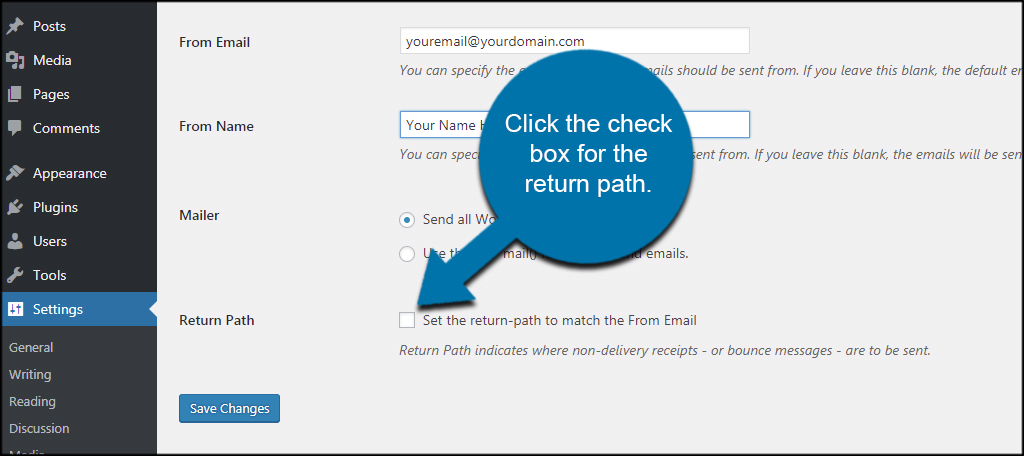
Click the checkbox for the return path if you want things like non-delivery receipts to go to the address. The return path is also visible to others if you use WordPress to send mail to them.
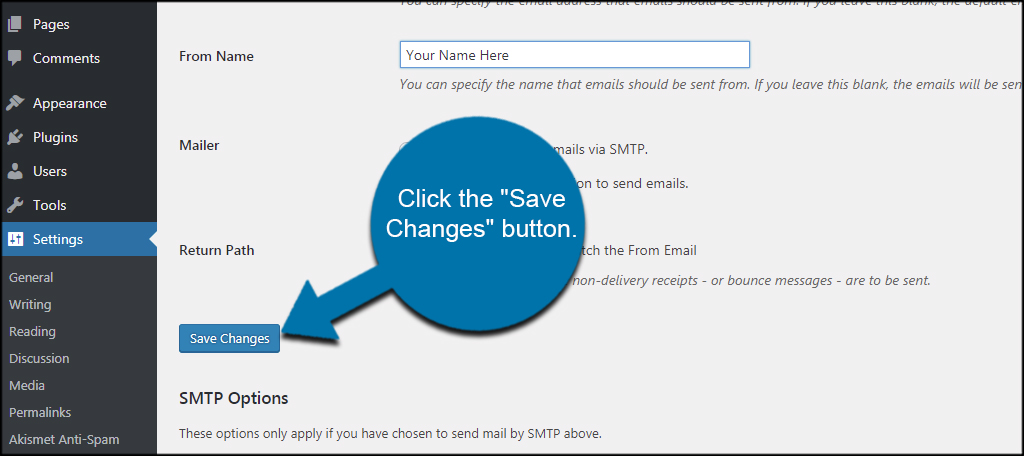
Click the “Save Changes” button. This will keep the above settings before you start entering the information for SMTP.
Setting Up the SMTP Server
For this next part, you will need to know the information regarding your email server. You can access this information using cPanel to manage your email accounts.
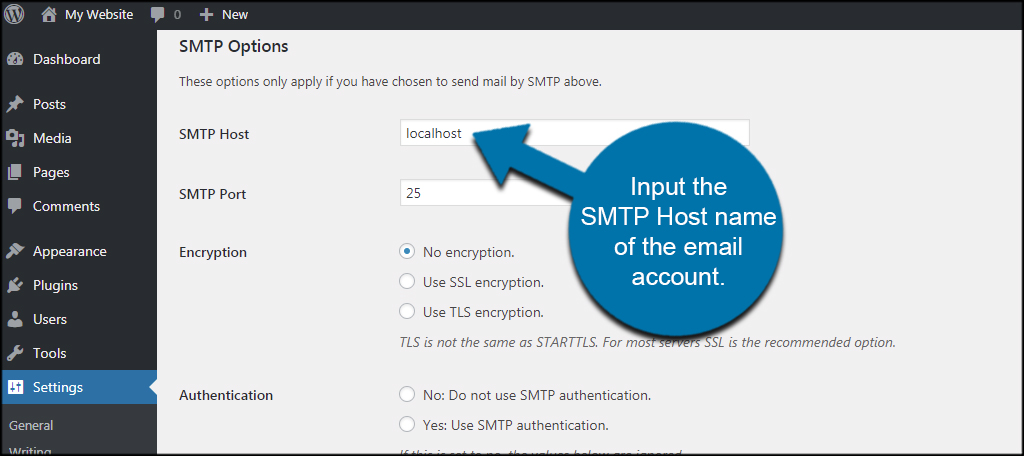
Enter the SMTP Host name of the email account. The SMTP host will be provided by your hosting provider. For example, Gmail users would enter “smtp.gmail.com” in this field to access the account. It may also look like, “mail.ggexample.com.”
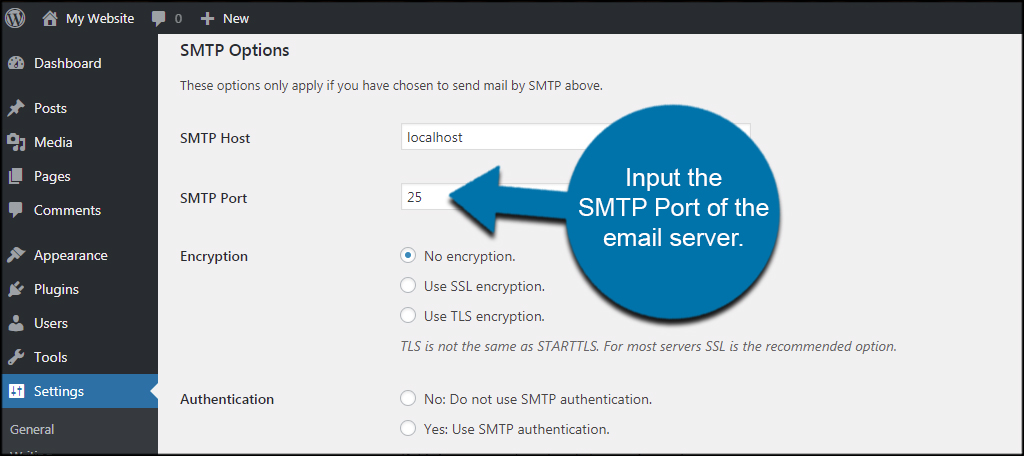
Enter the SMTP Port of the email server. This defaults to port 25, which is the standard for outgoing email. However, secured servers such as those using SSL on the domain will have a different number available.
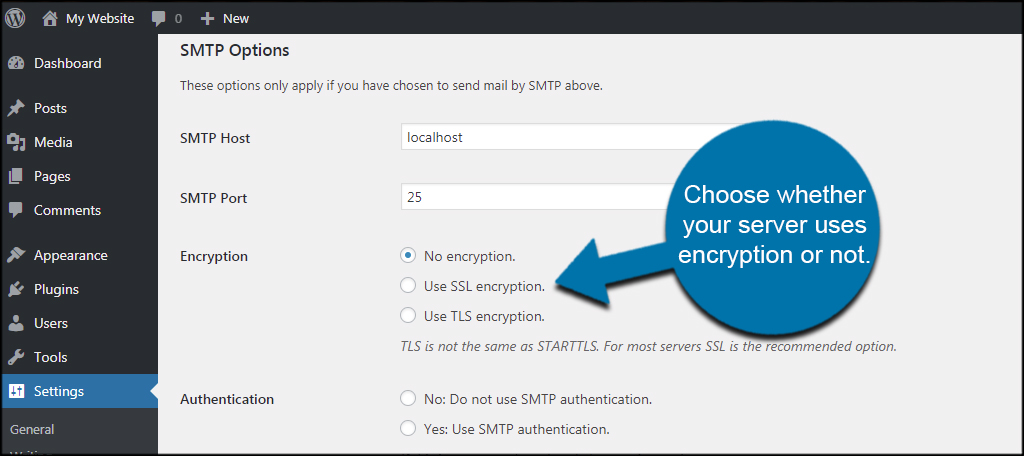
Choose whether your server uses encryption or not. You can select between SSL and TLS depending on how your web server is set up for security. In most instances, you’ll more likely either select “No Encryption” or “Use SSL encryption.” This is information your web hosting provider will give you if you set up a secured website.
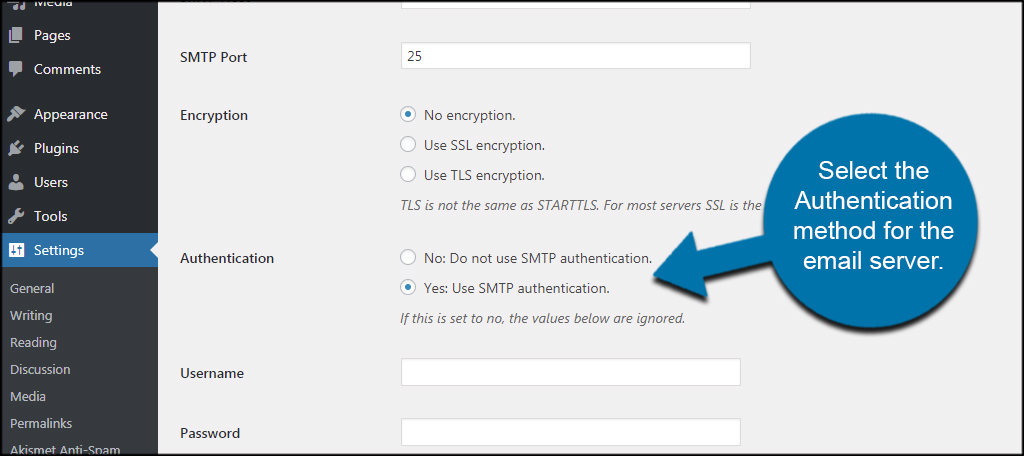
Select the Authentication method for the email server. This is another point that your web host provider will supply when you set up the email address. A lot of domains will be set up to use SMTP authentication to help prevent unauthorized access to the account. This is perhaps one of the more common practices.
Enter your username and password for the email account. WordPress will need this to connect to the email server and send messages. However, these values are unnecessary if your email server doesn’t use SMTP authentication.
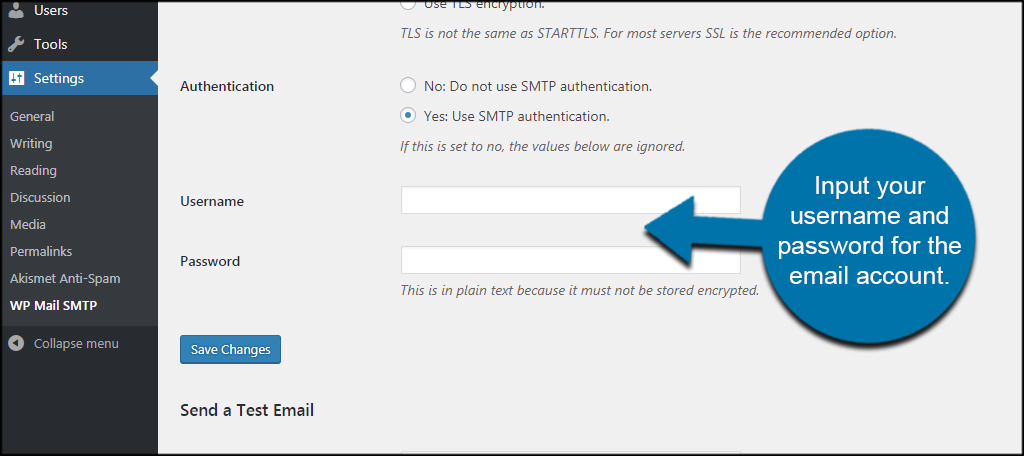
NOTE: For WordPress to use the email server, the password cannot be encrypted. This means it will be visible when you type it into the password field.
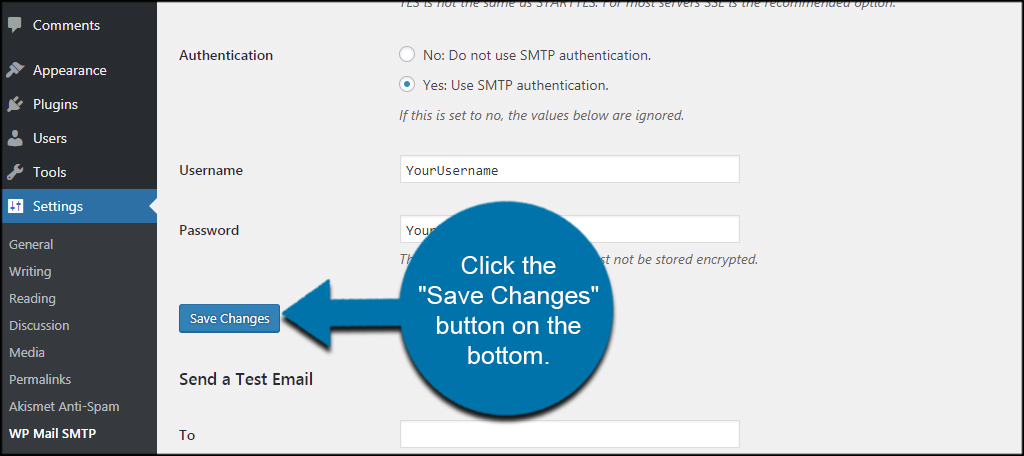
Click the “Save Changes” button on the bottom.
You are now ready to start sending WordPress emails from the local server.
In many ways, this is similar to how you would set up Outlook or any other email system on your computer. The only difference is that WordPress isn’t geared for POP3 responses. For that, you will need to either use Webmail or access the email in another way.
Before you call it complete, you should test the email settings. This gives you a chance to make sure the email address information is correct. If it’s not, you won’t receive messages from WordPress.
Enter a test email address and click the “Send Test” button.

If you don’t receive the test message, verify your email settings in WP Mail SMTP are correct.
SMTP over PHP
Many developers prefer the SMTP local host over the PHP mail function for a variety of reasons. From a more professional appearance to preventing being identified as spam, there are distinct advantages to setting up an SMTP account for your website. Decide if it’s right for you and customize your WordPress experience.
What kind of mailing system do you use with WordPress? Are your visitors more receptive to SMTP messages over the PHP function?