
Do you need to reset your WordPress website’s database to its default settings? The database contains a lot of valuable information about your website and how it works. Things like your login information, posts, pages, comments, and dozens (or hundreds) of pieces of data that you never see.
Of course, you may wonder why anyone would ever need to reset such an essential part of a website.
Many web developers use cloned websites to test significant changes. Making changes on a clone or staging site ensures that your live site doesn’t experience any downtime while you work out the bugs. And when the testing is complete, resetting WordPress to default is necessary in most cases.
Today, I will demonstrate how to reset WordPress database settings to default using the Advanced WordPress Reset and WP Reset Database plugins.
Before We Reset
Resetting a WordPress database is appropriate when you want to revert to the default WordPress setup. But if you’re trying to fix a sluggish database, and intend to keep some content, you may want to consider doing a database “clean up” before resetting.
And as you might have guessed, there is a plugin for that.
The Advanced Database Cleaner plugin will fine-tune your WordPress database, removing a lot of unnecessary data. It can delete old revisions of posts and pages, auto drafts, trash posts, spam and trash comments, pingbacks, and trackbacks.
It can also remove a lot of “orphan” data. Things that are no longer linked from your site, but remain in the database—orphan metadata from posts, comments, users, and terms. You can view and verify specific data types before performing a cleanup.
Resetting the database should be a last resort and only done when you want to start from scratch. If that’s your goal, let’s carry on with the reset.
How to Reset the Default WordPress Database Settings
Database reset plugins are very easy to use, and there is a lot to choose from. In this tutorial, I will be examining two of them that will reset your database to default.
Taking this action will reset WordPress settings, comments, posts, pages, and all data to default. Thus, if you want to preserve any of this content, create a backup before continuing.
Method 1: Advanced WordPress Reset Plugin
Step 1: Install Advanced WordPress Reset
First, we’ll reset the default WordPress database settings using the Advanced WordPress Reset plugin. The plugin will completely reset your WordPress website’s database. The site will be as it was after installing WordPress for the first time.
It’s perfect for test websites, but can also be used on live websites if the need arises.
Note: This plugin should not be used on a website that you want to save the content for. This plugin will wipe everything.
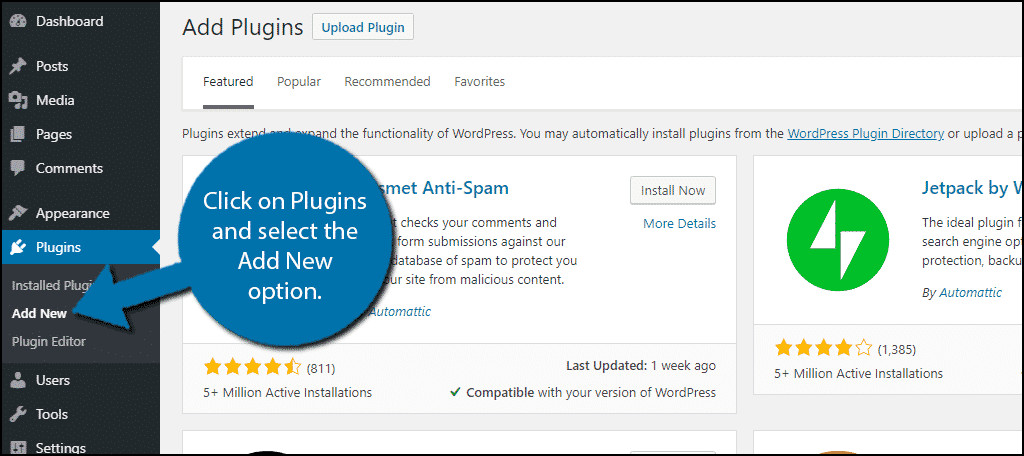
Start by clicking the “Plugins” link and selecting the “Add New” option.
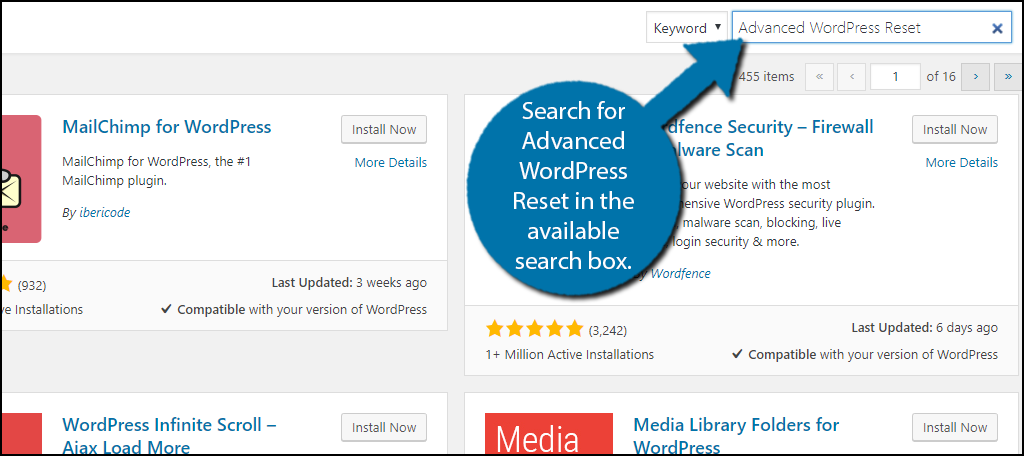
Enter “Advanced WordPress Reset” in the search box. That will also list additional plugins that you may find useful.
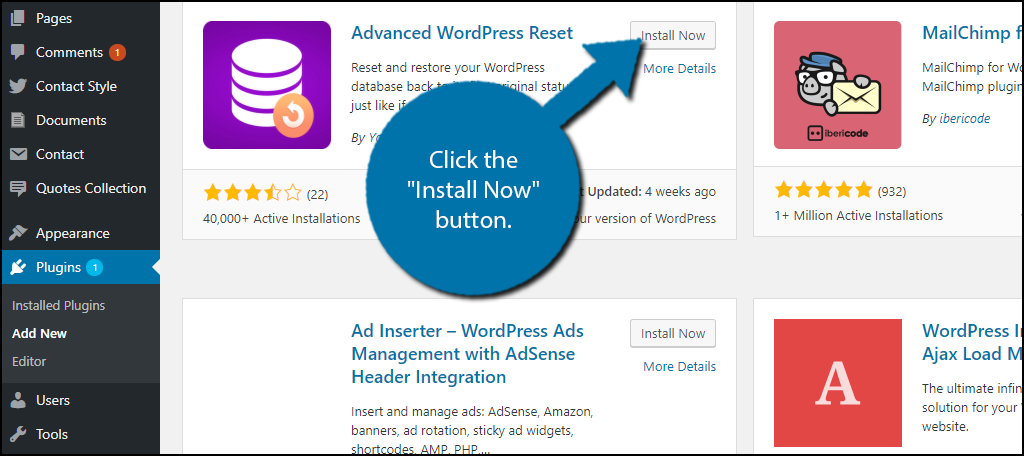
Find the Advanced WordPress Reset plugin and click the “Install Now” button. Then activate the plugin for use.
Step 2: Reset Your Database
Luckily, the reset process only takes a few clicks of the mouse.
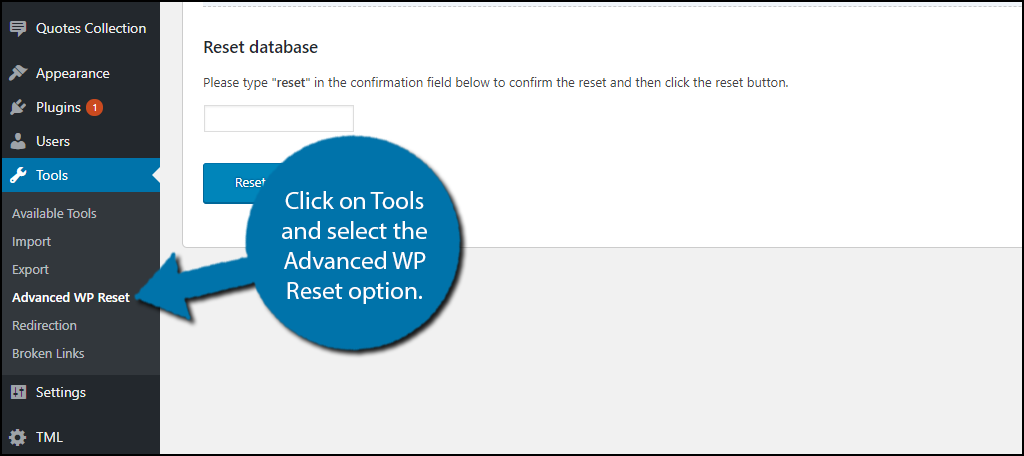
In the left-hand admin panel, click Tools and select the Advanced WP Reset option.
The plugin is straightforward to use, but remember that you will be resetting the entire WordPress database to default, with one notable exception. Your current administrator account will be recreated with the same login information.
That will make it easier for you to rebuild your test website. If you do not have an administrator account, resetting could cause an error and lock you out of the website. If you don’t have one, create an admin account before you begin.
To reset your database, you need to verify that you want to proceed by typing “reset” into the text box.
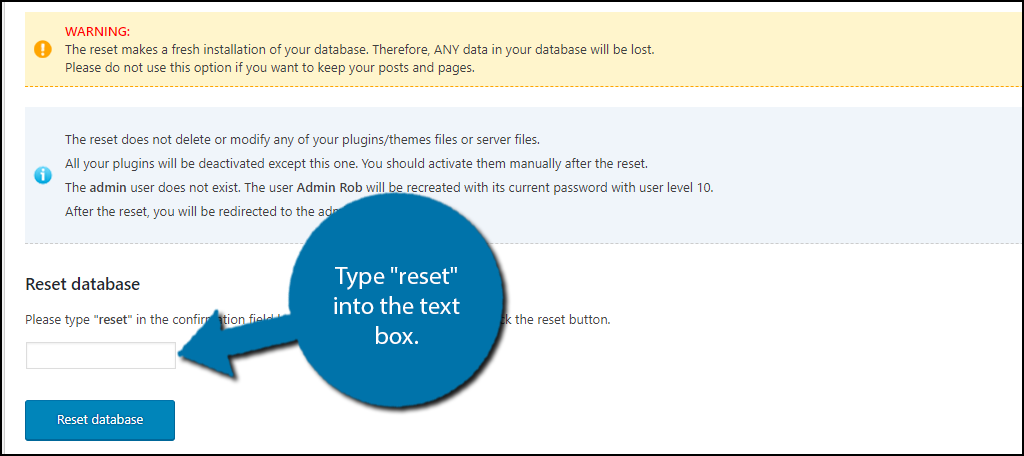
After the word “reset” has been entered, you are ready. This is the point of no return! Create a database backup now if you have not already done so and do not want to lose any data.
Click the “Reset database” button to begin the process.
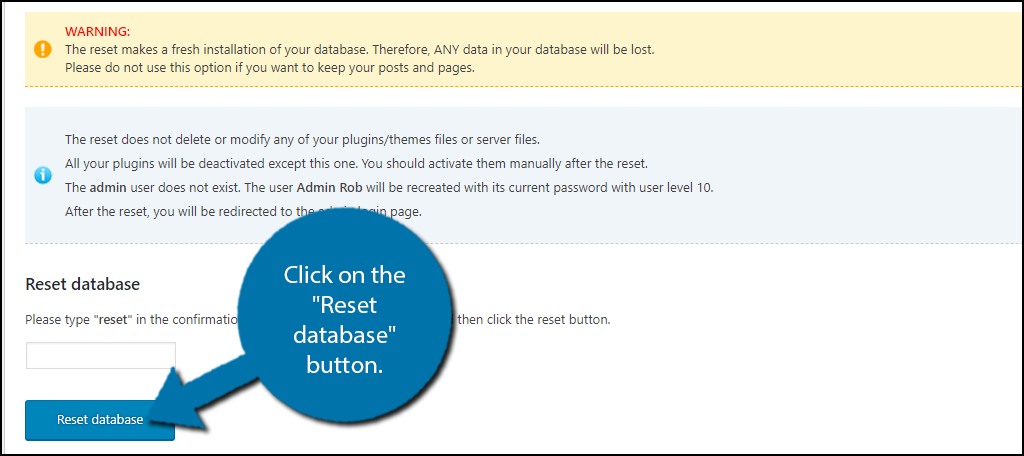
Your website’s database should now be reset. It may take several minutes. How long the process takes depends on the size of the website.
Once the plugin runs, there’s no going back unless you created a backup of the website and database.
Method 2: WP Database Reset Plugin
Step 1: Install WP Database Reset
Another reliable tool to reset WordPress with a plugin, you may want to try is the WP Reset Database plugin. It allows you to quickly and easily reset any or all database tables to the default settings in just a few clicks.
As a result, this tool is more versatile than the last because it allows you to reset individual data tables. After all, the database for WordPress is made up of a series of smaller tables that handle one type of data.
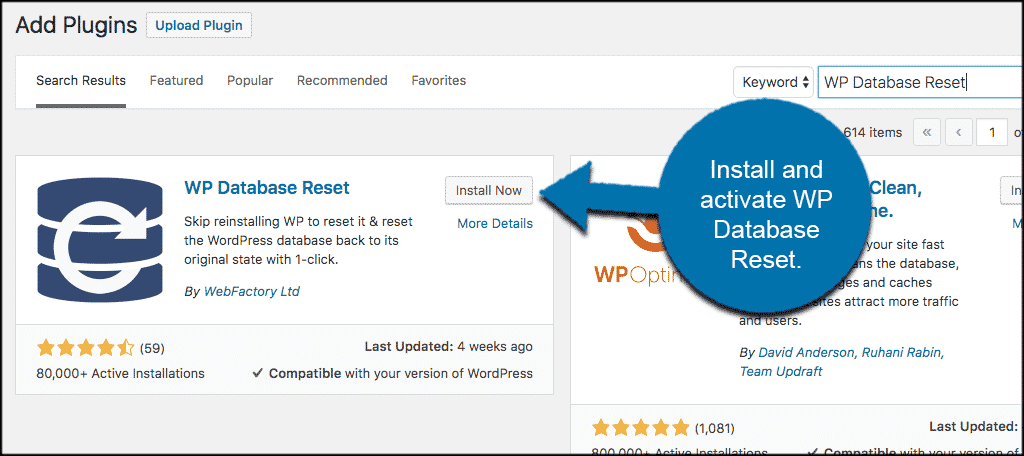
To use the plugin, it needs to be installed and activated. Do that the same way we installed the first plugin, from the plugins page in your WordPress admin dashboard.
Step 2: Reset Your Database
Once the plugin has been installed and activated, click Tools and select the Database Reset option.
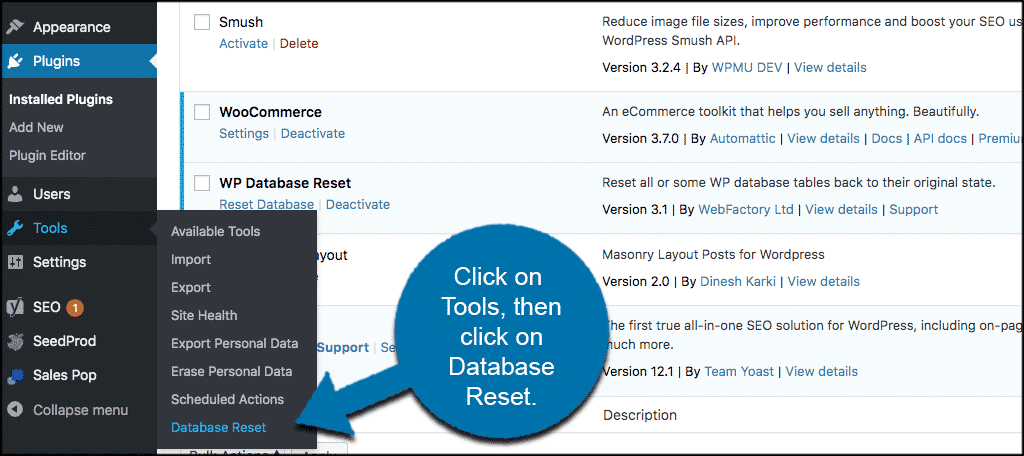
That will take you to the database reset page. Here you can find all of the options the plugin provides and it even lists them in 3 easy steps.
The first step is a warning that instructs you to make a backup of your website. This will ensure that if you can recover any data that is deleted during the reset. Of course, if you do not want any of the data, feel free to skip this step.
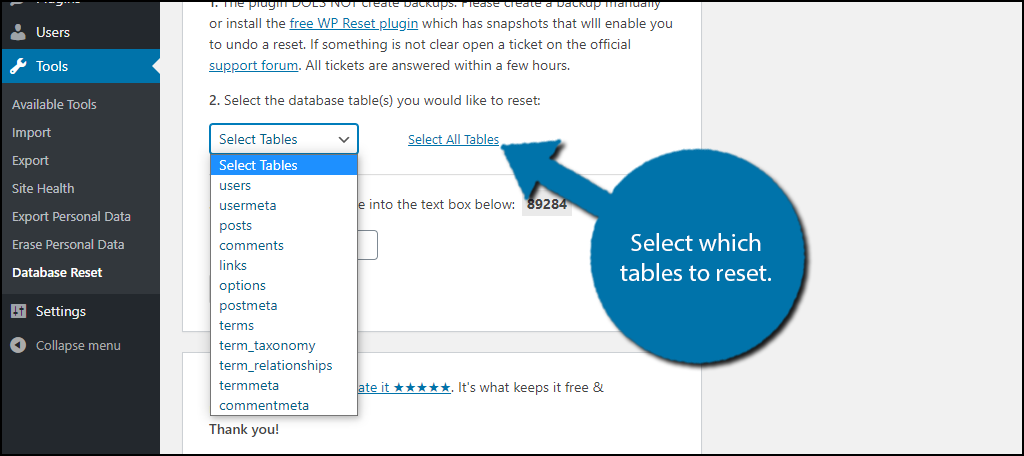
Now you need to select which database tables you will reset. As I said before, this plugin provides you with a lot of options. Use the drop-down box to select an individual table to reset or click on the Select All Tables option.
Lastly, you will need to enter the security code provided into the textbox. This is intended to make sure that users do not mistakingly reset their database.
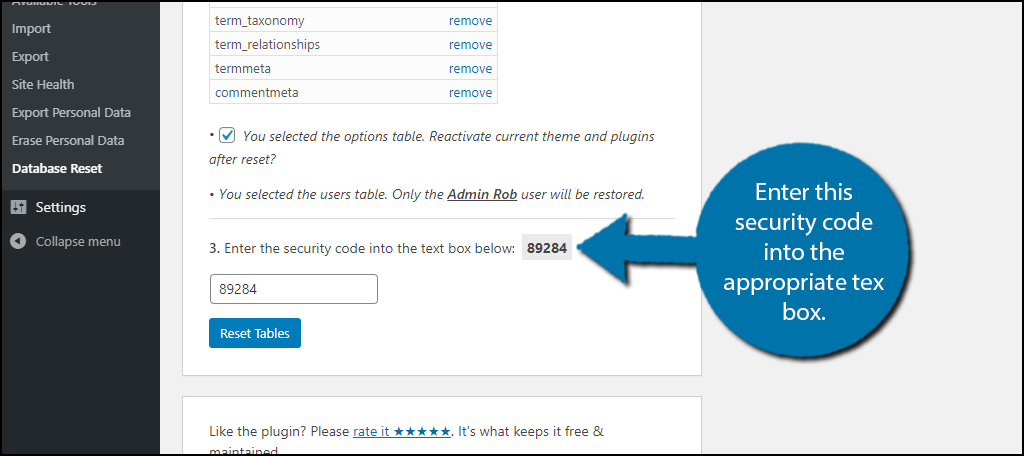
Double-check your selection and click on the “Reset Tables” button to clear your database.

The reset will now begin and the time will vary depending on how large the database was.
Method 3: Resetting the Database Without A Plugin
Step 1: Delete the Existing Database
For those of you that may not want to use a plugin, you don’t need to. But it is definitely a longer process without one. To put it simply, you need to delete the existing database, create a new one, delete other key files (plugin, theme, etc.), and finally reinstall WordPress.
Again, like the last two methods, this will delete everything on your website and send you back to default. Proceed with caution.
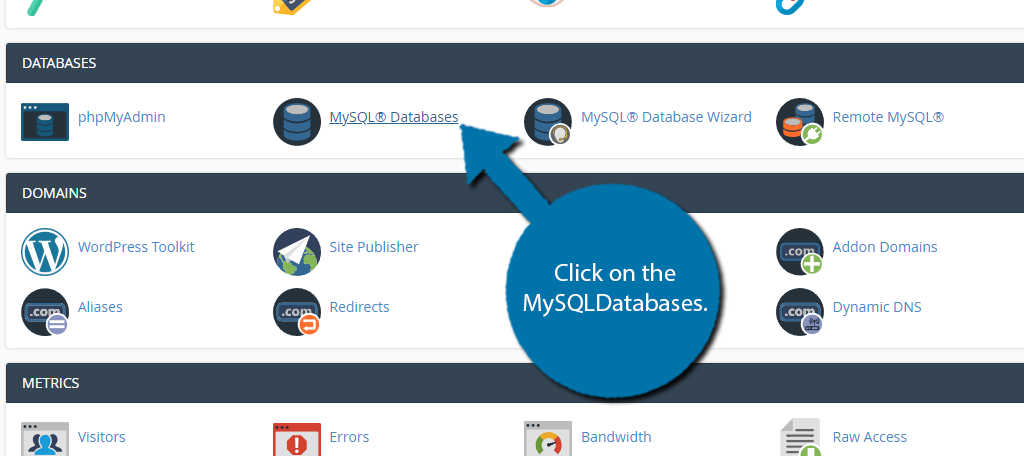
First, log in to your cPanel and locate the Database section. Click on the MySQLDatabases.
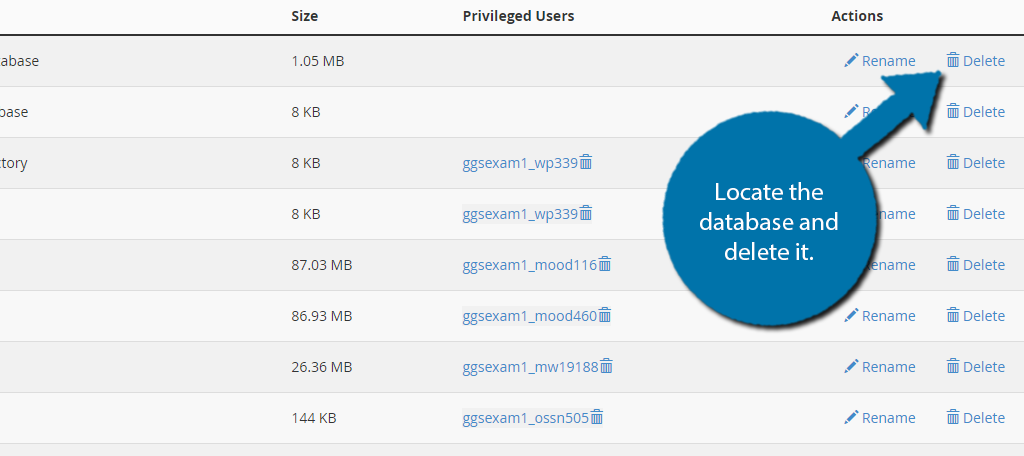
There is a chance you might have multiple databases here. If so, locate the database that is your specific WordPress install and click on the Delete option.
Step 2: Create A New Database
Now that the old database is gone, you will need to create a new one. And luckily, this is in the exact same spot as where you deleted the old one.
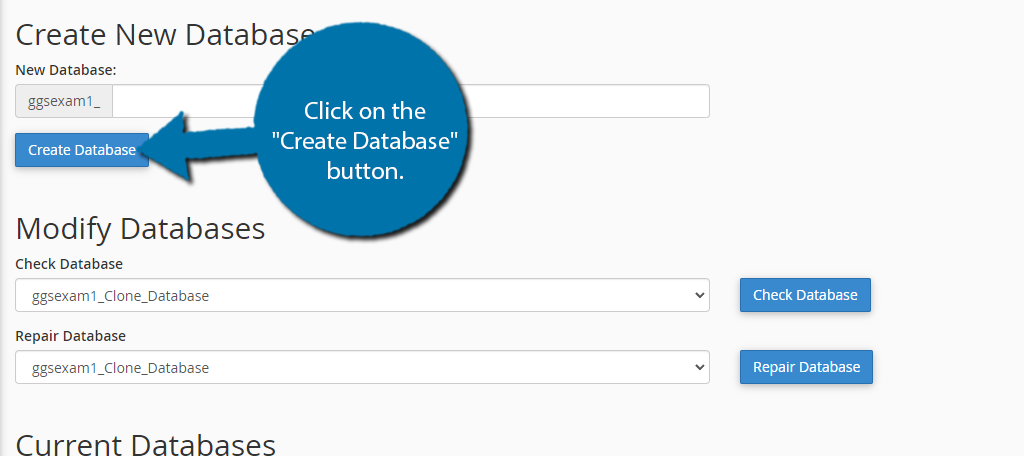
Scroll to the Create Database section. Enter a name and click on the “Create database” button.
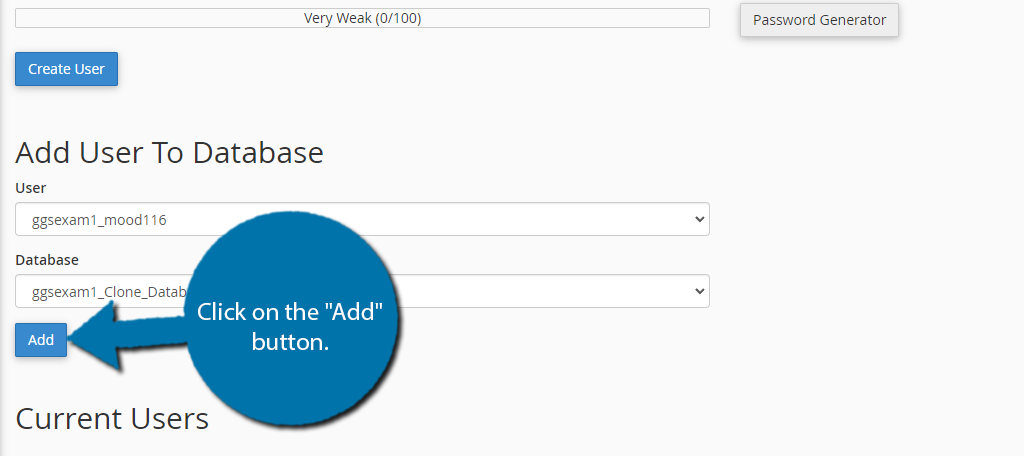
The database will now be generated. After that, you need to assign users to that database. Scroll down to the Add User to Database Section. There are two drop-down menus, one for users and one for databases.
Simply choose a user and a database to assign them to. Click on the “Add” button to finish.
Step 3: Delete the wp-content Folder
Now, it’s time to delete the wp-content folder. This will result in the deletion of all plugin and theme files.
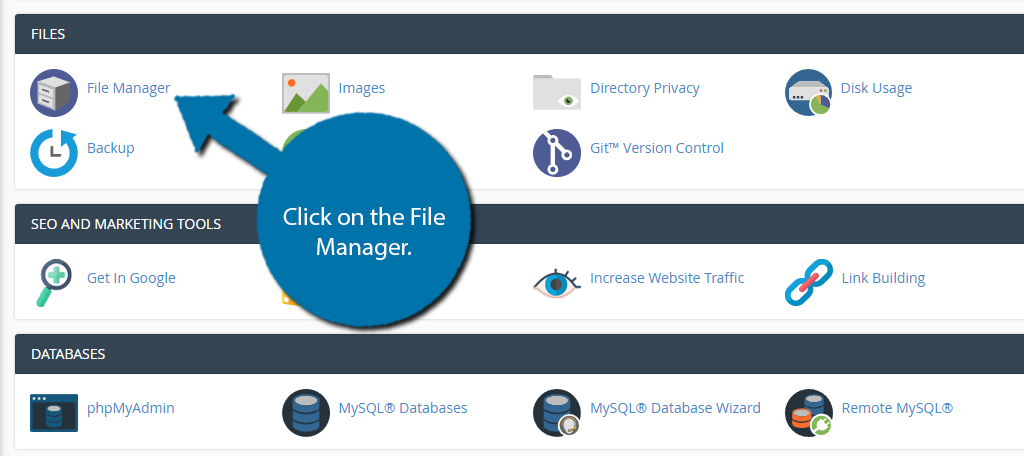
Go back to the cPanel and click on the File Manager.
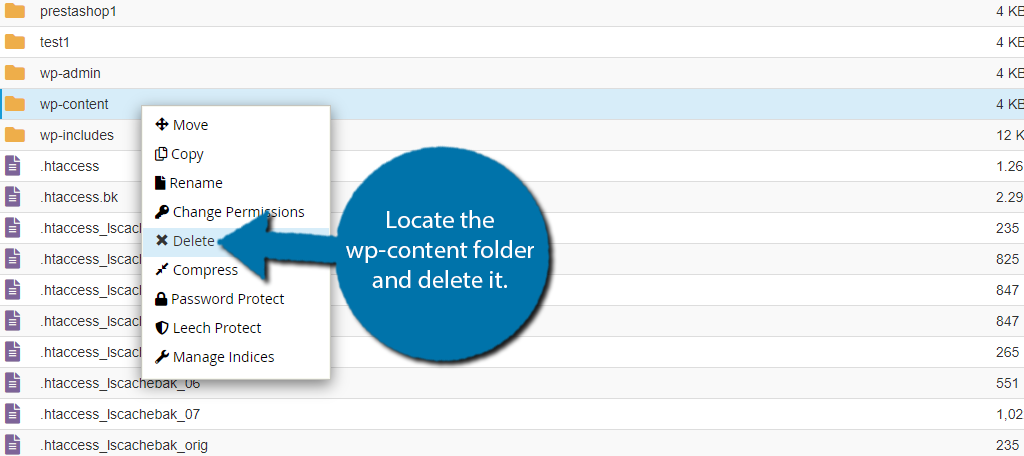
Click on the public_html directory. Locate the wp-content folder and delete it.
Your website is now completely reset, but it is not functional. To make it so, in your URL bar, type YourWebsite.com/wp-admin/install.php. Make sure to replace “YourWebsite” with your actual domain name.
A small welcome form will appear on the screen and ask you to fill in some information regarding your default settings and new database credentials. Fill it in and click on the “Install WordPress” button. WordPress will install and the website will be fully operational.
Congratulations on learning how to reset your WordPress database.
Test Everything First
Knowing how to reset WordPress is an essential tool for any website developer in a testing environment. Testing new features and designs is vital for all websites. It may be fine to test a new website on a live platform if the site doesn’t yet have an audience.
But as you grow and gain visitors, you should avoid testing on the live site.
The best way to test new ideas is on a test site since it will not affect your actual live content and layout. You can create a clone of your website and work out your ideas there. It’s better to work out experiments and updates where no one can see them.
Your live site should never have a broken page or function. This cannot only ruin the user experience but also affect your website’s SEO.
Why do you want to reset your website? How often do you use a clone or staging site to test ideas for your live website?