Do you need to correct a widespread typo or name change? This could mean hours of work for your staff to change every instance of a widespread typo, name change, URL change, etc. There are two solutions to this problem. The first is to use the SQL query in your database to make these changes or use the Better Search Replace plugin.
If you are uncomfortable with code editing, I recommend using the plugin method, but it is quite easy to use the SQL query. Keep in mind that using either method will replace all of the text that matches throughout your website. Today, I will demonstrate how to replace text using two methods.
When Should I Use This Technique
It is very important that you understand how much text could be affected by this technique. For example, let’s say you typed “sql” instead of SQL. This is a great example of a small typo that may be found throughout a website. As you can see, the letters are not all capital, but what if there were specific instances where it was left lower case intentionally, like in this article?
This means that replacing text is not a simple task and you need to carefully review everything before making a change. You cannot reverse this process regardless of the method you choose. Your only option is to use a backup of your website. This way you can safely revert your website back to before the change was made.
How to Replace Text in Your WordPress Database
Today, I will demonstrate how to replace text using two methods. The first method I will demonstrate is the plugin method. The Better Search Replace plugin is extremely popular with over 400,000 active installs. You can select from all of the content on your website. Keep in mind there are plenty of alternatives to choose from.
The second method is to use the SQL query within your database to make the changes. Don’t worry if you are not a coding expert, all you need to do is copy and paste a line of code and change the words you want to replace and what to replace it with.
Method 1: Plugin Method
Installing Better Search Replace
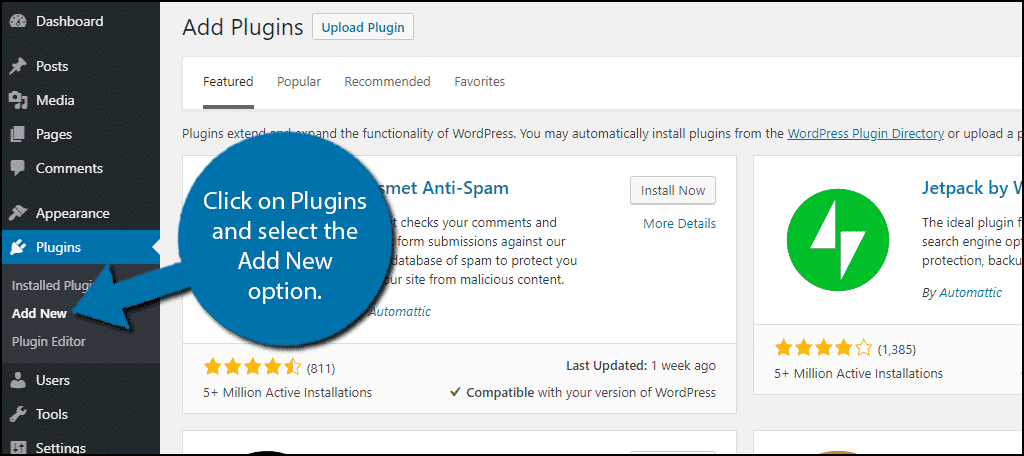
Let’s start by clicking on Plugins and selecting the Add New option on the left-hand admin panel.
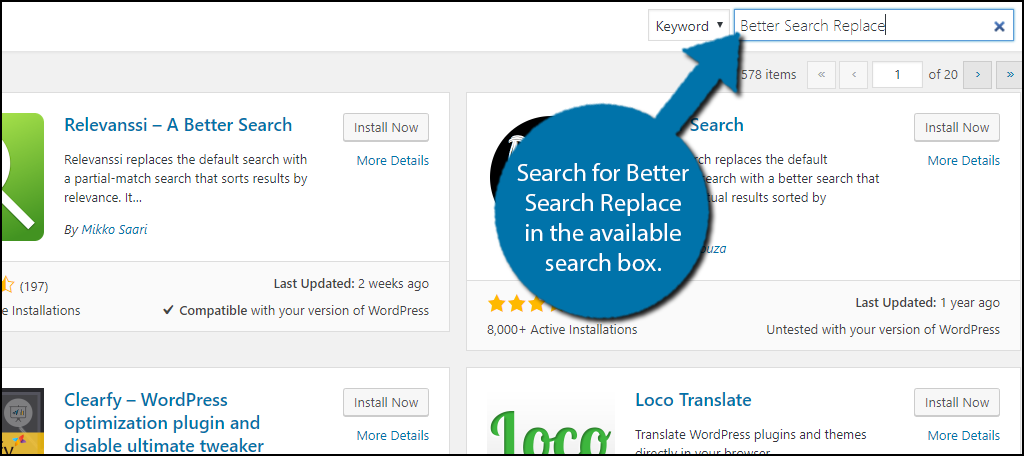
Search for Better Search Replace in the available search box. This will pull up additional plugins that you may find helpful.
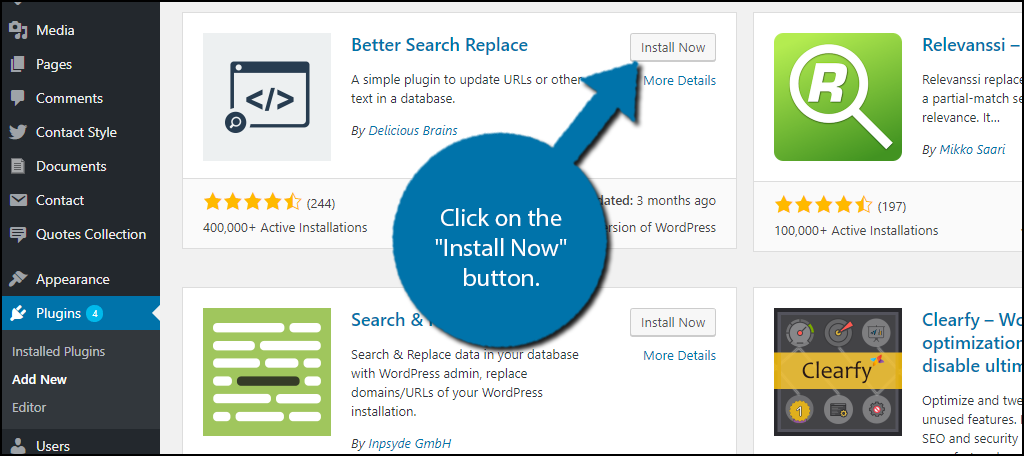
Scroll down until you find the Better Search Replace plugin and click on the “Install Now” button and activate the plugin for use.
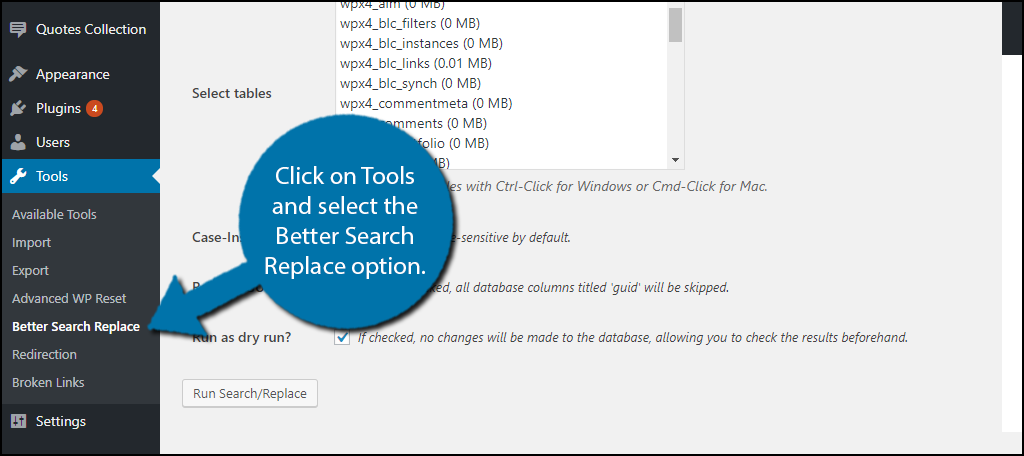
On the left-hand admin panel click on Tools and select the Better Search Replace option. This will pull up the main settings page.
Using Better Search Replace
It is very important to understand that the only way to undo a change is to revert your website using a backup. You need to make sure that all of the text you type is accurate. You do not want to replace a URL with the wrong one or fix a typo with another typo. These changes will directly affect your database and you need to review everything carefully before making a change. If you have not created a backup of your website at this time, do so now.
Type the text you want the plugin to search for in the first text box. Type the text you would like to replace it within the second box. Check carefully for spelling errors.
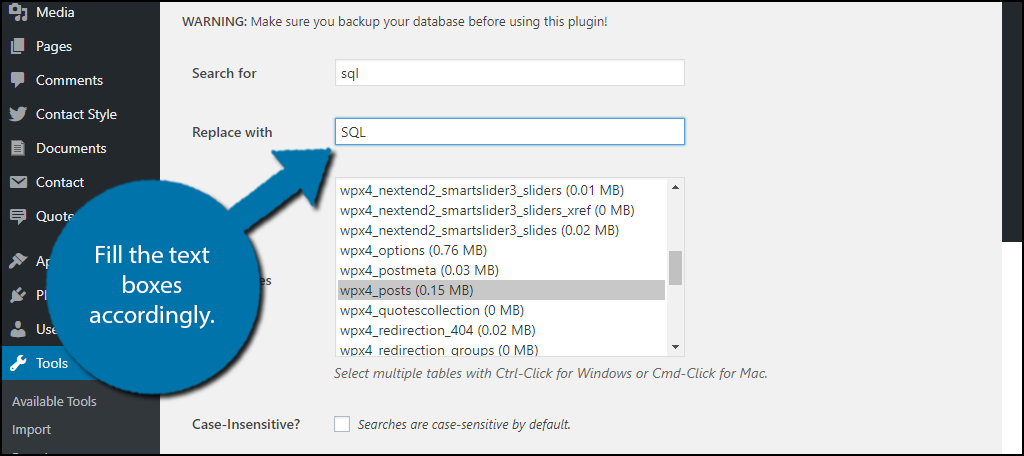
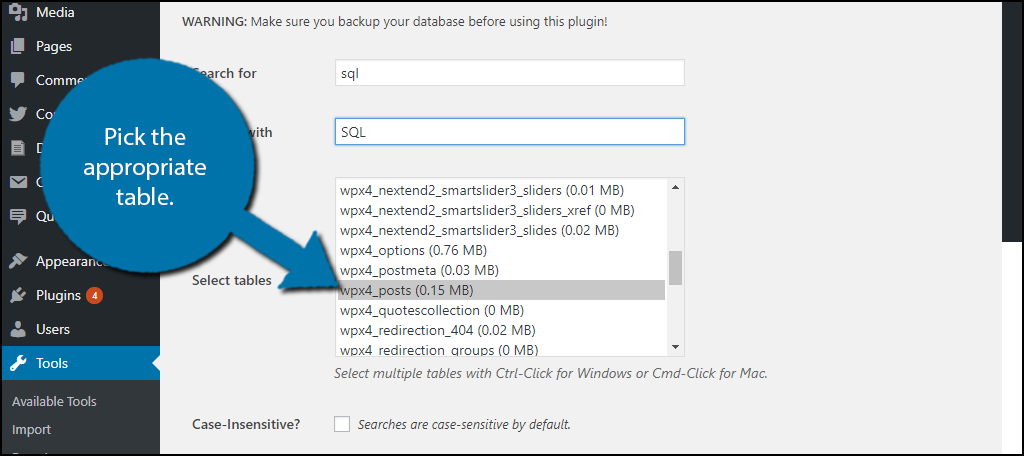
You now need to select the tables from your database. You can select multiple by pressing Ctrl + left-click on Windows and Cmd + left-click on Mac. Make sure you are selecting the correct tables or you could make a serious mistake. You will most likely be using the posts table. The names of the tables will be different for most. In my case, it is “wpx4_posts”.
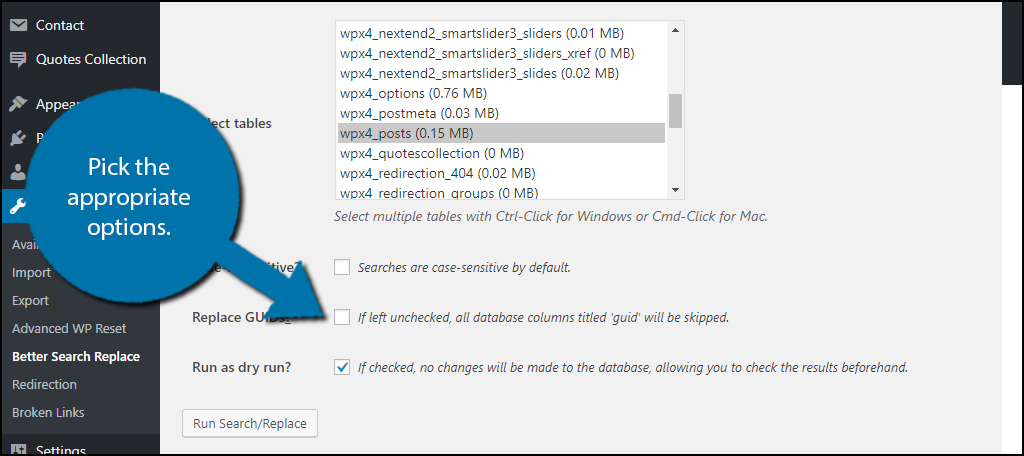
You will now have three options to select. The first is if you want your text to be case insensitive. By default, it is case sensitive. The second is to include Guid columns. If you are not aware of what they are, skip it and leave it unchecked. The final option is for a dry-run. This allows you to search first and see the results before making a change. I recommend doing this first and when you are ready, uncheck the box to complete the process.
Click on the “Run Search/Replace” button.
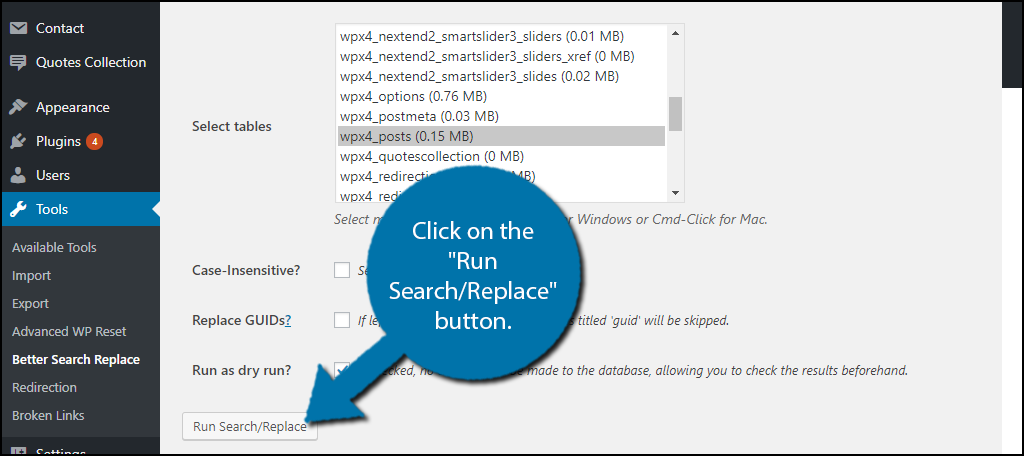
Congratulations, the plugin will make all of the appropriate changes if you left the dry-run option unchecked. If you are not happy after making the changes, use a backup to revert your website to before the changes were made.
Method 2: SQL Query
You will need access to your website’s cPanel. The login information is provided to you with your web hosting plans when you create an account. This is a very simple method to follow even if you have zero coding experience.
Log into your cPanel. Click on the phpMyAdmin option under the database section.

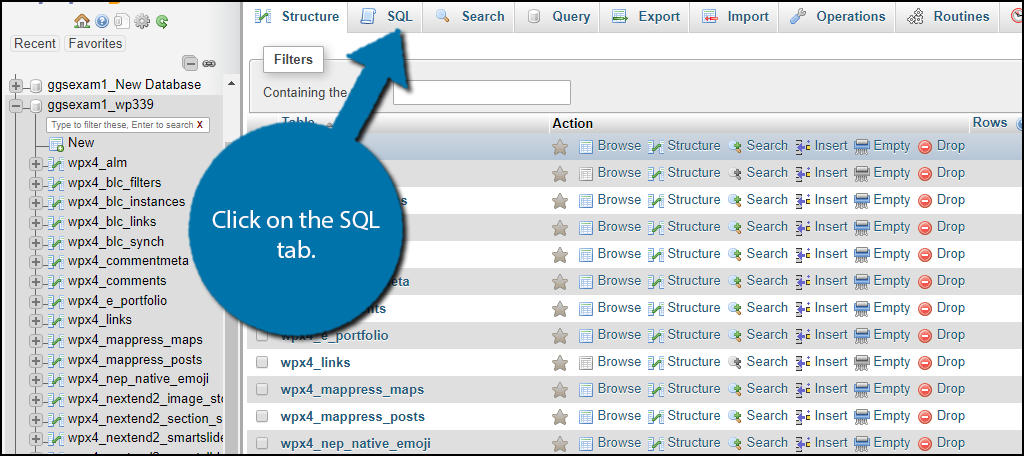
You need to locate your WordPress database on the left-hand side. The naming conventions are different depending on your web host and if you manually made a name change. Once you have found your database, click on the SQL tab.
The SQL query is a simple text box where you can enter code commands. Copy and paste the following code command:[ht_message mstyle=”info” title=”” show_icon=”” id=”” class=”” style=”” ]update Insert_Table_Here set content =
replace(content, ‘Text to locate’, ‘text to replace with’);[/ht_message]
You need to replace a few things in this code. First, Insert_Table_Here needs to be changed to the correct table. Naming conventions are different so my name will not apply to everyone, but it should be similar to wp-posts if you want to change it throughout your posts. Second, content must be changed to the content name. Finally, the text must also be changed. The “Text to locate” is what will be changed, and the “text to replace with” will be what it is changed too. Review everything and click on the “Go” button to make the changes.

Congratulations, you have successfully replaced text in your WordPress database.
Review Twice Change Once
It is very important to be sure about any potential changes you will make using either method. You will only be able to fix it by using a backup of your website and it could be very bad if your backup is not up to date. This is an extremely useful method for larger websites with thousands of posts. It is not feasible to change every post individually. For these cases, bulk changes are the only solution.
Review all of the information twice because these changes can have serious consequences for your website. If you are a smaller website that is looking to change something on a few articles, you may want to manually do it. This method should be reserved for bigger bulk changes.
Which method have you chosen to use? How long has your method taken you?
Thanks for the article Ron.
I have tried the plugin but it doesn’t recognise the difference between left and right curly apostrophes.
I have a word on my website – e.g. say it was S’lott
Now the current word S’lott – would have a single, right curly apostrophe.
But what I need to do is to replace all instances of that word with S’lott – with a single left curly apostrophe.
Any idea on how I might achieve that?
Many thanks