A WordPress Loop, or “The Loop,” as many call it, is a function in WordPress that is used to display each of your posts. Usually, the number of posts to be displayed is set in your WordPress Admin Panel Settings area under the “Reading” tab. However, what can you do to override the default WordPress Loop?
How to Use the Loop
When using the Loop, it should be placed in your Theme’s index.php, as well as placed in any other templates used to display your website post information.
In this article, I will show you several examples of how to use The Loop and override it to display posts in several different ways. Simply follow the code examples below to get the WordPress Loop override structure that you prefer.
You will need to access the functions.php file that is located in the WordPress admin dashboard if you want to add any of the code below. Scroll down to the bottom of this tutorial for instructions on how to access that file.
Once you have the file open and ready, then start adding the demo code functions displayed below.
The loop example will display any number of posts within that specific WordPress Loop. Open any template file where you would like to place the posts and add the following loop:
// if everything is in place and ready, let's start the loop


// to display 'n' number of posts, we need to execute the loop 'n' number of times
// so we define a numerical variable called '$count' and set its value to zero
// with each iteration of the loop, the value of '$count' will increase by one
// after the value of '$count' reaches the specified number, the loop will stop
// *USER: change the 'n' to the number of posts that you would like to display


// for CSS styling and layout purposes, we wrap the post content in a div
// we then display the entire post content via the 'the_content()' function
// *USER: change to '' to display post excerpts instead


// here, we continue with the limiting of the number of displayed posts
// each iteration of the loop increases the value of '$count' by one
// the final two lines complete the loop and close the if statement
Exclude Posts From a Category
This loop example demonstrates how to hide a specific Category or Categories from being displayed:
have_posts() ) : while ( $query->have_posts() ) : $query->the_post(); ?>


 by
Style Posts From Some Category Differently
This loop example displays each post with its Title (which is used as a link to the Post’s Permalink), Categories, and Content. It also allows posts in a category with Category ID ‘3’ to be styled differently:
by
Nested Loops
Nested Loops simply means that you are trying to run a second loop before finishing the first one. Using this in certain situations can be useful. For example, maybe you want to display a post list with a shortcode.
$my_query = new WP_Query( 'cat=3' );
if ( $my_query->have_posts() ) {
while ( $my_query->have_posts() ) {
$my_query->the_post();
the_content();
}
}
wp_reset_postdata();
Remember, you want to reset the main loop data after a nested loop. Do this so that some global variables hold the correct values again.
Accessing the functions.php File
In order to add any of the code above to play with the default WordPress loop, or any other code you may want to try, you have to know how to access the functions.php file on your WordPress website. You can do this by accessing the cPanel and going to the correct file.
However, the easiest way to access the file is directly from the WordPress admin dashboard. Here is how you do that and how to enter the code from above if you are trying it out.
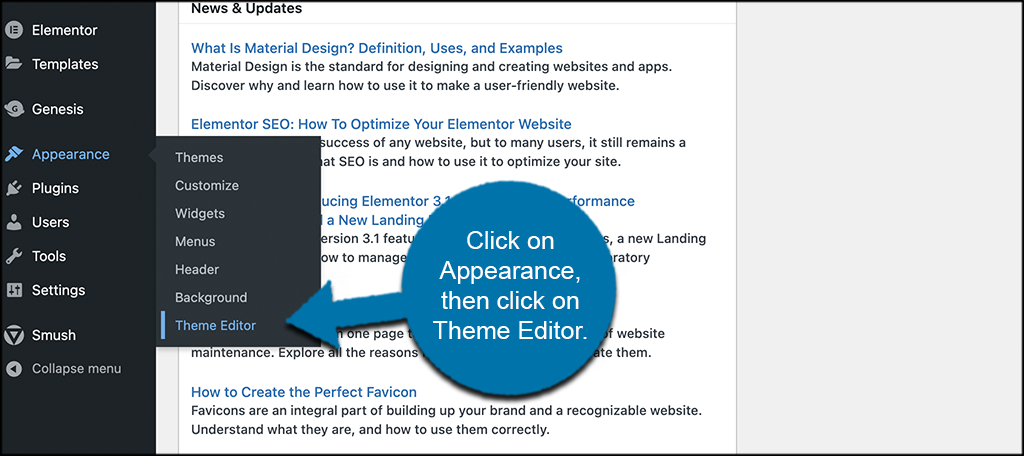
Step 1: Go to Theme Editor
From the admin dashboard of the WordPress site, click on Appearance > Theme Editor. You will see this option on the left side menu area of the dashboard.
This takes you to all of the main site files.
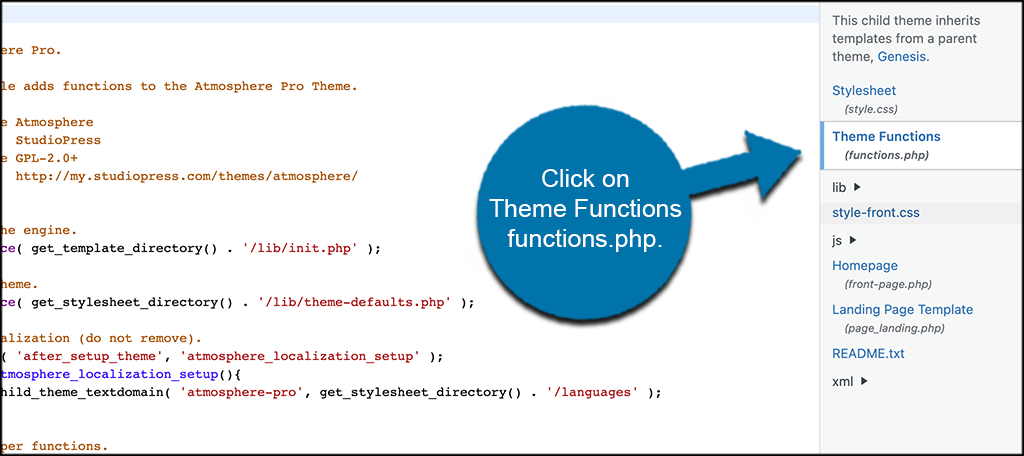
Step 2: Click on the Theme Functions File
You will see that there are several file options available to the right of the screen. The number of options available will be based on what you are currently running.
You want to find the “Theme Function functions.php file and click on that to open it up.
Step 3: Scroll to the Bottom of the File
Now that the file is open, you can add the appropriate code to it. Scroll down to the very bottom of the file and add any relevant code updates there.
Don’t forget to update your file when you make code changes. When the update is successful, go ahead and see if the code worked.
You can repeat these steps and add as much relevant code to that file for different functions as you want.
Final Thoughts
I hope this article gave you a few easy examples of how you can override the default WordPress loop in a few different ways. You can see by the code above that there are several options to play with.
Don’t mess with the functions.php file and add and subtract code unless you have a decent understanding of how it all works, and how to fix it if something happens. As of this writing, we have still not found a plugin that accomplishes this. Let us know if you find one.
Did the code above work correctly? Do you understand how to easily access the correct functions.php file to use the code above?