
Allowing authors to revise published WordPress posts can help improve the quality of the post over time. Sometimes changes need to be added, things need to be subtracted, or the content needs some adjusting. These are called post revisions in WordPress.
Over time authors may come and go, so it is crucial that you have a system in place that allows any author to make WordPress author post revisions. You don’t always want to have to be the one as admin of the site to change every post revision needed.
This is especially true if you have authors that you trust. Allowing any author to make post revisions in WordPress not only saves time but also gives your authors the confidence they need to get things done properly.
In this article, I will show you how you can allow any author to make WordPress post revisions
User Roles and Permissions
User roles and permissions in WordPress are set to allow specific handling of content. Each user role allows for different permissions.
WordPress allows you to let contributors edit their published posts and update them without getting approval from an editor or administrator.
However, I don’t recommend giving such permissions to contributors, as you just leave too many variables in the air of what could go wrong.
Correct user roles must be in place in order for you to be able to run a nice, clean, smooth website.
As an administrator of the website, you want to be able to review all changes that have been made before the post is updated or published. This allows for the editorial quality to be up to par.
There is a solution that allows contributors to make changes and submit them for editorial review. Once approved, the editor can easily merge the changes to the live post.
Basically, this means any author can make WordPress post revisions, but can’t publish anything without first submitting it to you for approval.
Let’s take a look at what this solution is.
Why Use Revision Manager TMC?
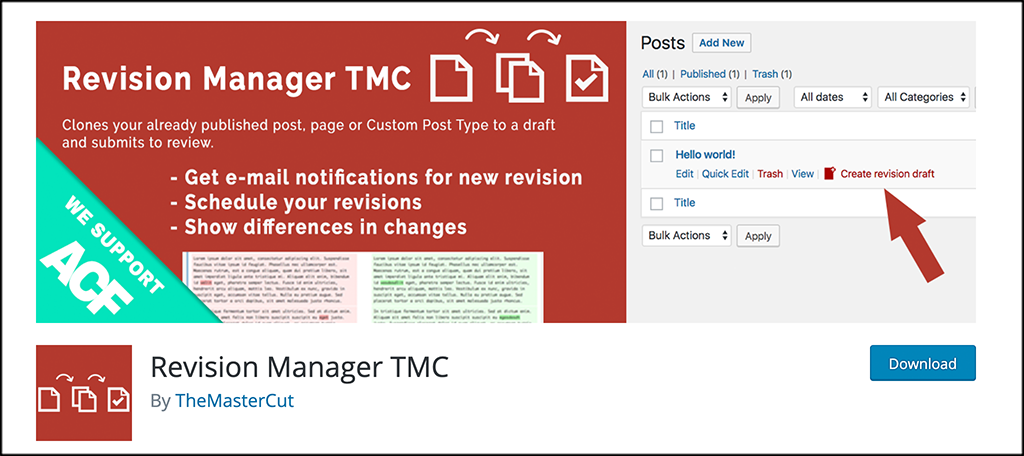
The Revision Manager TMC plugin allows your authors to easily create post revisions in WordPress. It does this by allowing your editors to create clones of posts and replace them with one click.
The plugin gives you and other authors an easy, yet powerful way to make these revisions. The plugin is extremely powerful, yet lightweight. It will not bloat your website or slow it down in any way.
The plugin comes with a ton of features. Some of the main ones include:
- Revision Scheduling
- Detailed Support Section
- Change Differences
- Support for Third-Party Plugins
- Ability to Delete All revisions from Database
- Dashboard Widget
- Easy to Set Up
- Email Notifications
- Select Who can Review and Approve Revisions
As you can see, it gives you all the tools you need and much more to allow any author to create revisions in WordPress. Not only that, but the plugin also supports Elementor page builder, Beaver Builder, and Gutenberg.
So all-in-all, it is a very solid plugin to have on your site.
How to Let Authors Make Post Revisions in WordPress
Step 1: Install and Activate the Plugin
The first thing you need to do to accomplish this is to install and activate the Revision Manager TMC plugin. You can do this fairly easily by jumping over to the Plugins page in the WordPress admin dashboard.
Simply use the search field that is available to search the plugin by name. When it pops up, go ahead and install and activate it directly from there.

Step 2: Access the Revision manager TMC Settings Page
Once the plugin has been installed and activated click on Settings > Revision Manager TMC, and you will be taken to the plugin page in your WordPress admin area.
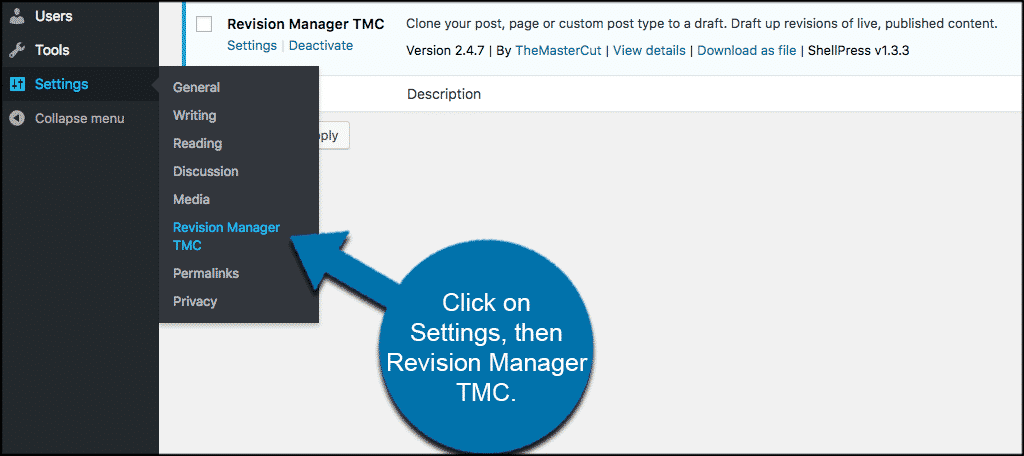
You will notice that the setting dropdown boxes have quite a few choices. Don’t worry, below I am going to show you the exact setup you want to allow any author to make WordPress post revisions.
Step 3: Use Proper Revision Manager Settings
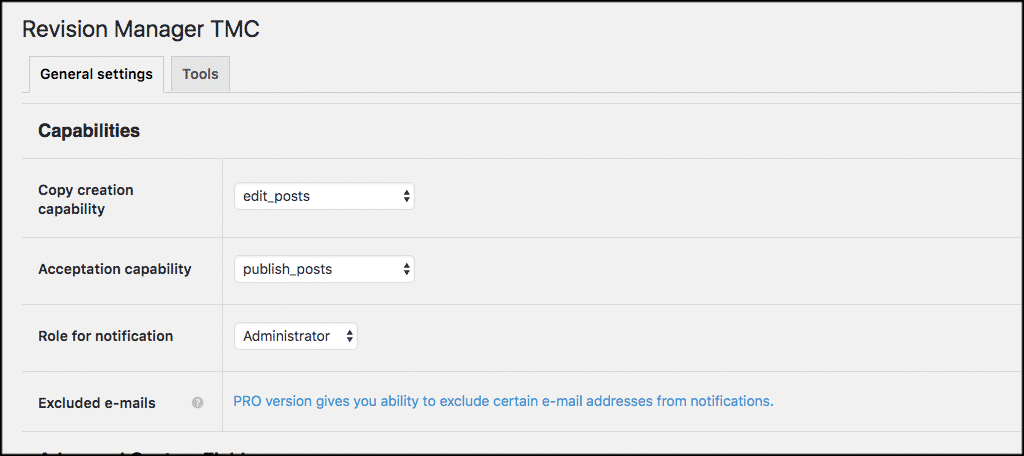
On the general settings page, you need to select edit_posts in the “Copy creation capability” dropdown menu.
Then select published_posts in the “Acceptation capability” dropdown menu.
What this does is allow users with the contributor user role to create a duplicate copy of a published post.
The “Role for notification” dropdown menu should be assigned to an Administrator or Editor who will review the changes and publish the post. In most cases, this is you, or the person in charge of site content.
When you are done adding the proper capabilities, scroll down, and select the WordPress post types where you want to allow authors to submit revisions.
You can select whatever post types you would like. If you have multiple post types on your site and want to allow WordPress author post revisions on all of them, then click the appropriate boxes.
Note: You will need to have the Pro Version of the plugin to check other post types
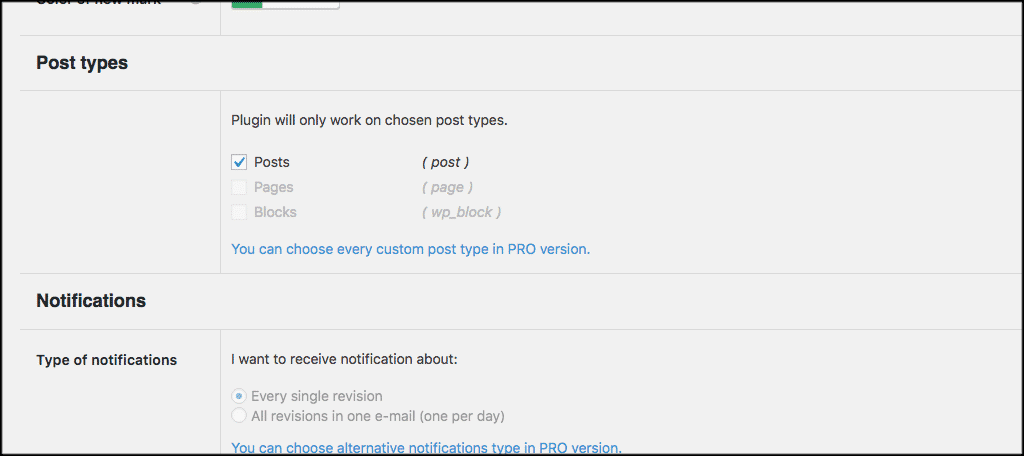
Last but not least on the main settings, you can edit notification settings to get notified when a contributor submits a post revision.
Step 4: Select a Template
You can select a template and customize it to your liking and standards.
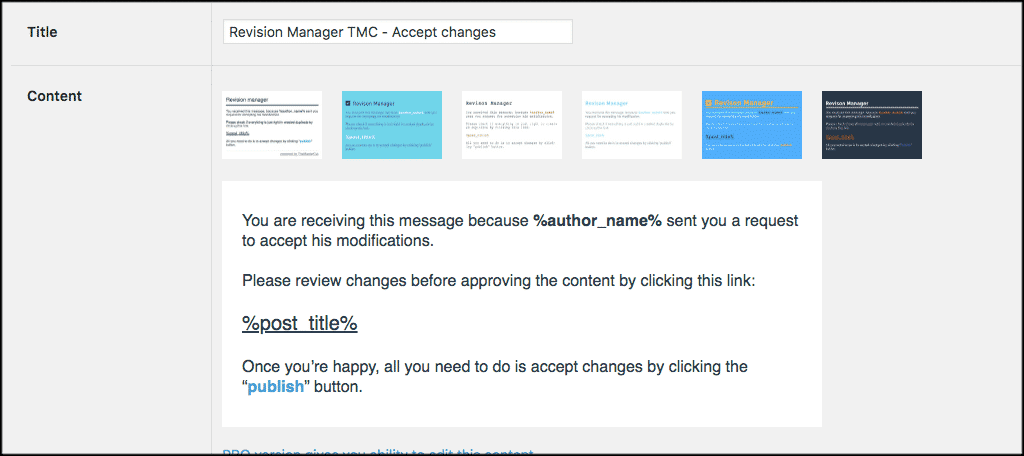
When you have everything set to your liking click on the “Update Changes” button to save all your changes and settings.
Step 5: Log Out and Then Log Back into WordPress Site
Now that you have completed the setup and plugged in the correct settings, let’s take a look at how Revision Manager works.
Log out and log back in from a contributor account on your WordPress website.
Once you are logged in again, click on Posts > All Posts and drag your mouse to any published post. You will now see an option to “Create a revision draft” below each post.
Step 6: Create Revision
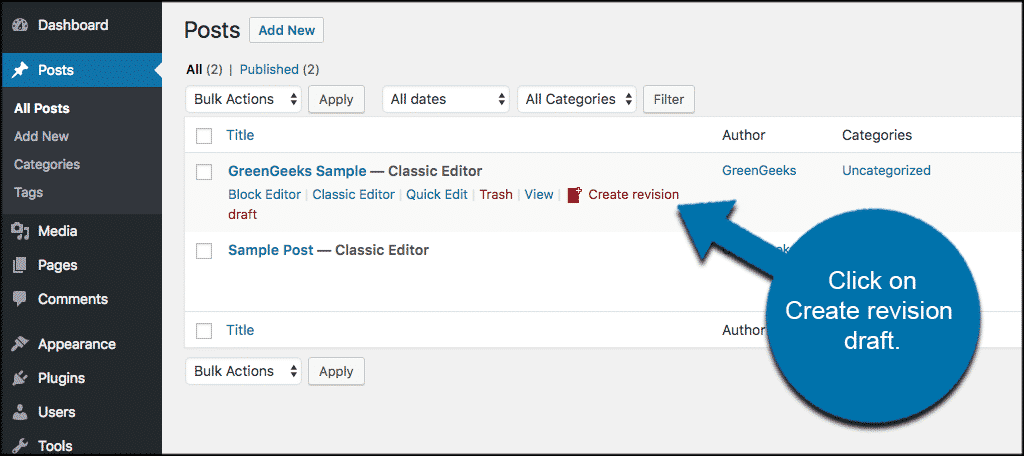
Once a contributor clicks on the “Create revision draft” link, the plugin will create a duplicate version of the published post and open it for editing.
An author can revise the post, make changes, and submit it for review.
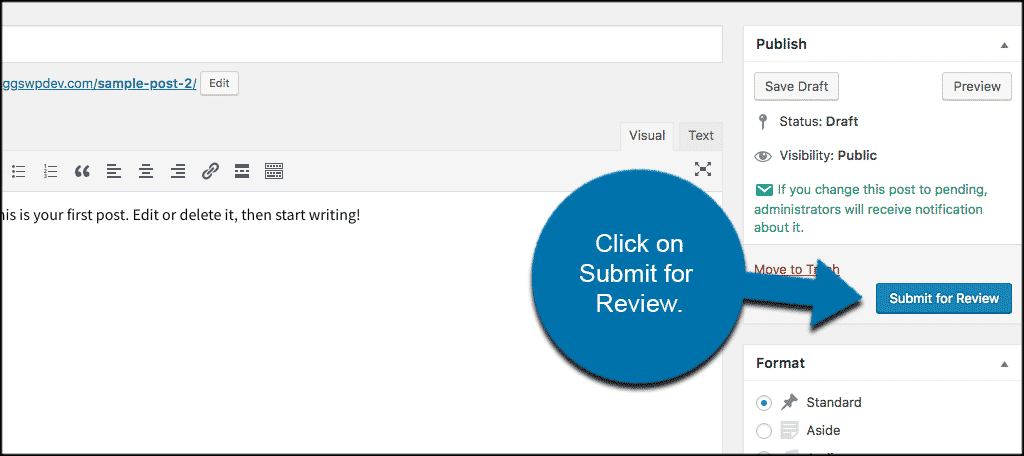
When the update has been submitted the administrator will receive a notification to review and publish the post with the updated changes.
Note: Only the administrator will see the update accept revision button below, so make sure you log out, and then back in as the administrator.
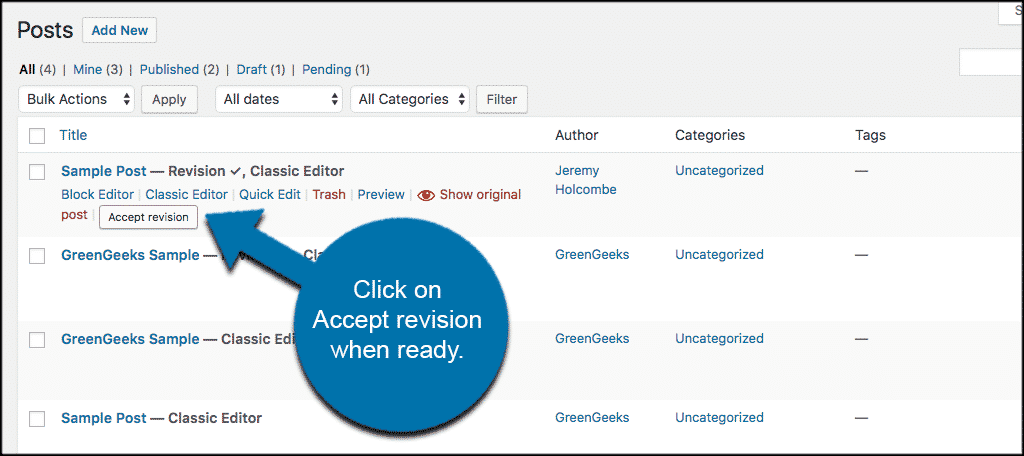
You can open the revision and check out all the edits and changes that were made.
Step 7: Publish the Revision
When you are satisfied with the changes simply publish the revision. This will replace the old version of the post automatically.
That’s it. You can repeat this process as often as you need to. This allows all your authors to complete post revisions in WordPress.
Note: There is also a “Tools” tab located on the main settings page for the plugin. This gives you the ability to import and export settings between multiple websites and WordPress installations (multisite). You can also roll back to factory settings and check the plugin status from the tab.
How to View Post Revisions in WordPress
If you are giving others the ability to make revisions on content, you may be interested in a way to view the differences, luckily WordPress has you covered. While we focused on using a plugin, WordPress has a revisions function built in.
It allows you to view all of the changes made from the last time the post or page was updated.
Step 1: Go to the Revision Section of Your Website
The revision section is very easy to go to. Go into any post or page on your website and expand the settings. You should see a Revisions option (assuming you have made changes to that post or page).
Click on the Revisions option.
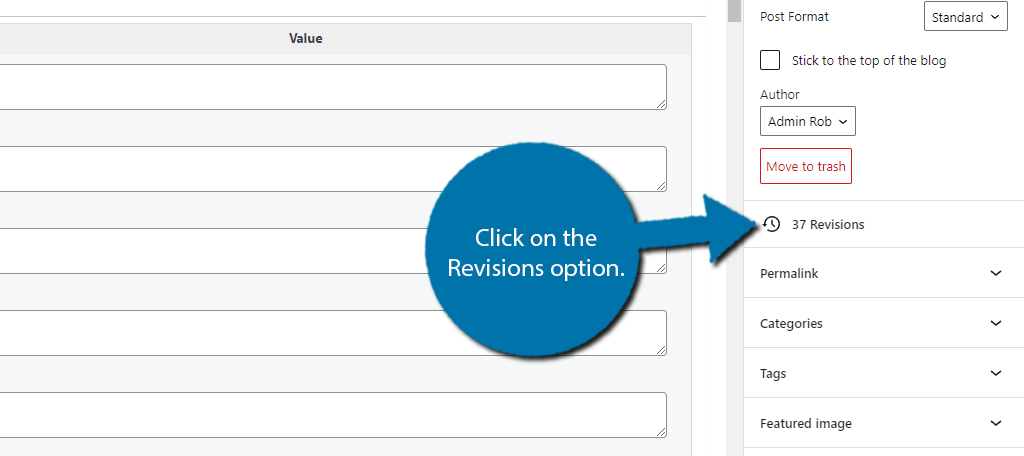
The number in front of this option represents the number of times the post or page has been updated. Every revision is stored regardless of how old it is.
Step 2: View Revisions
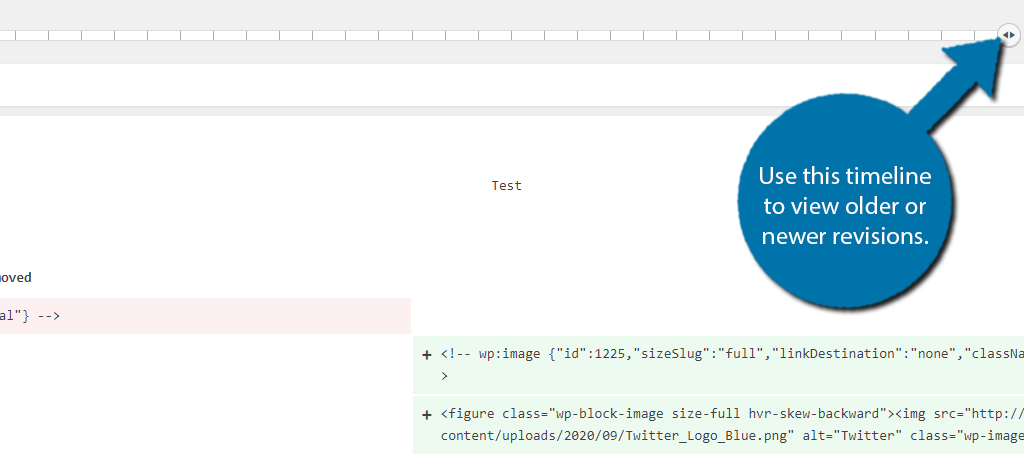
Here you can see all of the changes that were ever made to the post or page. On the left-said, you will see text highlighted in red. This is what has been removed from the post during the last update. While on the right, you will see text highlighted in green.
This is what was added. At the top, there is a timeline that you can use your mouse to click on. This is how you view older changes.
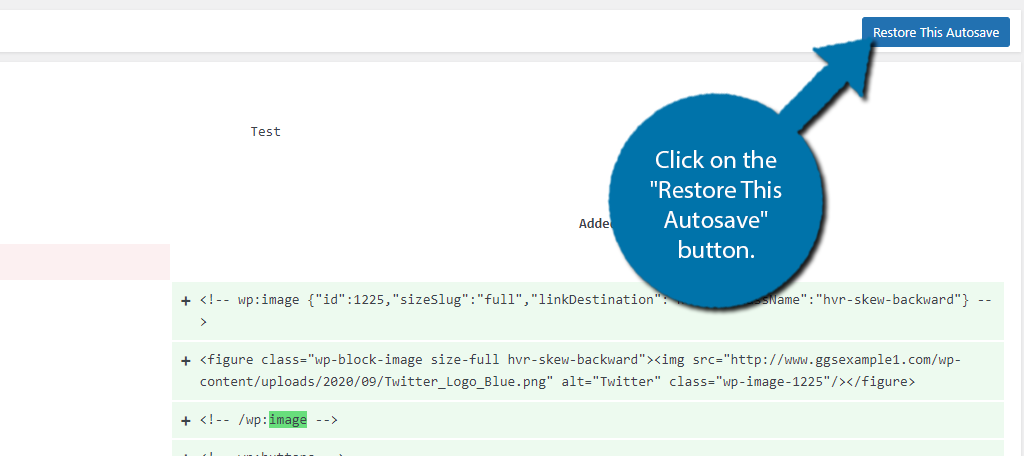
You can restore any of these revisions at any time by clicking on the “Restore This Autosave” button.
That’s pretty much it. The only downside is that storing these revisions in the default manner takes up a lot of server space. After all, you may be unintentionally saving 10+ copies of a single post. That’s why many developers choose to either disable or limit the feature.
Step 3: How to Delete the Revision History
It’s actually pretty easy to either delete or limit revisions and all it takes is a single line of code that you can copy and paste.
To limit the revisions to a specific number copy and paste the following line into the wp-config file:
define( ‘WP_POST_REVISIONS’, 3 );
This line will limit the revisions to the three latest. This is a pretty standard number, but you can change it to any number you like.
How to Disable Post Revisions in WordPress
Perhaps you don’t want anyone to access revisions for your site’s content. This may help reduce “revising” the material to an earlier state, which could undo any updates.
Since Google loves fresh and current information, you really don’t want to revert an article back to an earlier state.
If you want to completely disable WordPress revisions simply add the following line to your wp-config file:
define( ‘WP_POST_REVISIONS’, false );
This will completely turn the feature off. To turn it back on simply change false to true and it is enabled.
What Are WordPress Post Revisions?
Post revisions are a great feature in WordPress that allows you to go back to previous versions of a post or page and either use that version, make changes, or update content accordingly.
Remember, in WordPress, posts and pages are automatically saved every 60 seconds.
When this happens, the old version of the post or page you are working on is replaced with the newest revision that was saved. There is basically an “autosave” feature that WordPress has, and it keeps all content fresh and up-to-date in case something goes wrong.
For example, sometimes a browser or your computer may crash. The autosave function makes everything available so when you get up and running again, everything is there that you have been working on.
Aside from the autosave post revision function, WordPress also saves any revision whenever the user clicks on the “Save Draft” or “Publish” button in the editor. The main difference between these saved revisions and the autosave function is that these are actually saved in the WordPress database.
You have the ability to locate any of these past revisions or revert back to them within the post edit screen.
The Importance of Post Revisions in WordPress
Most content that you write on a website needs to be maintained and updated over time. Oftentimes, news stories might need revisions as well as articles that involve years, statistics, pricing, and other relevant information that changes over time.
Having an easy-to-use tool like Revision Manager is a great way to get these updates done. Especially when you have a number of authors writing on a site.
Keeping content relevant is key to ensuring that your site traffic remains high and that your users stay engaged.
Post revisions are also a great way to see how your content has evolved over the writing process. For sites with multiple authors, revisions allow you (the website owner) to easily manage all the updates and revisions that authors make.
The tool above just makes it even easier to take new revision submissions.
Utilize Post Revisions in WordPress Today
Keeping your content up-to-date is a great way to keep your site relevant and keep the users coming back. Allowing any author to revise WordPress posts is a perfect example.
Now you know there’s an easy way to accomplish this. You should have no problem following the steps above and get it all in place. I hope this tutorial was able to show you how easy it is to accomplish by using the plugin method.
Have you ever used the Revision Manager plugin to allow any author to perform WordPress post revisions? Do you prefer the traditional method?