There are a lot of cool features baked into WordPress, but something that’s always been lacking is user management. There are some excellent user management plugins, but I want to look at one today that goes beyond the typical WordPress profile management tasks.
It’s called ProfileGrid, and it gives you a full-featured user registration, management, and profile capabilities.
ProfileGrid makes it easy to set up multi-author blogs, groups, communities, and memberships. It can handle paid memberships and even integrates with bbPress and WooCommerce. It takes WordPress profiles to an entirely new level.
As you might imagine, there’s a lot to take in where the ProfileGrid WordPress profile plugin is concerned. So I’m not going to pretend to provide an in-depth user guide. That would require half a dozen articles like this one.
Instead, I’ll cover the basics of plugin setup and configuring groups and group membership registration pages. After that, you’ll want to take your time to explore the many ways ProfileGrid can benefit your site.
Installing the ProfileGrid WordPress User Profile Plugin
Log in to your WordPress admin panel.
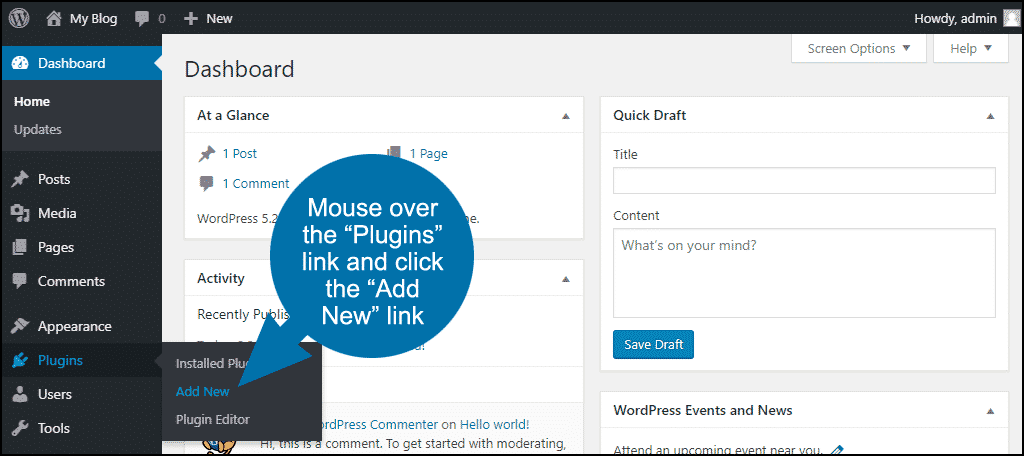
In the left column navigation, mouse over the “Plugins” link and click the “Add New” link.
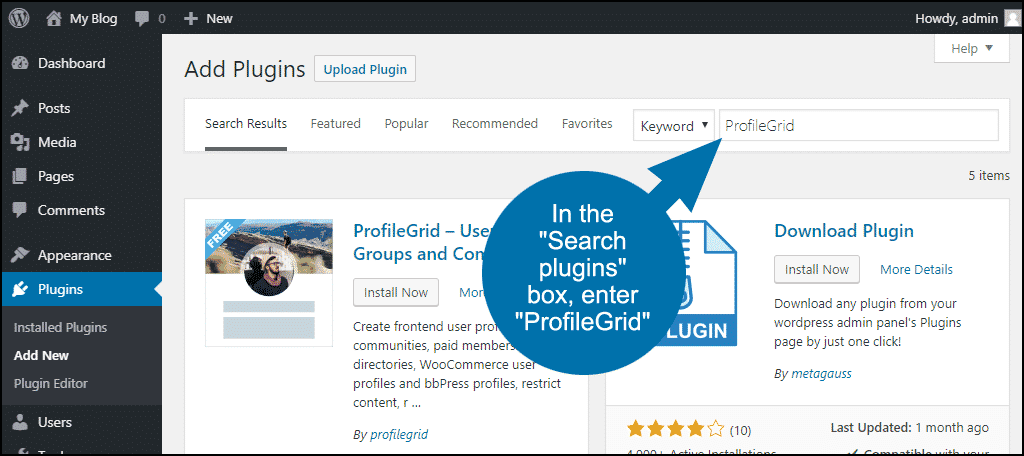
In the “Search plugins…” box, enter “ProfileGrid.”
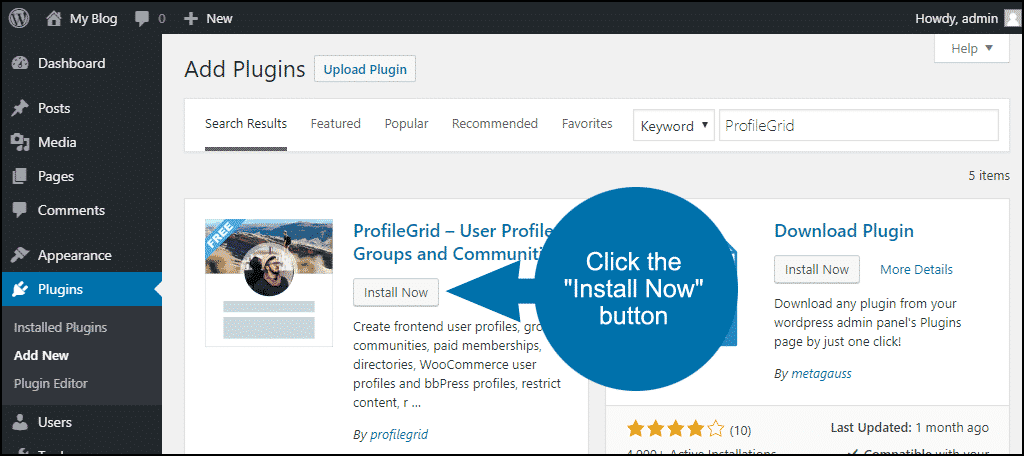
Once you have located the plugin, click the “Install Now” button.
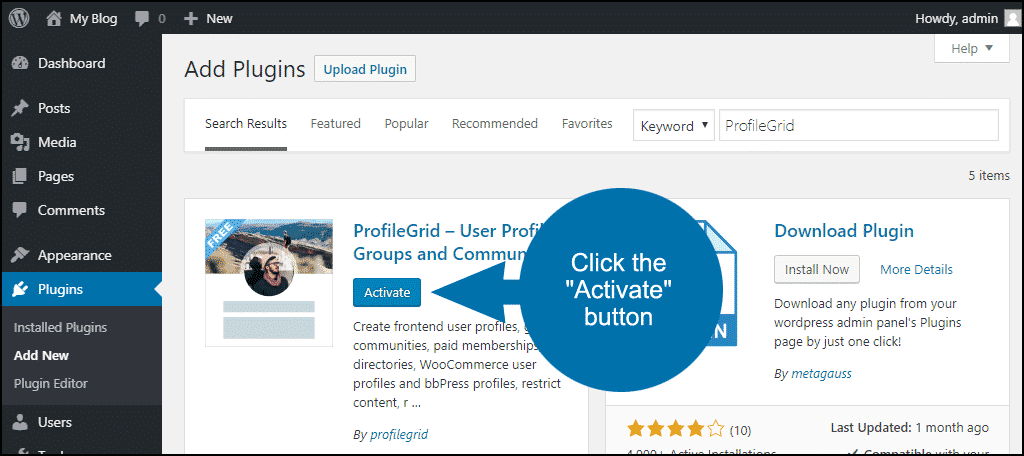
When the plugin has been installed, click the “Activate” button.
ProfileGrid Pages
When ProfileGrid is activated, it creates several pages.
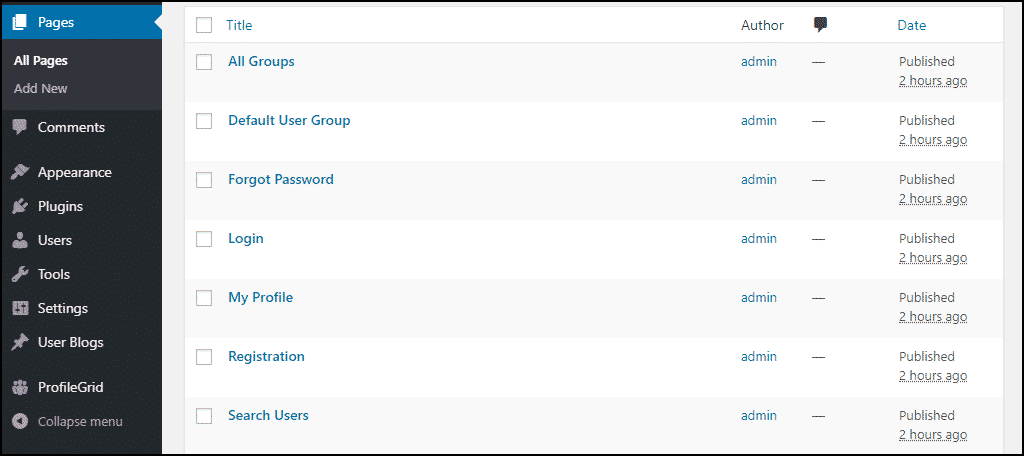
- All Groups (URL: /all-groups)
The page that displays a list of all ProfileGrid Groups. A visitor can check out any group from this page and sign up to become a member. - Default User Group (URL: /default-user-group)
The page that displays all the information for the default group. You can edit the shortcode on this page to make it display any group or create separate pages for each group. - My Profile (URL: /my-profile)
This page displays the ProfieGrid profile information for a specific user. It includes notifications, personal messages, blog posts, and settings. - Registration (URL: /registration)
Registration to become a member of a group. Like the Default User Group page, you can edit the shortcode on this page to do registration for any group. You can also create separate registration pages for each group (I’ll show you how to do that in a minute). - Login (URL: /login)
The default ProfileGrid page for user login on the front-end of your site. - Forgot Password (URL: /forgot-password)
Set a new password. - Search Users (URL: /search-users)
Search all ProfileGrid profile pages. - Submit New Blog Post (URL: /submit-new-blog-post)
If you’re using ProfileGrid to manage a multi-user blog, this is where the users submit posts. - User Blogs (URL: /user-blogs)
If you’re using ProfileGrid to manage a multi-user blog, this is a list of the authors.
Creating User Groups
User groups are the backbone of ProfileGrid. You can create separate registration forms for specific groups. This allows you to use different group-appropriate custom fields.
Groups can be used as social groups or profile types.
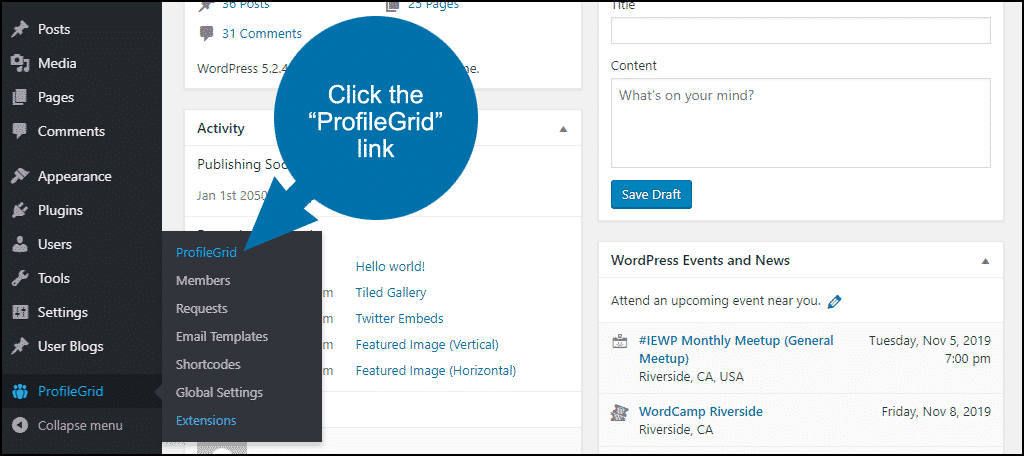
To create a new group, in the left column navigation, mouse over the “ProfileGrid” link and click the “ProfileGrid” link. That will take you to the Group Manager.
There is a Default User Group that contains all of your current users.
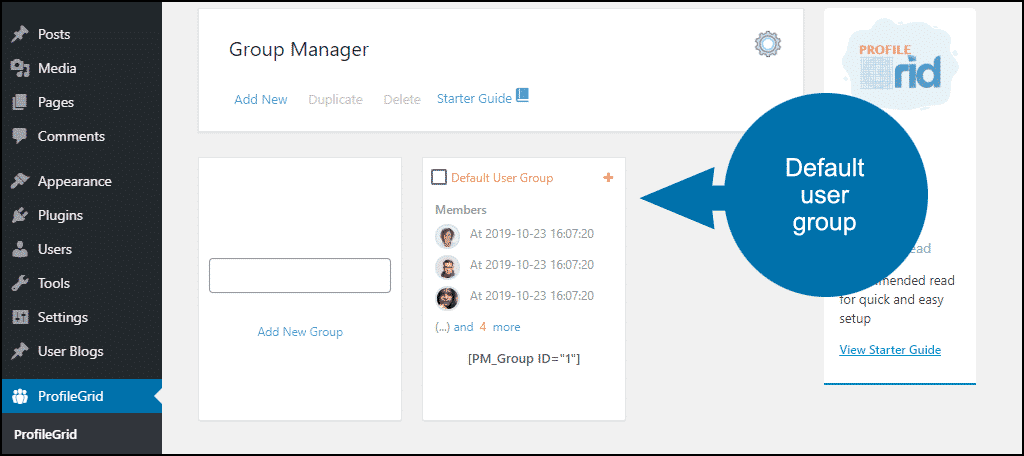
Creating a new group is not a requirement for using ProfileGrid. If you think you’ll only need a single group, you can use the Default User Group. It can be renamed by clicking the red “Default User Group” link.
To create a new group, enter a group name, and click the “Add New Group” link.
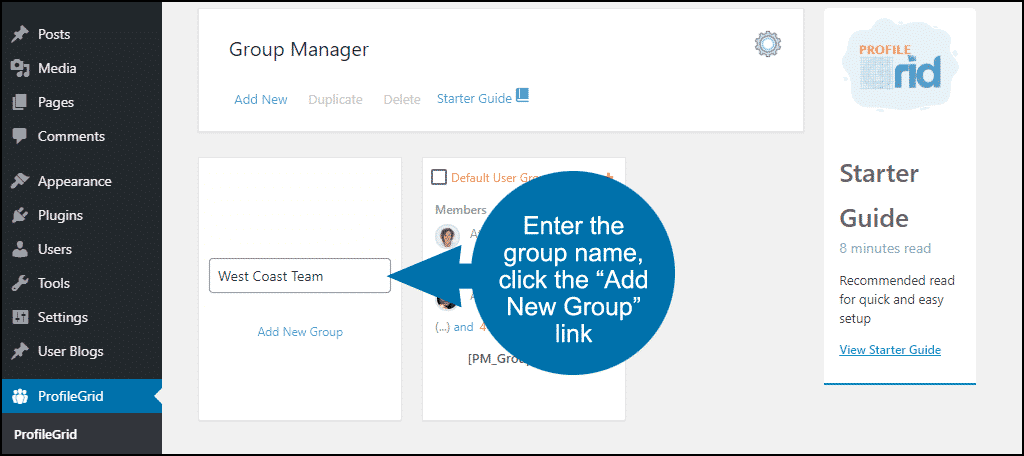
The new group is displayed in the Group Manager.
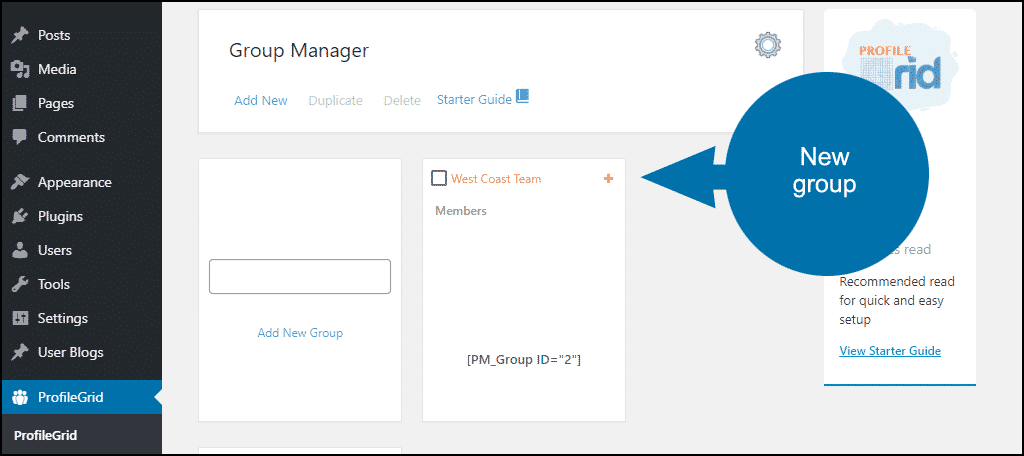
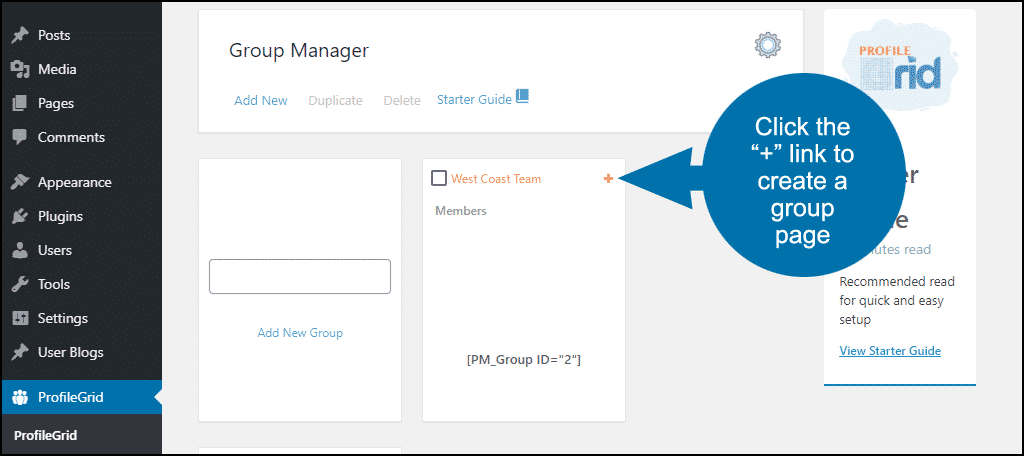
As you can see, a shortcode has also been created, [PM_Group ID=”2″]. That’s the shortcode used to display the team on a page. You can create a page and add the shortcode manually, or click the red “+” icon to create a page for the group automatically.
![]()
We aren’t going to look at that page yet since there are no users in the group. Let’s remedy that.
Adding Members to a Group
To add existing members to a group, click the “Members” link under “ProfileGrid” in the left column navigation.
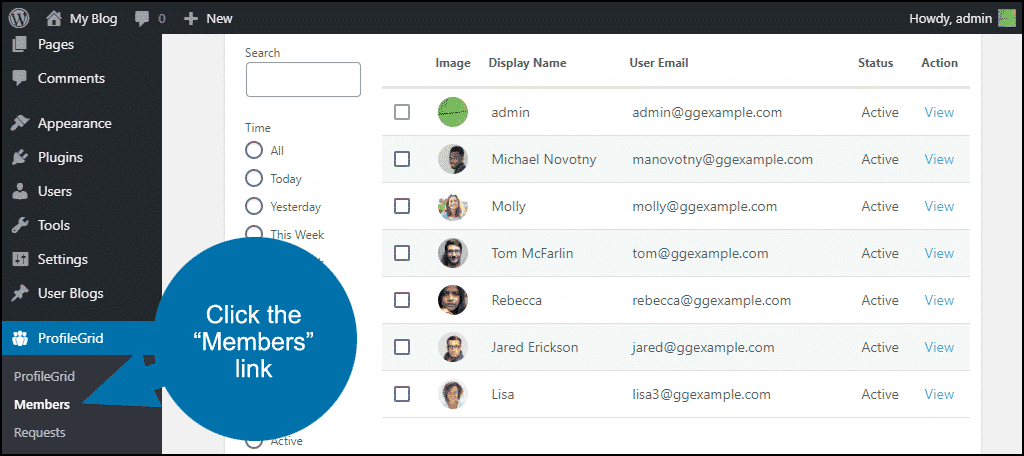
Click the “View” link for the member you want to add.
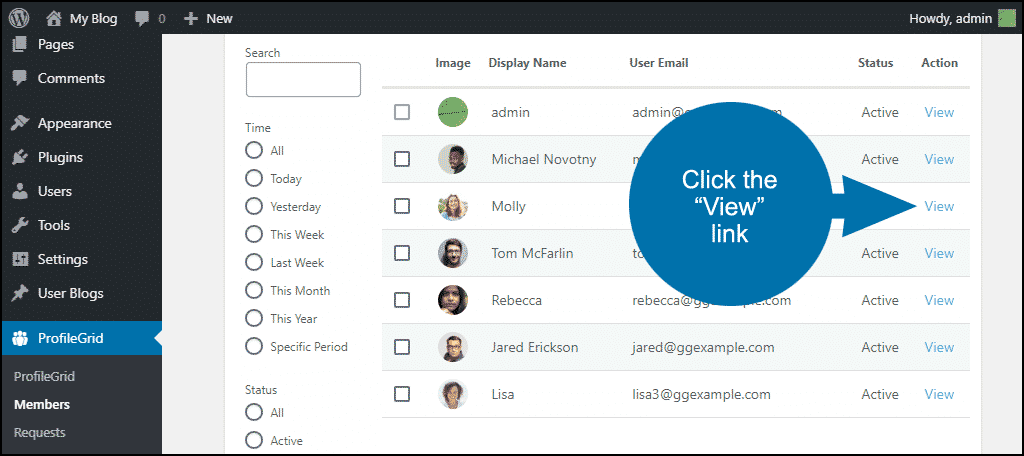
Click the “Edit” link.
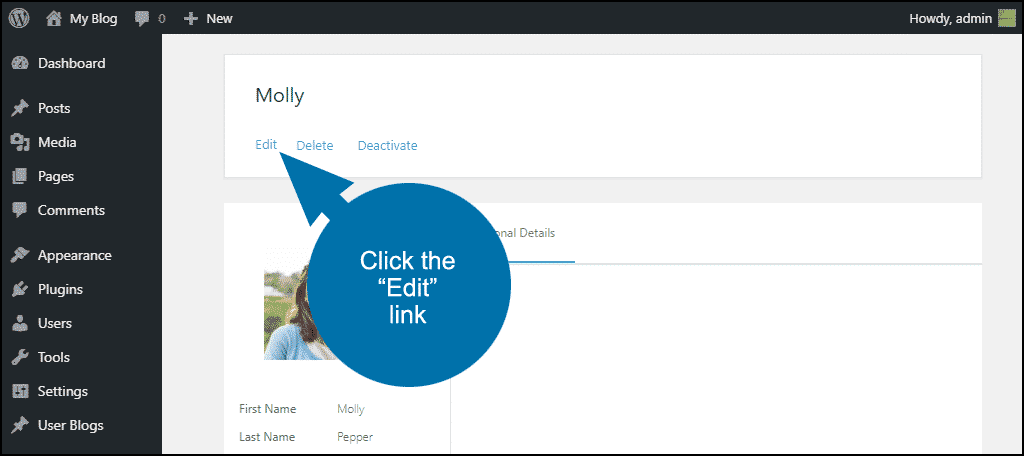
That will take you to the standard WordPress user profile editor. But if you scroll down, you’ll see some new profile fields that ProfileGrid has added.
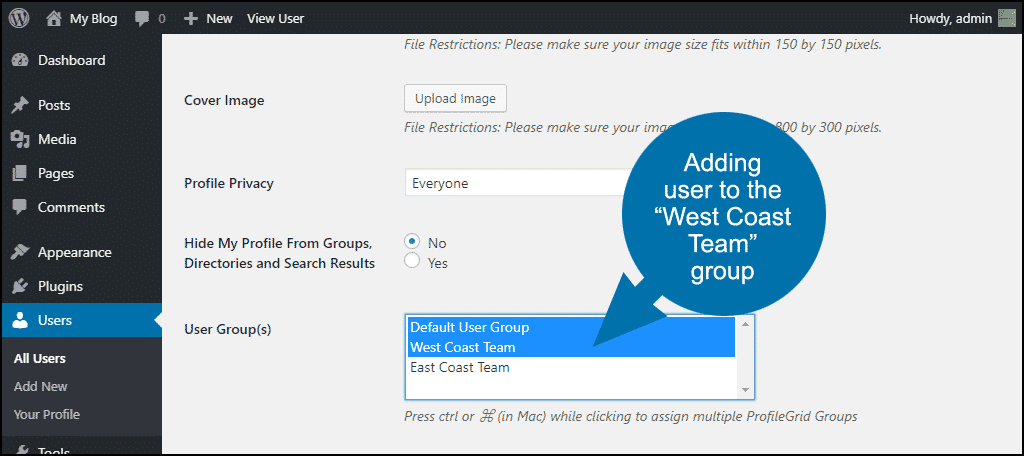
The “User Group(s)” section is where you assign users to groups. So in this case, I’ll add the user to the new group. But, I’ll also keep her in the default group by hitting the Ctrl key while selecting the new one.
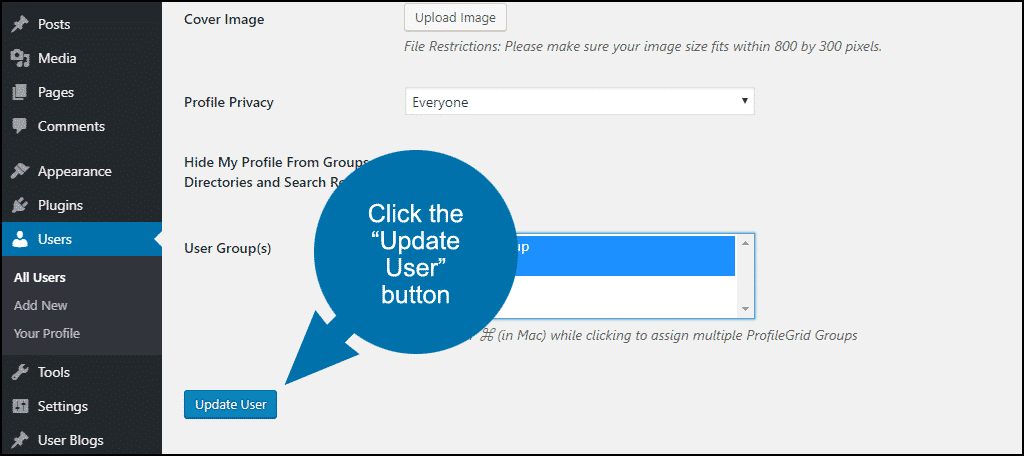
Then click the “Update User” button.
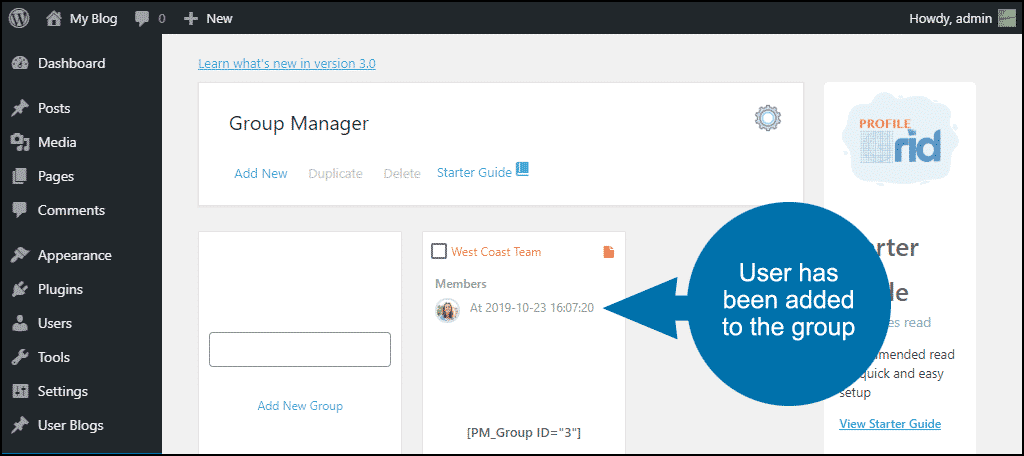
Now when we go back to the Group Manager page, you can see the user is listed as a member of the group.
The group members will keep the WordPress user roles that they had before you installed ProfileGrid. So if a user was a contributor or an admin, they’d still have those roles.
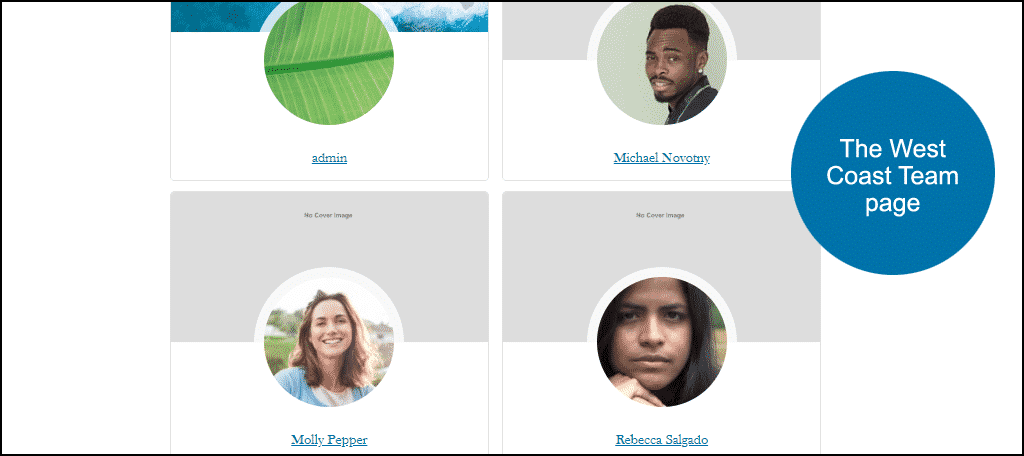
Once we add all the users to the group, they show up on the group page that we created earlier.
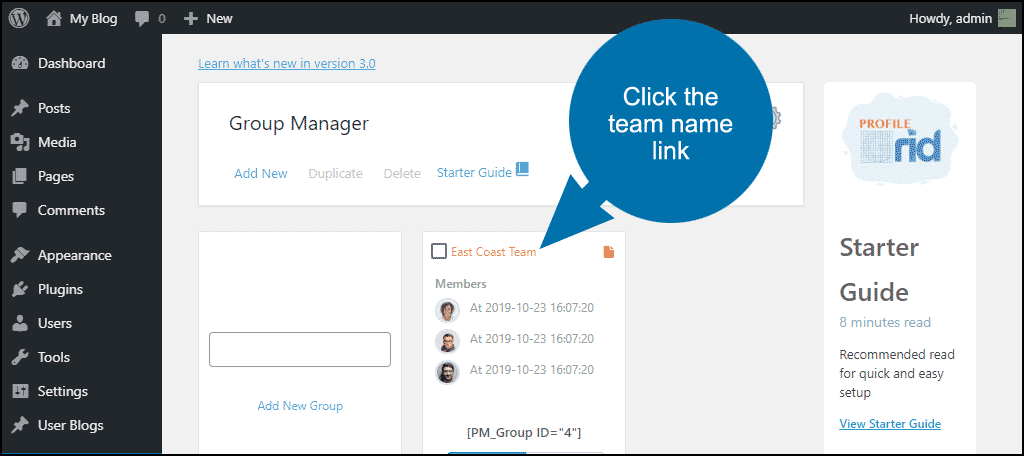
Editing a ProfileGrid Group
In the Group Manager, click the red group name link.
Some of the options of note:
Group Type – If you want people to be able to register themselves in a group, you want this set to “Open.” Closed groups require admin approval or an invitation to join.
Group Page – This is where you choose the page you want to display when users click on this Group’s link. If you clicked the red + icon to create a page for the group automatically, that page will already be associated with the group. If you want to display the default ProfileGrid page for the group, select “None.”
After Registration, Redirect – This controls where the new user is sent after completing the registration form. Options are “None,” “Page,” and “URL.” “Page” lets you choose an existing page from a drop-down menu.
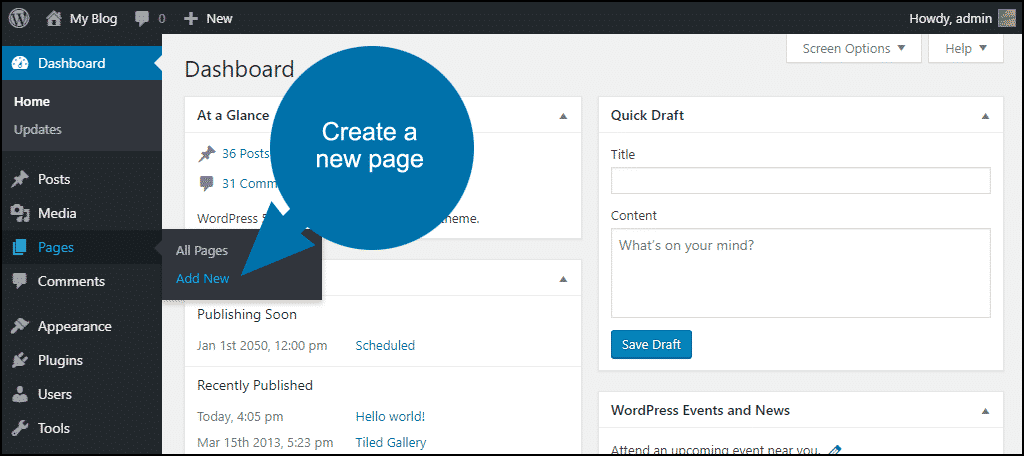
Creating a Registration Form for a Group
Start by creating a new page.
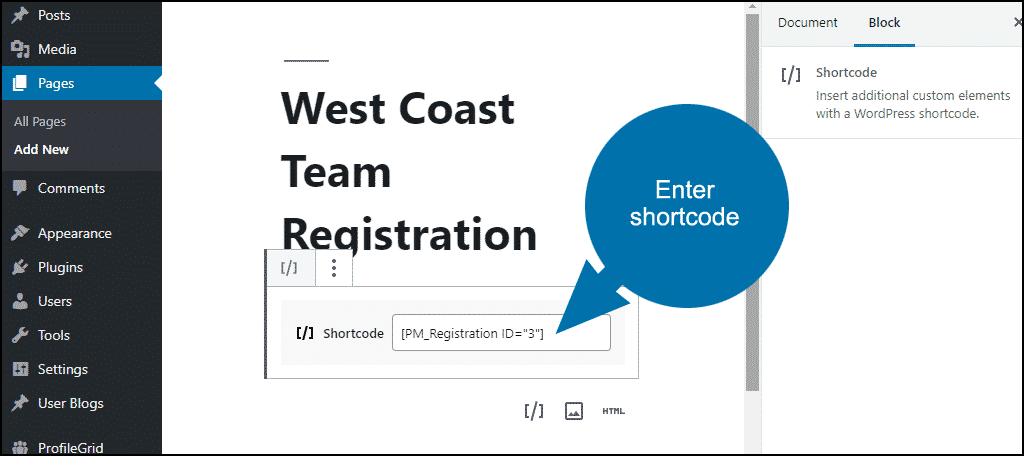
Enter the following shortcode, where ID= is the number associated with the group for which you are creating a registration page. You can find that ID on the Group Manager page.
[ht_message mstyle=”info” title=”” show_icon=”” id=”” class=”” style=”” ][PM_Registration ID=”2″][/ht_message]
Tip: to access all of the available ProfileGrid shortcodes, in the left column navigation, mouse over the “ProfileGrid” link and click the “Shortcodes” link.
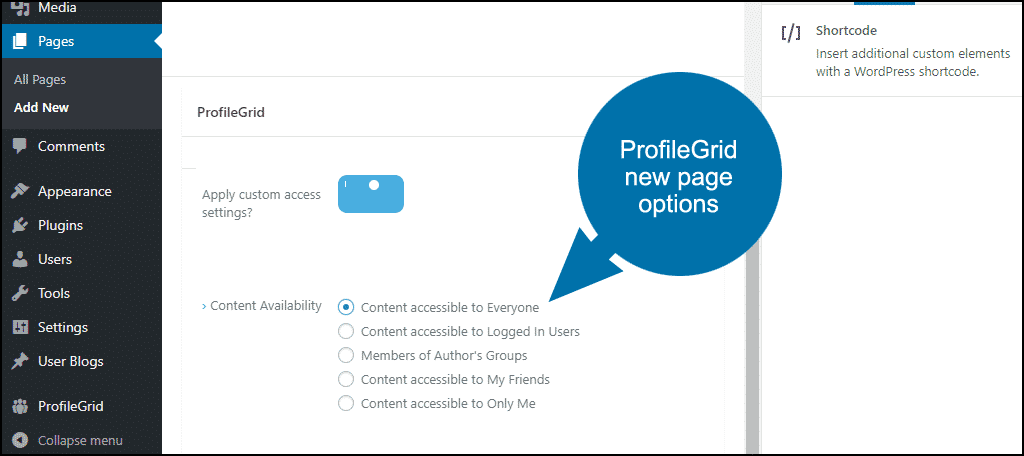
Note that ProfileGrid adds a field to the page creation template.
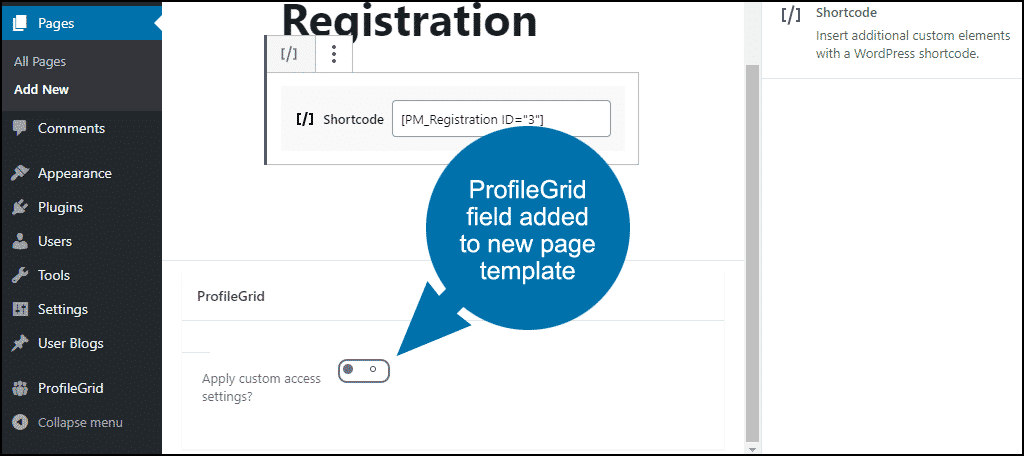
If you toggle that “on,” you have some options for page access. For this tutorial, we’ll leave it off.
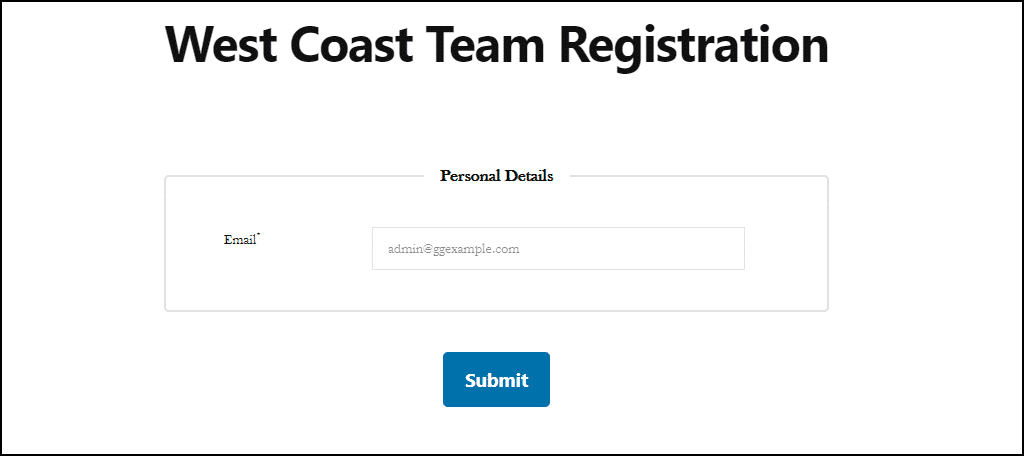
When you publish the page, the registration page for the group is live.
Global ProfileGrid Settings
To access the Global Settings, in the left column navigation, mouse over the “ProfileGrid” link and click the “Global Settings” link.
Global Settings contain general options for ProfileGrid.
- GeneralForm – appearance, default pages, attachment settings, etc.
- Security – spam protection, blacklists.
- User Accounts – activation link, manual approvals.
- Email Notifications – admin notifications, multiple email notifications, from email address.
- Tools – import/export options.
- User Blogs – default post status, privacy settings, etc.
- Private Messaging – turn private messaging on or off.
- Friends System – turn friends system on or off.
- Uploads – image widths, sizes, quality.
- SEO – all SEO related options.
- Content Restrictions – how to restrict content for members.
- Registration Forms – Configure RegistrationMagic Integration options.
- Profile Notifications – enable or disable live profile notifications.
- Payments – currency, symbol position, checkout page, etc.
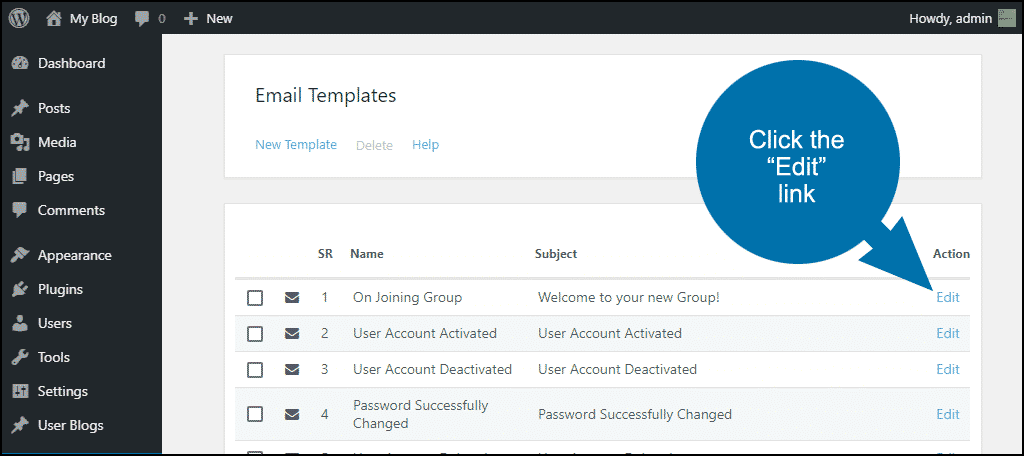
Email Templates
To edit or create new ProfileGrid email templates, in the left column navigation, mouse over the “ProfileGrid” link and click the “Email Templates” link.
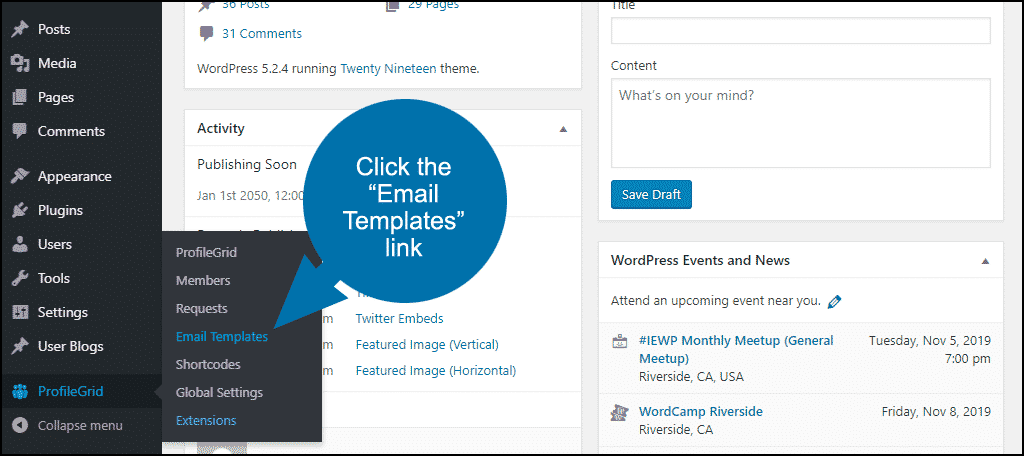
Click the “Edit” link to edit an existing message, or the “New Template” link to create a new email.
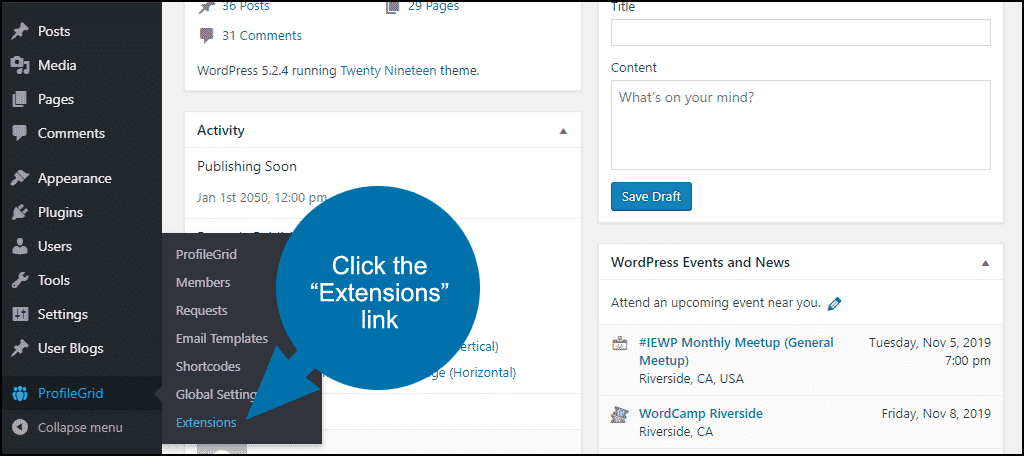
Extensions
There are ProfileGrid extensions that do some pretty cool things. The free options include bbPress and WooCommerce Integration, User Display Name lets you style usernames and add group-related prefixes or suffixes, and Custom Profile Slugs to change the permalinks to user profiles. There’s even an EventPrime Integration extension that gives you the ability to create ProfileGrid group events by integrating ProfileGrid user groups with EventPrime functions.
To access the extensions, in the left column navigation, mouse over the “ProfileGrid” link and click the “Extensions” link.
The ProfileGrid WordPress Frontend User Profile Plugin Is a Monster
The good kind of monster. One that you want on your side.
As I mentioned, there’s a deep well of features and configuration available here that make ProfileGrid the first and last WordPress profile manager you may ever need.
Have you tried other user management plugins for WordPress? Do you use another tool to create public-facing profile pages for your users or contributors? Let me know in the comments.
Hi Michael, thanks a lot for all the detailed info.
Would you happen to know of a way of including those Profile fields data as part of the billing info during WooCommerce checkouts?
Specifically uploaded files, or at least a link to those uploaded files in the Customer Profile.
Hi Michael
I’ve just wasted weeks on this plugin. It has a huge flaw in the creation of multiple group memberships. If you belong to more than one group, the plugin duplicates the Personal Details field on your profile page. Join six groups and you’ll end up with six Personal detail sections under your name. There is no work around that is practical and its a huge flaw in an otherwise really useful plugin. They’ve known about his for ages and not addressed it. Also you cannot add more than one URL to any profile.
If you can work around these issues,then its a great plugin, powerful and when combined with Registrationmagic, you can really go crazy.
Hello Robert,
I am from ProfileGrid team and I sincerely apologise for the issues you faced while using our product. While conceptualising the plugin we hoped that admins will use separate details section from every group to be added to the user profile for group specific details. It does not necessarily have to be Personal Details (which it is named by default) and can be easily renamed. For example, a Birdwatchers group would request users to fill different set of profile fields than, say, a group for Hikers.
We do understand that not all admins will like to use a setup like this and we are planning to make this optional very soon. Since it was visualised like this from ground-up, we need to ensure backward compatibility and avoid adversely impacting anyone who wants to use it in original form.
Moving to your second issue, the URL field is mapped to WordPress’ default Website field in user profiles which cannot be replicated limiting our own field’s flexibility. We will soon introduce a separate user-meta mapped field which can be added multiple times.
We know we have let you down with couple of decisions we made during early product cycle, and which were not easy to change later (or else we would have already done by now). But this is going to change very soon. We would love to see you return to ProfileGrid later and explore all the new features we have been adding over months. Plus there is a lot more in the pipeline.
Thanks for your support!