There are some amazing tools that you can add to WooCommerce to help drive sales. One of the more useful ones to integrate into your eCommerce website is a one-click chat to the order process that allows customers to buys goods right from a chat.
So, which chat app do you go with? Well, today I am going to show you how to use a smooth plugin that attaches to WhatsApp and will allow customers the ability to order products directly.
Why Add WhatsApp Sales to Your Site?
Like anything else you attempt to do to your eCommerce site, the main goal is more than likely to attract more customers and more sales. Aside from this, you also want your customers to have access to several different sales channels and styles.
Not only does this give them choices on how they buy, but it can make purchases much easier on them, depending on their situation. In this case, we want to offer not only another sales channel but the ability for customers to easily communicate.
Let’s take a look at the plugin we are going to be using today and see what all it has to offer.
OneClick Chat to Order
OneClick Chat to Order is a plugin that makes it easy for your customers to order products you are selling directly from WhatsApp using a single-click technique. If you have always wanted to integrate WhatsApp with WooCommerce, then this is the plugin you have been looking for.
You simply connect your WooCommerce store and WhatsApp together and boom, you have made it easier than ever to create WhatsApp sales. The plugin is both packed with features, yet lightweight and smooth.
Now, you can sell through WhatsApp because you connect it to WooCommerce. As stated above, the OneClick Chat to Order plugin is packed with a lot of different features. Some of the main ones include:
- Select WhatsApp Button Positions
- Hide or Display Floating Buttons
- Multiple Numbers
- Assign a Specific Number
- Hide or Show Order Dates
- Set Button Messages
- Set Custom Messages
- Ability to Add Coupon Code
- Show Button on Shop Page
- Hide Button on Desktop or Mobile
- Set Pre-Filled WhatsApp Custom Messages
- Hide or Display Prices
- Custom Message From Floating Button
- Shortcode Generator
- GDPR Ready
Honestly, if you want to sell easily through WhatsApp and you are running a WooCommerce website, then this plugin is a must-have.
Let’s get it installed and set up together so you can start selling through chat.
Note: This plugin does not have a pro version. However, there are some suggested premium add-ons you can look into if you are interested. The tutorial below is based on the free OneClick Chat to Order plugin. The rest of this tutorial also assumes you have WooCommerce installed and set up already on your website.
Set Up a Chat to Order on Your eCommerce Site
Step 1: Install and Activate the Plugin
In order to start using OneClick Chat to Order, you first need to install and activate the plugin. You can do this by going over to the Plugins page of the WordPress admin dashboard.
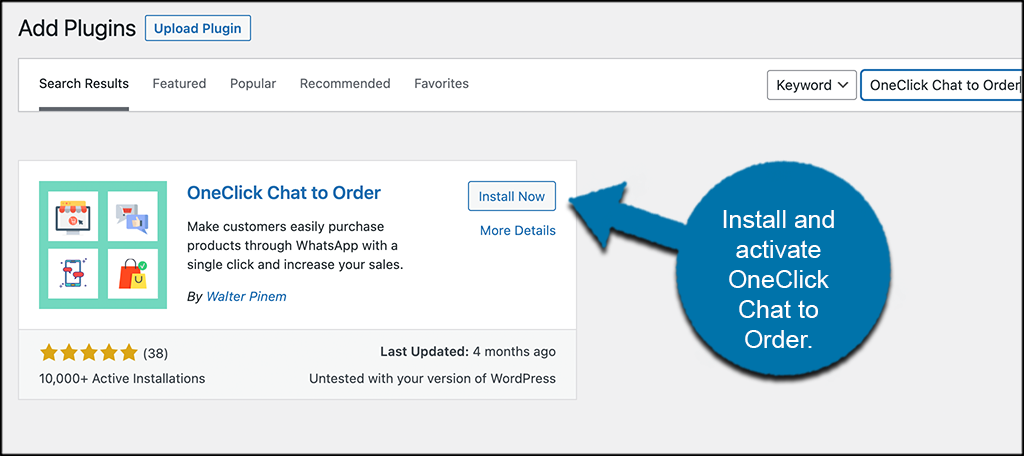
Once you are there, you will see that there is a search field available. Simply use that search field to search the plugin by name. When it pops up, install and activate it right from there.
Step 2: Access Global Settings
Now that the plugin has been installed and activated, you want to go ahead and access the “Global Settings” portion. To do this, click on Chat to Order > Global Settings, located on the left side menu area of the dashboard.
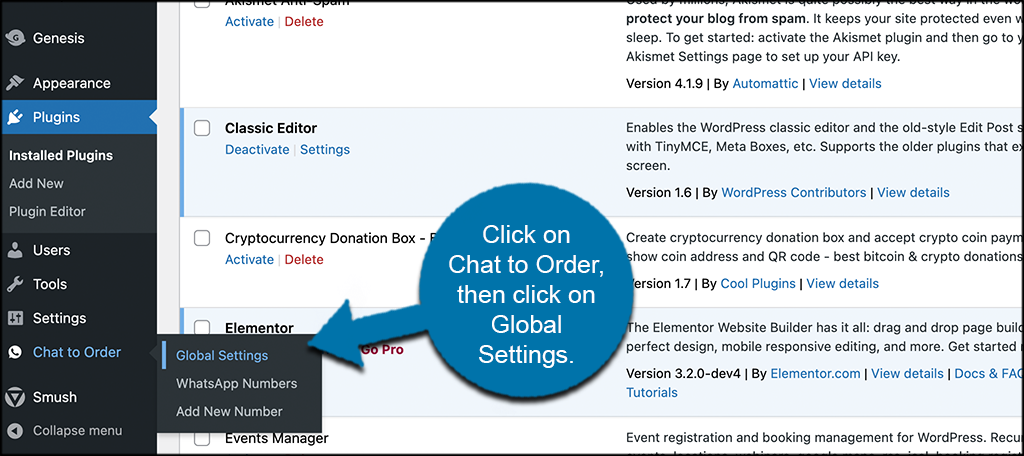
You can see that these are now available options in your dashboard because you activated the plugin.
Step 3: Configure the OneClick Settings
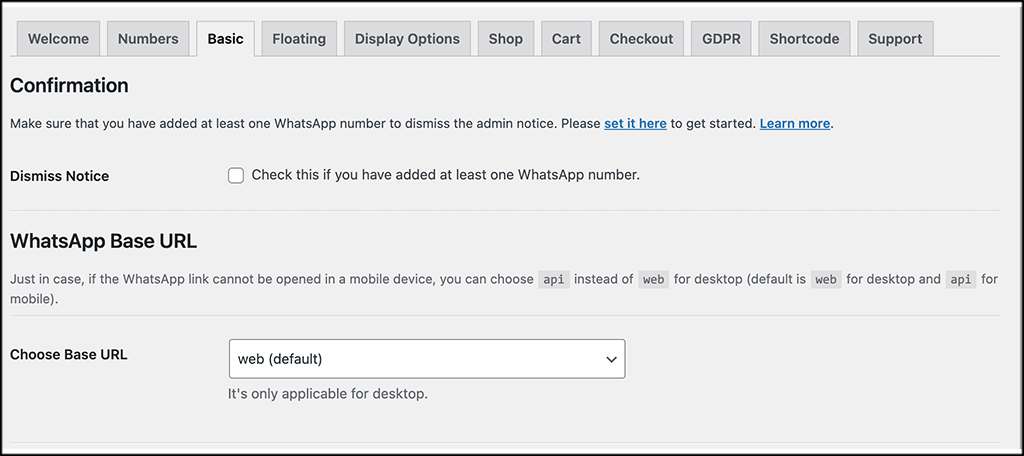
When you arrive on the main Global Settings page for the plugin, you will see quite a few tabs available. These include:
- Welcome
- Numbers
- Basic
- Floating
- Display Options
- Shop
- Cart
- Checkout
- GDPR
- Shortcode
- Support
The welcome page is a long welcome to the plugin. There are helpful links, other info, and all the plugin documentation if you ever need to access it. You can go through and read that page at your leisure.
The “Numbers” tab simply displays the phone numbers you have attached through WhatsApp. We will add a number together below. The rest of the tabs are as follows:
Basic
The Basic tab is where you will configure all the basic and important settings for the OneClick plugin. Go ahead and go through these and set it up how you want for your particular situation.
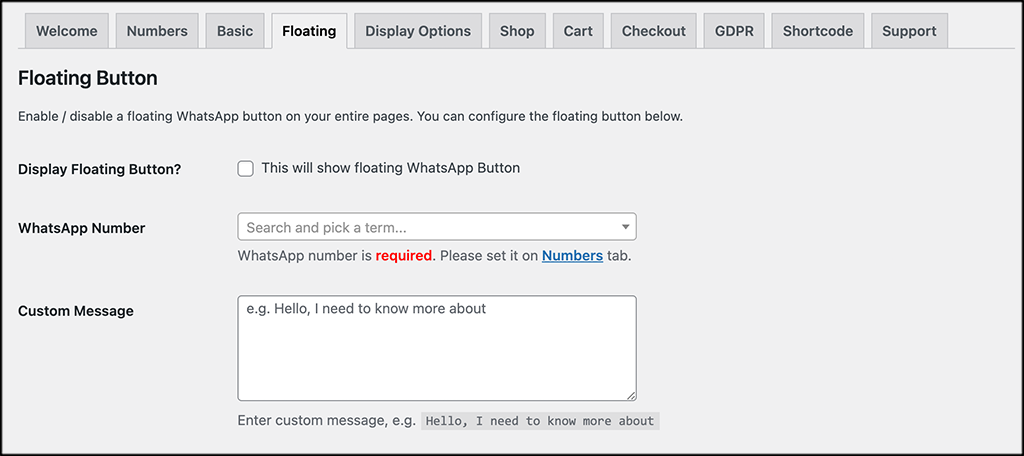
Floating
This is where you will configure all the settings for the floating button and options that the plugin offers. Again, configure these how you see fit.
Display Options
The display options tab will have all the display settings for the entire plugin. There are quite a bit of styling options and configurations available, so have fun with it and get it styled to match your site.

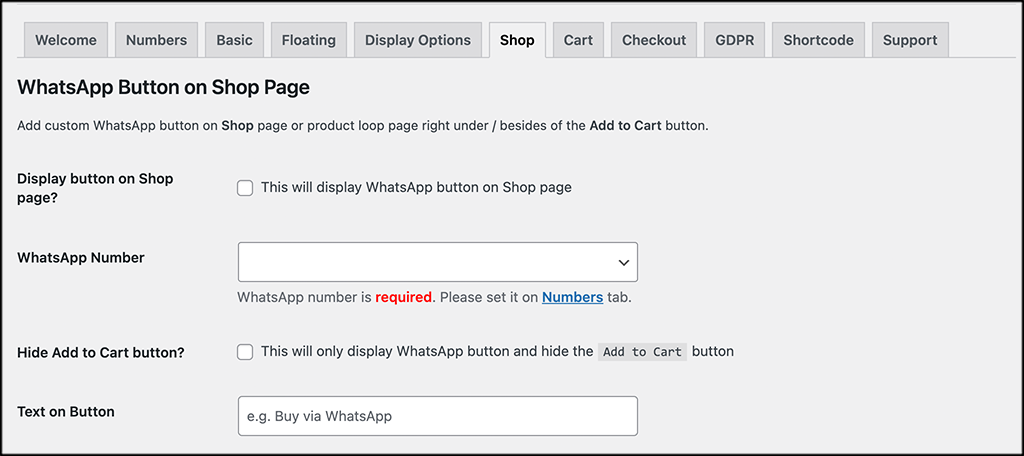
Shop
Configure all the options here for your WhatsApp button as it displays on the shop page of the website.
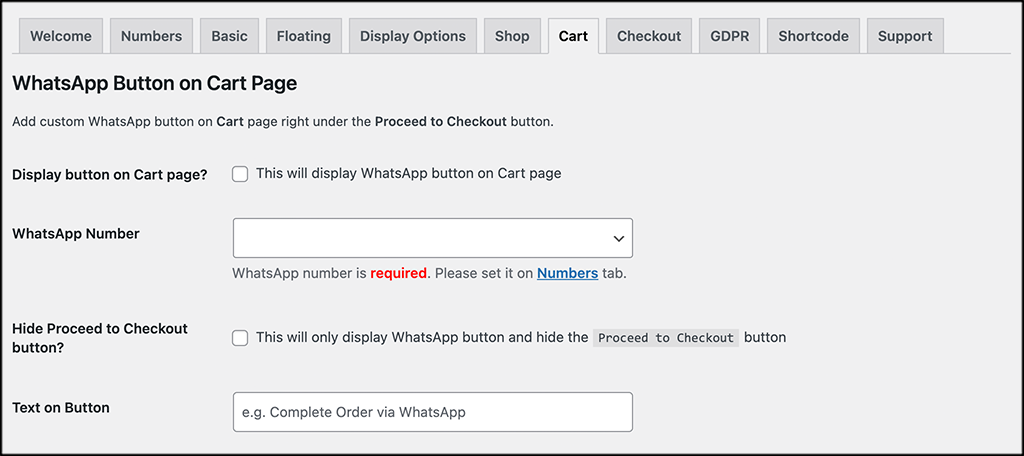
Cart
This is exactly like the shop tab, except you configure the options for display on the cart area of the site.
Checkout
From here, you will be able to customize your thank you page and other messages that you want to be included in the process.

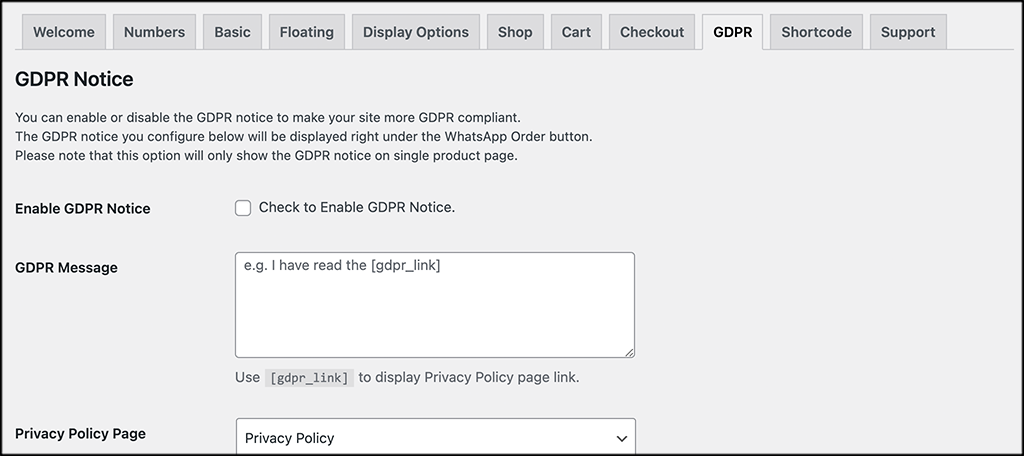
GDPR
As mentioned earlier in the article, the OneClick Chat to Order plugin comes GDPR ready. Under this tab, you can enable that functionality automatically and also point to your website’s Privacy Policy page.
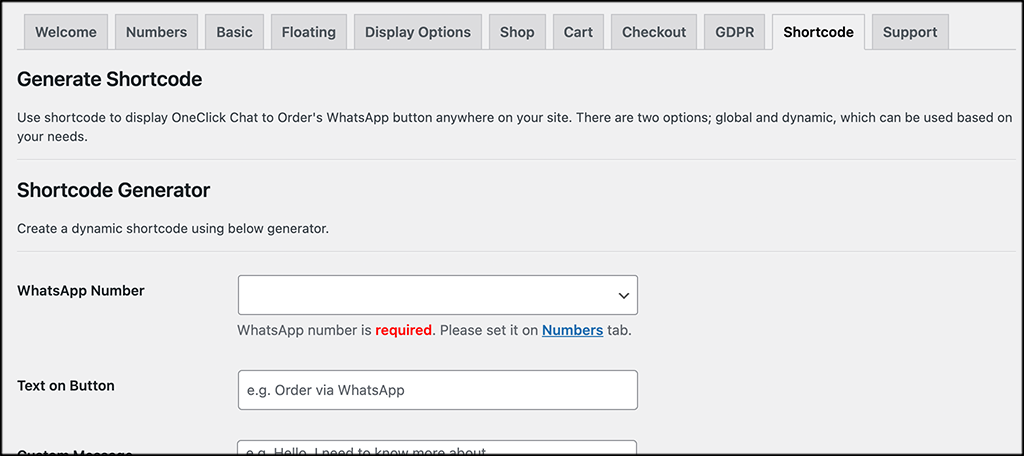
Shortcode
If you want to use shortcodes to display the OneClick WhatsApp plugin, then you can generate those here.
There is also a support tab available. There are several links on that tab and also other information regarding plugin developer support. If you need to troubleshot or if you get stuck, then this is a good place to contact the developer.
That’s it. Make sure you saved all your configurations and now let’s add a number.
Step 4: Add a Number
Now that the entire plugin is configured and ready to roll, you need to add a number to it so it will work. To do this, click on the “Add New Number” link, located on the left menu area of the dashboard.
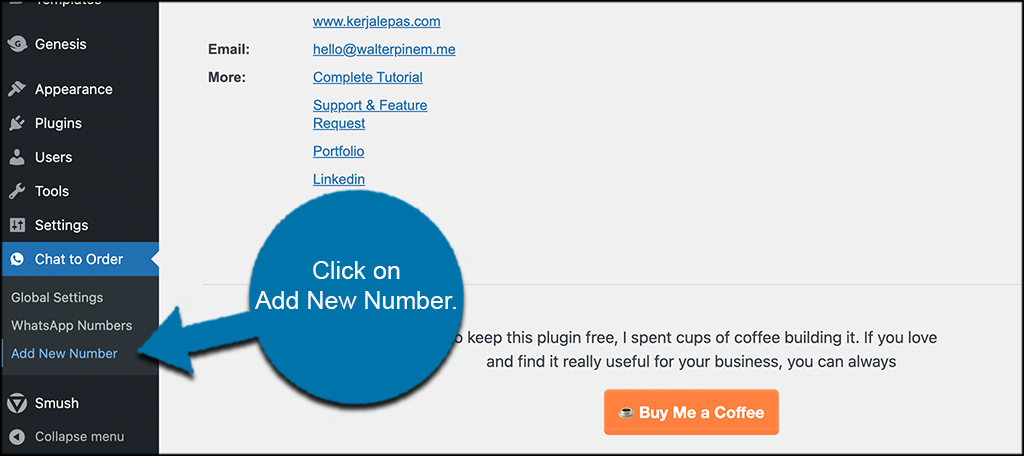
You will find it under the main Chat to Order tab.
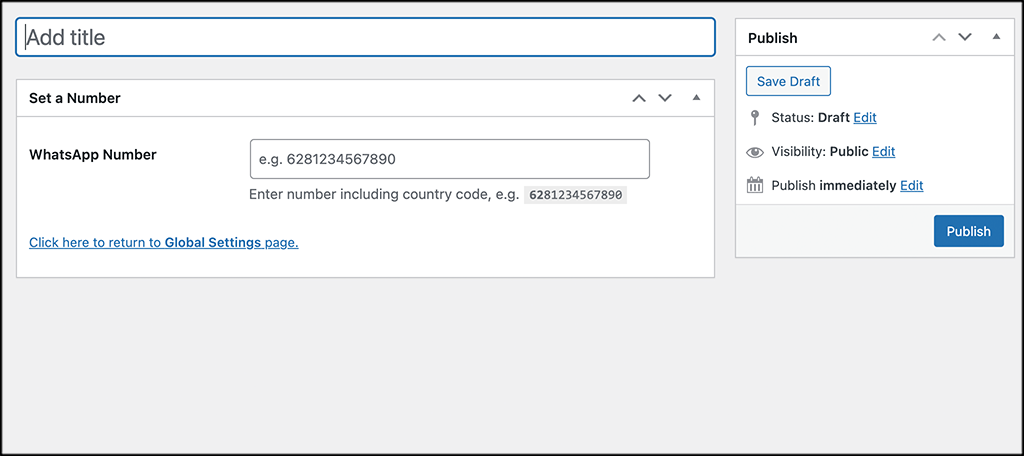
The add new number page is very straightforward. Simply add a number title and then add your WhatsApp number into the field. When you are done, click on the “Publish” button and that number will become active
That’s it! You are ready to roll. Place the shortcodes you generated where you want the OneClick Chat to Order to display and you can start taking orders.
For example, you can easily add the shortcode to any sidebar areas you have on your site. This will be visible on nearly every post and page.
Adding Multiple Numbers
This version of OneClick chat to order actually allows you to add multiple WhatsApp numbers and use them all. This is a new feature, and you can read more about it if you would like.
That being said, in order to add more numbers, simply repeat the “Add a Number” process from above and you are good-to-go, simple as that.
Final Thoughts
Giving your customers multiple ways to buy your products is never a bad idea. In this case, we are simply adding a chat ability that will give them easy access to OneClick shopping.
I hope the article was able to show you how easy it is to install and add OneClick Chat to Order to your WooCommerce website. In a matter of a few minutes, you can have this running.
What other sales channels do you like to use along with this one? Have you found another plugin like this that you prefer to use?