Have a new domain and want to migrate? It’s not difficult to move a website to a new domain with WordPress. Though, you do want to take your time to do it right. Otherwise, you could cause harm to both the function and SEO performance of the site.
Luckily, you have all the tools available to make the transition near seamless. The best part is that your content is far less likely to lose position in Google search results.
Today, I’ll show you how to move your website to a new domain using WordPress. Overall, it’s more time-consuming than anything. But, it’s worth the effort for an easy move.
Why Move a Website to a New Domain in WordPress?
Perhaps you found a domain name that is better suited for your purpose. Maybe you discovered you need to upgrade a hosting plan and decided to go with a better domain.
A common reason to move to a new domain is re-branding an online business or persona. You’ll also see this happen a lot when one company buys out another.
Back in the day, moving a website was an arduous process. If you didn’t know what you were doing, you could really screw up a site. Today, systems like WordPress make the entire process far more simple.
Even the most novice of users can effectively move a website to a new domain with WordPress. For the most part, the system does the work for you.
Here are seven steps to redirect from an old domain to a new domain in WordPress.
1. Create a Backup of Your Website
Before you make any major changes to your website, you should always create a backup. This will save you from a lot of aggravation, later on, should something happen.
Being prepared is always better than the alternative.
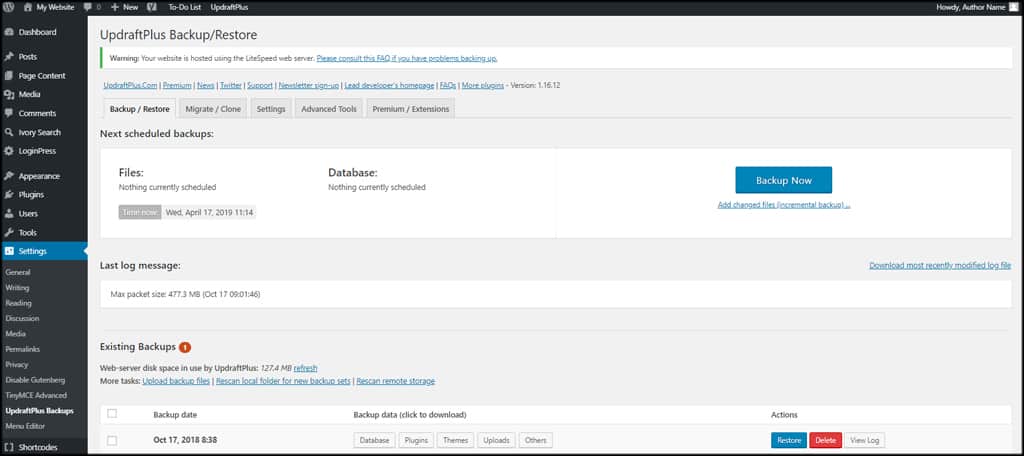
Personally, I like using UpdraftPlus. It will create backup files of the website itself as well as the database. Which is convenient because you don’t have to take additional steps to export the SQL file.
As an added bonus, UpdraftPlus also lets you connect to Cloud storage systems such as OneDrive and Dropbox.
2. Using the Duplicator Plugin
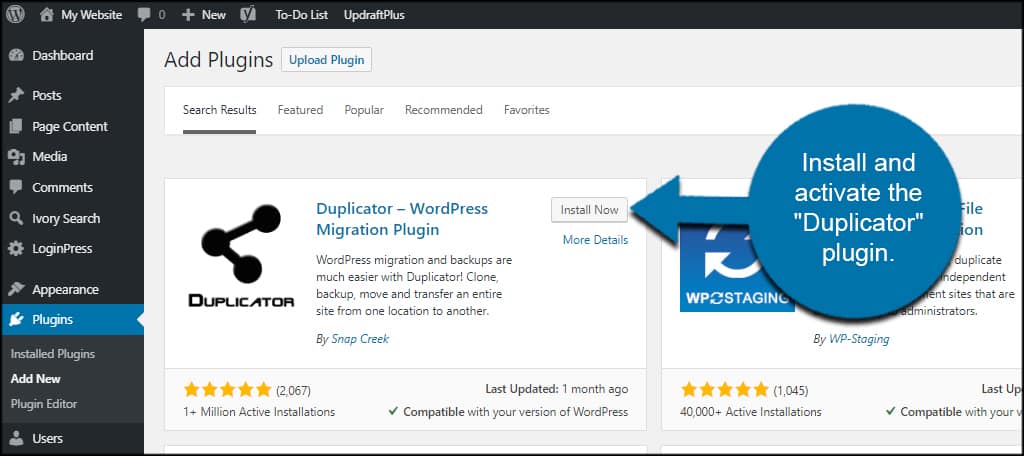
For this tutorial, I’m going to use the Duplicator plugin for WordPress. It’s a free tool that lets you download the full WordPress site in a package file, which is then used to expand into the new website directory.
Install and activate the “Duplicator” plugin.
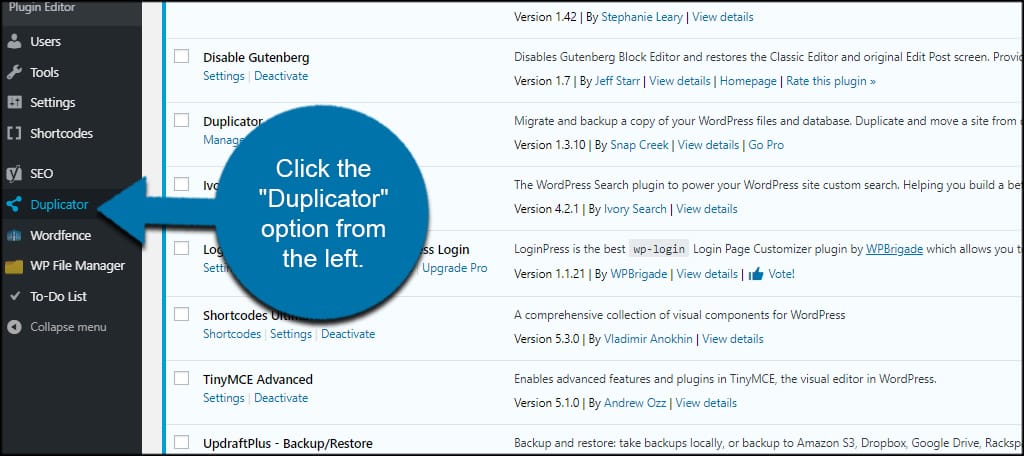
Click the “Duplicator” option from the left WordPress admin panel.
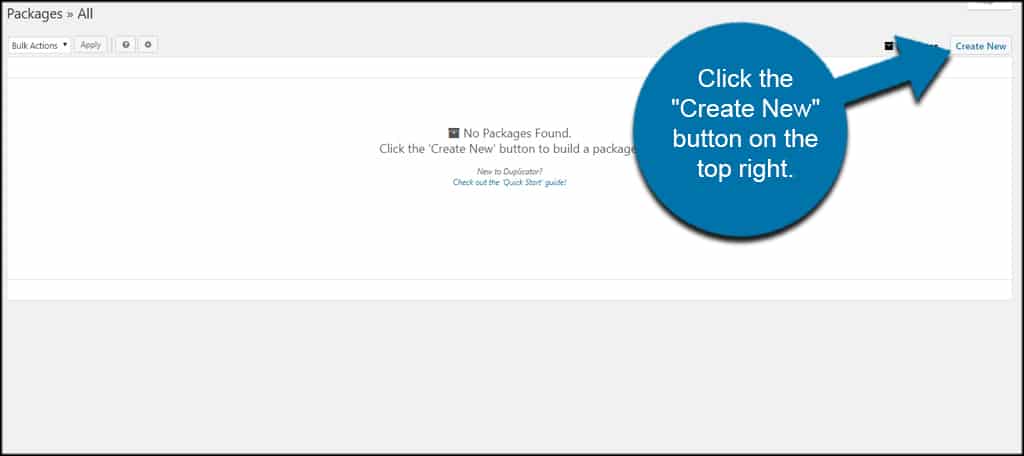
This screen will show any packages you have for WordPress. Obviously, we don’t have any as this is the first time running the plugin. Click the “Create New” button on the top right.
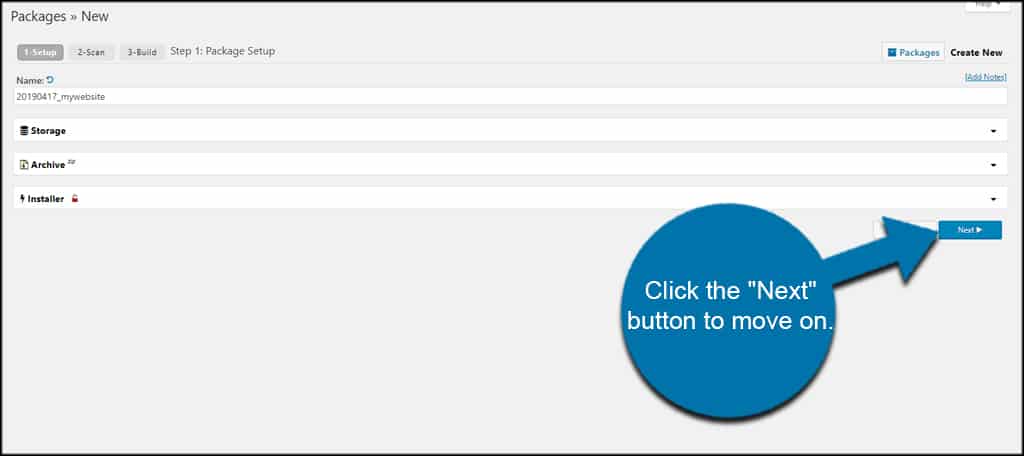
In the first step, you can assign storage devices, change how the archive functions or even enable password protection for the installer. But for this example, I’m simply going to leave everything at default values.
Click the “Next” button to move on.
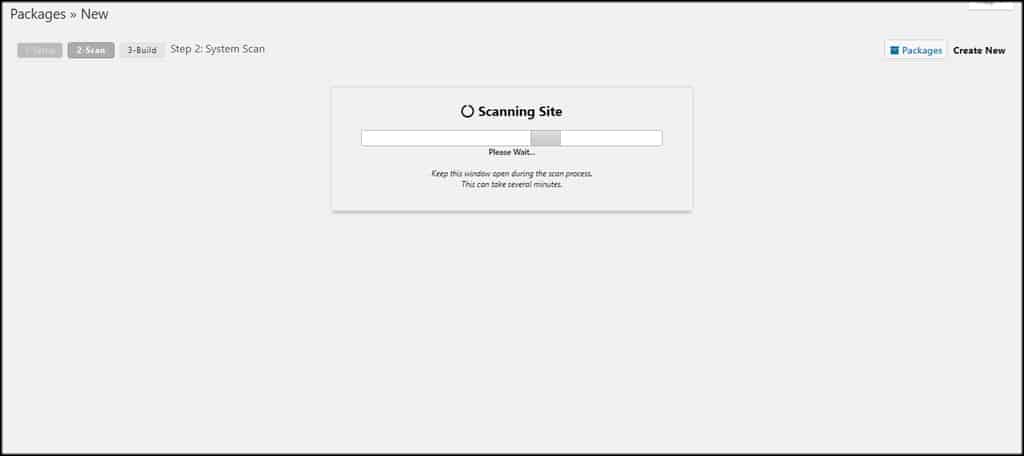
Immediately, you’ll see a scanning screen as Duplicator looks for your files.
When the scan is complete, click the “Build” button on the bottom.
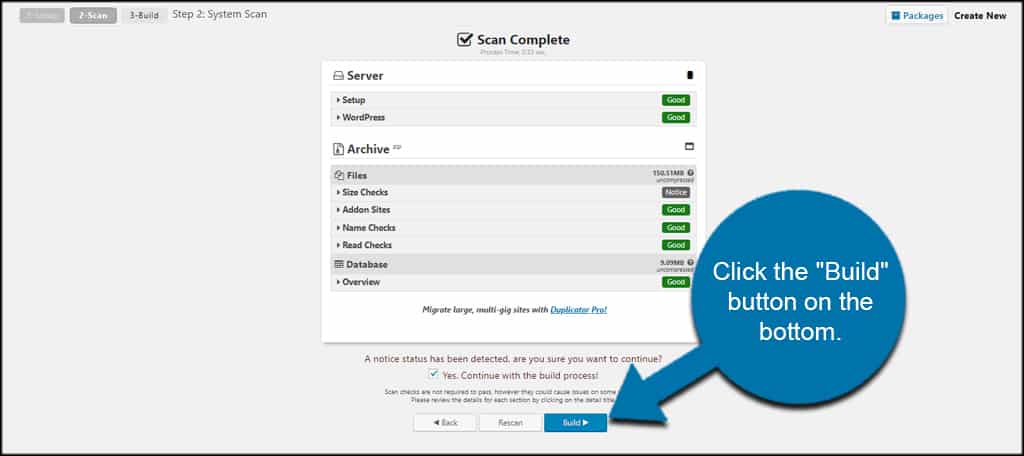
NOTE: If you receive a notice within the scan, you’ll need to expand and address the issues. Large files often trigger these notices in Duplicator, and you can filter out certain types.
Things which trigger the notice include backup, video and large ZIP files you may have stored.
Once the build is complete, click the “One-Click Download” link and save the files to your computer.
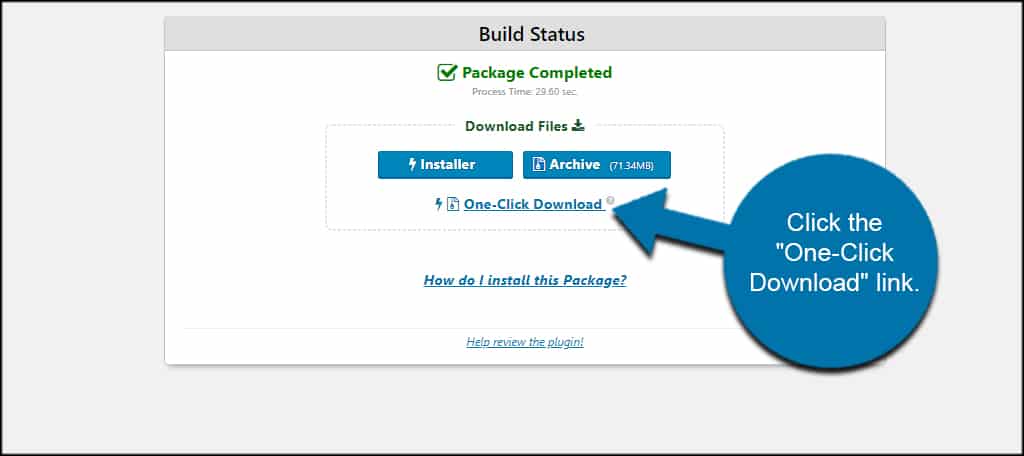
NOTE: It may take a moment or two for the installer.php file to download.
3. Add a New Database to New Domain
Now that you have the website files and Duplicator package ready, you’ll need to create a new database for the new domain. This is so Duplicator can export the WordPress database from the old domain to the new one.
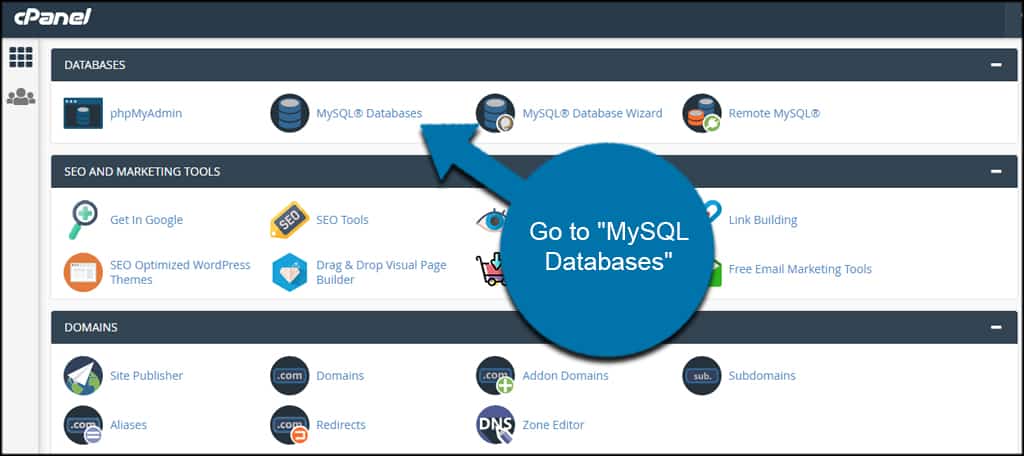
Go to “MySQL Databases” of your hosting account. This is easy to find if you’re using a system like our hosted cPanel dashboard.
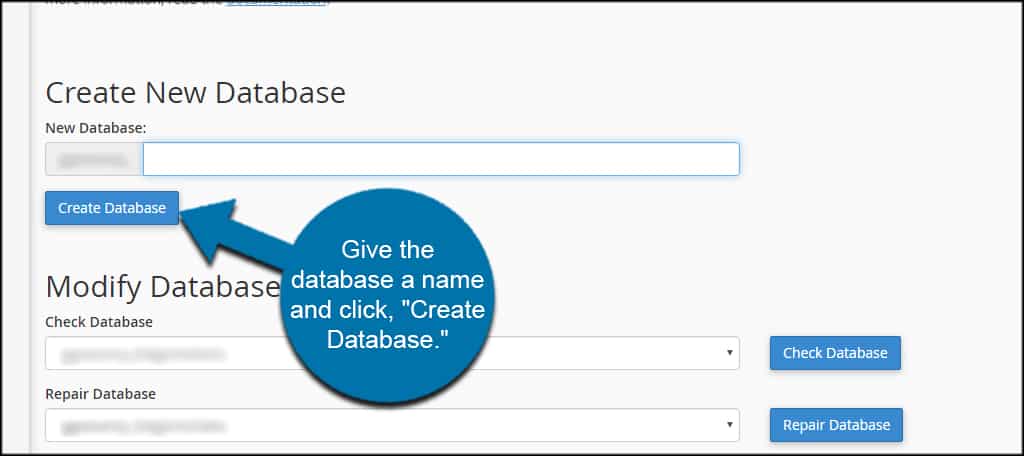
Give the database a name and click, “Create Database.” You will need to know the name of this database when you run the installer.php file from Duplicator. Otherwise, you won’t be able to connect.
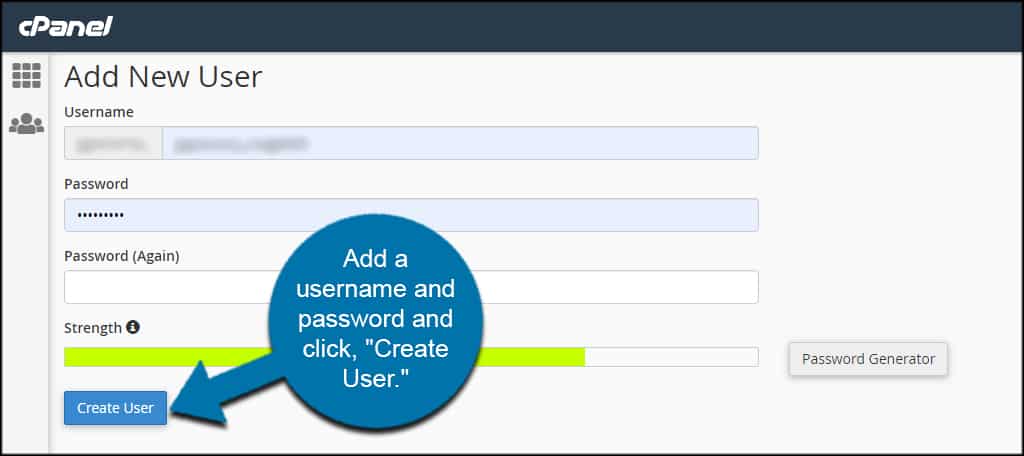
After you create the database, go back to the databases page and scroll down to the “MySQL Users” portion.
Add a username and password and click, “Create User.” You will need this information as well if you want to move the website to a new domain in WordPress while using Duplicator.
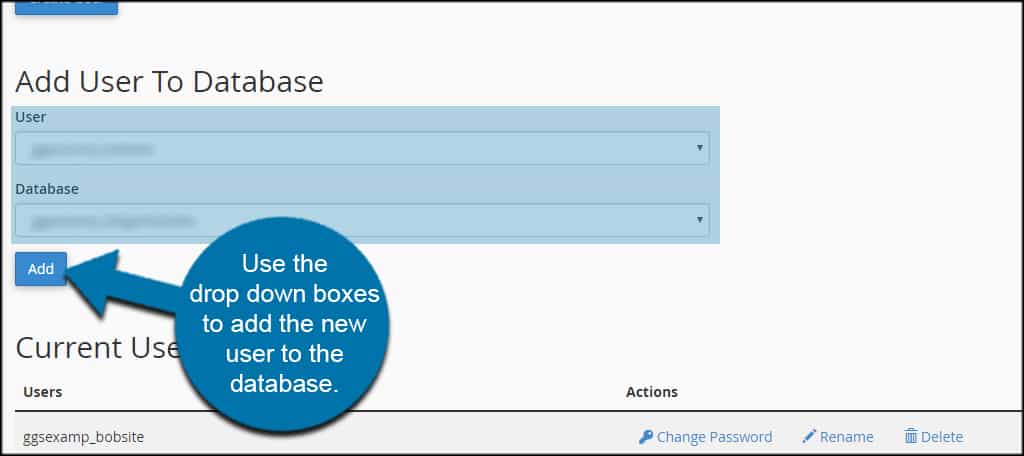
When you create the new user, go back to the MySQL Database screen and scroll down to the “Add User to Database” portion.
Use the drop down boxes to add the new user to the database you created a moment ago. Without this setting, your website will not have permission to access data.
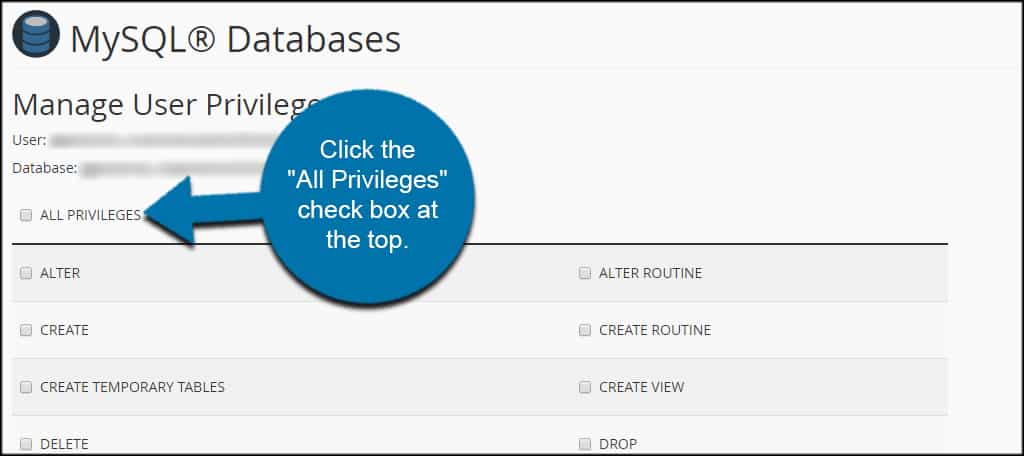
In the next screen, click the “All Privileges” check box at the top. This is to make sure your website has everything it needs to operate WordPress without causing errors.
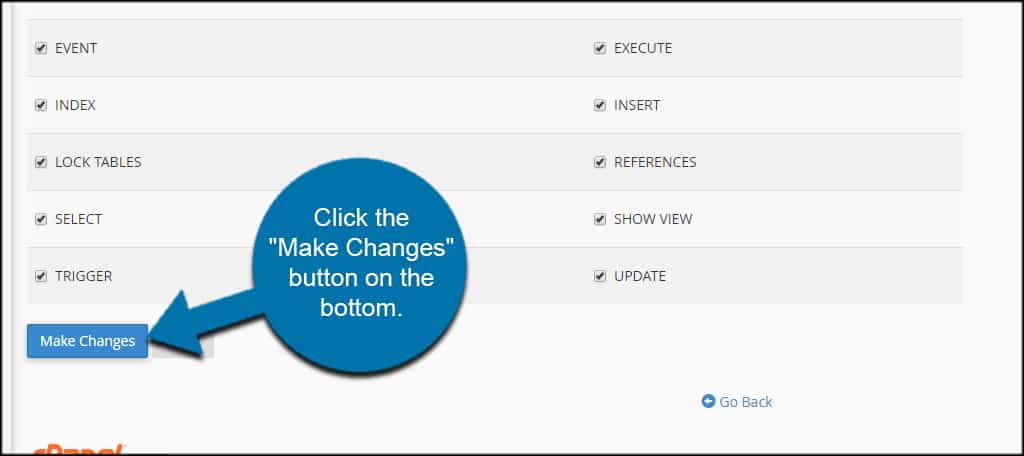
Click the “Make Changes” button on the bottom.
4. Upload and Expand Duplicator Files
With the database ready, it’s time to move on to uploading the files you downloaded from Duplicator.
You can do this a couple of different ways. Many people like using FTP programs like FileZilla. Today, I’m just going to use the File Manager in cPanel.
Upload the two files from Duplicator to your new domain’s directory.
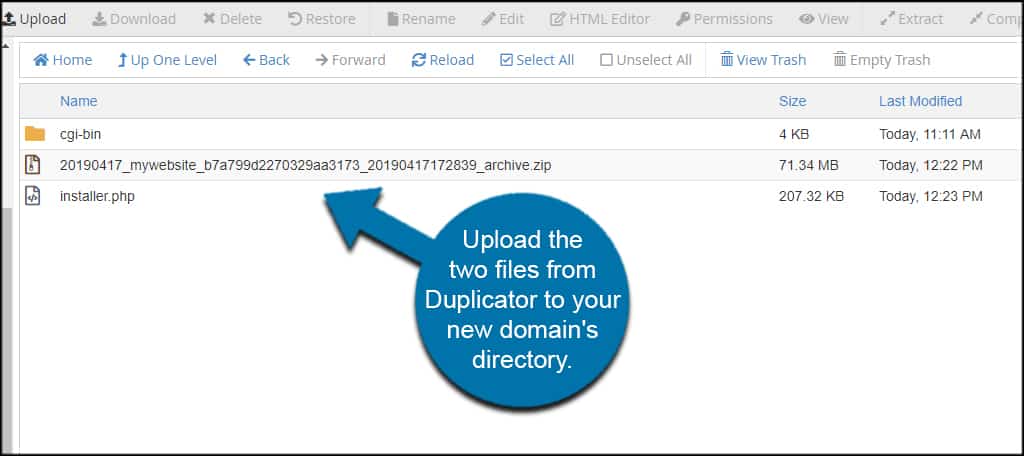
NOTE: If you changed web hosts, this directory may simply be the “public_html” folder of your site.
Now, open a new web browser tab and type this into the address bar:[ht_message mstyle=”info” title=”” show_icon=”” id=”” class=”” style=”” ]https://yourwebsitedomain.com/installer.php[/ht_message]
NOTE: Make sure you change the “yourwebsitedomain.com” to your own domain name.
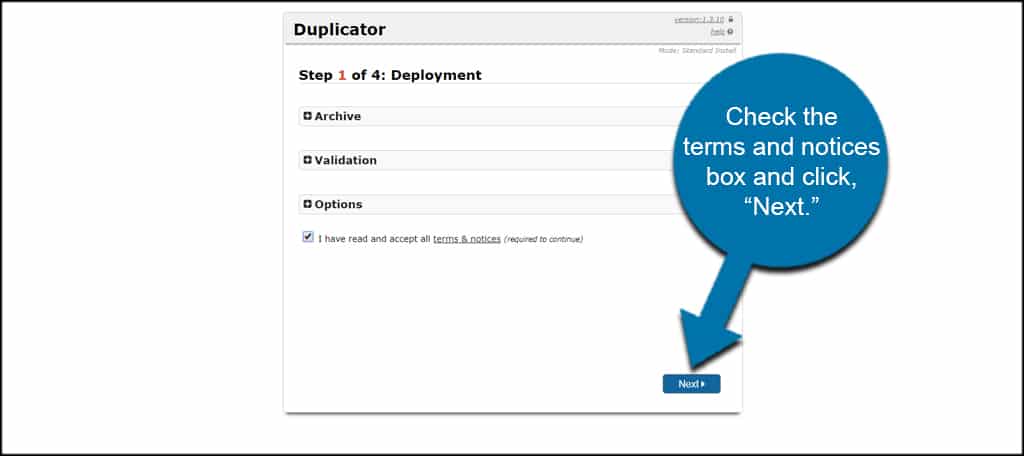
Once the Duplicator launcher loads, check the terms and notices box and click, “Next.”
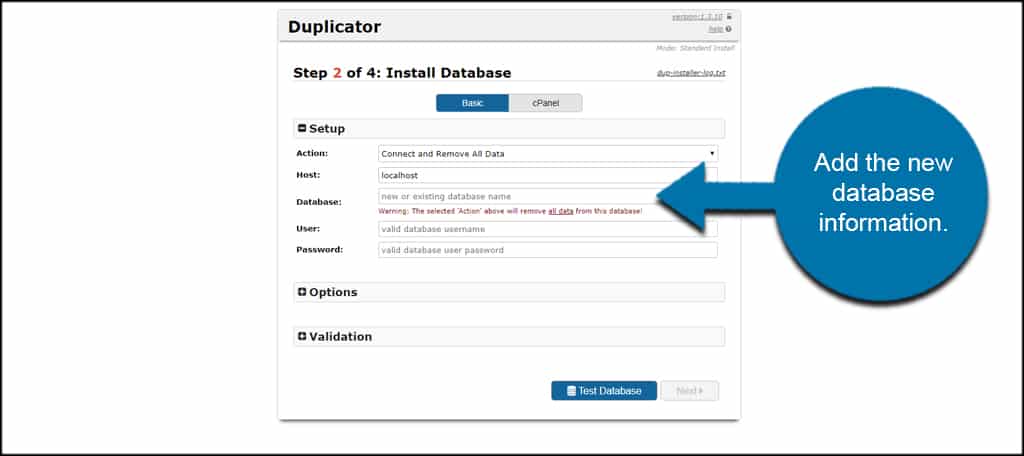
After Duplicator extracts the files, add the new database information. This is the database name, user and password you set up earlier.
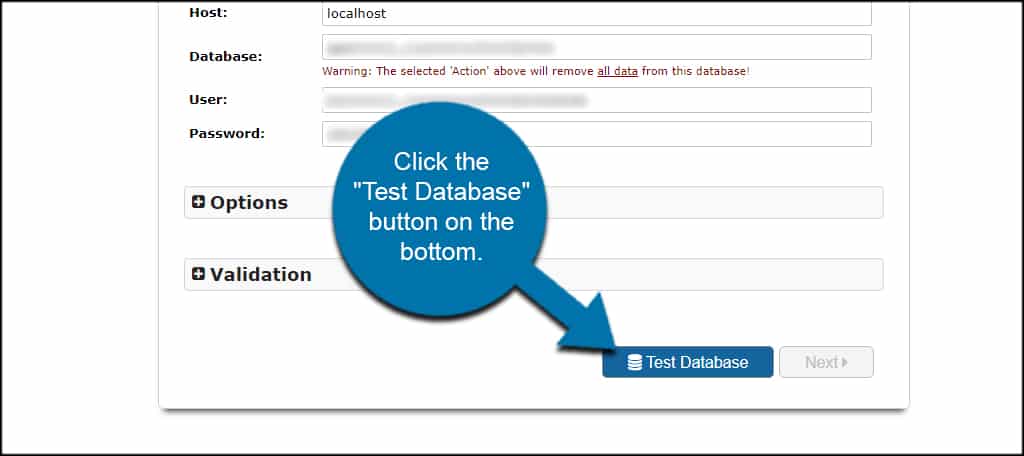
Click the “Test Database” button on the bottom. This is to test the integrity of the new database. Since we just created it and there’s no information available, it should pass almost instantly.
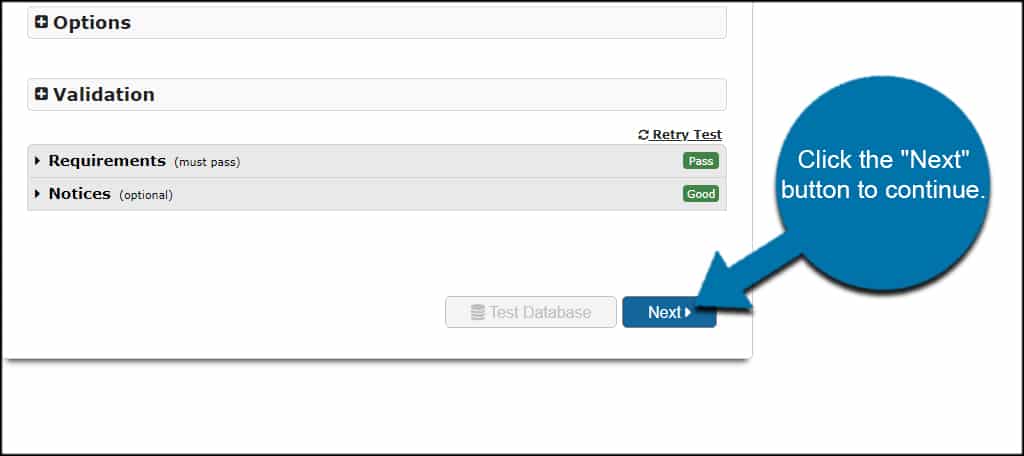
After the test is complete and the requirements passed, click the “Next” button to continue.
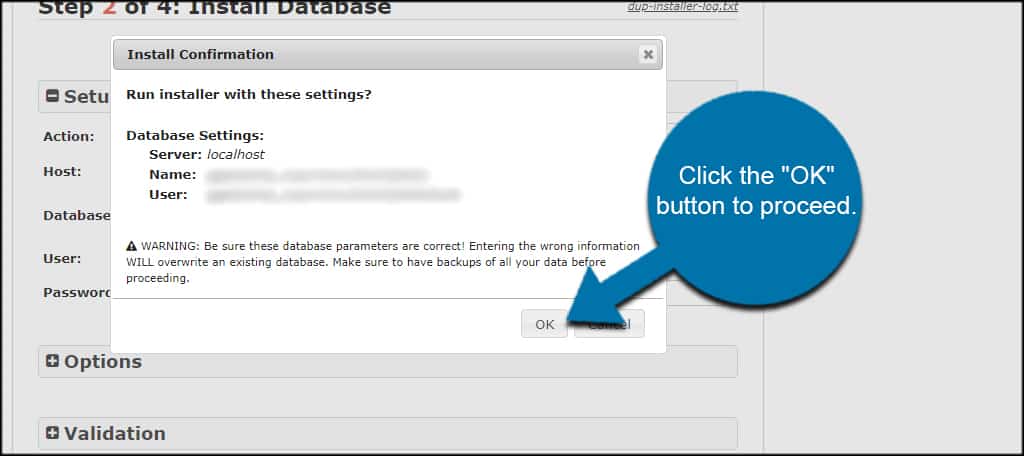
A verification screen will launch displaying your database information. Verify you typed in the name and user correctly and click the “OK” button to proceed.
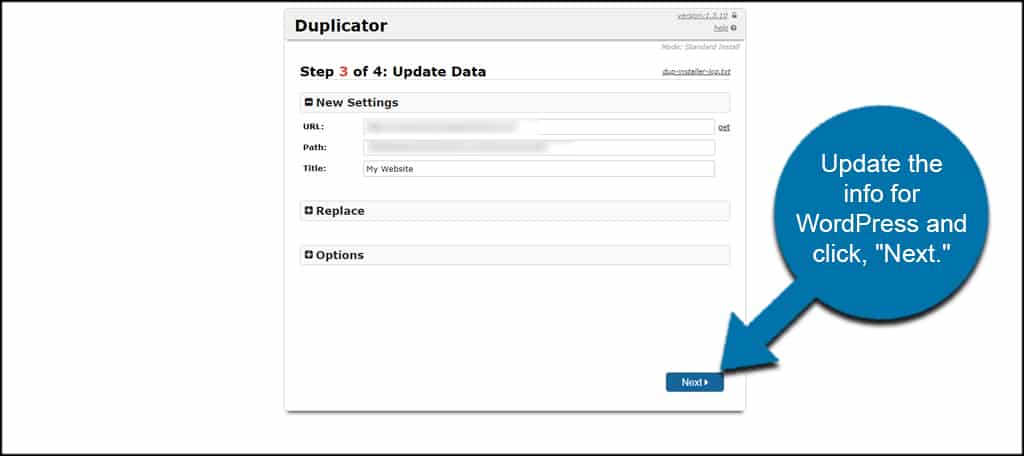
Update the info for WordPress and click, “Next.” This is the data that is stored in your WordPress website, such as the URL and title. The path should be correctly added on its own.
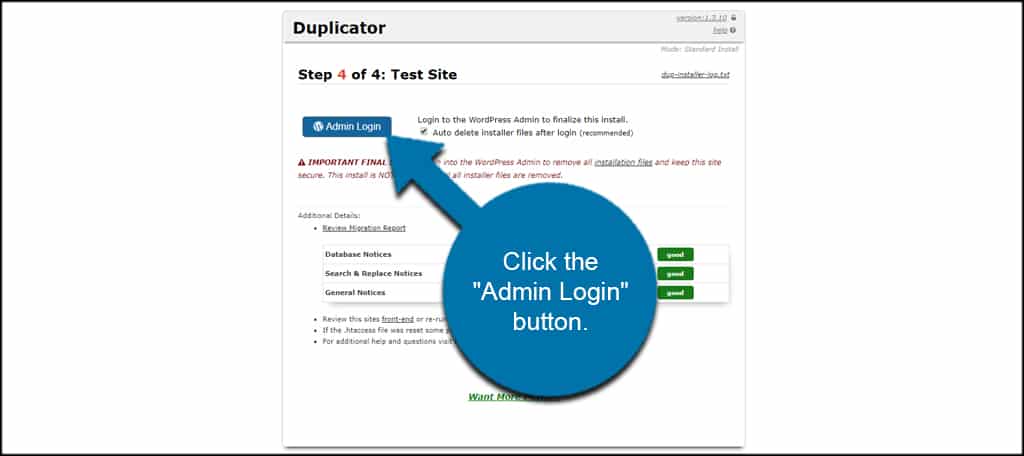
Finally, click the “Admin Login” button. Leave the auto deletion check box marked as you will no longer need the installer.php file or the ZIP archive. This helps keep the site clean and reduces risks from being exploited.
You can now log into your new website.
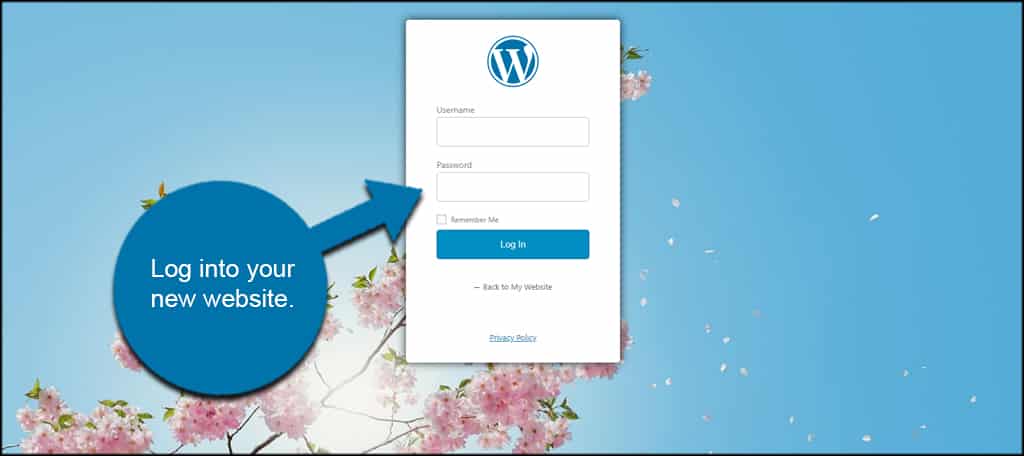
As you can see, Duplicator copies everything perfectly. The sample image above is the log in screen I created using LoginPress to add a background and remove the password reset link.
5. Add 301 Redirects to Old Site
After we move a website to a new domain in WordPress, we need to set up some 301 permanent redirects on the old one. This is so you can gain traffic to the new domain from search engines while letting bots know where to find your content.
This is a vital component if you want to keep with the best SEO practices.
You have a couple of ways to set up 301 redirects. You can add a bit of coding to the .htaccess file of the old website or you can use a plugin.
Adding Lines to .htaccess
If you know your way around editing, add this to the .htaccess file:[ht_message mstyle=”info” title=”” show_icon=”” id=”” class=”” style=”” ]#Options +FollowSymLinks
RewriteEngine on
RewriteRule ^(.*)$ https://www.yournewdomain.com/$1 [R=301,L][/ht_message]
Make sure you change the “https://www.yournewdomain.com” to your website address.
Using WordPress Plugins
Another method of sending traffic after you change a website domain name is by using plugins on the old site.
A few plugins you can try include:
- SEOpress
SEOPress has a lot of tools beyond creating 301 redirects. It might be something you’d use on your new site as well. Still, it has features that will let you manage how 301s are handled. - Redirection
Redirection is probably one of the most popular plugins for handling 301s. It has a lot of customizable options for control including monitoring visitor behavior and usage. - 301 Redirects – Easy Redirect Manager
The Easy Redirect Manager is a fairly simple tool to use. You can redirect individual posts, pages, custom post types, and a destination URL. It’s one of the easier plugins to use for setting up 301s simply because it’s pretty straightforward.
The above plugins are only a few of the tools you can install to create 301 redirects after changing a domain name in WordPress. If you want a longer list, you can just enter “301 redirect” when searching for plugins.
Some will even give you control over .htaccess so you can fine-tune your edits.
6. Add Change of Address to Search Engines
The next step is to offer a change of address to search engines like Google. After all, you want search engines to crawl the correct site so your new domain gets indexed.
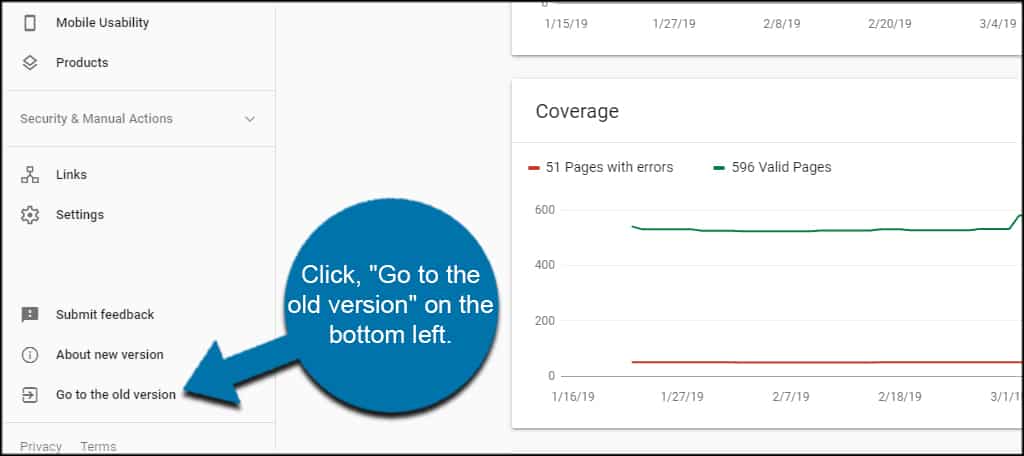
In this tutorial, I’ll set up a change of address using Google Search Console. At the moment, the new version of Search Console does not support changing a web address. So, I’ll need to do that in the older version of the tool.
In Google Search Console, click, “Go to the old version” on the bottom left.
Make sure you’re in the properties of the old domain name. This is located in the drop-down box near the top right.
Click the gear icon and choose, “Change of Address.”
Next, Google will launch a change of address form. Follow each of the steps and submit your request.

Once Google is aware and verifies the new changes, its bot will start crawling accordingly. This may take a bit of time depending on how often Google crawls your website.
7. Update Social Media and Other Accounts
One element a lot of people forget is to change the domain name on various social profiles. Facebook, LinkedIn, Twitter and anywhere else you’ve added the old domain should reflect the new address.
You want people to start using the new domain immediately.
Also, don’t forget your email signature. If you use the site’s URL in your email signature, you want to make sure it gets updated.
Another thing you want to keep in mind is changing email addresses in apps or other login credentials if you use your domain email for those elements.
Just like moving into a new house, you need to make sure everyone knows the best method to contact you. It may seem like a long process, but it’s better than losing potential traffic.
Simple Ways to Notify Visitors After the Move
- Push Notifications
Adding push notifications works well to keep an audience coming back to your site. But plugins like OneSignal also lets you send text messages to all who follow your content. - Writing a Blog Post
Writing a blog post about the move can keep your audience updated. You can also share these posts on social media to reach out even further. - Sending Email
Newsletters and mailing lists are helpful for letting people know your site is moving. Don’t underestimate the power of email. - Sharing on Social Media
You don’t need to share a blog post on social media to get the word out you’re about to move WordPress to a new domain. A few scheduled updates to sites like Twitter and Facebook are helpful in this situation. - Popup Messages
You don’t have to merely use popups for email subscriptions or login screens. In fact, you can use popup messages in a welcome gate to let others know your site is moving.
Here’s to a Successful Move!
Perhaps the most difficult part to move a website to a new domain with WordPress is changing all of the URLs in various accounts and apps. It’s not just search engines that need the updated URLs.
Take the transitions nice and easy to move WordPress to a new domain. While it may be an easy process, there are a lot of small nuances you could forget…such as changing email addresses.
How often have you thought about changing your domain name? What’s your favorite metric in tools like Analytics and Search Console and why?
I am searching on google how to migrate WordPress site to new domain and I find your post. Hopefully, now we can migrate website easily. Thank you!