Sometimes a manual install of PrestaShop is ideal depending on the situation. It’s not as difficult as some of the other systems you can use, and it’s a relatively straightforward system.
This means you don’t need a tech dictionary to understand the jargon. The developers made it so that even the most novice developers can build an online store quickly with Prestashop hosting.
In this tutorial, I’m going to show you how to install PrestaShop manually. It’s a bit longer of a process than using Softaculous, but you should still be able to get started selling right away.
Downloading PrestaShop
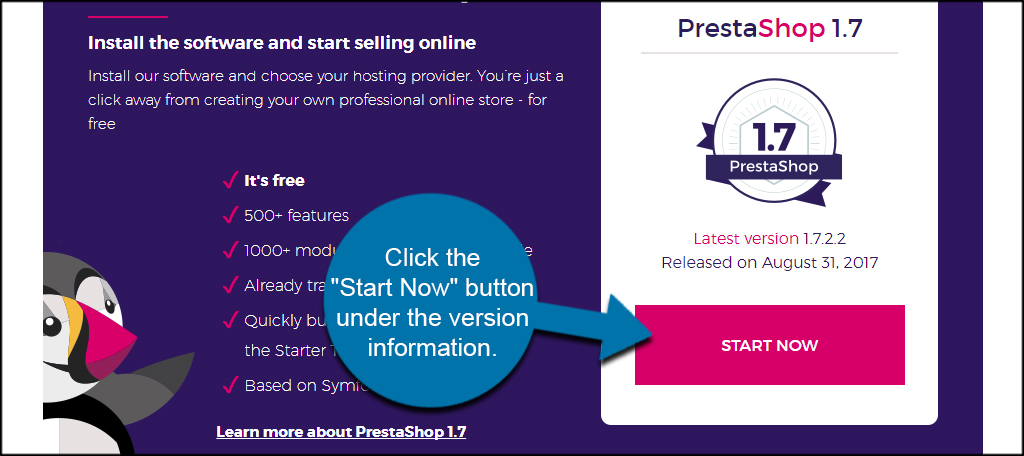
The first thing you’ll need to do is download PrestaShop. From the website, click the “Start Now” button under the version information.
Fill out your information and click, “Download Now.” Your computer will probably prompt you to save the ZIP file, or it will do so on its own, depending on your browser settings. I try to save things like this to the desktop as it makes it easier to find when I need them.
After downloading, unpack the ZIP file into a folder on your computer. Again, this is much easier if you unpack it into a desktop folder. For this instance, I am simply going to name a new folder “PrestaShop” and extract the ZIP files into it.
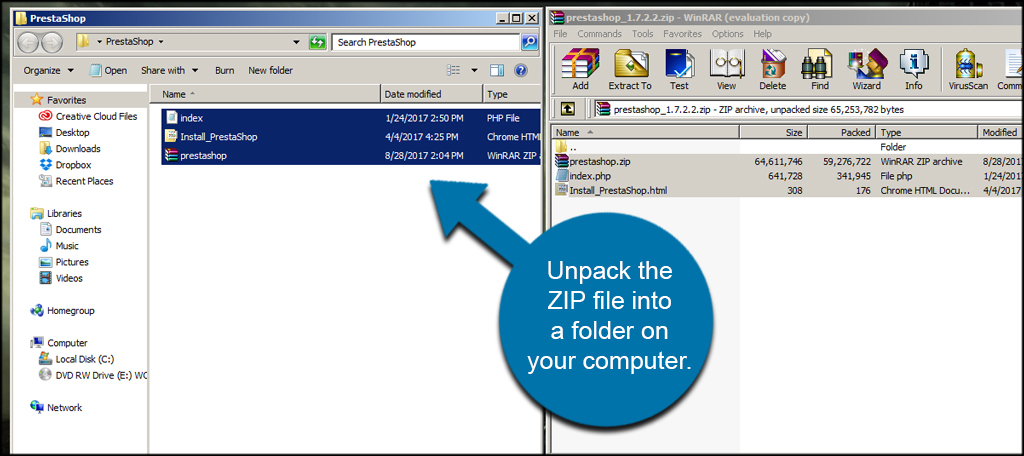
You will see you have another ZIP file of PrestaShop along with an Index and an Install_PrestaShop file. Don’t extract this second ZIP file. We are going to leave it for now and unpack it later in cPanel‘s File Manager.
Uploading PrestaShop
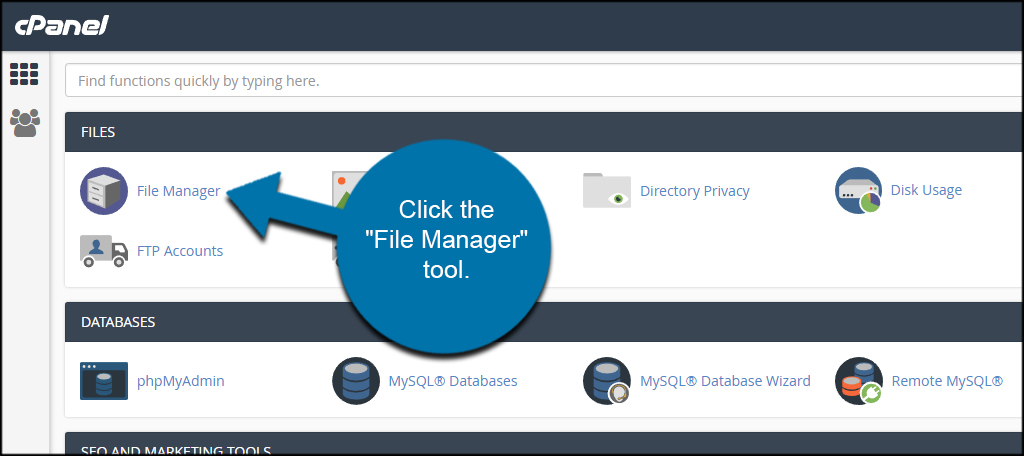
With the files ready, now we’re going to upload them to your web host. From cPanel, click the “File Manager” tool.
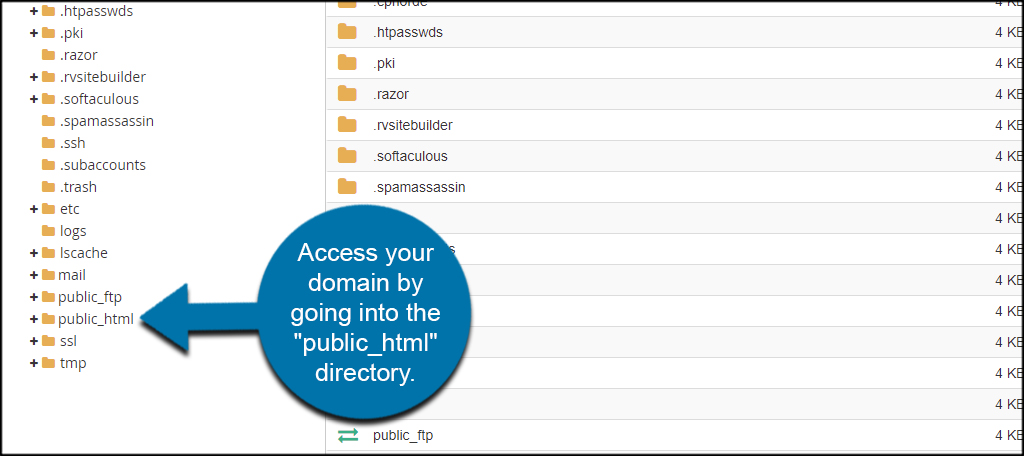
Access your domain by going into the “public_html” directory.
The only thing that should be in this directory is the “cgi-bin” folder. If anything else is present, you need to delete it. This directory should be empty.
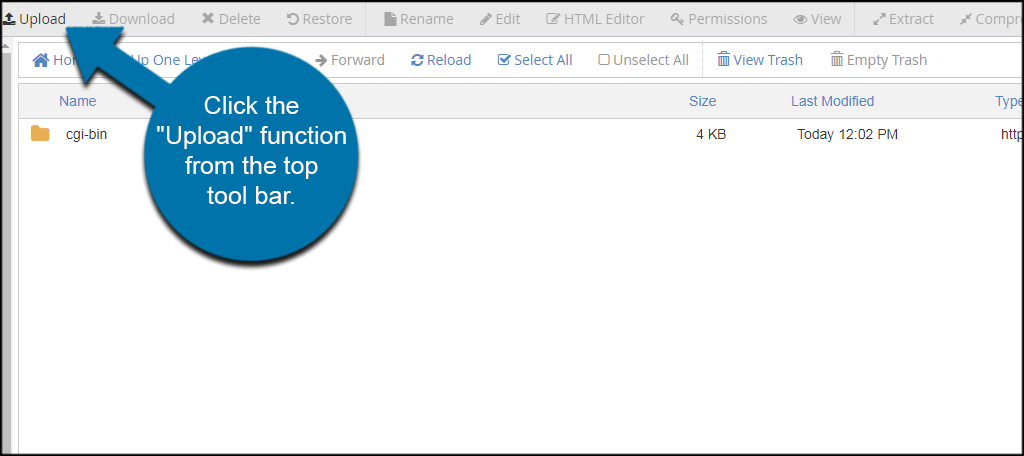
Click the “Upload” function from the top toolbar.
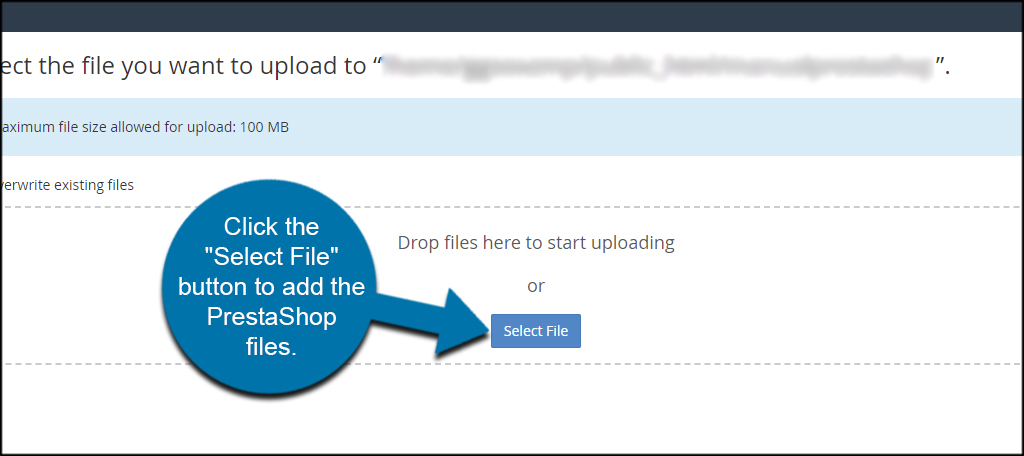
Upload the files you extracted earlier from the PrestaShop ZIP. You can drag and drop them onto the page or click the “Select File” button to add the PrestaShop files.
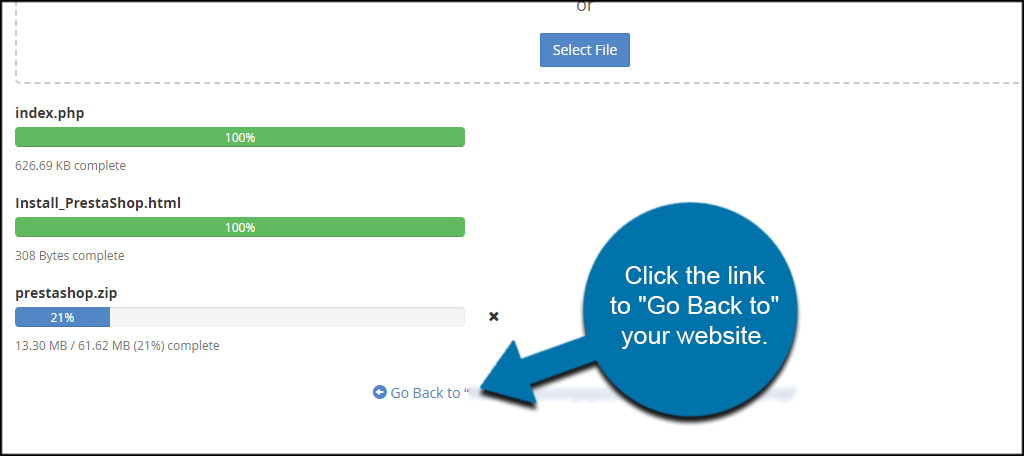
Once the files are uploaded, click the link to “Go Back to” your website.
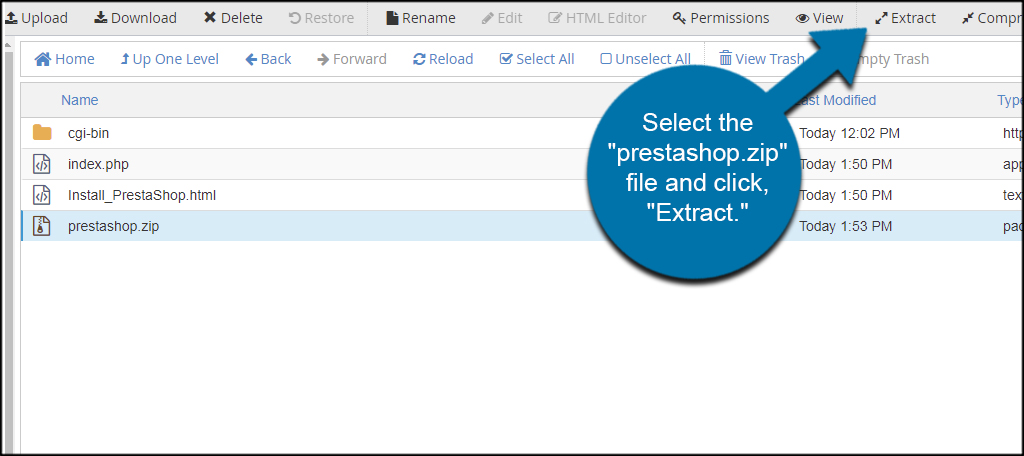
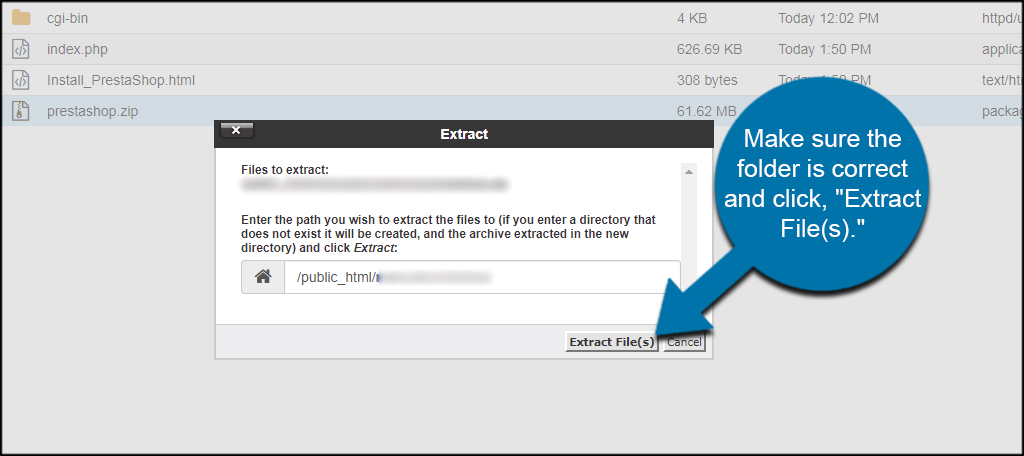
Select the “prestashop.zip” file and click, “Extract.”
Make sure the folder is correct and click, “Extract File(s).” The default folder should be aimed at your website’s directory already, so you shouldn’t have to change anything.
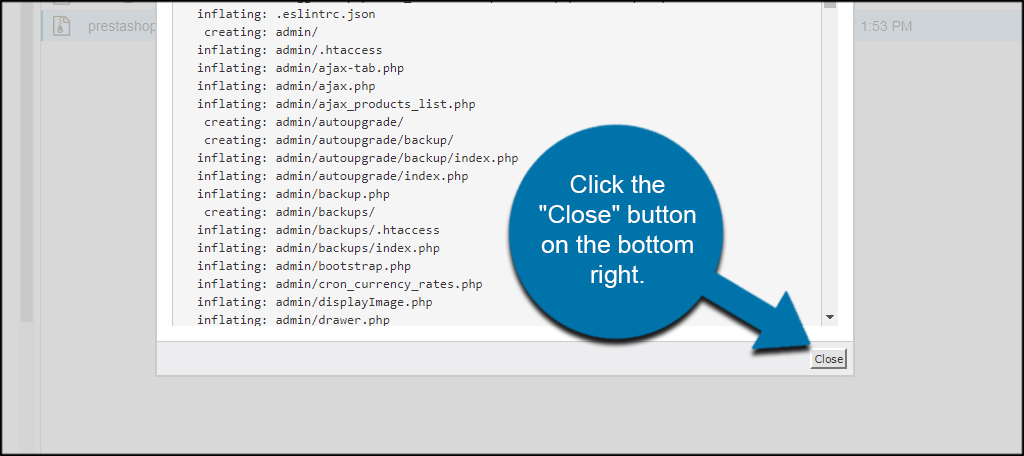
This process may take a few minutes to complete. When it does, you’ll see a results screen. Click the “Close” button on the bottom right.
You’ll have to reload your browser’s view to see your files.
Using FTP
If you don’t want to upload the ZIP file, you can always use FTP programs like FileZilla. These applications connect your site to the computer. From there, you can drag and drop files from your computer directly into the website.
Using FTP as opposed to the File Manager method takes quite a bit longer, but it gives you a tool that is excellent when it comes to troubleshooting problems later. However, it may require a bit of advanced site coding to truly get the most out of it.
Setting Up the Database
One last step we need to do before actually installing PrestaShop is to set up the database. Don’t worry; this is pretty quick and easy.
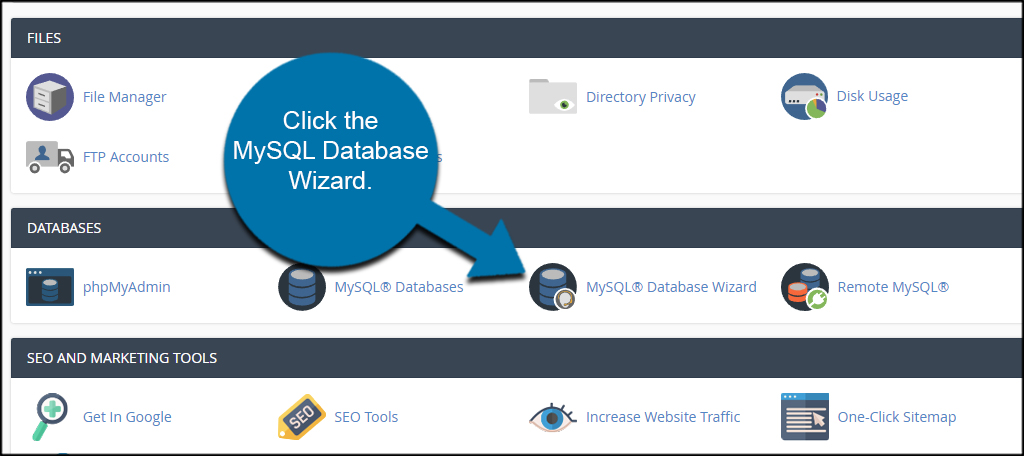
From cPanel, click the MySQL Database Wizard. This is by far the fastest method for setting up a database for any content management system like PrestaShop.
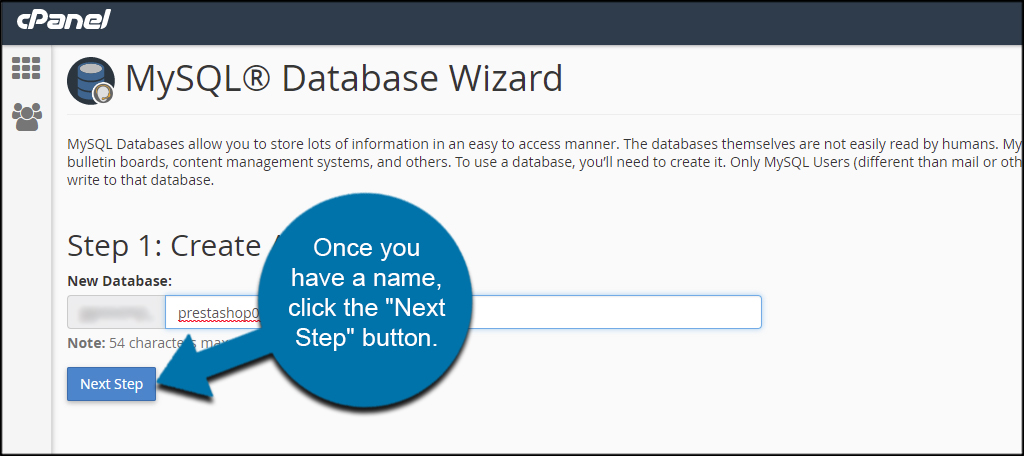
Input a new name for your database. For this tutorial, I’m just going to keep it simple and use “prestashop01.” However, you can name this virtually anything you want. You’ll want to write this database name down as you will need it when setting up PrestaShop.
Once you have a name, click the “Next Step” button.
Create a username and set up a password. This is also going to be used by PrestaShop to connect to the database. Make it unique and hard to crack. Don’t forget to write them down as well.
Click the “Create User” button when you’re ready.

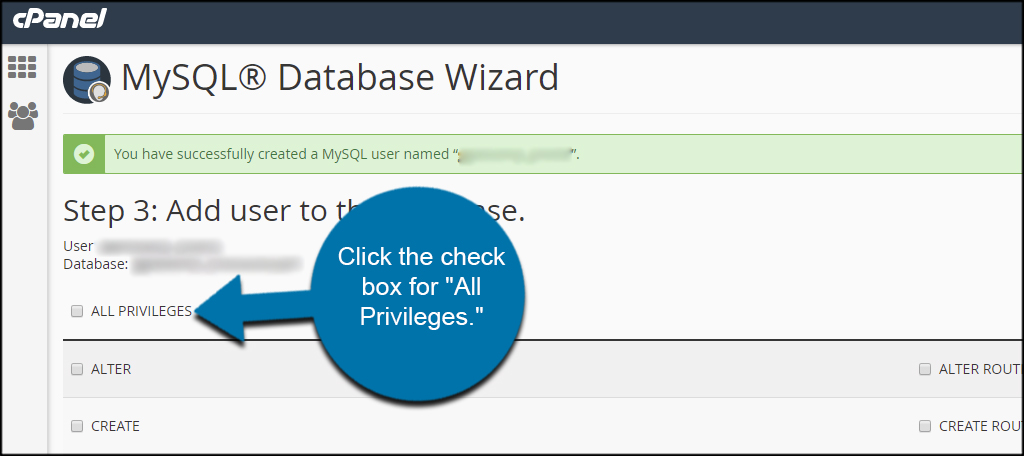
In the next screen, click the checkbox for “All Privileges.” You want to make sure that PrestaShop has complete control over the database. Otherwise, you may have problems trying to operate the site correctly.
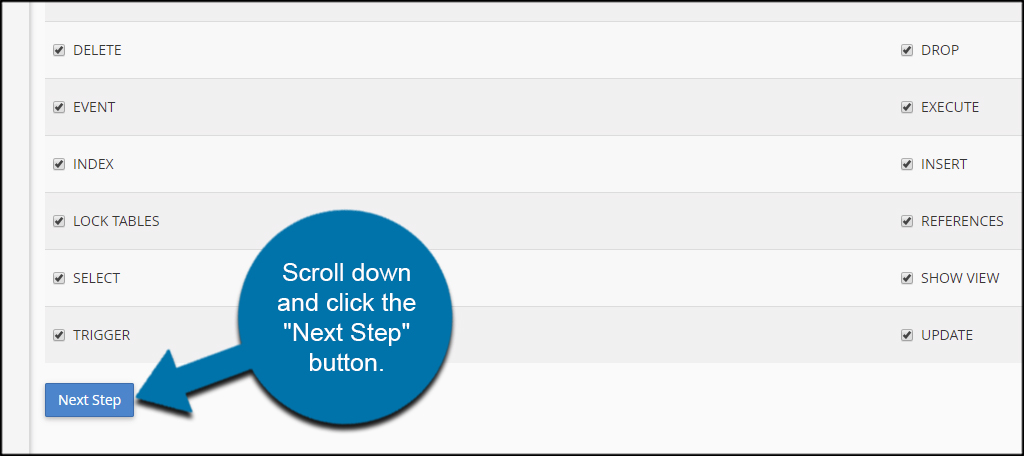
Scroll down and click the “Next Step” button.
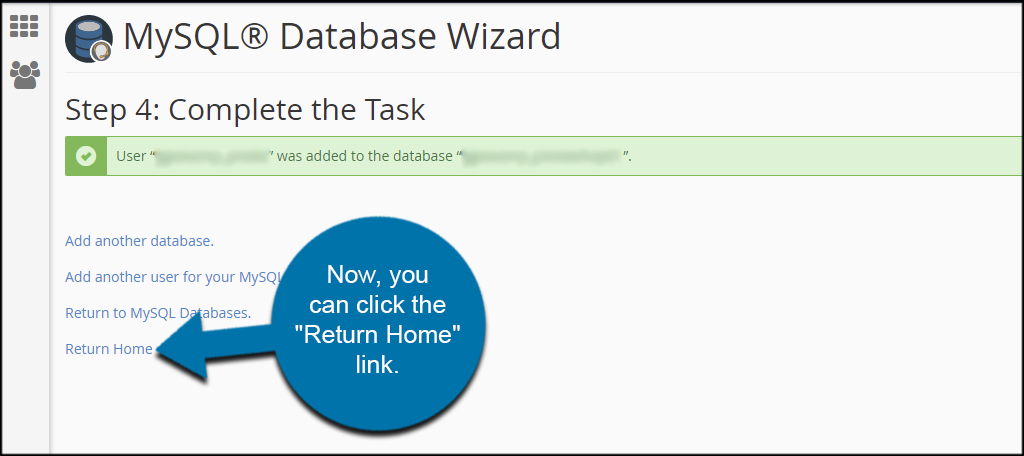
Now, you can click the “Return Home” link.
Installing PrestaShop
Visit your website by going to your domain URL from a web browser.
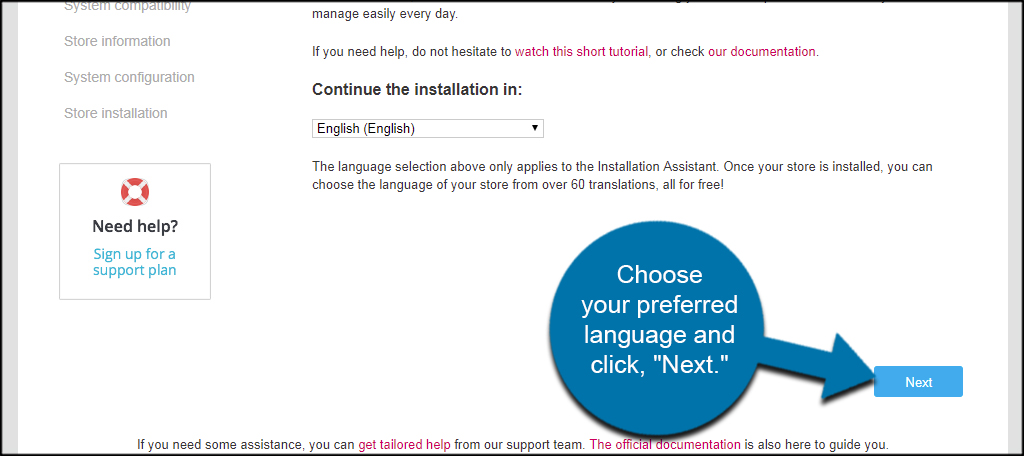
Choose your preferred language and click, “Next.”
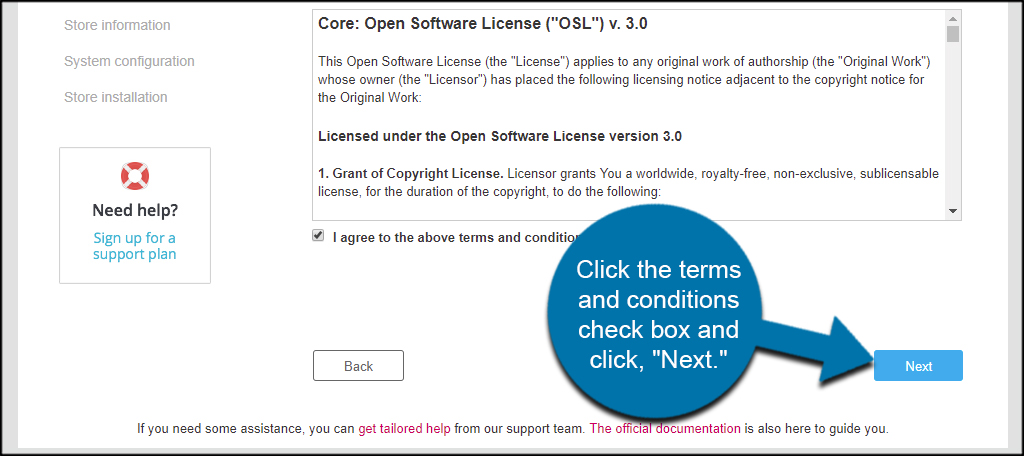
Click the terms and conditions checkbox and click, “Next.”
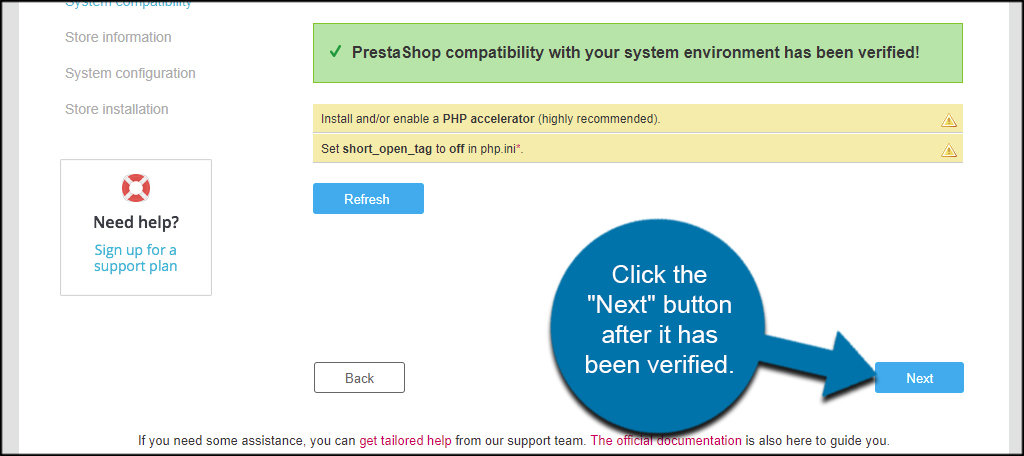
PrestaShop will then check for compatibility. Click the “Next” button after it has been verified.
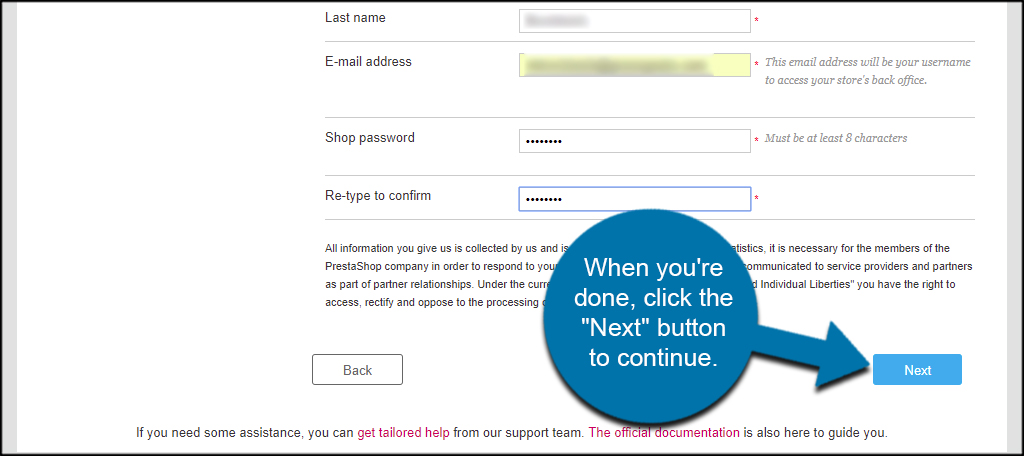
Input your shop’s information and your administrator account details. This username and password are not for the database. It’s for when you access PrestaShop as the administrator.
When you’re done, click the “Next” button to continue.
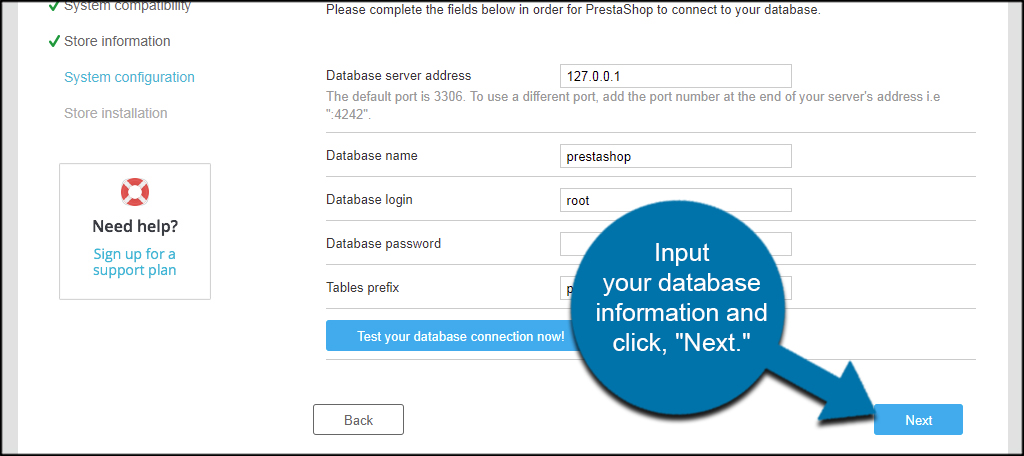
Input your database information and click, “Next.”
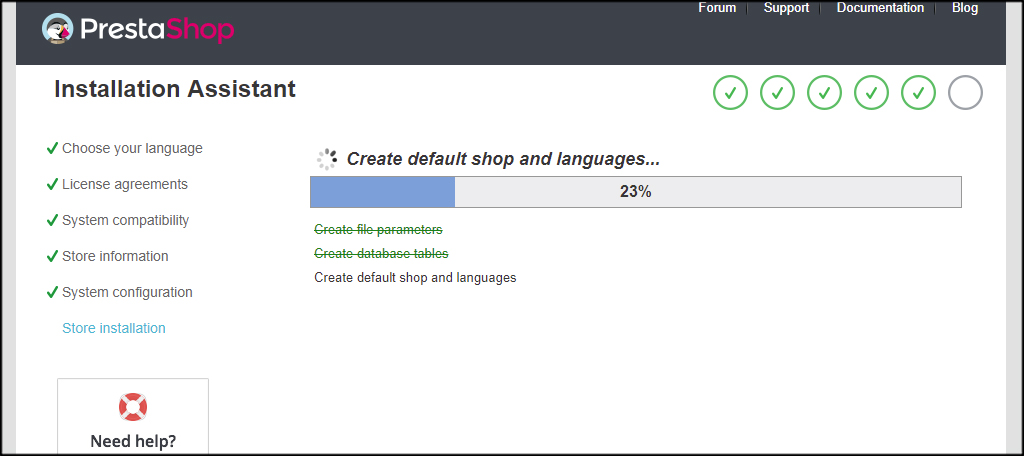
PrestaShop will now begin to install all of its software components.
After the installation, type your domain and add “/admin” in a web browser. So, the address would look something like, “https://www.ggexample.com/admin.”
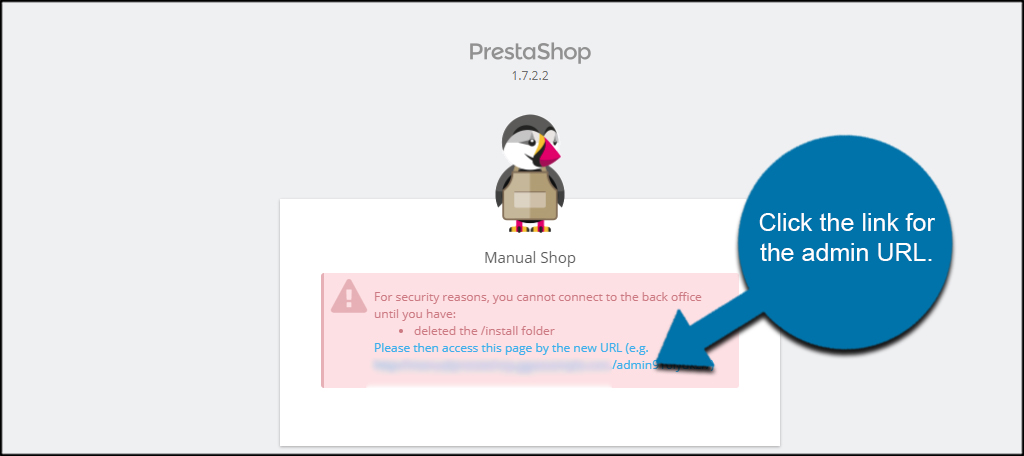
You’ll see an error screen immediately. This is PrestaShop telling you to delete the install files from your site’s directory. This is to prevent anyone from vandalizing your site.
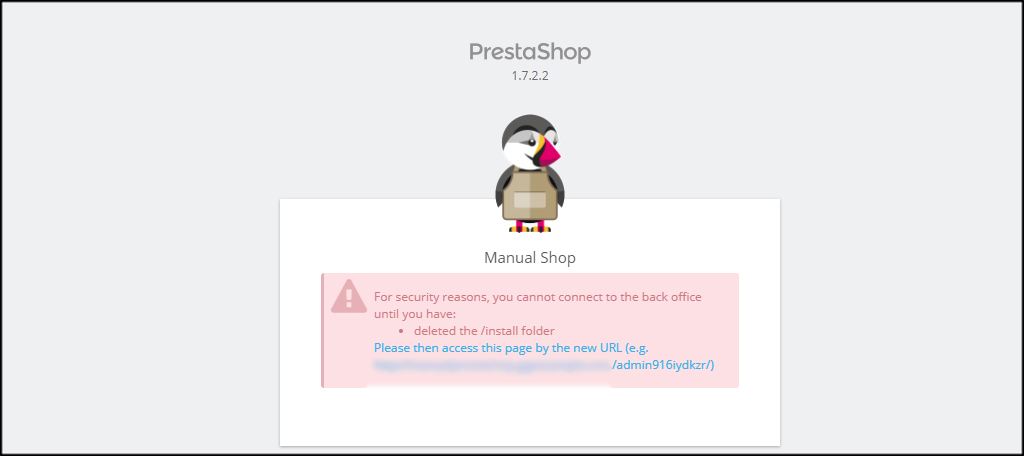
This screen will also show you the link to access your PrestaShop admin screen from now on. Leave this browser window open for a moment and go back to your File Manager in cPanel.
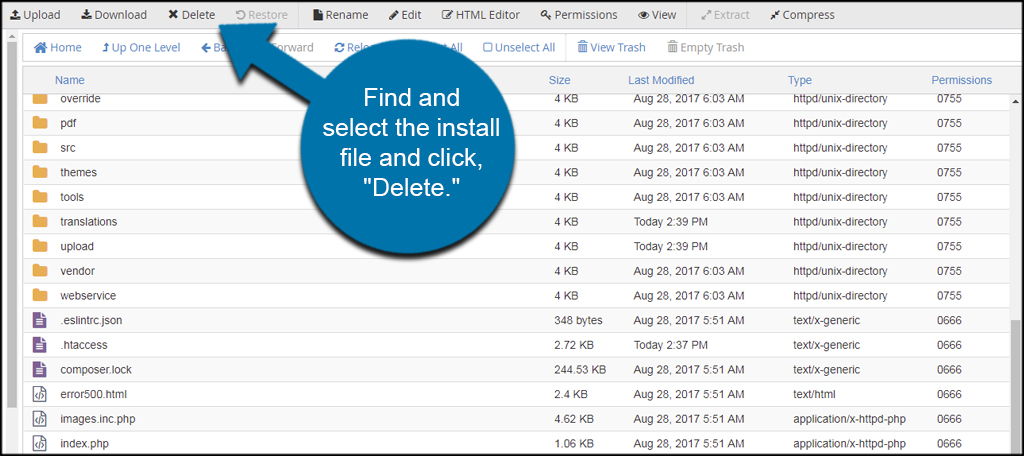
Find and select the install file and click, “Delete.” It will be the file, “Install_PrestaShop.html.”
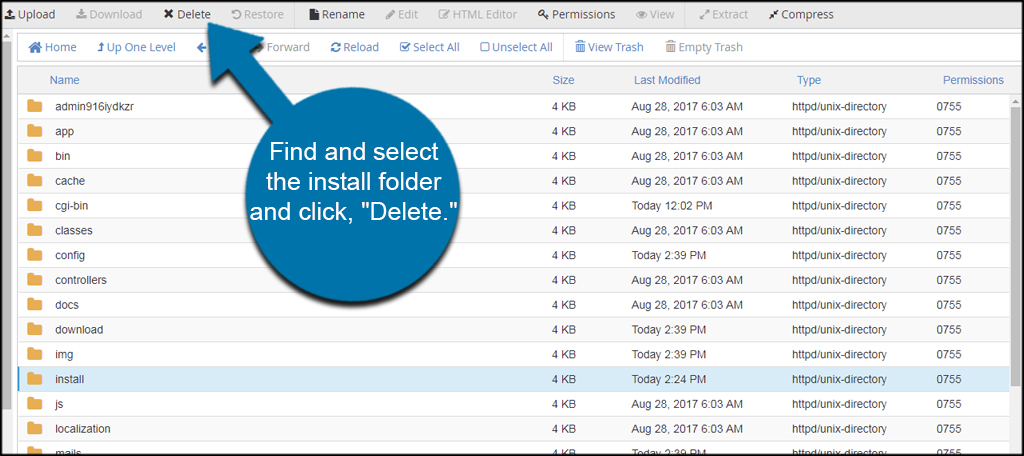
Find and select the install folder and click, “Delete.”
Go back to the PrestaShop error screen. Click the link for the admin URL.
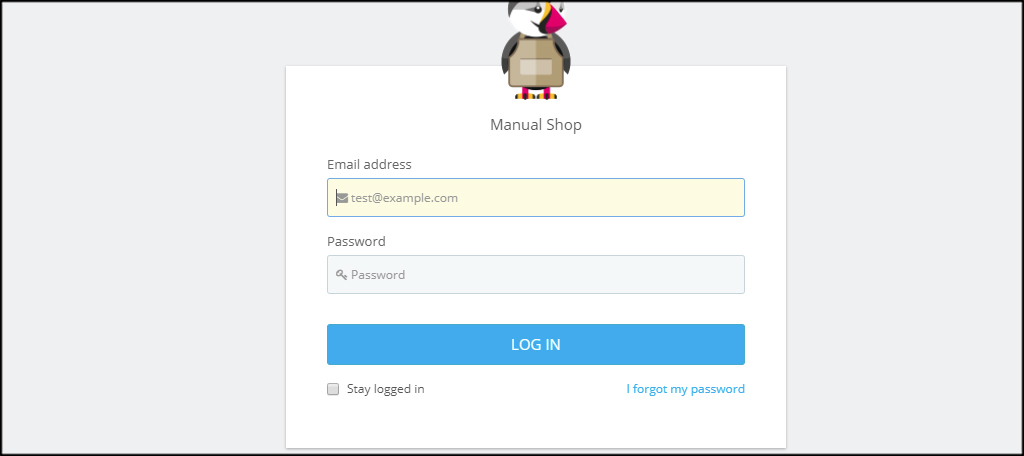
Now, you’re ready to log in and start selling.
Once you’re in the admin screen, you can start doing things like changing your theme or adding products to sell.
I would suggest bookmarking this screen so you can easily find it later on.
Start Selling Goods Today
The PrestaShop installation is only part of the eCommerce experience. After it’s complete, the fun part begins. Customize your store with everything from various shipping platforms to your favorite payment gateways. Before long, you’ll be raking in the money. As long as you have some good marketing behind you.
I install Prestashop on my pc and I created a store on my local host using xampp now I’m trying to move my Prestashop to IONOS server can you tell me step by step what to do and how to move my local site to public one I’m new to tech so please help me I have bought IONOS account and upload my database there but now I’m blank and can’t think
You are going to need some sort of third-party local host plugin that you can transfer files to and from.