Wikis are the best platform to use when you want to set up a site that allows collaborative editing and contribution by website users. The best piece of software for wikis is MediaWiki, and the easiest way to install MediaWiki is through Softaculous.
One of the advantages of using Softaculous is the ability to track updates. Softaculous can alert you when a new version is available and do the update for you. That’s a valuable perk when working with software like MediaWiki, which can be inconvenient to maintain otherwise.
We’ll go through the Softaculous MediaWiki installation, and then I’ll show you a couple of configuration options that you may want to use.
How to Install MediaWiki
If your hosting provides a direct login to Softaculous, log in there.
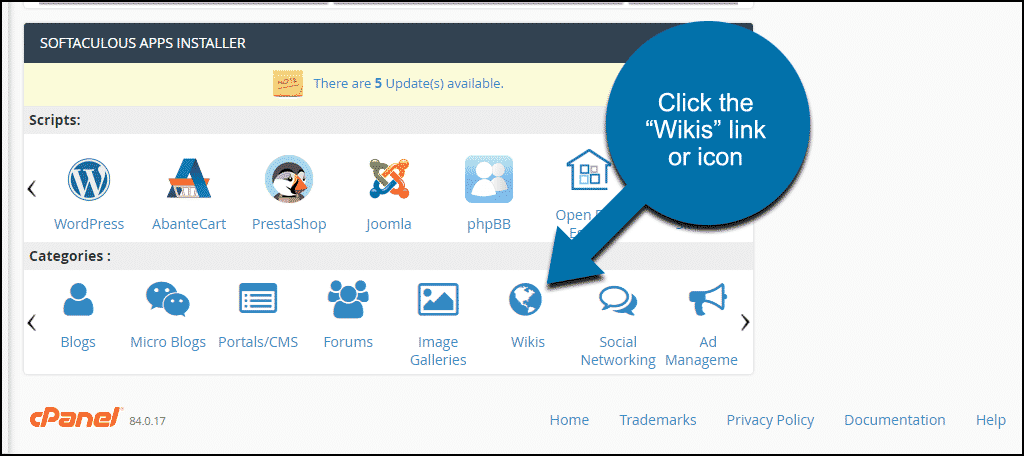
Otherwise, log into cPanel and go to the “Softaculous Apps Installer” section.
Click the “Wikis” link or icon.
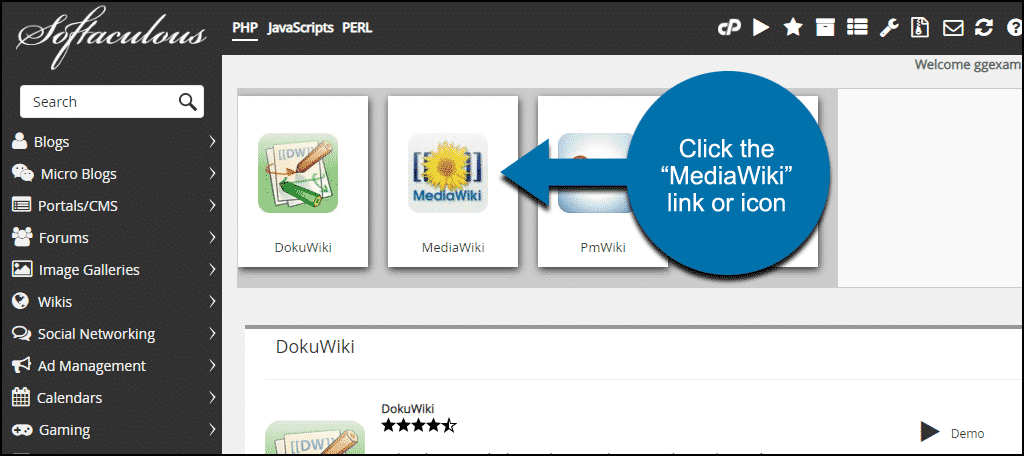
Click the “MediaWiki” link or icon.
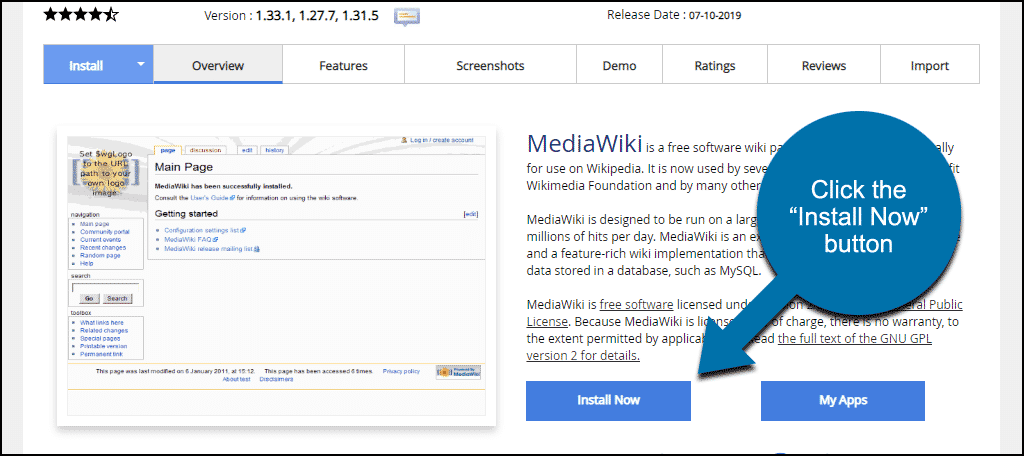
Then click the “Install Now” button.
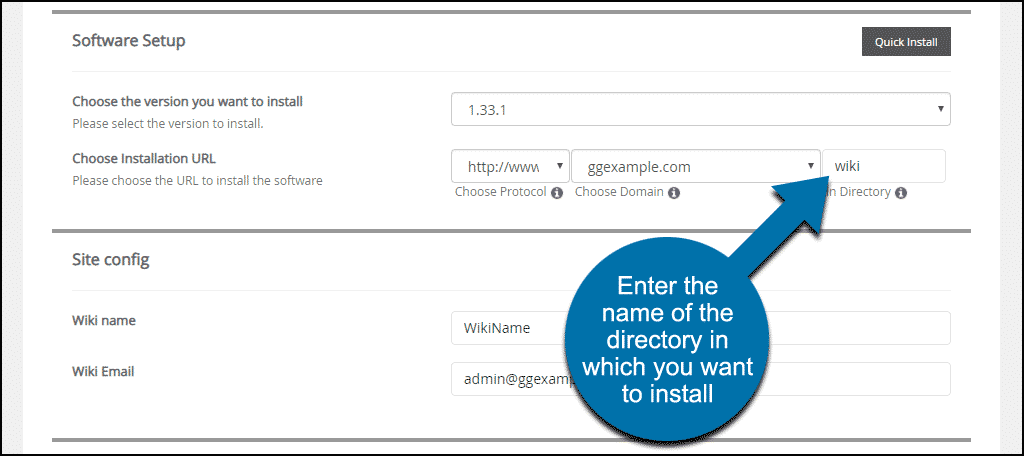
On the MediaWiki installation page, configure the options to suit your installation. Most of the options can be left as-is, but you should change the following.
Unless the wiki is going to be the home page of your site, on the “Choose Installation URL” line, enter the name of the directory in which you want to install MediaWiki.
In the “Admin Account” section, make sure to change the default password.
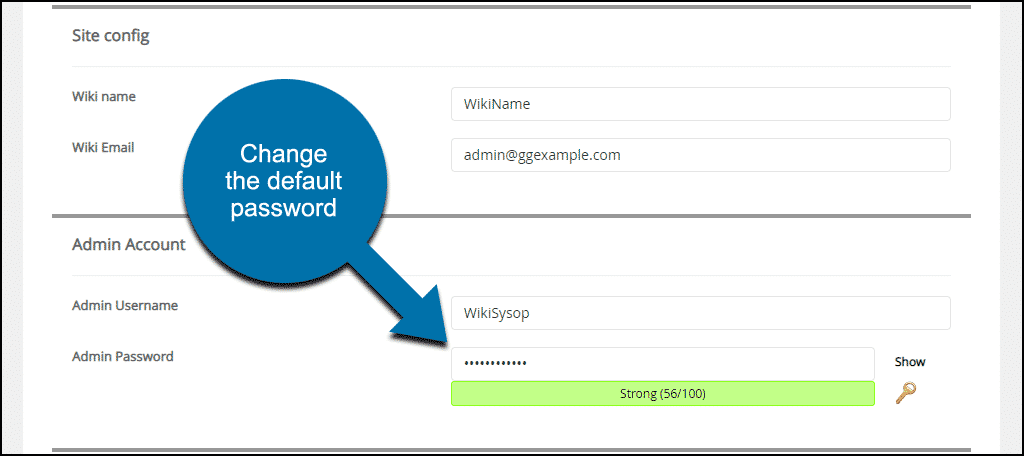
And make sure your Admin Username is unique.
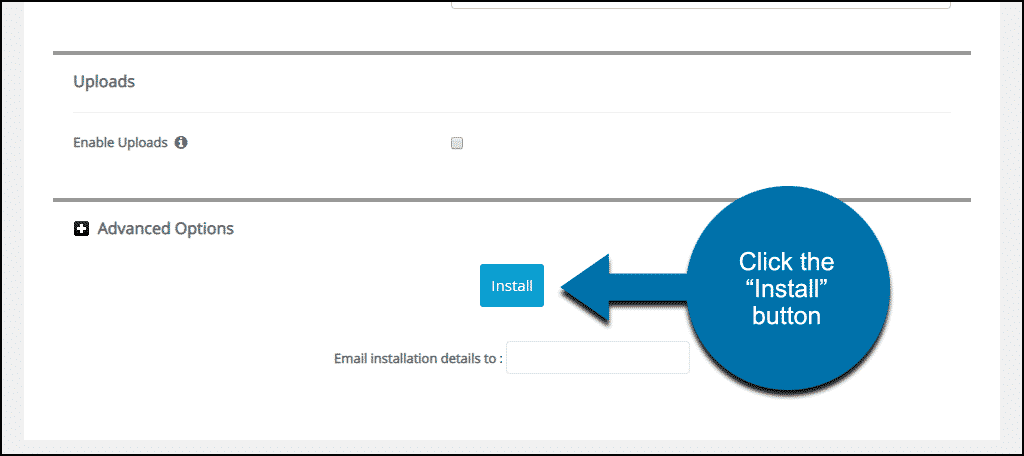
Scroll down and click the install button.
On the installation success page, click the “Administrative URL” link.
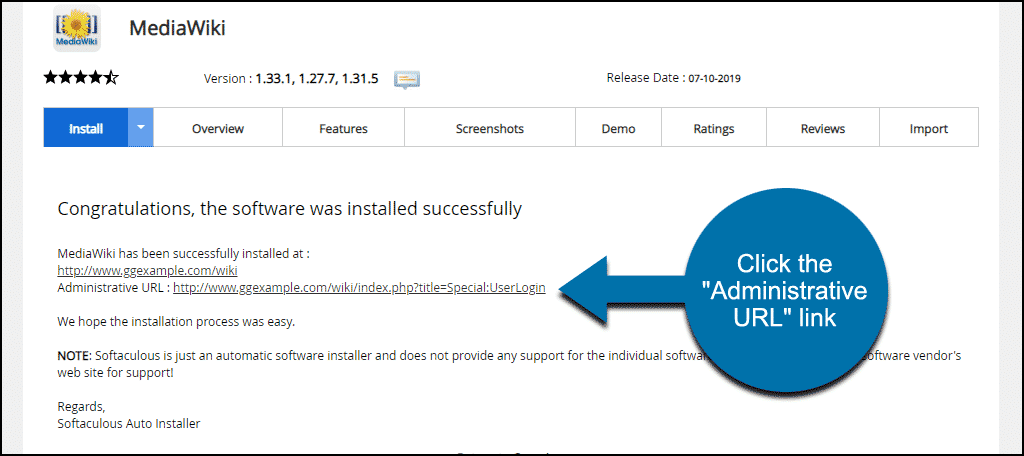
NOTE: It may take a few minutes for the URLs to propagate throughout the Internet. If clicking the link doesn’t open the MediaWiki page, wait a bit. For some web hosts and ISPs, this can take up to 48 hours. However, I’ve seen it work in less than 10 minutes.
MediaWiki Setup
Log in to MediaWiki with the username and password that you specified in the setup.
Some changes that you will make to MediaWiki are done by directly editing the program’s files. You can do that using the cPanel file editor, or an FTP program.
For this MediaWiki tutorial, I’ll be using FTP, but if you prefer a web-based file editor, check out our comprehensive guide to using the cPanel file editor.
Replacing the Default MediaWiki Logo
One of the first things you’ll want to change may be the default logo. We’ll do that by editing the LocalSettings.php file.
LocalSettings.php is located in the root directory of your MediaWiki installation. For this tutorial, I’ve installed MediaWiki in a directory called “wiki.” So the path to LocalSettings.php is: /public_html/wiki/LocalSettings.php
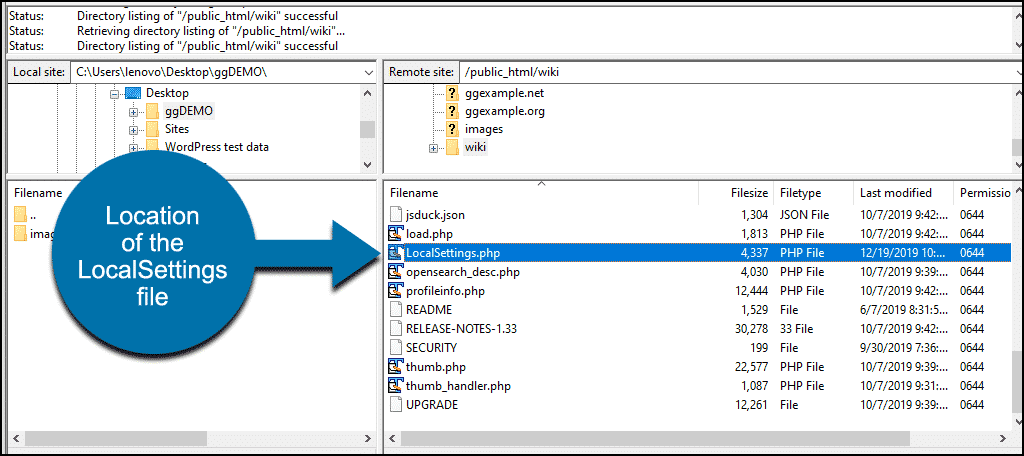
I’ll download LocalSettings.php to my computer and open it with a text editor. Again, you can edit the file directly using the cPanel file manager if you’re not familiar with or comfortable using an FTP program.
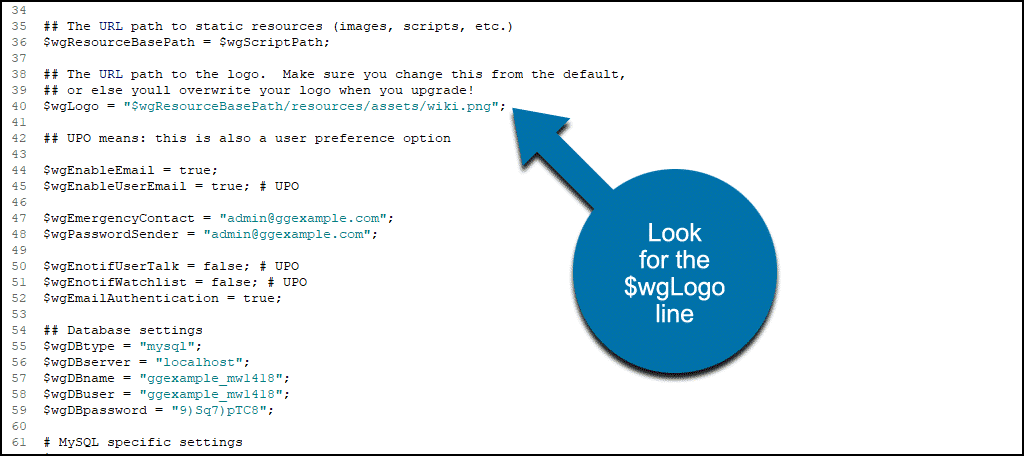
What we’re looking for in the LocalSettings.php file is the line that begins with $wgLogo.
When you find it, you’ll see that there’s a path to the logo image file in that line: $wgResourceBasePath/resources/assets/wiki.png
The easiest way to replace the logo is to upload your image file to that directory, /resources/assets/. But make sure your image does not have the same name as the default image, “wiki.png.”
The recommended image size for the logo is 135×135 or 150×150 pixels, so we’ll stick to one of those to avoid any forced resizing of the image.
FTP to /public_html/wiki/resources/assets.
Upload your logo. In my case, that’s wiki-logo.png.
![]()
Now we’ll go back to the text editor and change the image name in the LocalSettings.php $wgLogo line.
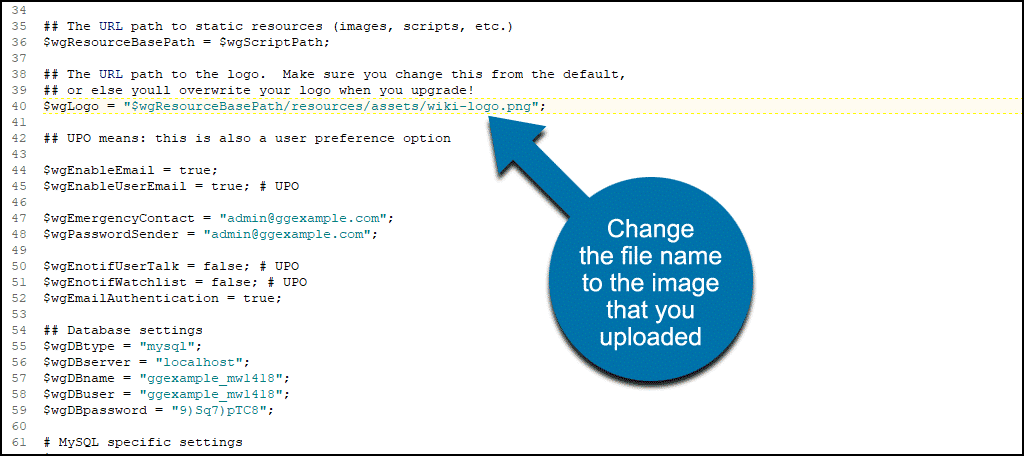
You can see that all I changed in that line was the image name. If you upload your new logo to a different location, you have to change the path here to point to that location.
After updating the image file name in LocalSettings.php, I save the file and upload it to /public_html/wiki, overwriting the existing LocalSettings.php file.

Now when I go back to the wiki, my logo should be there.
![]()
Additional LocalSettings.php Configuration
As you no doubt noticed, LocalSettings.php controls many aspects of the MediaWiki installation. There are a lot of other configuration settings you can add as well.
What’s Next?
As soon as your installation is complete, the wiki is up and running. If the URL is publicly accessible, visitors can edit or create pages. That’s by design, of course. That’s the purpose of a wiki; to allow anyone to contribute or improve the information.
While the initial MediaWiki install is simple and straightforward, as far as management and configuration are concerned, there is a lot of ground to cover — much more than we can address here.
In your new installation, the User’s Guide link is at the top of the Main Page, and it should be your first stop for learning more about using MediaWiki.
A Better Way to Edit Wiki Pages
A page you will probably visit often while learning the ins and outs of MediaWiki is the formatting page. Wikis use a combination of HTML and their own language for text markup. So for anyone new to contributing to a wiki, even the basics can be confusing.
Why isn’t there a visual editor?
There is!
MediaWiki’s functionality can be expanded using what they call extensions. One of the available extensions is a TinyMCE editor.
Installing MediaWiki extensions is a manual job, so let’s go through the installation for the visual editor. Once you’ve done this, you’ll be able to install most MediaWiki extensions.
Installing the MediaWiki TinyMCE Extension
Go to the TinyMCE extension page. In the “Download” section, find the link to download the .zip file.
When you unzip the download, you’ll extract a folder with a name like mediawiki-extensions-TinyMCE-0.3 (that version number at the end of the folder name may be different).
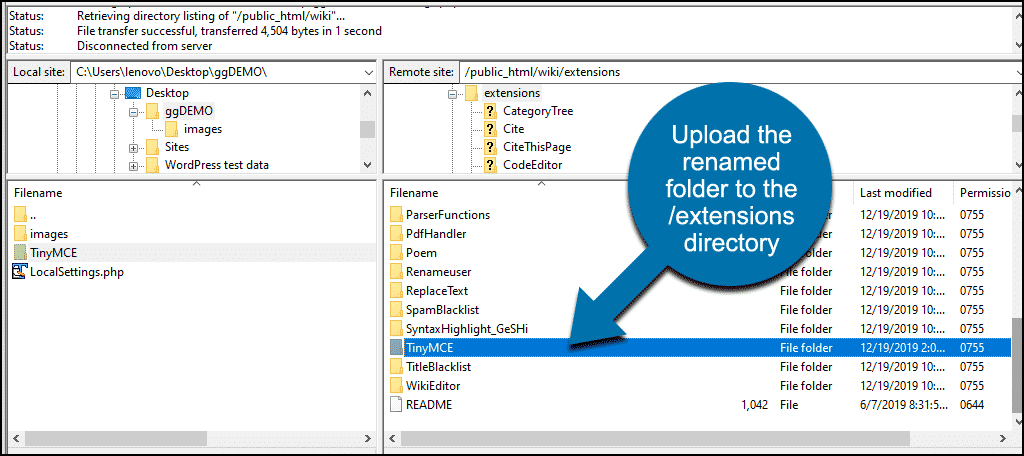
Rename that folder “TinyMCE.”
Then upload the entire TinyMCE folder to the /extensions directory.
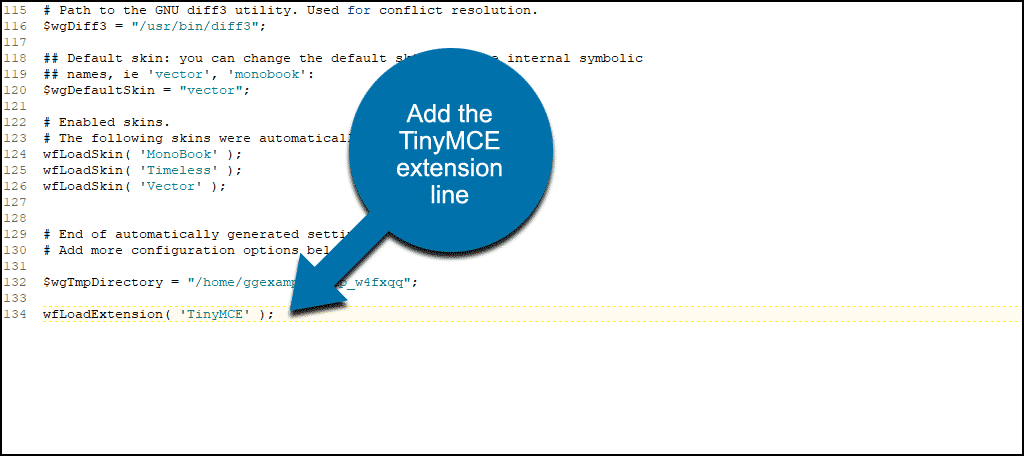
Now go back to the LocalSettings.php file and at the very bottom, add the line:
[ht_message mstyle=”info” title=”” show_icon=”” id=”” class=”” style=”” ]wfLoadExtension( ‘TinyMCE’ );[/ht_message]
Save LocalSettings.php and upload it to the server.
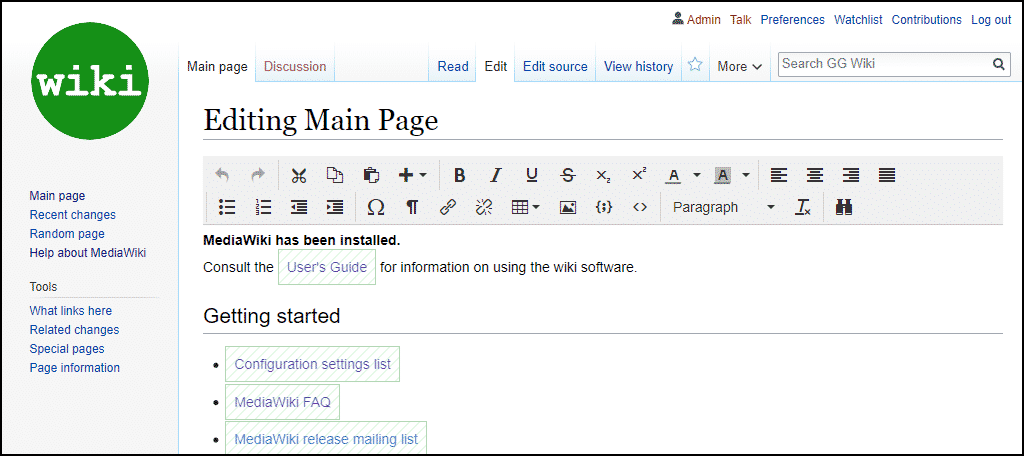
Now you have a visual editor.
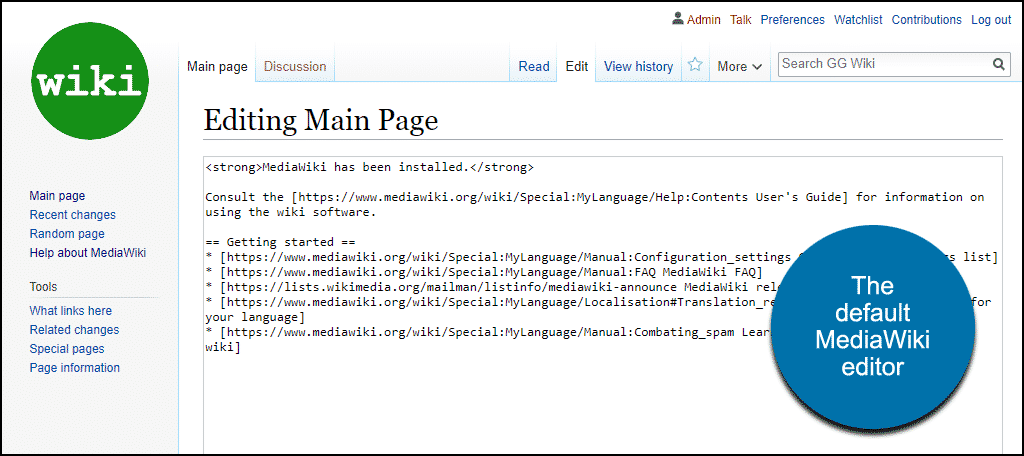
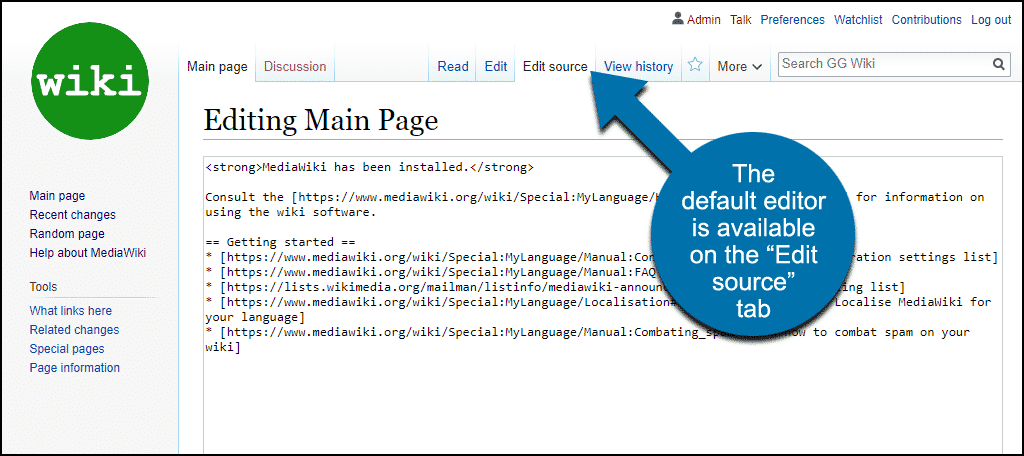
And as a bonus for those who prefer using wiki markup, the original editor isn’t gone. Clicking the “Edit source” tab takes you to the default MediaWiki editor.
Wikis Are Awesome
But they are also very nerd-like contraptions, requiring a lot of learning and memorization of arcane commands. So don’t be discouraged if very little of it makes sense to you right off the bat. Lean on the MediaWiki User’s Guide; it can answer most of your questions.
What do you use a wiki for on your site? Do you make use of any extensions? Let me know which ones in the comments.
For those that might have also gotten stuck for a sec adding TinyMCE to LocalSettings.php, the official page says to do this:
wfLoadExtension( ‘TinyMCE’ );
$wgTinyMCEEnabled = true;
Hello Reese,
That’s good to know. Thank you. 🙂