Installing a theme in Magento 2 is similar to installing a module. Both systems access Magento Connect to directly download and install your component onto the website. This makes the process quick and easy, cutting the time it takes to install these elements.
In this tutorial, I’m going to show you how to install themes for Magento from the Connect system. It’s one of the best ways to get an extension without worrying about third-party coding errors or other issues that may arise.
When making changes to your theme, you may want to put your site in maintenance mode. It’s not a requirement, but it’s beneficial as it prevents search engine bots from crawling content that may be invalid by the time you’re done.
Choosing a Theme
The first step is finding a theme you want for the website.
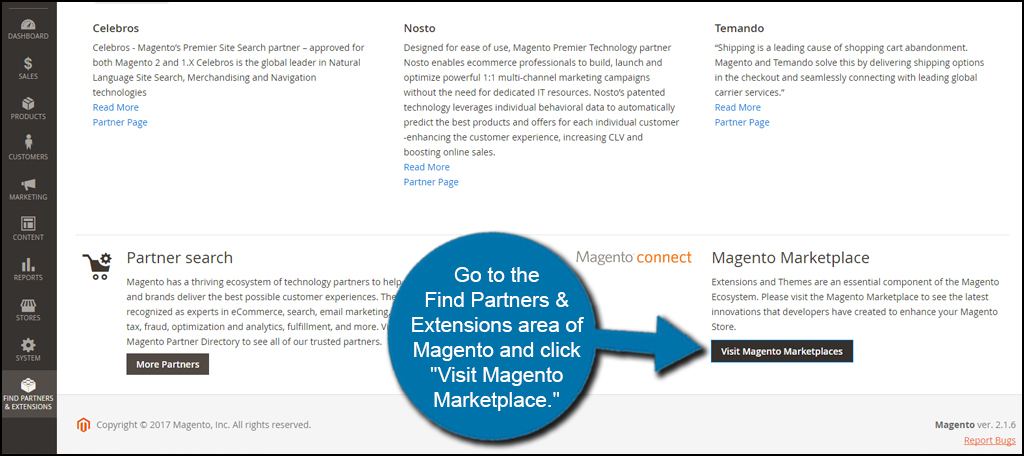
Go to the Find Partners & Extensions area of Magento and click “Visit Magento Marketplace.” This will open a new browser window to access Magento Connect.
Click the navigation link for “Magento 2.0.”

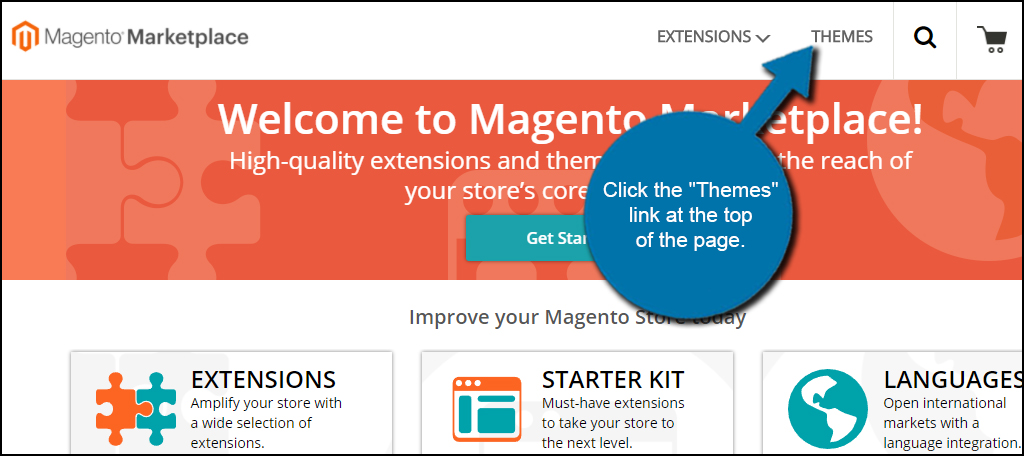
Click the “Themes” link at the top of the page.
Search for a theme you want to use on the website. For this tutorial, I’m keeping it simple and using a free theme that is available. You can use the different filters of the site to fine-tune your search criteria. For instance, you can look for nothing but five star rated themes if you wish.

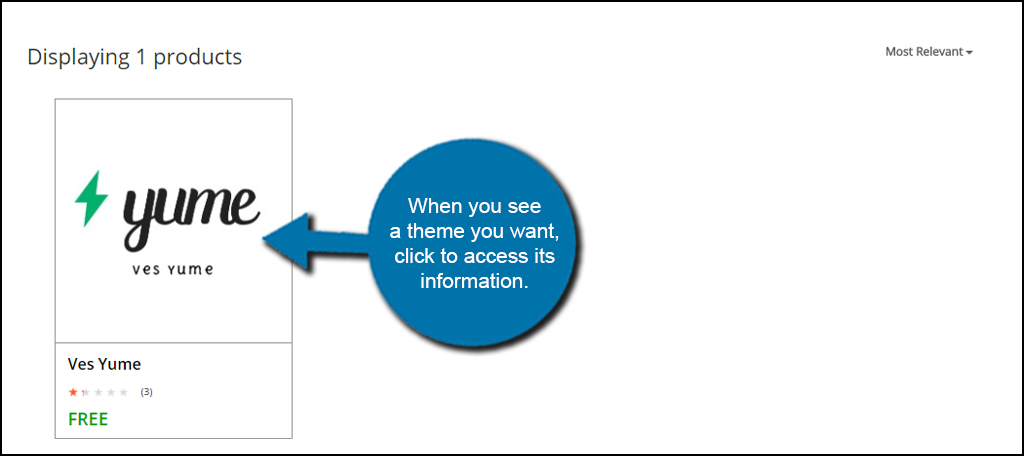
When you see a theme you want, click to access its information.
Click the “Add to Cart” button to save it to your Magento account.

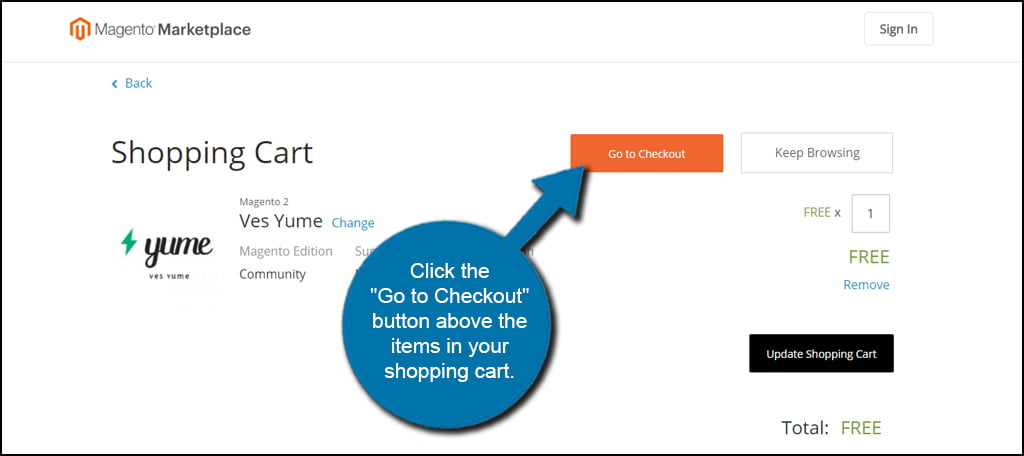
Click the “Go to Checkout” button above the items in your shopping cart. You will need to log into your Magento account in order to proceed. If you do not have one, it’s probably a good idea that you register. There are a lot of goodies on the site you might want to install on your store.
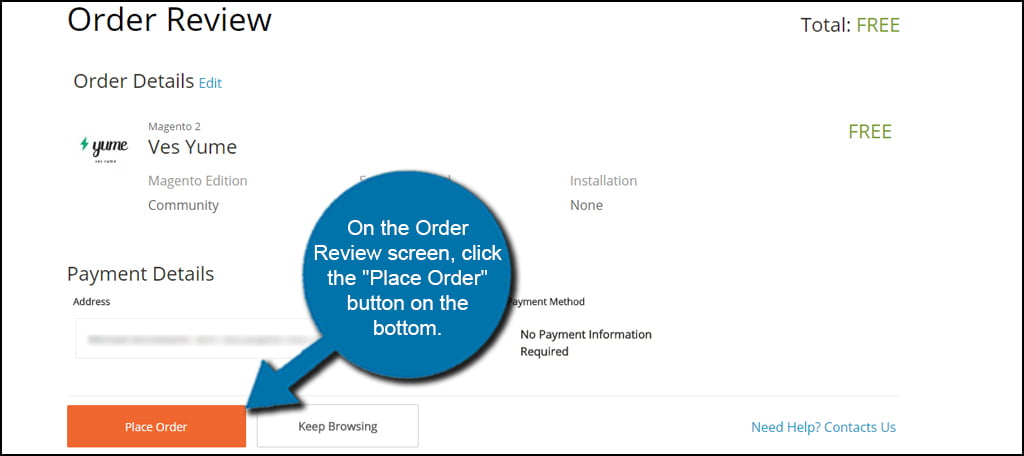
On the Order Review screen, click the “Place Order” button on the bottom.
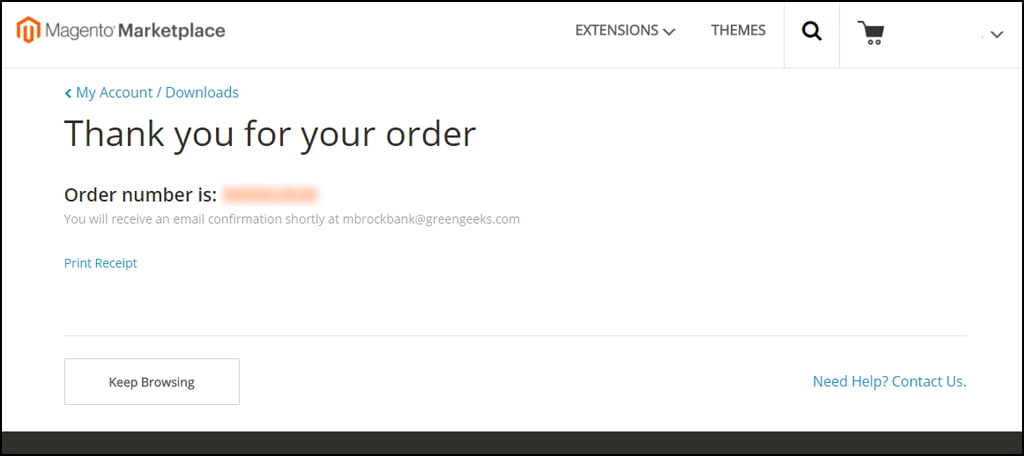
You will receive a “thank you” message from the Magento Marketplace complete with your order number.
Installing Your Theme
Once the theme is added to your account, you can install it immediately onto your store. As long as your access keys are valid, all it takes is a couple clicks of the mouse.
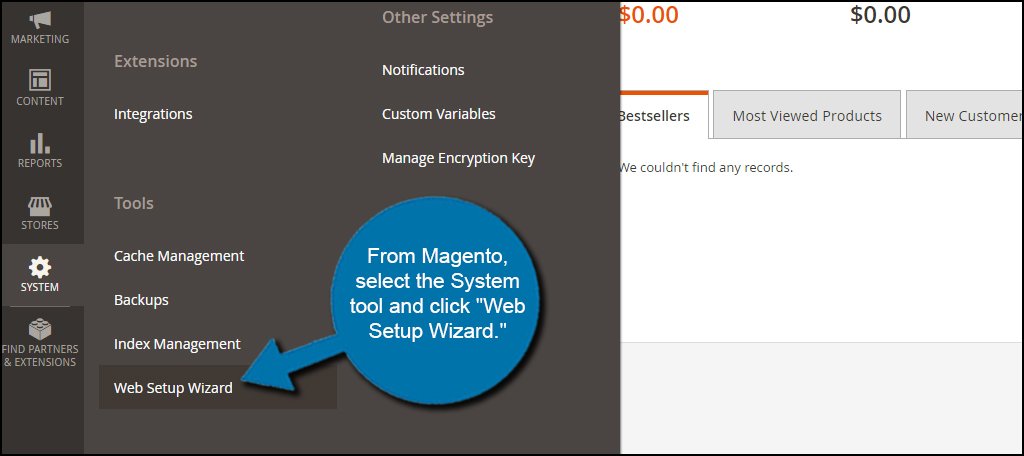
From Magento, select the System tool and click “Web Setup Wizard.”
Click on the left box for the “Component Manager.”

Magento will then synchronize your website with the Magento Connect account. You’ll see a number under “New Purchases.” This is the number of additions that are currently available for your website.
The reason why I have so many is because I never installed the sample data that comes with Magento. You really don’t need to install those files for the system to work, but it may be helpful if you’ve never used Magento in the past.
Click the “Install” link that sits just under the number of purchases you have.

Find the component for your theme and click the “Install” link on the right.

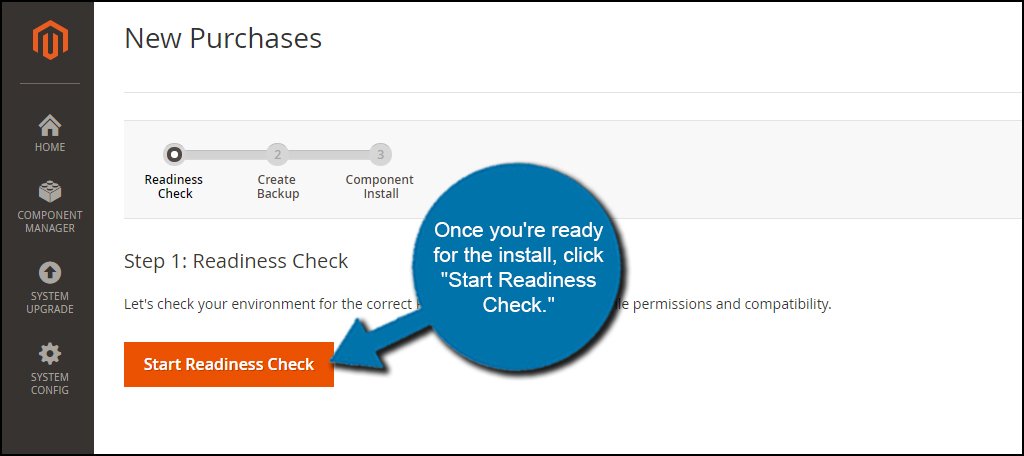
Once you’re ready for the install, click “Start Readiness Check.” Magento will then verify your web host and other components support the addition as well as create a backup. Afterwards, the system will finish installing the theme.
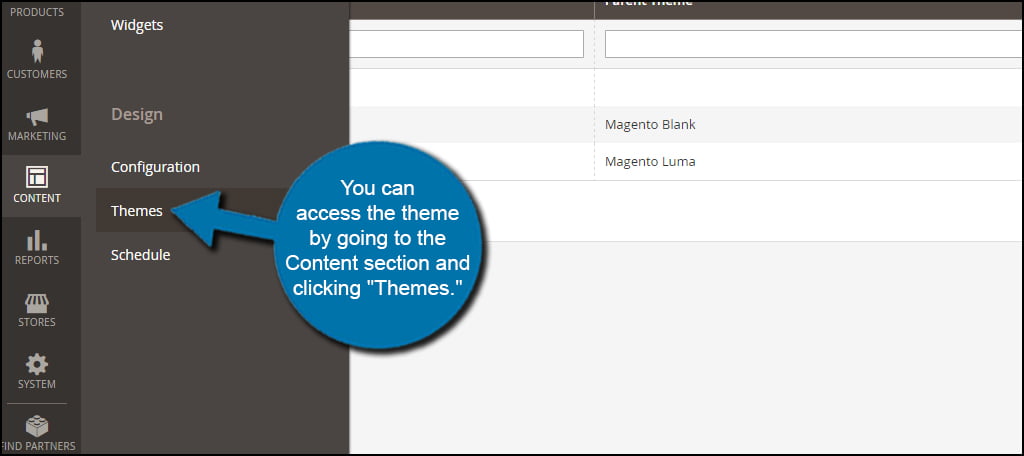
After the install is complete, you can access the theme by going to the Content section and clicking “Themes.”
First impressions are important for any website. As the theme is the first thing visitors will experience when looking at your Magento hosted website, it needs to be attractive. Find a layout that is right for what you’re trying to sell. It will directly affect the success of the online store.
Hello,
Thanks for sharing this useful guide. To install Magento 2 theme manually, I have filter a guide which can be helpful for others also: https://magenticians.com/magento-2-install-theme/