
The favicon is the image that is displayed next to the web address in a browser. It’s also stored when someone chooses to bookmark the website. For many, these icons are used as part of their branding. It’s a miniature logo that can stand out just as pronounced as any advertisement.
It’s not difficult to install a WordPress favicon to give your site that sense of individuality. The hardest part is choosing what kind of a graphic you want the site to be remembered for.
Although these small images may not be as vastly important as other design ideas that can make or break the site, you may be amazed by how often these little icons affect visitor acquisition and retention.
Today, we’re going to show you how to add a WordPress favicon to your website. So, get your creative juices flowing and let’s get started choosing the right image for you.
Why Favicons Are Important
When it comes to branding, the logo of a business plays an important role for recognition. In the digital world, favicons have nearly the exact same function. For those who spend a lot of time at their computers, these tiny graphics are just as recognizable as a billboard for a company.
A favicon can also denote a sense of professionalism. From a visual standpoint, a site without a graphic can be unattractive and may turn visitors away. As silly as it may seem to some, think about how you feel if you visit a website without one of these tiny images.
Creating the Image
There are several ways you can create the perfect image for your icon. Many businesses will actually create smaller versions of their logos for the purpose of creating these tiny graphics. This helps keep consistency in the brand.
A few other ideas could include:
- Initials of names
- Basic representations of logos
- Single letters
- Simple symbols or shapes
One thing you need to keep in mind is that images that are shrunk to 16 pixels wide will not show a high degree of detail. It’s better to try and keep these graphics as simple as possible. Adjustments like drop shadows, embossing and outer glows are extremely difficult to see as a favicon.
Using Pixlr
Pixlr is a free image editor that functions much like Adobe Photoshop. You don’t need an account, and you can get started right away. To do this:
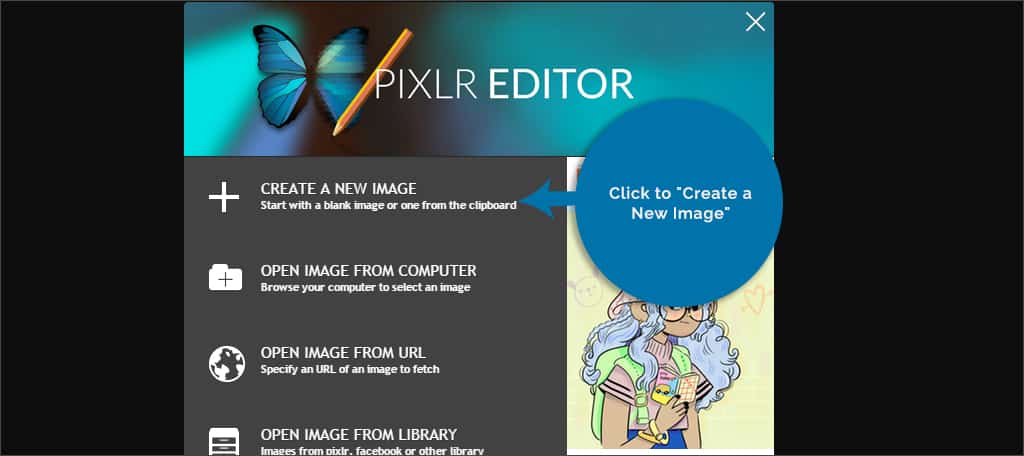
Step 1: Go to the Pixlr editor website.

Step 2: Click to “Create a New Image.”
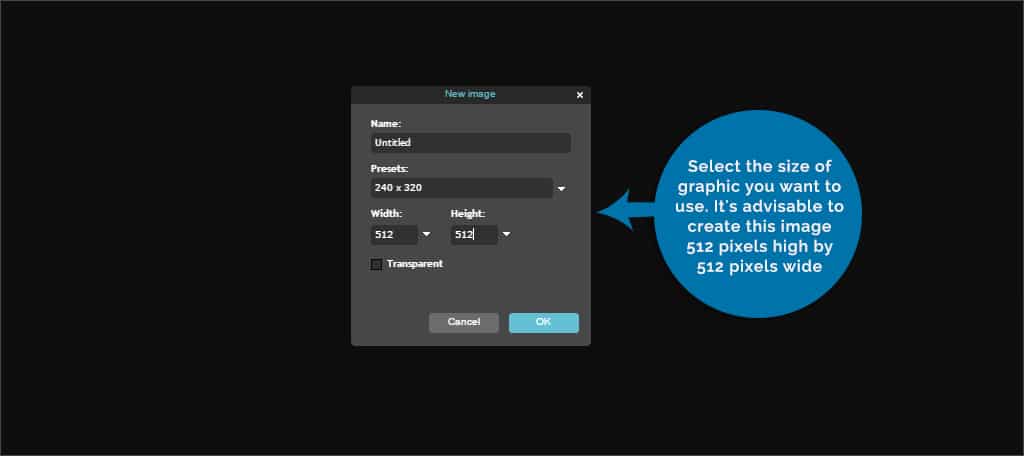
Step 3: Select the size of graphic you want to use. It’s advisable to create this image 512 pixels high by 512 pixels wide. This creates a perfect square that WordPress can modify easily to shrink. Enter 512 in both the width and height areas and click, “OK.”
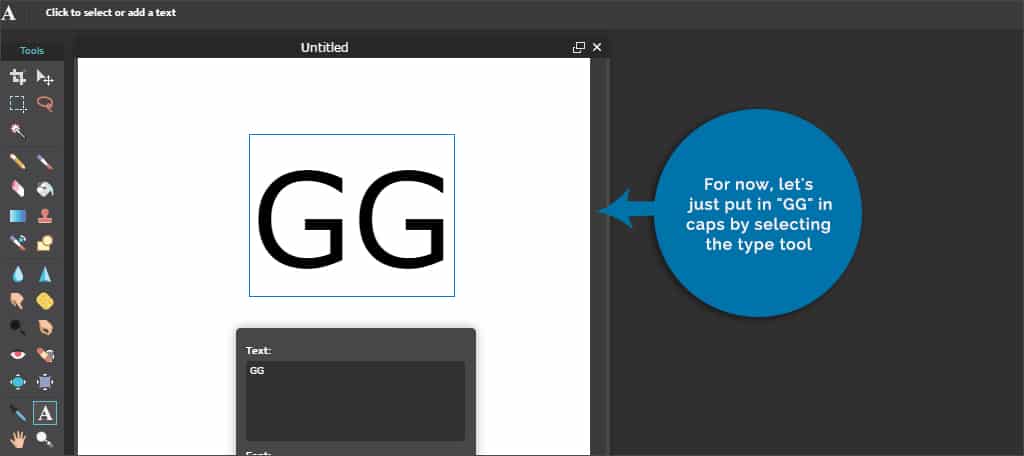
Step 4: This will give you a blank canvas to build anything you want as your favicon. For now, let’s just put in “GG” in caps by selecting the type tool.
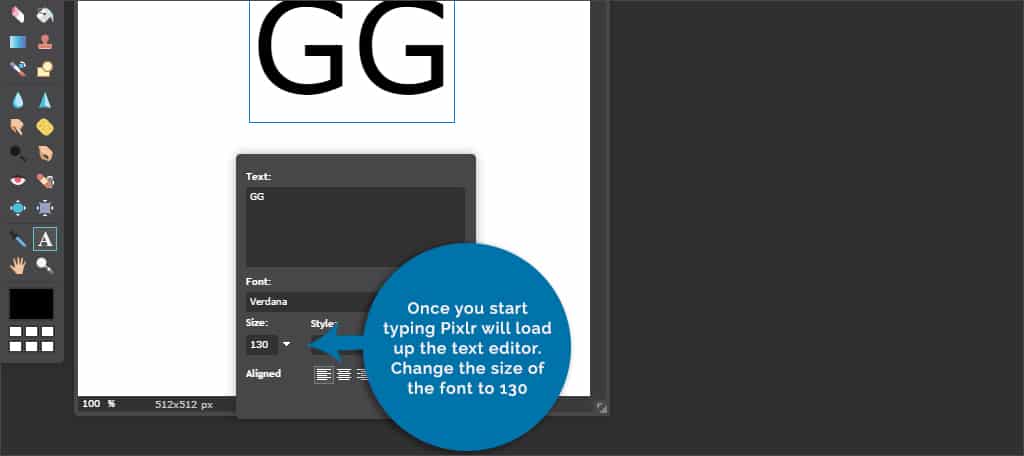
Step 5: Once you start typing Pixlr will load up the text editor. Change the size of the font to 130. This is the highest the app will go, but we’re just using the text as an example anyway.
Step 6: Move the GG to the center of the canvas and click the “OK” button on the text editor.
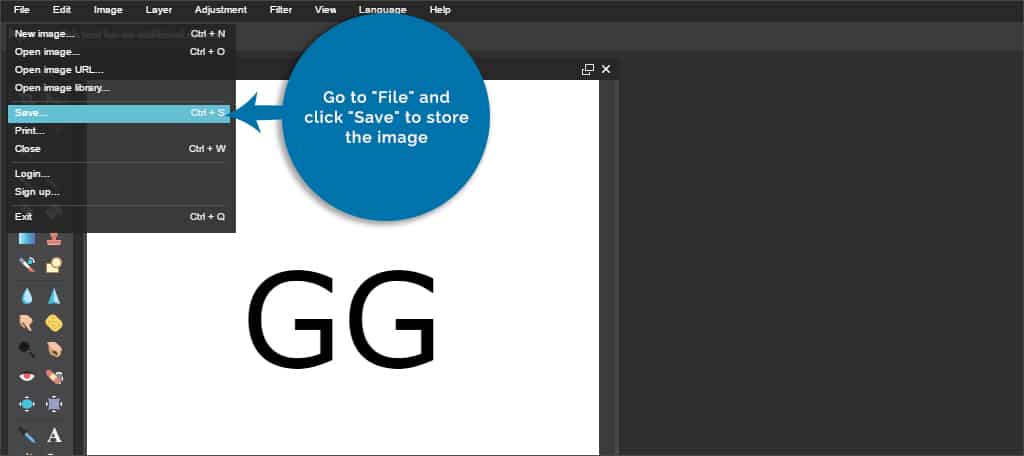
Step 7: Go to “File” and click “Save” to store the image.
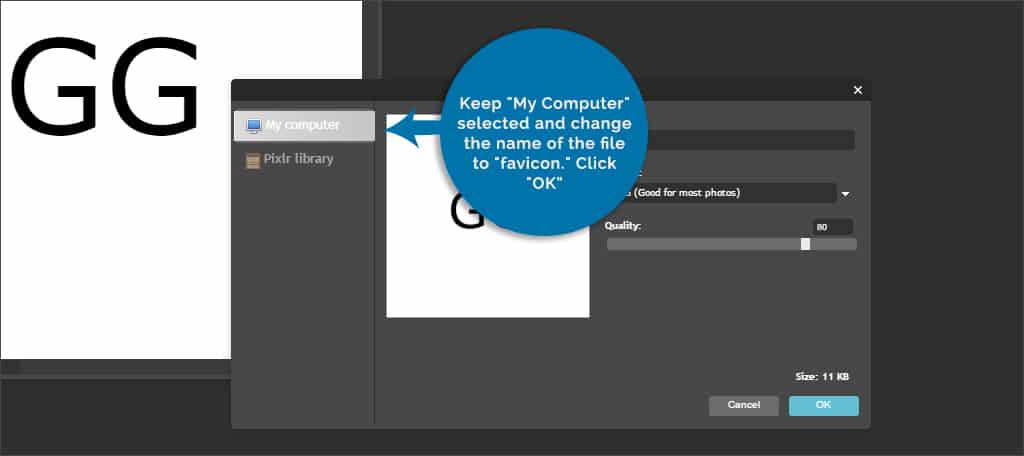
Step 8: Keep “My Computer” selected and change the name of the file to “favicon.” Click “OK.”
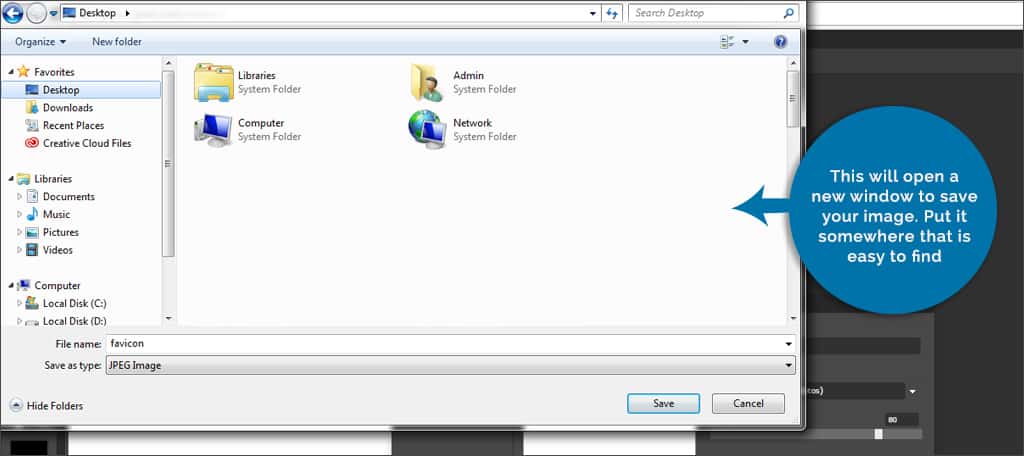
Step 9: This will open a new window to save your image. Put it somewhere that is easy to find.
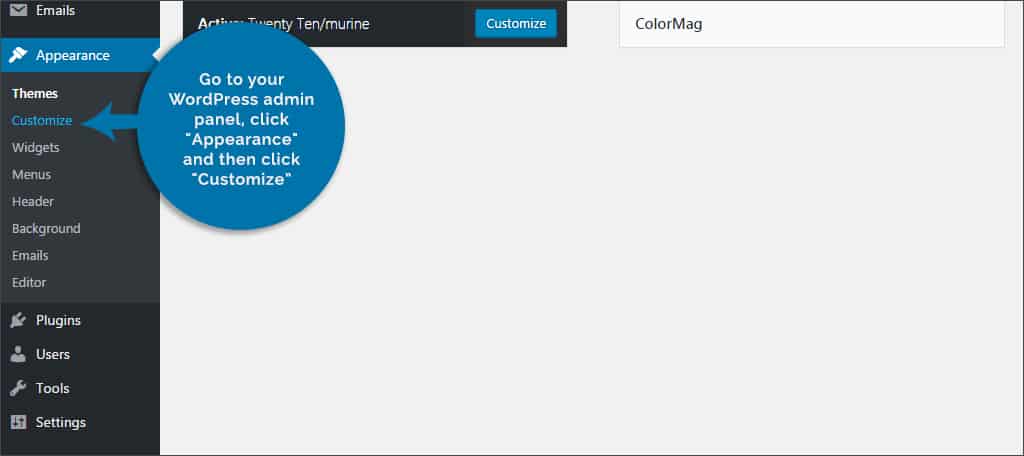
Step 10: Go to your WordPress admin panel, click “Appearance” and then click “Customize.” This will load your theme’s settings of WordPress.
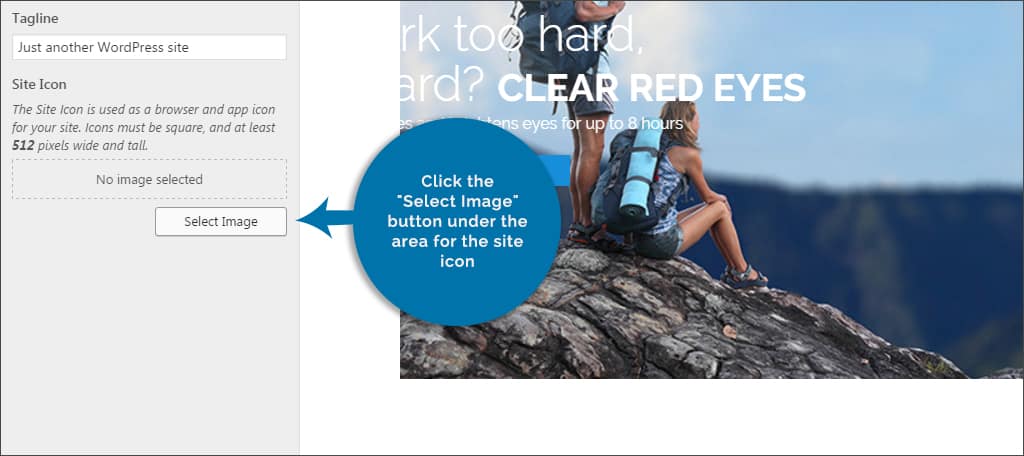
Step 11: Most themes will have a control built-in for “Site Identity.” It should be the first option in the customizer. Click on it.

Step 12: This will open a window where you can change your site title, tagline and add the favicon image. Click the “Select Image” button under the area for the site icon.
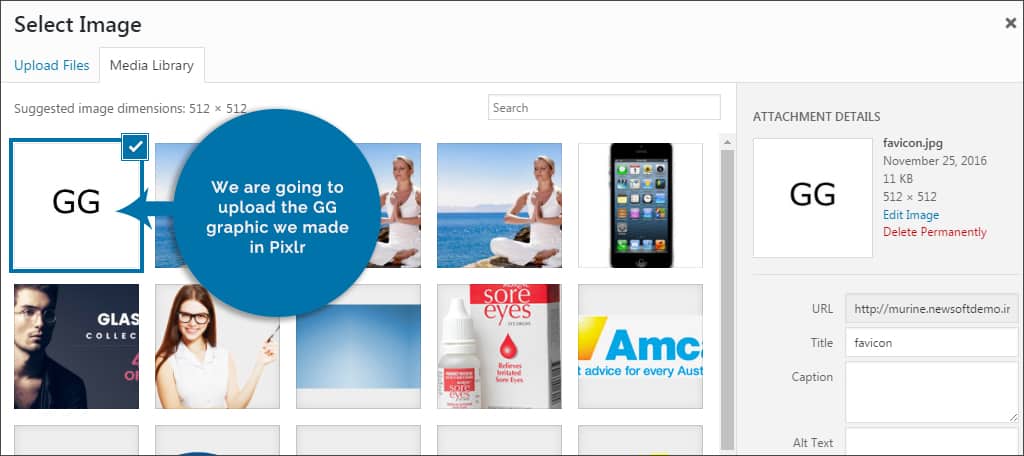
Step 13: This will open the media library of WordPress. You can either choose an image in the library or upload one. We are going to upload the GG graphic we made in Pixlr.
Step 14: Once the image is uploaded, select it to become the website icon.
Step 15: On the top left of the screen, there is a button for “Save & Publish.” No changes you make in the customizer will stay unless you click this button.
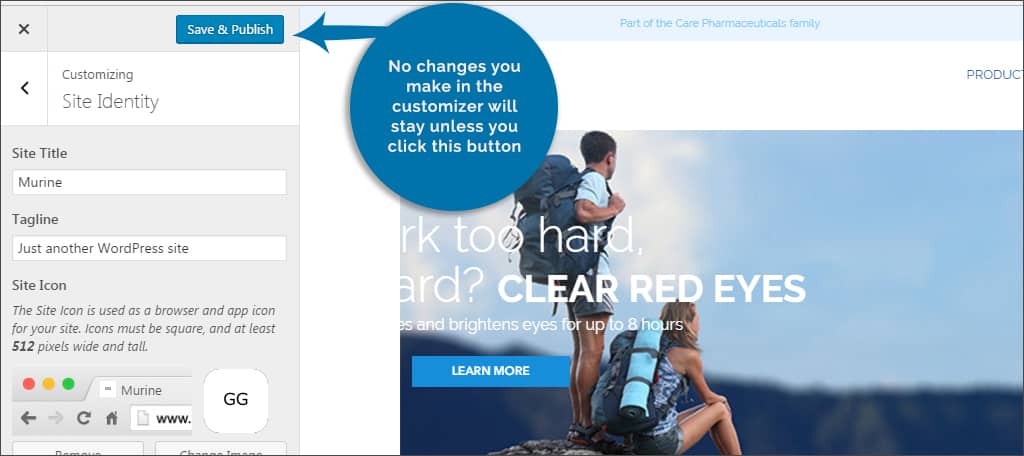
Step 16: Once you have saved, click the little “x” to the far left of the button to close customizer and return to WordPress.
In reality, any image can be used as a favicon. Even an image that is larger than 512 pixels. This is because WordPress has a built-in cropping tool.
Using Other Image Editors
You don’t need to use Pixlr if you have other editing software. The thing to keep in mind is the graphic is ideal at 512 pixels square. This helps WordPress adjust the size for various purposes.
Bookmarking a website is only one aspect of the favicon. The graphic needs to be able to scale in the event someone creates a desktop shortcut to the site. This is one of the reasons why you should stick with the 512-pixel shape in WordPress.
Using the larger image will also help it keep greater detail when it’s reduced in size. Of course, you don’t want something that has a lot of small features because they will be lost once the image is shrunk to 16 pixels for the icon.
Plugins of Interest for Making a WordPress Favicon
If your theme does not have a place for the favicon image or you would rather use some of the features of plugins, here are some that may be perfect for you. Some of these come with automatic installation and easy to use graphic editing abilities.
Favicon by RealFaviconGenerator
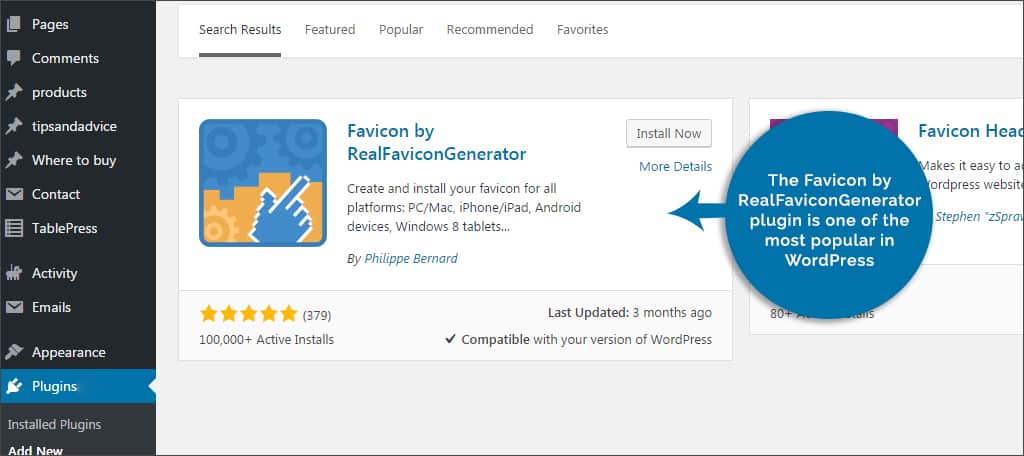
The Favicon by RealFaviconGenerator plugin is one of the most popular in WordPress. It allows users to create the favicon to be used in a myriad of situations other than the tiny icon in the browser. The plugin supports setting up the image for various operating systems while providing a checking system to make sure it’s set up correctly.
Favicon Rotator

If you want to add a bit of flare to your site, Favicon Rotator may be of some use. This plugin allows you to set more than one graphic as your site’s icon. If you use more than one image, the system will randomly select it every time someone visits the site. You can also set certain favicons to display according to mobile device operating system.
Multicons [ Multiple Favicons ]
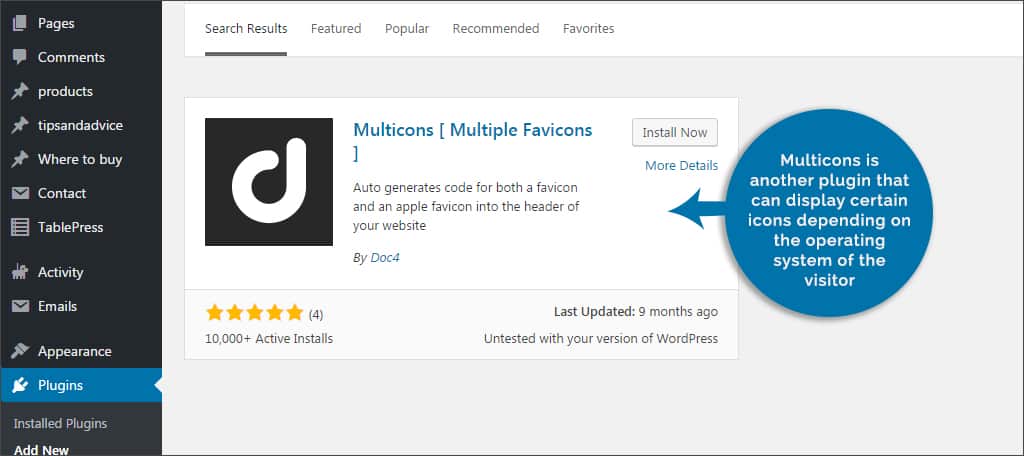
Multicons is another plugin that can display certain icons depending on the operating system of the visitor. You can set a default icon for the website and then display a separate image for those using Apple-based devices, for example. If your business has separate services, such as a computer repair shop, this could be a fun addition for your visitors.
It’s often the small things that make the greatest impact when developing a website. Before you think that an icon depicting your business is unnecessary, consider what your company would be without the logo. Your website is an extension of the organization, and it needs to have the same level of professional appeal as any brick-and-mortar location.
What kinds of things do you have installed on your site that make it different from others? How often do you implement features with the sole purpose of engaging visitors?