Before we jump into this All in One Favicon plugin tutorial, let’s go back in time for a moment.
Way back in the last century, almost every web browser offered a favorites or bookmarks list. As the web grew in size, the favorites list went from being a cool feature to being a necessary addition. But if your list of favorites was long, it was sometimes difficult to find the website you were looking for.
So a savvy developer at Microsoft created the favicon. It is a 16 x 16-pixel image that appeared next to the website title, making a site easier to identify. As long as your site had the image .ico file in its root directory, it was displayed in the favorites list.
Soon, all the other browsers adopted the favicon, and, in Internet Explorer, it started appearing next to the address bar. Now, of course, the graphic appears in the browser tab. And if you think about it, tabs wouldn’t be nearly as convenient without the humble favicon.
Creating a Favicon Image Isn’t Always Easy
The file format .ico is a Windows format, so it hasn’t always been easy to create your own favicon image. Most graphics programs couldn’t create the file. Even Photoshop used to require a plugin to save an .ico file.
Now, of course, there are websites that will convert your 16 x 16-pixel image file to .ico from almost any format.
But why use some random website to create an .ico file if you don’t have to?
I’m going to show you how to create a favicon for your WordPress site using a plugin, All In One Favicon.
All In One Favicon WordPress plugin even lets you add different graphics to your public-facing site and admin pages. You can download a favicon, or upload an image to create one. The plugin will make the image from an .ico, .png, .gif, or Apple Touch Icon file.
This is a simple single-function plugin, but let’s go through the steps to set your favicon.
Installing the All In One Favicon Plugin
Log in to your WordPress admin panel.
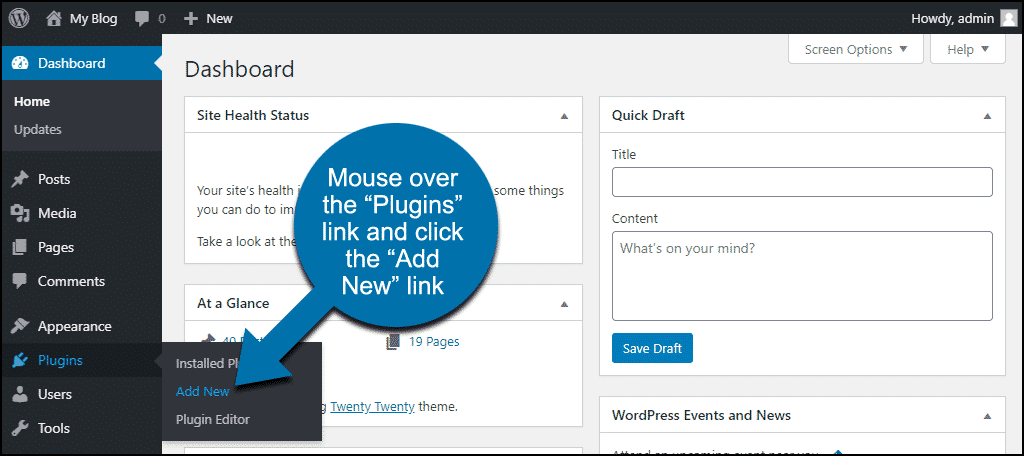
In the left column navigation, mouse over the “Plugins” link and click the “Add New” link.
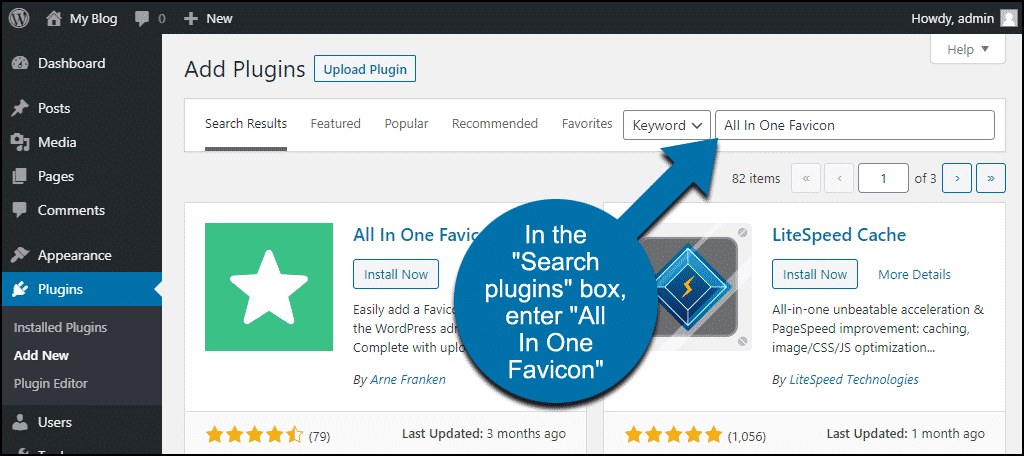
In the “Search plugins…” box, enter, “All In One Favicon.”
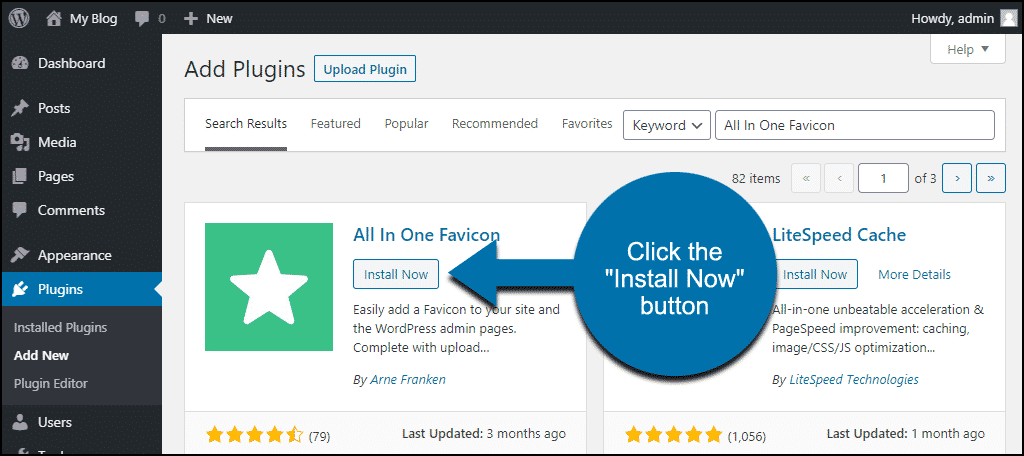
Once you have located the plugin, click the “Install Now” button.
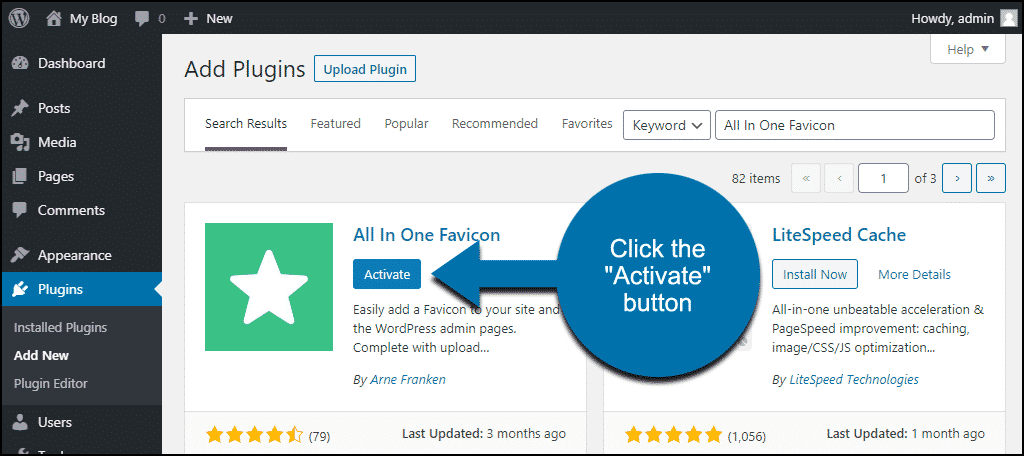
Finally, click the “Activate” button.
Creating a Favicon
By default, WordPress uses a perfectly acceptable favicon.
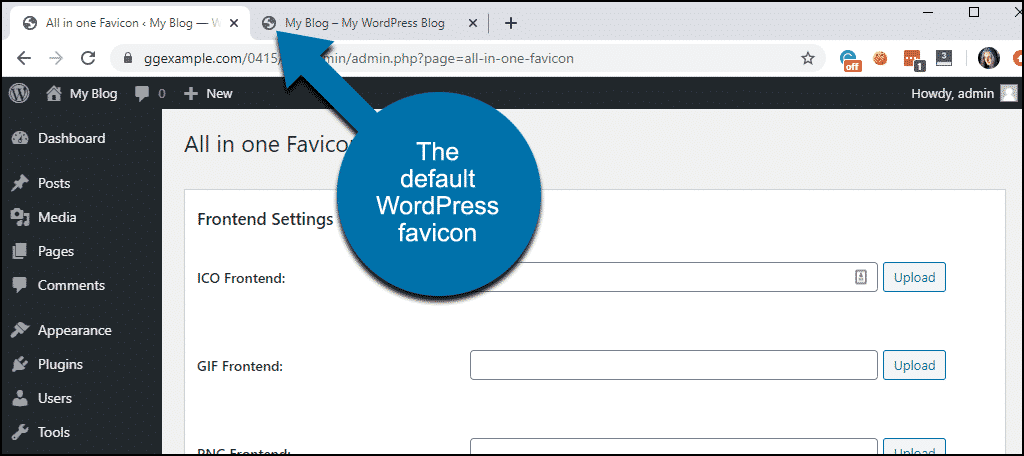
But the idea here is to get rid of it. Because it doesn’t make it easy to find your site in someone’s favorites list if it has the same graphic as twenty other sites.
So let’s go through the steps to create a new one and distinguish your website from all the others out there.
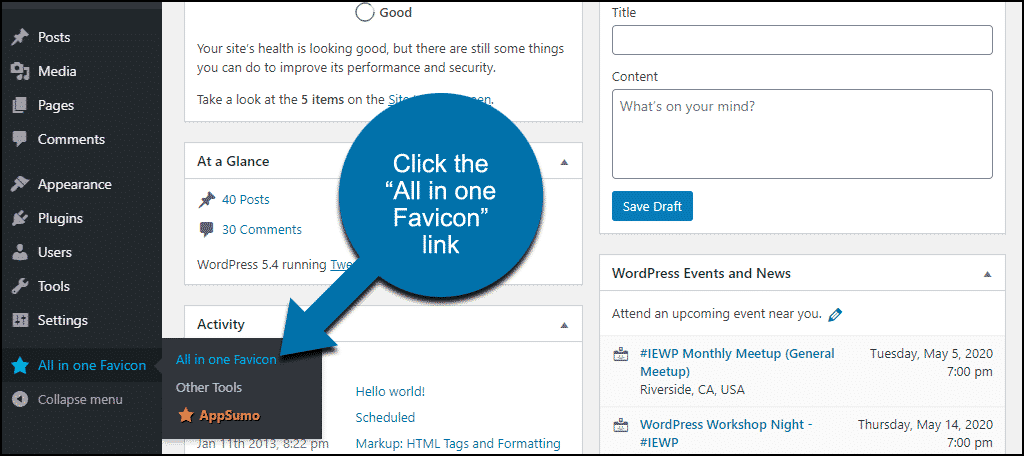
In the left column navigation, mouse over the “All in one Favicon” link and click the “All in one Favicon” link.
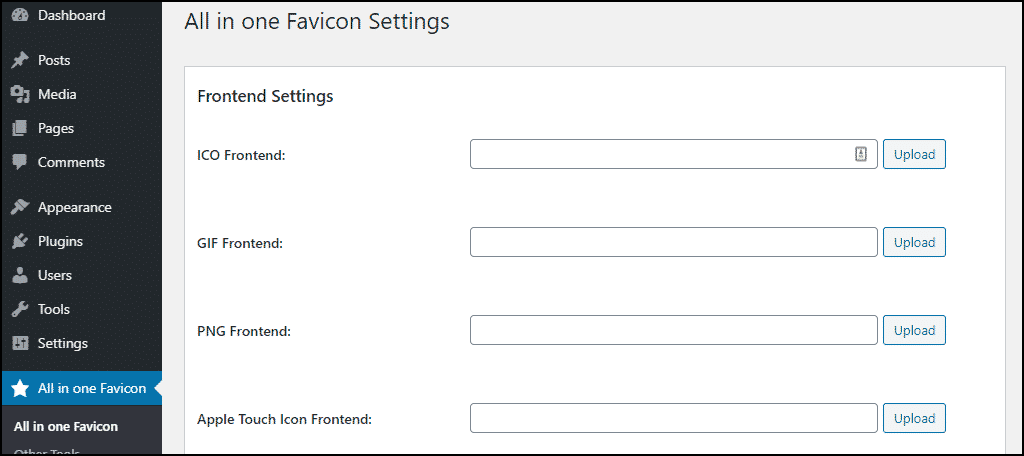
The plugin page has “Frontend Settings” and “Backend Settings” sections. Those are the separate controls for the public-facing favicon (Frontend Settings), and the admin area graphic (Backend Settings).
We’re just going to create a frontend favicon for the public areas of the site. But everything we do here also applies to the backend settings.
It’s worth noting though, that if you don’t specify a favicon for your admin area, none will be displayed. The image you specify for the frontend will not show up on your admin pages.
As you can see, there are four options for your file: .ico, .png, .gif, or Apple Touch Icon.
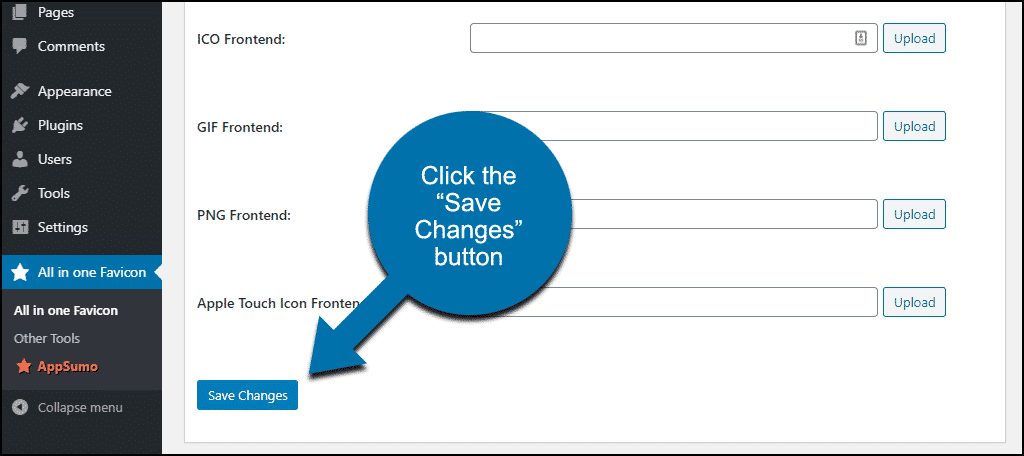
Since I happen to have a PNG file handy here, I’ll click the “Upload” button in the “PNG Frontend” line. That opens a standard file selection dialog.
After you select the file from your computer, it looks like nothing happened. The plugin doesn’t give you any indication that your file was successfully uploaded.
But if you click the “Save Changes” button:
You’ll see a path to your uploaded file appear in the field:
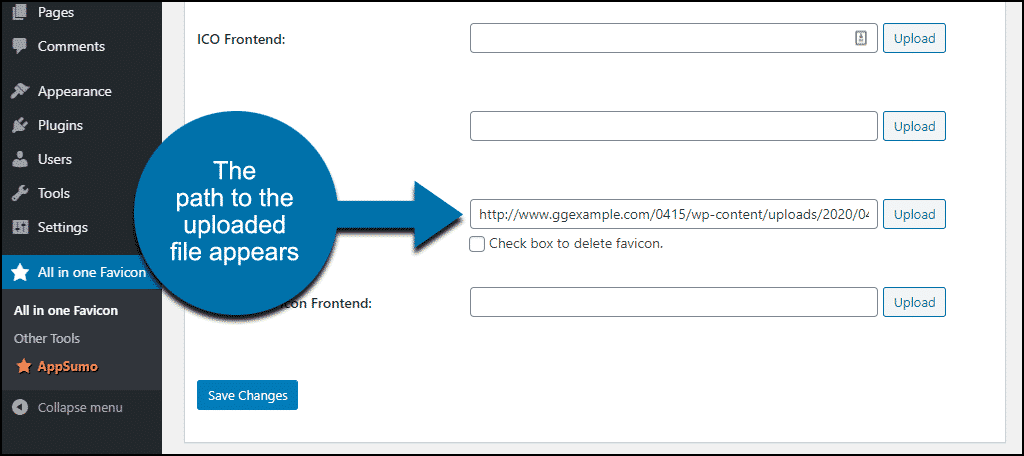
And believe it or not, that’s all there is to it.
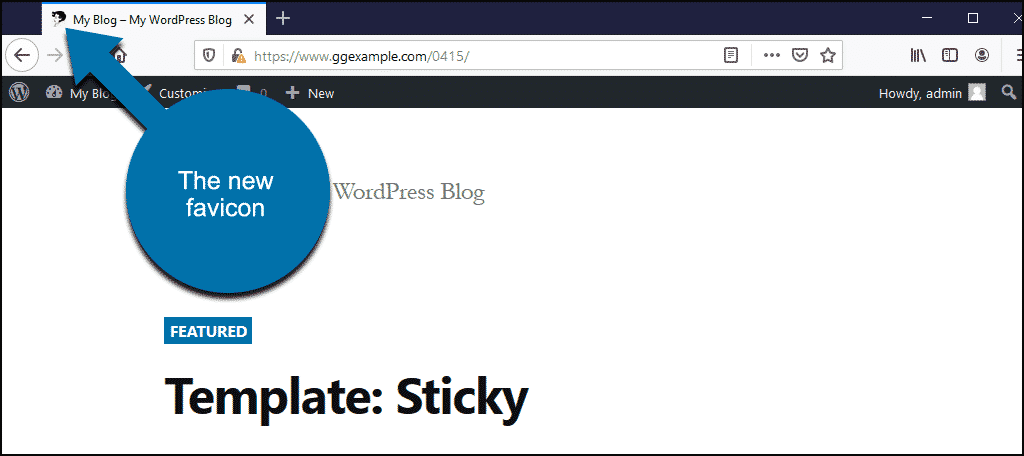
The newly uploaded image will now show up as your favicon.
Favicons and Browser Cache
Unfortunately, we can’t update favicons by refreshing a page—every browser stores favicons in a different way. And clearing your browser cache just to see a new image is usually overkill.
For that reason, I suggest opening up a different browser and visiting your site to see the new favicon. Eventually, it will show up in your main browser. But it may not happen until you close and reopen the software.
Some Strange Interesting Behavior
As you can see from our test site, it’s possible to upload multiple favicon files:
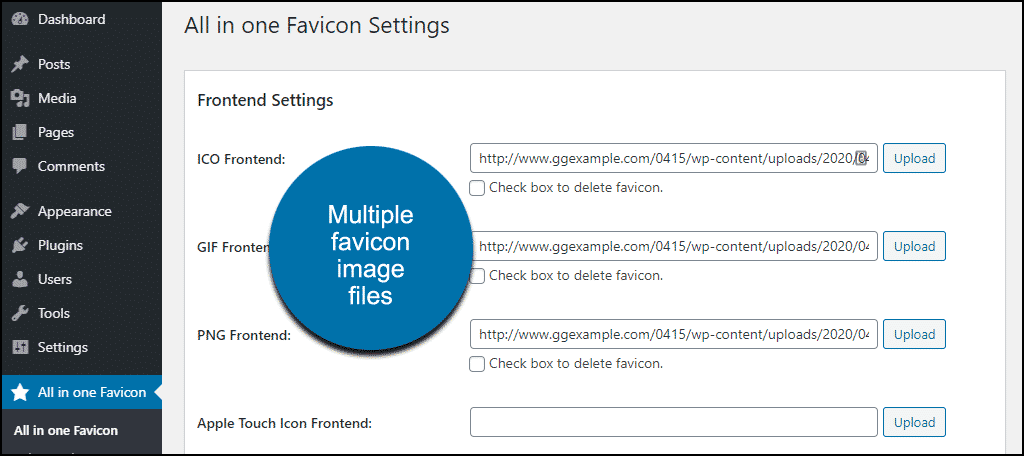
I couldn’t find any information on hierarchy, but I’ll pass along what I found through trial and error.
The format list, as it’s shown, with .ico first, then .gif, .png, and Apple, is the pecking order. So if you upload a .png file, then a .gif, the .gif will be the favicon. If you upload an .ico file, it will take over the primary position. The .gif and .png you uploaded previously are still there; they just aren’t used. The plugin defaults to whichever file is highest in that order.
I’m not sure what advantage there is (if any) in having multiple file types uploaded, but there you go.
What Happens if You Uninstall the All In One Favicon Plugin
If you uninstall the plugin, your favicon will stop working.
That’s because the plugin doesn’t create a 16 x 16-pixel file and put it in your root directory. It uses the alternate method of adding:
[ht_message mstyle=”info” title=”” show_icon=”” id=”” class=”” style=”” ]URL to image]” type=”image/[filetype]”/>[/ht_message]
inside your site’s
tag. When you uninstall the plugin, that line is no longer inserted in the head, so your favicon will disappear.You could copy the icon link before uninstalling the plugin, then add it to your theme header manually. But of course, if you do that, I’d recommend using a child theme. And that’s an added layer of complexity that you may not want to take on.
It’s Easy to Overlook the Simple Things
When you’re building a new website and shopping for hosting, a favicon is probably the last thing on your mind. If you forgot a favicon and now you need an easy way to create one, here you have it.
Or maybe you’ve been putting off changing or updating your favicon because it’s just too much hassle. Whichever boat you’re in, I hope this WordPress favicon plugin tutorial helps.
It’s not often that an early web technology sticks around for as long as this one has. Remember frames? How about
(And no, your grandmother trying to describe what your job during Thanksgiving dinner doesn’t count. She’s allowed to say “webmaster.”)
The fact that we still use favicon today is a sign of its enduring usefulness. It’s still essential to establish this image so your visitors can find you when they want to come back.
Have you ever implemented a favicon in the old-fashioned way? How long has it been since you updated your favicon? Let me know in the comments.