Before you can start making sales, you need a payment gateway. Otherwise, shoppers will be unable to buy from your online store. PayPal is one of the most common methods of online payment acceptance on the Internet. It’s a popular system that has been around for nearly two decades and trusted by millions.
In this tutorial, I’ll show you who to setup PayPal in CubeCart. It’s a quick and easy process that can start immediately working for you.
Setting Up PayPal in CubeCart
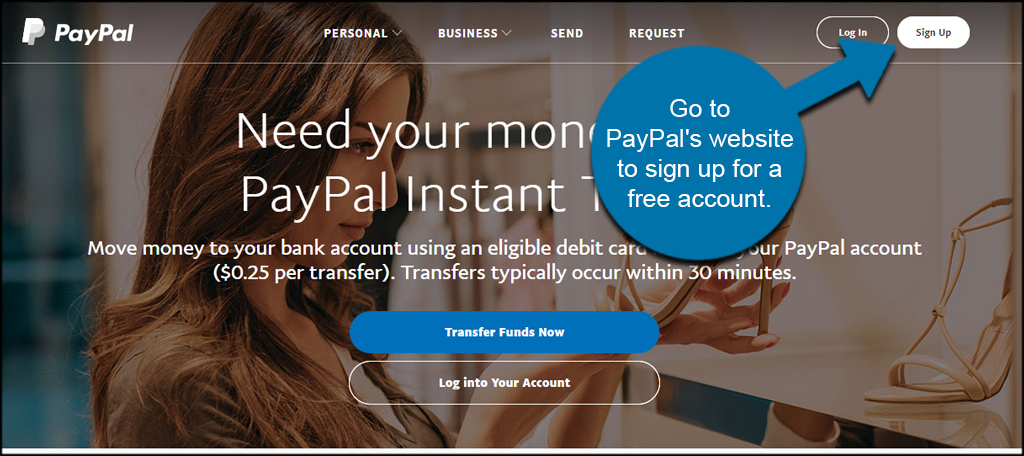
Before you can use PayPal, you’ll need an activated account. Go to PayPal’s website to sign up for a free account.
I would suggest setting up a PayPal under a business account and applying for the Mastercard Debit card. This gives you immediate access to your funds when someone makes a purchase.
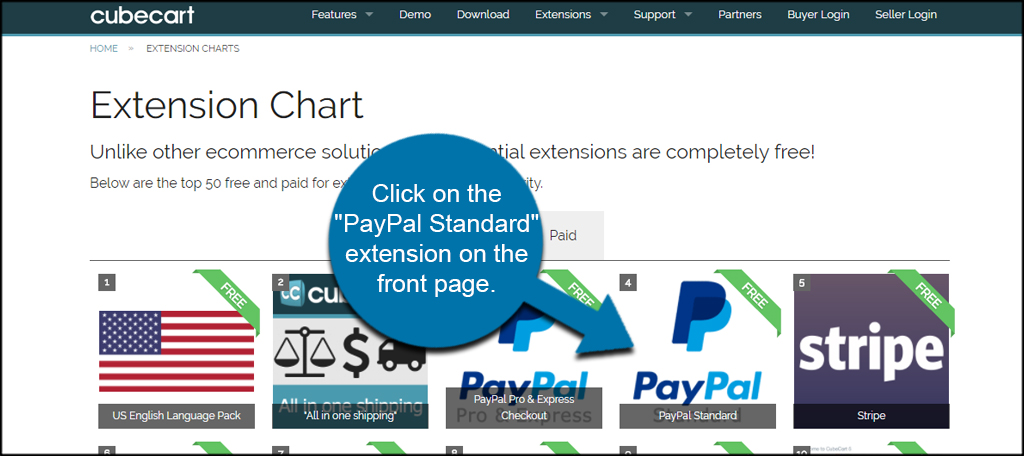
After you established an account at PayPal, you need to visit CubeCart’s extension webpage. Click on the “PayPal Standard” extension on the front page. If it’s not displayed, you can search for PayPal using the “Extensions” tool at the top.
PayPal has several different types of accounts when it comes to eCommerce. I am using Standard today because it’s one of the easiest and most common types. You can choose any you like that fits your online store.
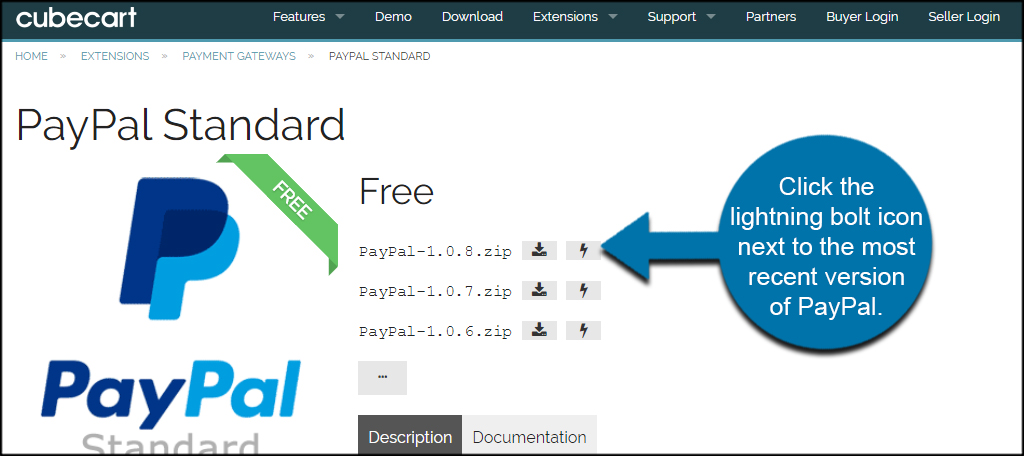
CubeCart has two primary methods when it comes to installing new modules for your store. You can either download the module and upload it manually or use the automatic install property. In this tutorial, I am going to use the automatic system because it’s faster and requires no downloads or uploads.
Click the lightning bolt icon next to the most recent version of PayPal.
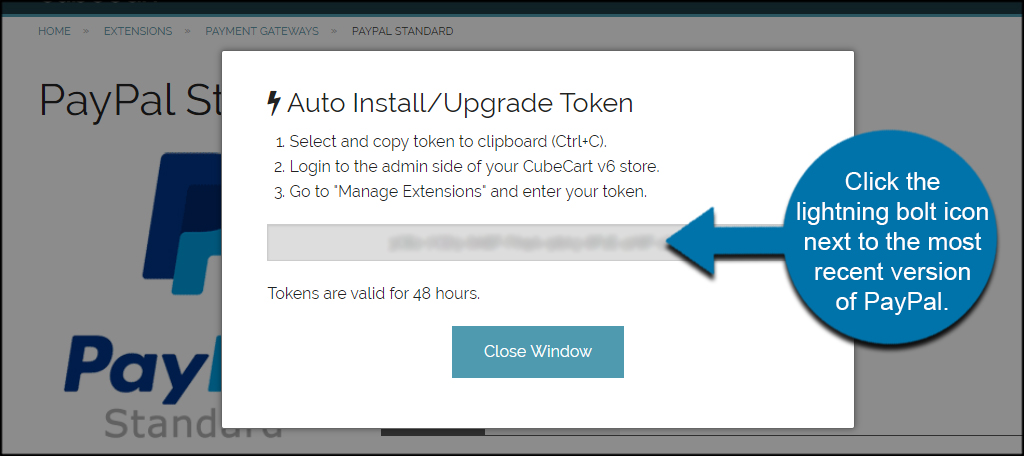
CubeCart will then give you a token consisting of numbers and letters. Copy this token as you will need it in your store. Once you copy the digits, you can close the window. It’s not a bad idea to paste the token into something like Notepad so you don’t lose it for now. This token lasts for 48 hours and will no longer be valid afterward.
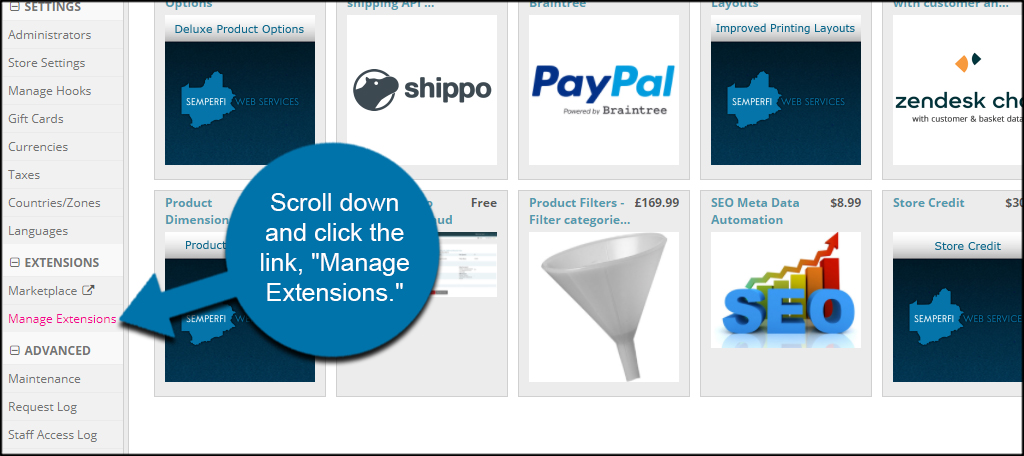
Log into your CubeCart admin screen. Scroll down and click the link, “Manage Extensions.”
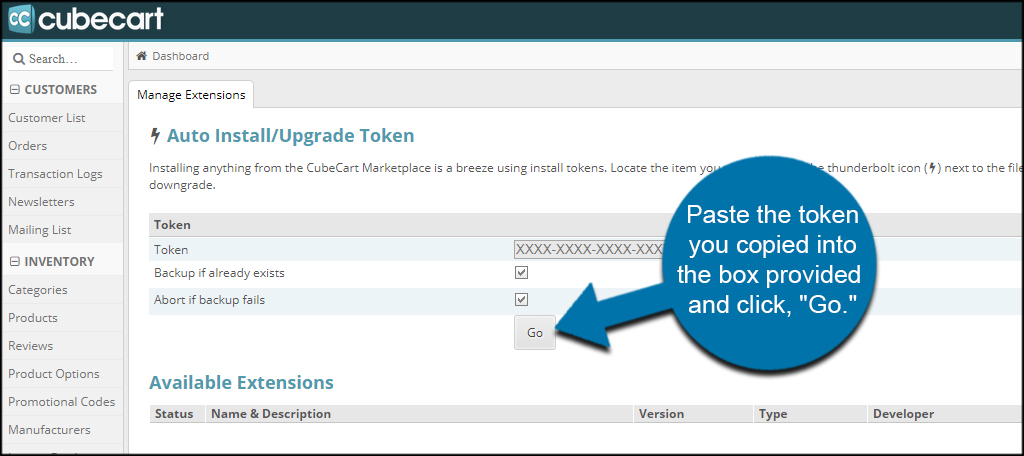
Paste the token you copied into the provided box and click, “Go.”
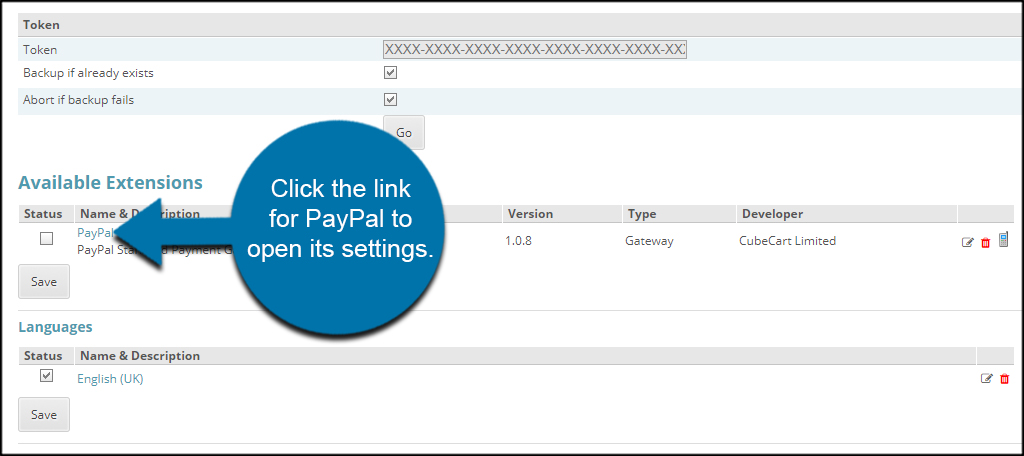
The install will be very rapid. You will see PayPal appear under the Available Extensions section. Click the link for PayPal to open its settings.
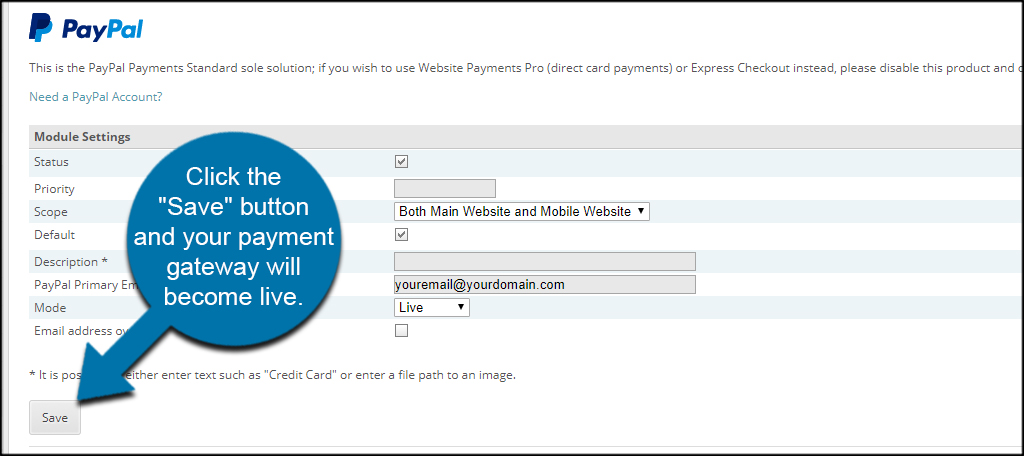
Fill in the information for your PayPal account and how you want it to work on your site. This includes the check box for “Status” as well as making it your “Default” payment system. Leave the Default box unchecked if you plan on using another system as the default for buyers to use.
Shoppers can still select PayPal if they want as long as the Status box is checked.
Your PayPal Primary Email address will be the one you used to sign up with PayPal. It’s your account address and how money is transferred from the buyer to your account.
In the “Mode” option, use the drop down to change it from Sandbox to Live. Sandbox is the testing mode for the PayPal module. Only change this when you’re ready to start accepting payments and you’re positive the money goes to your account.
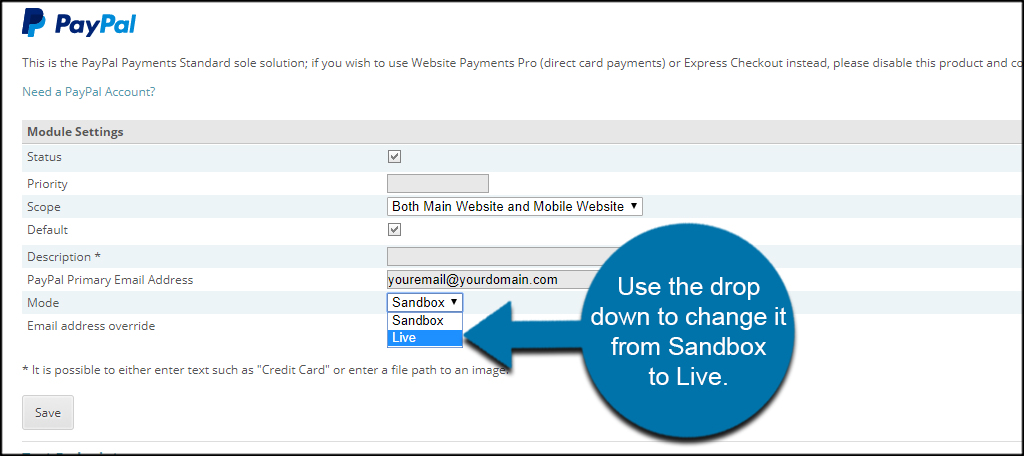
Click the “Save” button and your payment gateway will become live.
Some will market the ability to use PayPal in social media to entice shoppers to visit. In reality, any online digital payment system can offer interest when you advertising in various social media marketing tools.
Get More From Your Site
PayPal is just one of many payment gateways supported by CubeCart. This lets you give several options to buyers regarding which system the prefer. Explore your possibilities while configuring your CubeCart website. There is a lot to learn and a variety of useful features.