A payment gateway is needed if you want your online store to make money. After all, you can’t make sales unless there is a method for people to give you cash. Luckily, CubeCart supports a wide scope of payment gateways to suit your business needs. This includes using platforms like Authorize.net.
The Internet is full of various payment methods. Authorize.net is one of the most common for accepting credit cards. Adding this element to your eCommerce site gives it a professional appearance as it instills the sense of security.
In this tutorial, I’ll show you how to set up Authorize.net in CubeCart. After a few moments, you’ll be able to accept payments from you online store.
Setting Up CubeCart with Authorize.net
Before you can set up Authorize.net to work with your website, you’ll need an account. To do this, visit the Authorize.net website and click “Get Started” to begin setting up a profile.

After following the instructions from Authorize.net, you’ll be ready to continue.
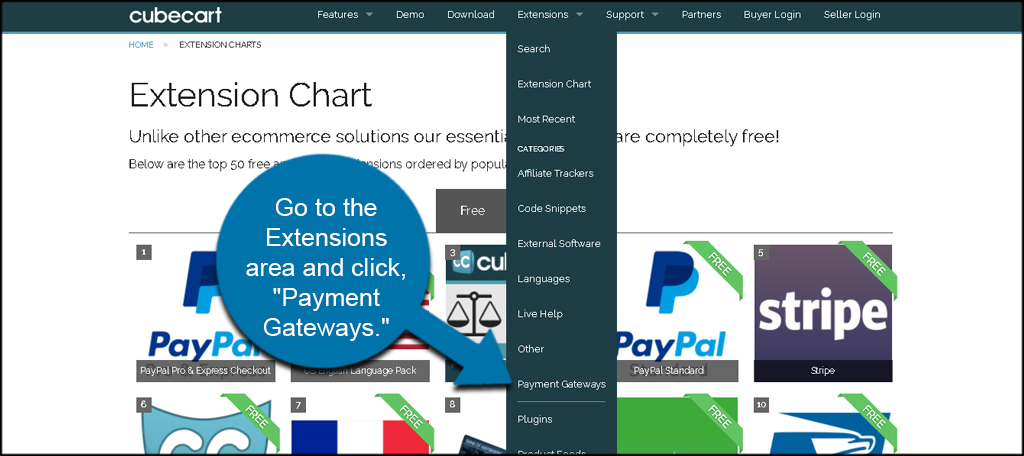
Go to CubeCart’s Extensions homepage. Go to the Extensions area and click, “Payment Gateways.”
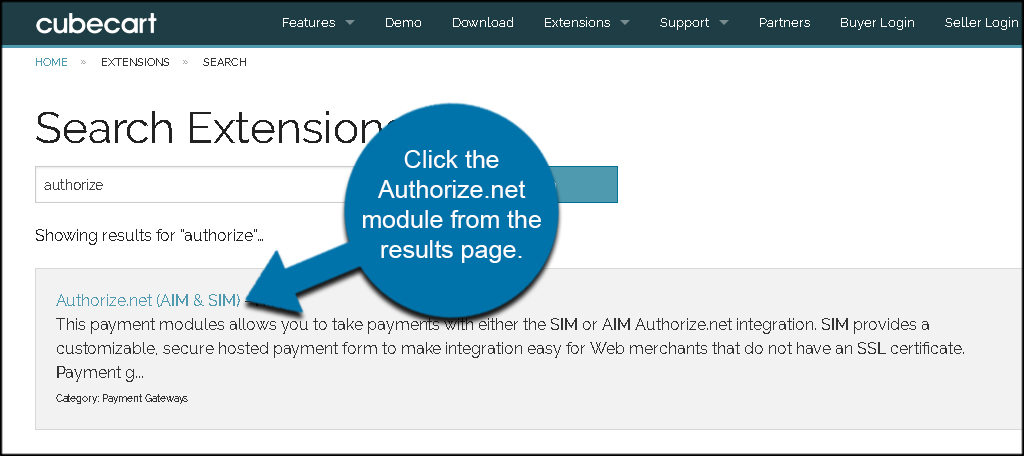
Search the term, “authorize” and click the Authorize.net module from the results page.
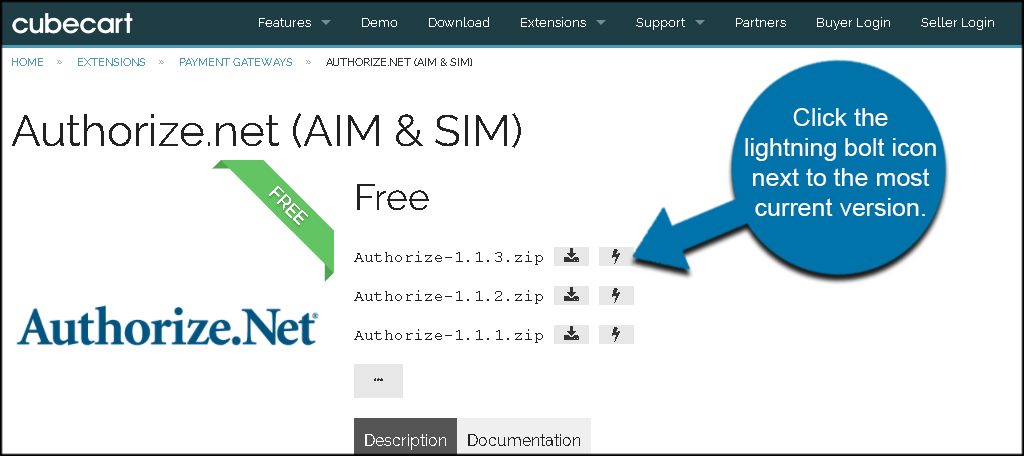
When installing modules for CubeCart, you have two available options. You can either download the module directly to your computer or use the automated system. For this tutorial, I’m going to keep it simple and use the automatic installer.
Click the lightning bolt icon next to the most current version.
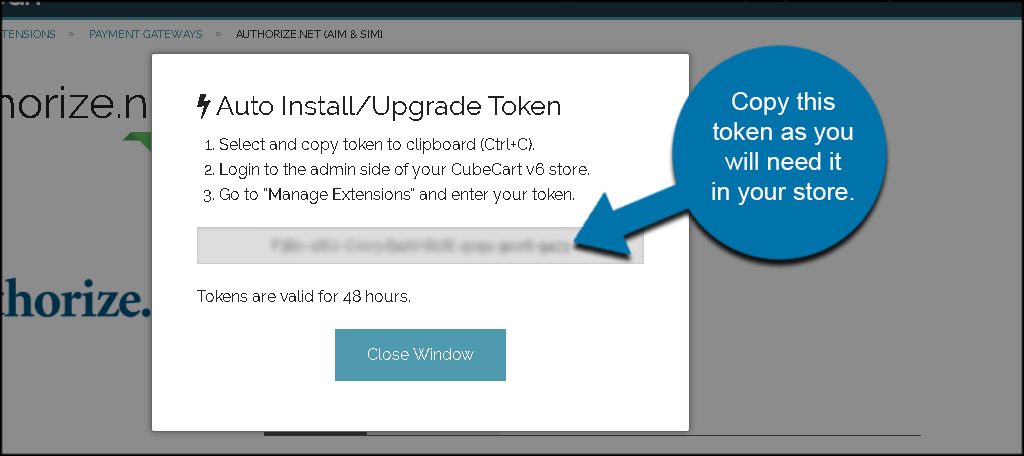
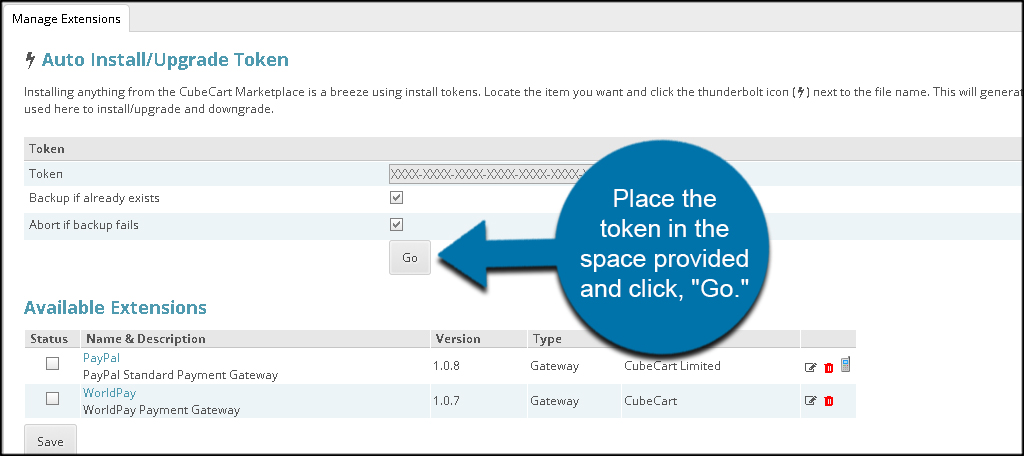
A new window will open up displaying a series of letters and numbers. This is an install token from CubeCart. Copy this token as you will need it in your store.
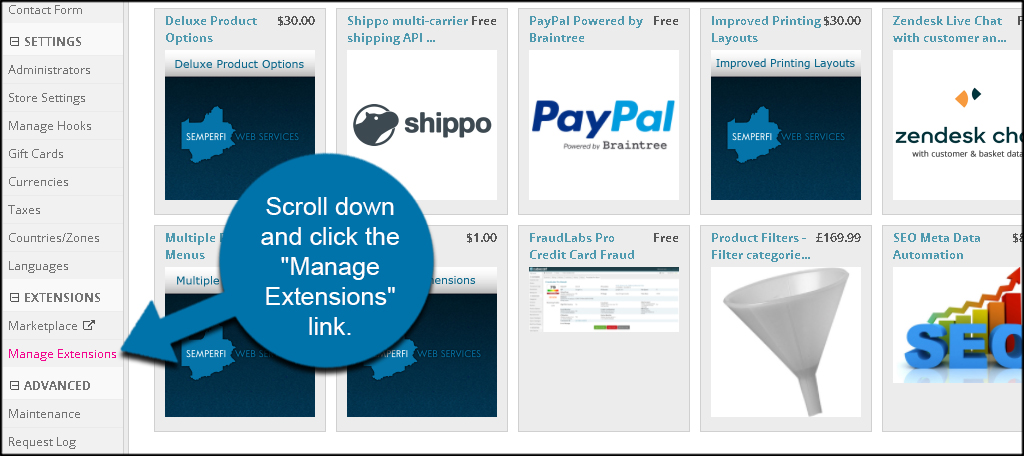
Log into you CubeCart admin dashboard. Scroll down and click the “Manage Extensions” link.
Place the token in the space provided and click, “Go.”
CubeCart will immediately connect to the server and install the Authorize.net module.
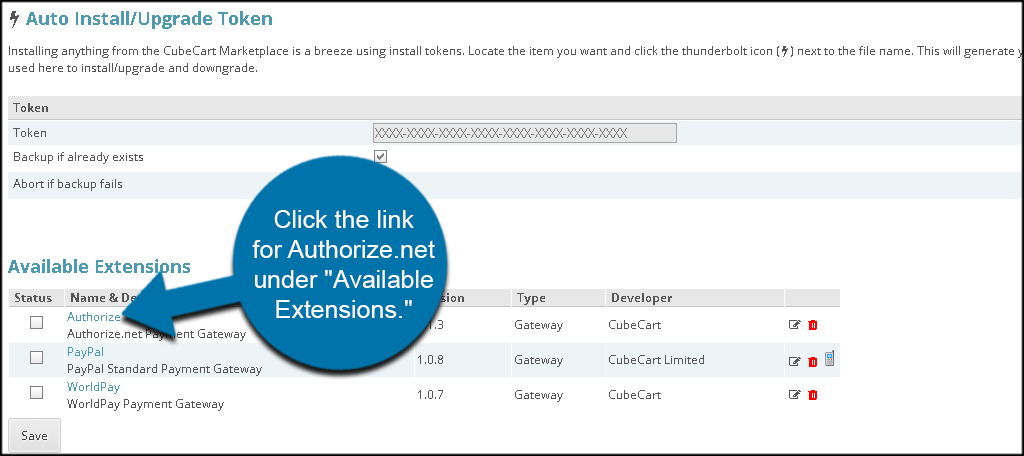
Click the link for Authorize.net under “Available Extensions.”
Input your Authorize.net account information and click, “Save.” You will need the Authorize.net API key for your account as well as the transaction key. Both can be set up from Authorize.net’s website.
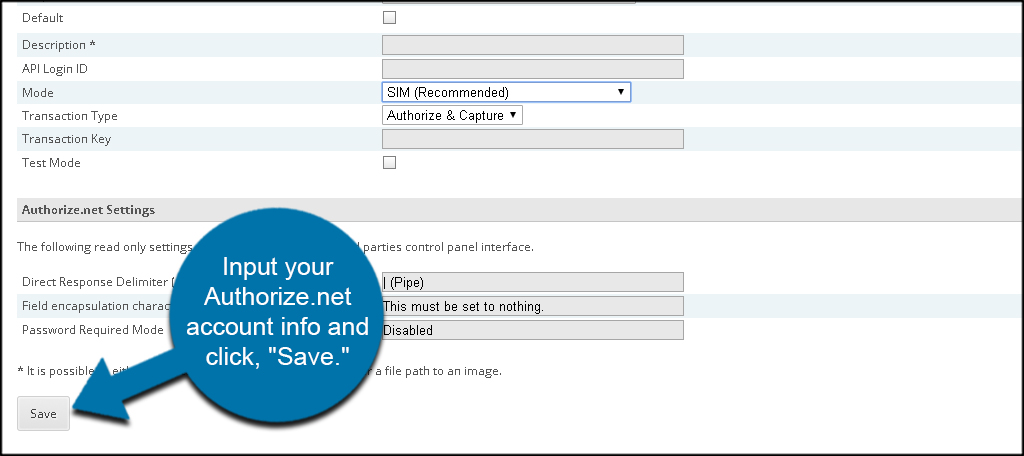
The information from Authorize.net is going to be unique to your store and what you’re trying to accomplish. Customize this section according to your own strategy.
Configure Your Store
Choosing a payment gateway is only one aspect of configuring your eCommerce site. You have a lot of tools at your disposal to create the perfect layout and functionality of an online store. Take time to learn all you can and create an online presence that drives the consumers.