There are not many web browsers that are as customizable as Firefox. From appearance to features like bookmarks, Firefox allows the user to change and customize all sorts of details. You can even customize the default font in Firefox if you choose.
As you might be aware, all of the major browsers come with a default font of Times New Roman. But what if you want to change or mix it up a bit? You can easily change Firefox font right from your options/settings page within the browser.
Follow these quick steps to customize the default font in Firefox.
Customize the Default Font in Firefox
Launch the Firefox web browser. Click or double-click the Firefox app icon, which resembles an orange fox around a blue globe. You can find it in your Applications folder on a Mac, or on your Start menu in Windows.
Once the browser has launched, you will see a hamburger style three-line icon menu on the top right of the Firefox browser. Click on that and a drop down menu will appear.
From this drop down, select “Preferences.” On a PC you will select “Options.”
Note: You should always keep your browser up-to-date. However if you are running an old version of Firefox, then you will select “Tools” in the menu bar. Download the newest version of Firefox now.

This will take you to the main setting’s page in Firefox where you can control just about anything.
Make sure the blue “General” tab has been selected on the setting’s page and scroll down a little until you see “Fonts and Colors.” This will be a sub-heading under “Language and Appearance.”
On a PC there will be a popup box where you will select the “Content” option. This also depends on the version of Firefox you’re running.
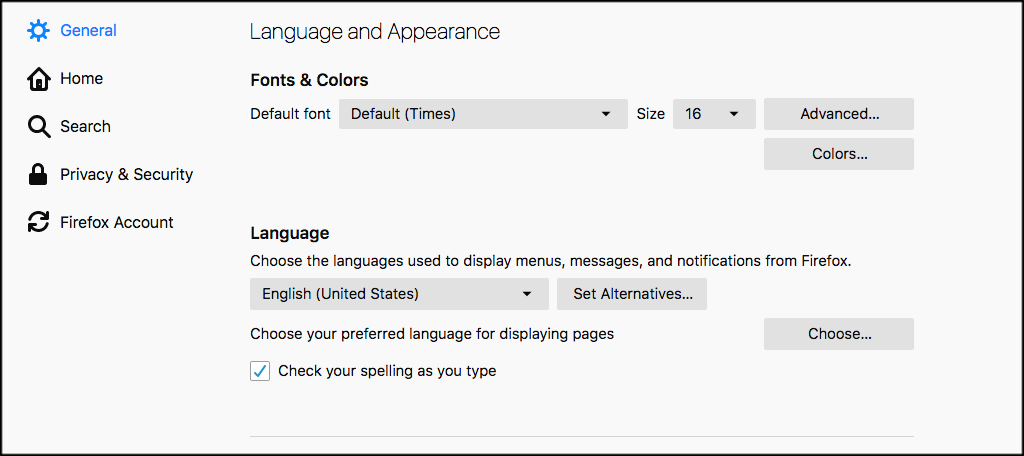
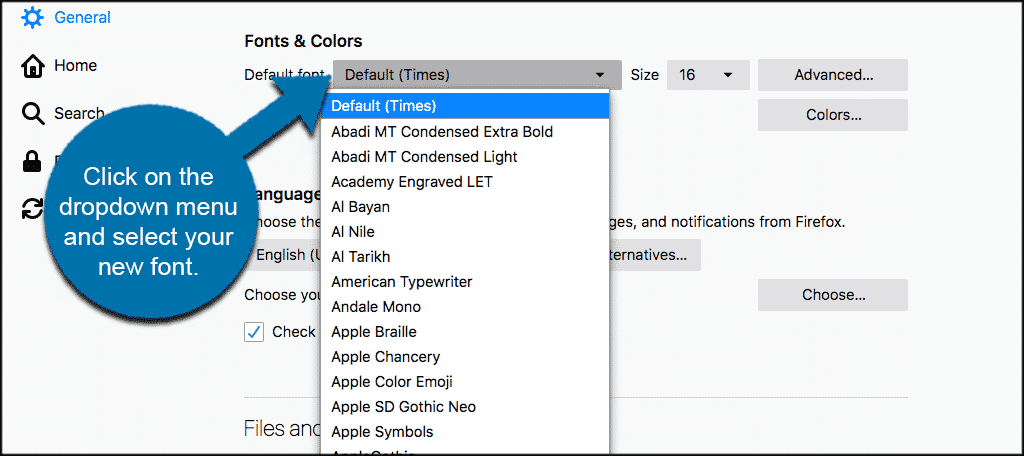
Under “Fonts and Colors,” you can click on the font box and a drop down will appear where you can select and customize the default font in Firefox. Simply click on the font you want from the drop down to select and change the default font.
That’s it! You have successfully changed Firefox font. You can also customize Firefox font on all web pages.
Customize Fonts For All Web Pages
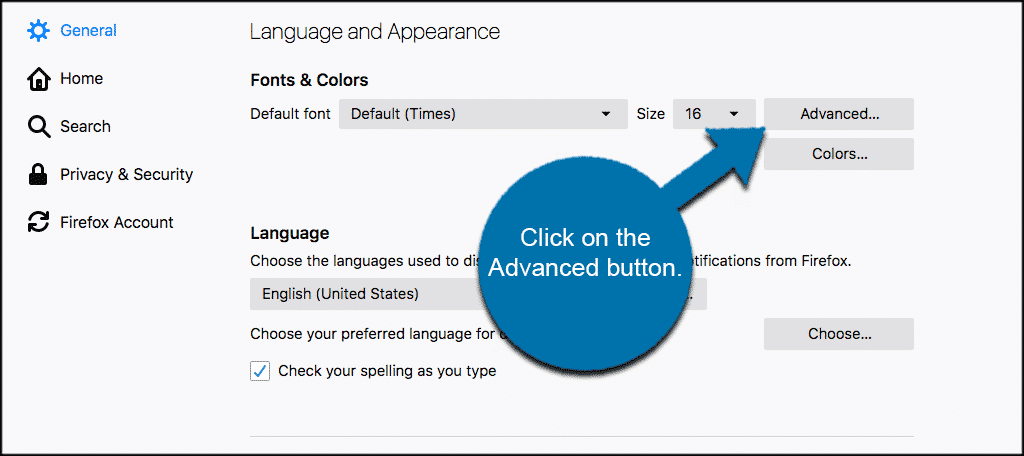
From where you are, you will see an “Advanced” button. Click on the Advanced button to open the settings popup box for Firefox fonts.
Inside this popup box you will see a checkbox selection that is checked by default called “Allow pages to choose their own fonts, instead of your selections above.”
Uncheck this box so the font you have selected in Firefox will also display on all web pages you visit in the future.
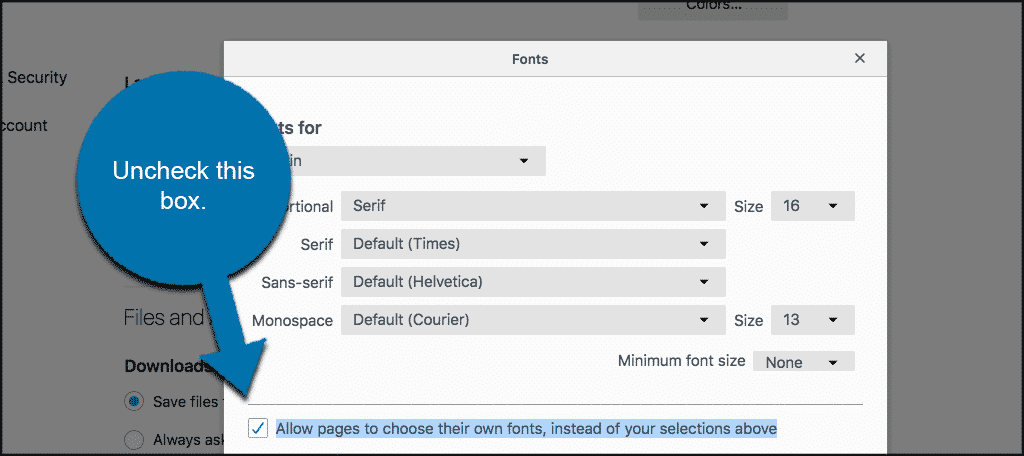
Now, after you have unchecked that box and saved your settings, you can visit other web pages and you will see that the customized font you selected shows on every web page.
That’s it! You have now customized the default font in Firefox. You’ve also made the correct advanced selection to force your customized Firefox font to show across all web pages.
Enjoy!