Are you looking to add additional custom post statuses in WordPress? A custom post status in WordPress is a simple editorial notice and should not be confused with custom post types. WordPress has some default ones built into the platform. It allows the staff to know what the current status of a piece of content is. For example, if an article says “Published” that means it is live on the website.
These notices are extremely helpful when you have a lot of content being created at once. For example, another common built-in post type in WordPress is the “Draft” which means the content is still being edited. Today, I will demonstrate how to create custom post statuses in WordPress using the Edit Flow plugin.
What Exactly is a Post Status and Why Should I Make My Own
Post status is used to tell WordPress what the current step in the development of a piece of content is. For example, the two most well-known post statuses are “Published” and “Draft”. Published means the article is live on the website and Draft means it is still being worked on. While this is helpful, it is also very vague. As we all know, there are different levels of completion and the term “Draft” does not give any clear indication of the status of the post content other than it is not done.
For this very reason, it is a great idea to add custom post statuses in WordPress, especially for websites with multiple authors. Let’s think about a simple but common system some websites use to produce content. One person writes the content and one person creates the images. Once the writer is finished, the status will show as Draft by default, but you could create a custom post status that says “Awaiting Images”. This is much clearer and is helpful to everyone.
How to Create a Custom Post Status in WordPress
Today, I will demonstrate how to create custom post statuses in WordPress using the Edit Flow plugin. Edit Flow is by far the easiest way to add a custom post status in WordPress and also offers other tools you can use to improve the efficiency of your websites work. Some of the other features it includes are a calendar, editorial comments, editorial notifications, and much more. It is a great addition to websites that would like to improve the editorial organization of the website.
Installing Edit Flow
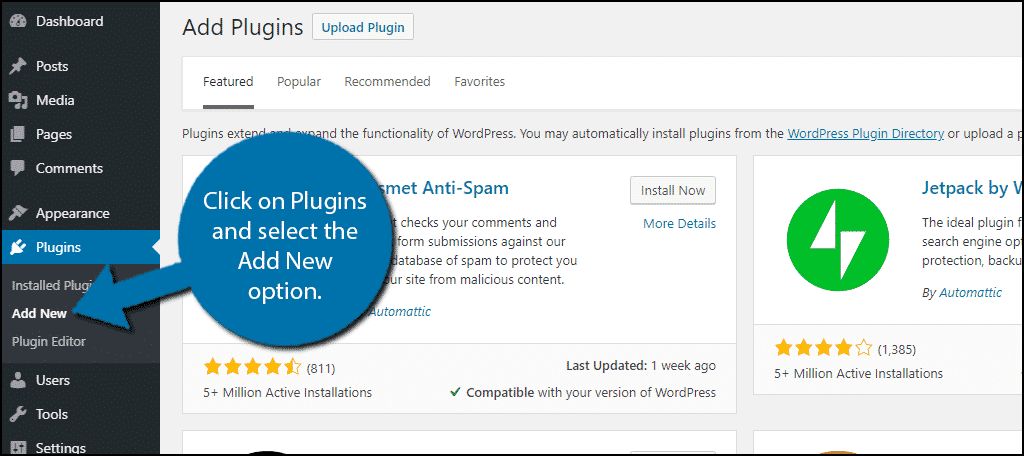
Begin with clicking on Plugins and selecting the Add New option on the left-hand admin panel.
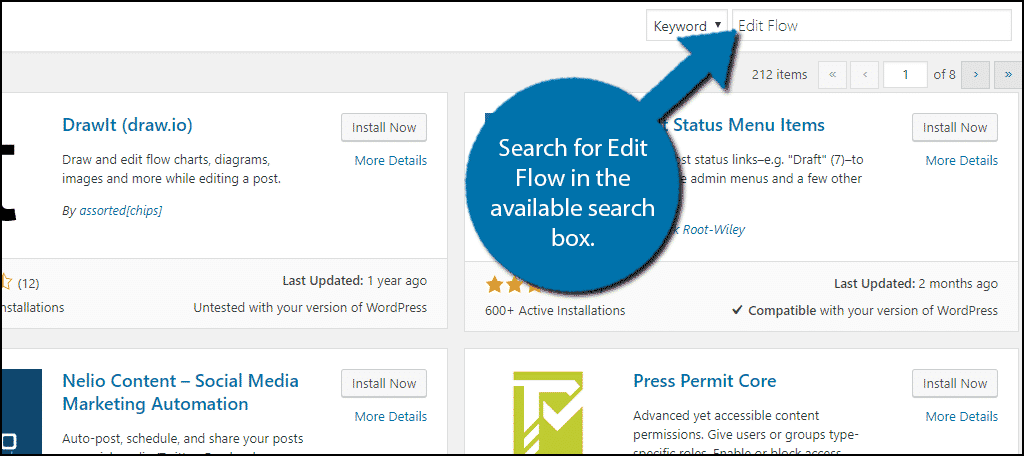
Search for Edit Flow in the available search box. This will pull up additional plugins that you may find helpful.
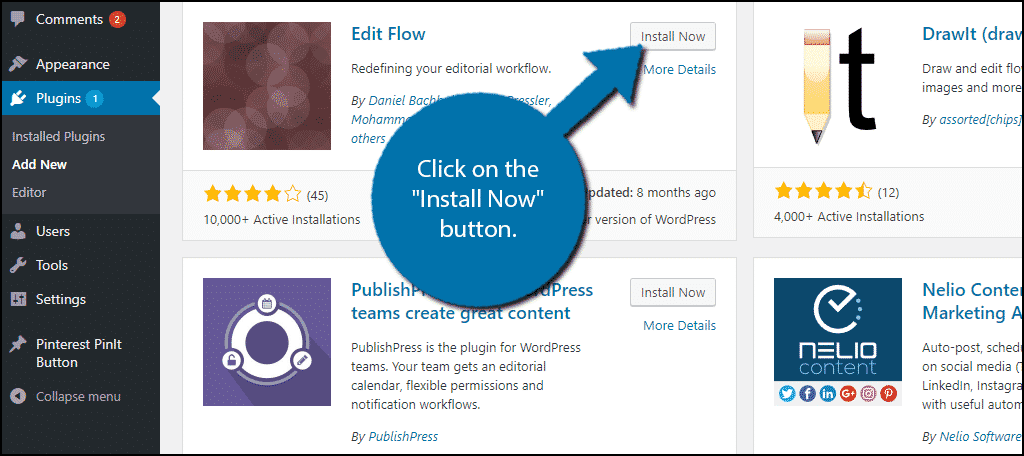
Scroll down until you find the Edit Flow plugin and click on the “Install Now” button and activate the plugin for use.
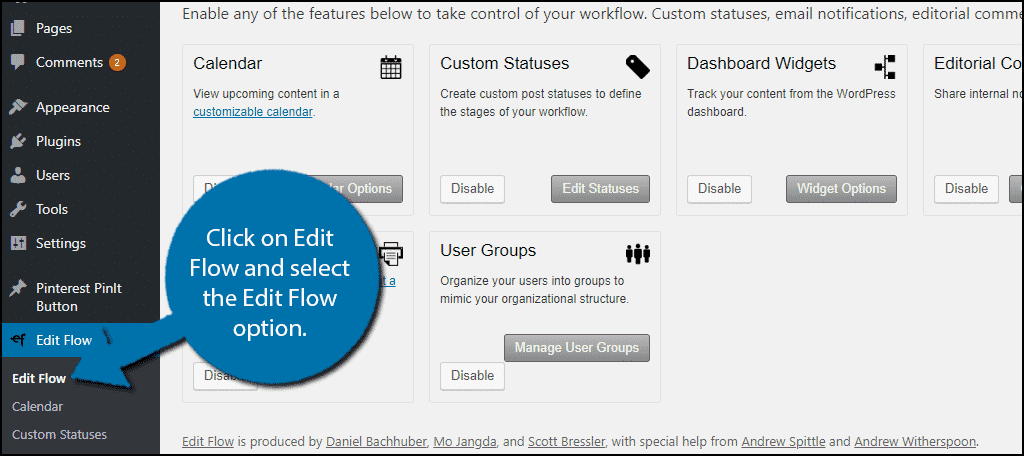
On the left-hand admin panel click on Edit Flow and select the Edit Flow option. This will pull up the main settings page.
Adding a Custom Post Status With Edit Flow
Adding a custom post status with Edit Flow is extremely easy. On the main plugin settings page, you will see multiple options to choose from. Click on the “Edit Statuses” button in the Custom Statuses box.

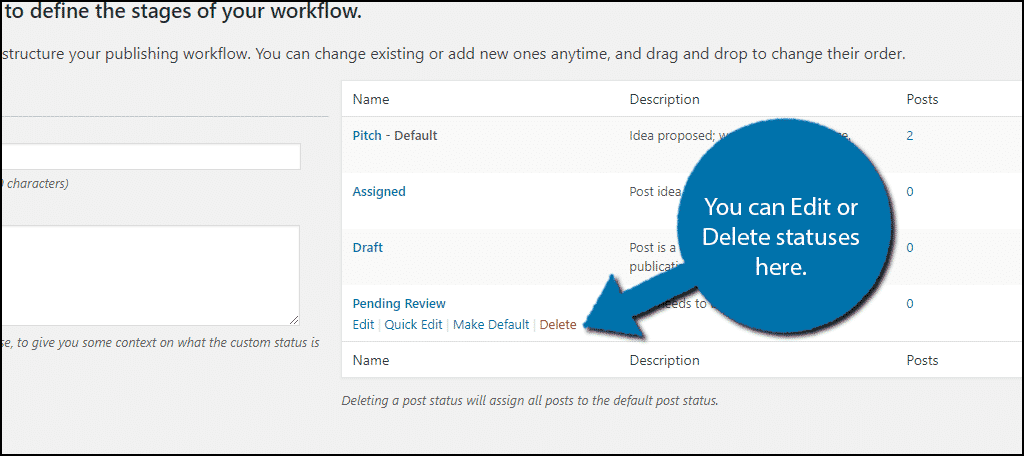
Here you can add as many custom post statuses as you want. On the right-hand side, you will see a list of the current ones. You will notice that three new post statuses are there. Edit Flow automatically adds the Pitch, Assigned, and Pending Review statuses. You can hover your mouse over any of these and choose to edit or delete them.
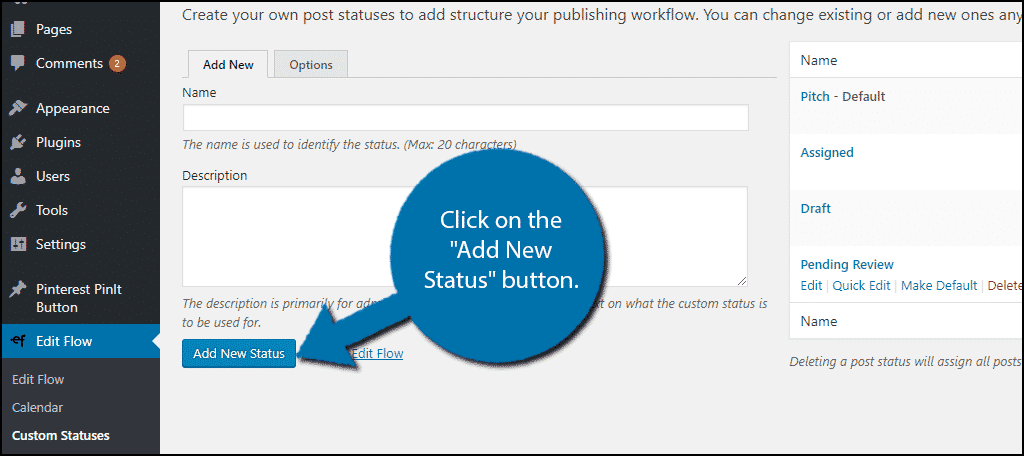
On the left-hand side, you will be able to add new statuses. All you need to do is fill out two text boxes. The first is the Name, which is what your status will be called, and the second is the Description. I recommend keeping the name easy to identify and the description informative, but short.
Once you have named and created a description for your new custom post status, click on the “Add New Status” button.
Congratulations, you have successfully added a new custom post status to your website. You can add as many as you need. It is a good policy to use as few as possible to keep the editorial process simple.
Using Your New Custom Post Type
Now that you have created your custom post statuses, it’s time to use them. Go to any page or post on your website or create a new one.
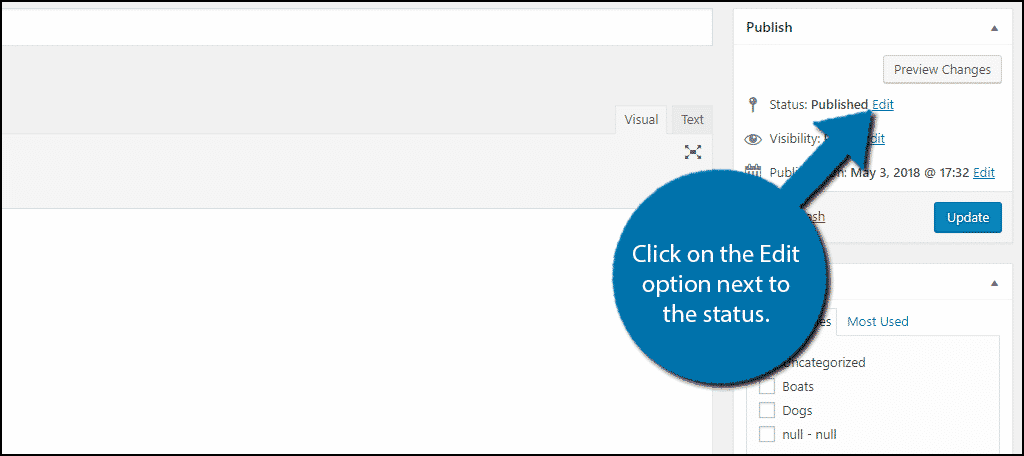
On the right-hand side, in the Publish box, click on the Edit option next to the status.
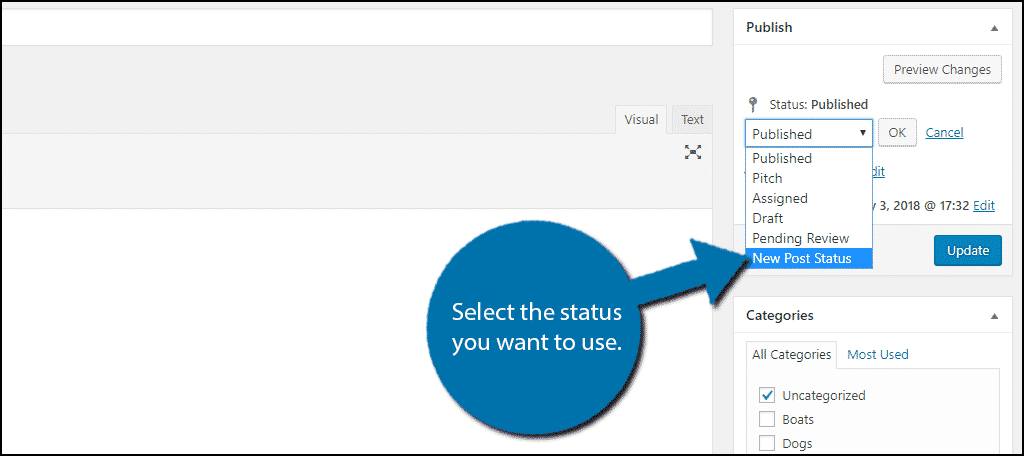
This will reveal a drop down box that holds all of the status options. Select the option you would like to use and click on the “OK” button. Make sure to save the changes on the page or post as well.
Congratulations, you have successfully learned how to select which status your posts and pages will use.
Keep It Simple
Creating quality content is no easy task. Keep the process as simple as possible to ensure that your content team has an easier time. Having more post statuses will give you more options and make it easier for your content team to act as a real team. Use the statuses as a way to let the right team members know it is their turn or what stage the content is currently in.
What custom post types have you added to your website? Why do you want to add more post types in WordPress?