Imagine a travel blog that adds location details to posts so blog visitors can geo-search post types.
Or the ability to set up events in different cities – or even neighborhoods – so group members can use geolocation to find events near them. Or to see which other members are attending the events.
If you’ve ever thought something like that would be cool, it’s time to learn how to add geolocation data to your posts. To both individual posts and groups of posts (post types).
We’re going to use the GEO my WordPress plugin to add searchable location details to your content.
Installing the GEO my WordPress Plugin
Log in to your WordPress admin panel.
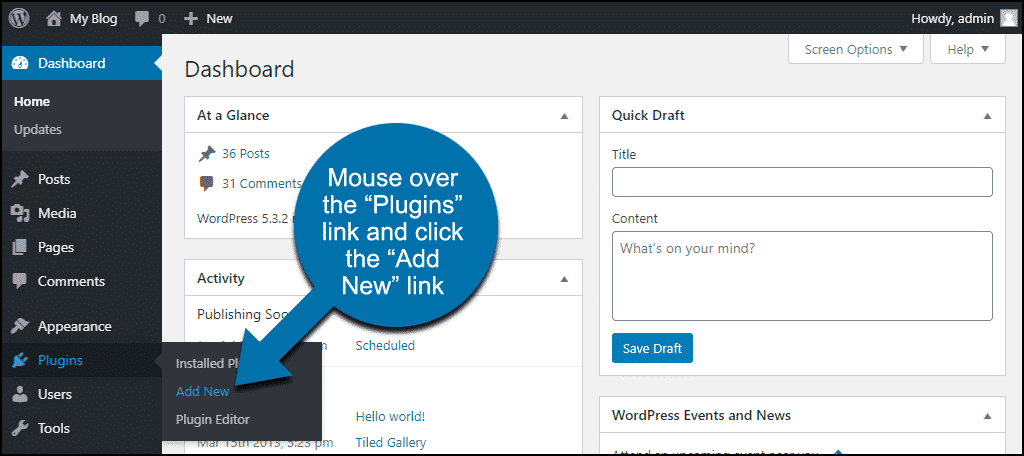
In the left column navigation, mouse over the “Plugins” link and click the “Add New” link.
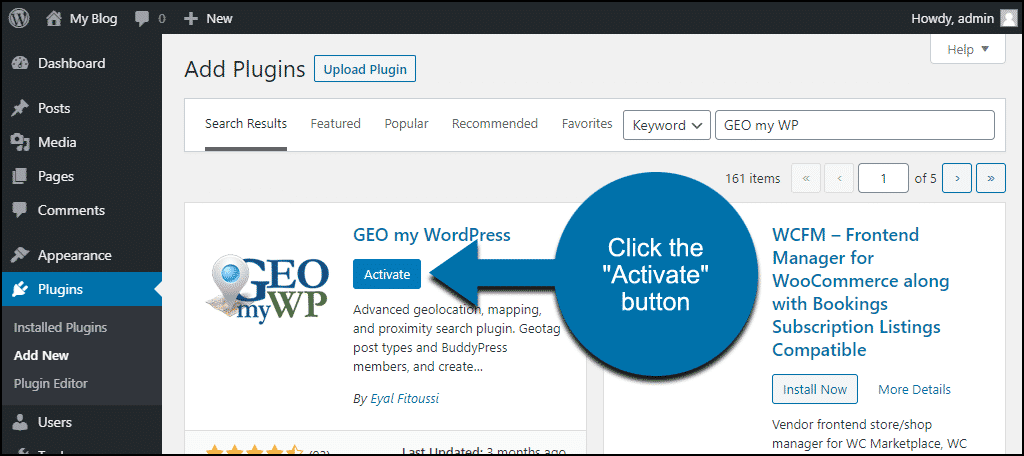
In the “Search plugins…” box, enter “GEO my WP.”

Once you have located the plugin, click the “Install Now” button.

Click the “Activate” button.
Configuring GEO my WordPress
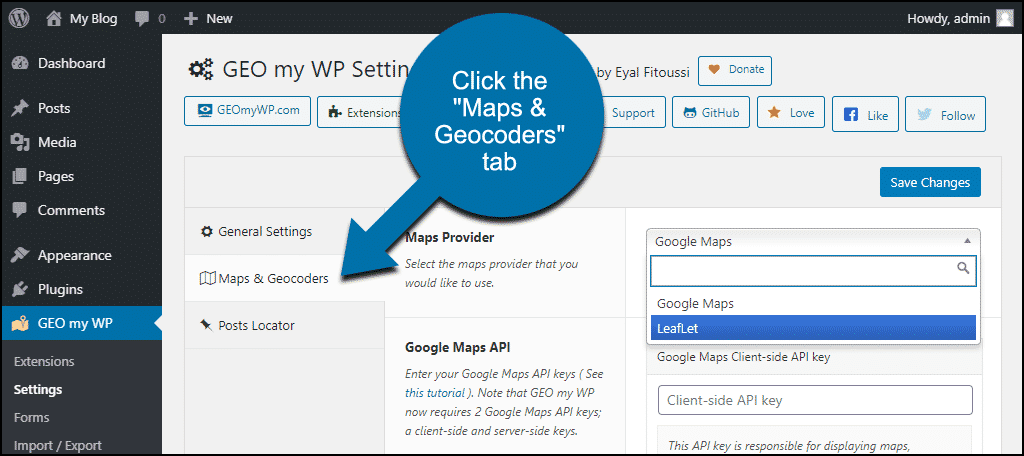
In the left column navigation, mouse over the “GEO my WP” link and click the “Settings” link.

Click the “Maps & Geocoders” tab.
To use Google Maps APIs, you’ll have to have a Google Developers/Cloud Platform account set up and provide billing information. At this point, you can set up the necessary API keys to use in this plugin.
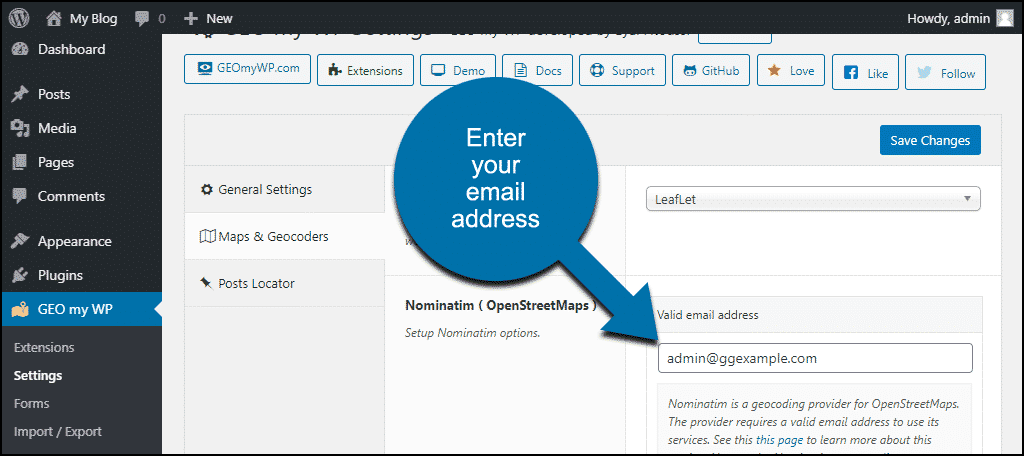
If you don’t have a Google Developer account or don’t want to add a payment method to the account, there is a free option. That’s what we’ll use in this tutorial.
In the “Maps Provider” section, select “LeafLet” from the drop-down.

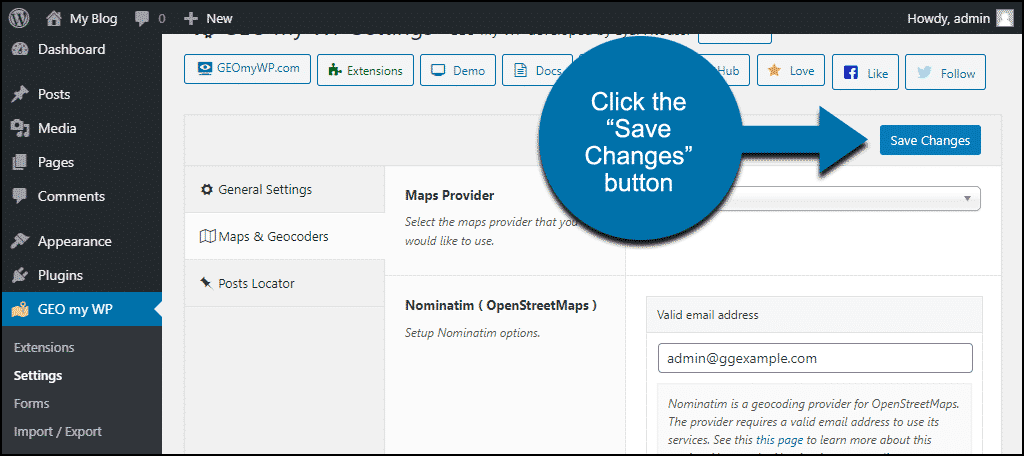
In the “Nominatim (OpenStreetMaps)” section, enter your email address.
Click the “Save Changes” button.
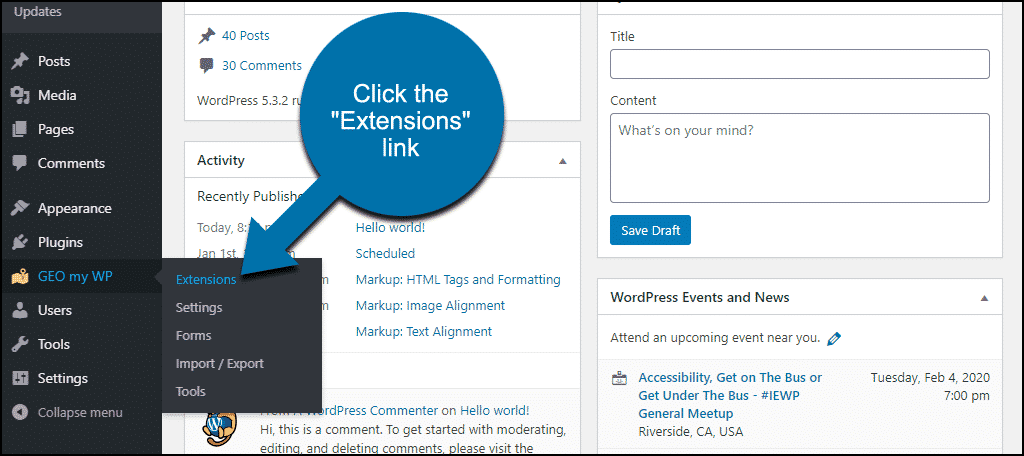
In the left column navigation, mouse over the “GEO my WP” link and click the “Extensions” link.
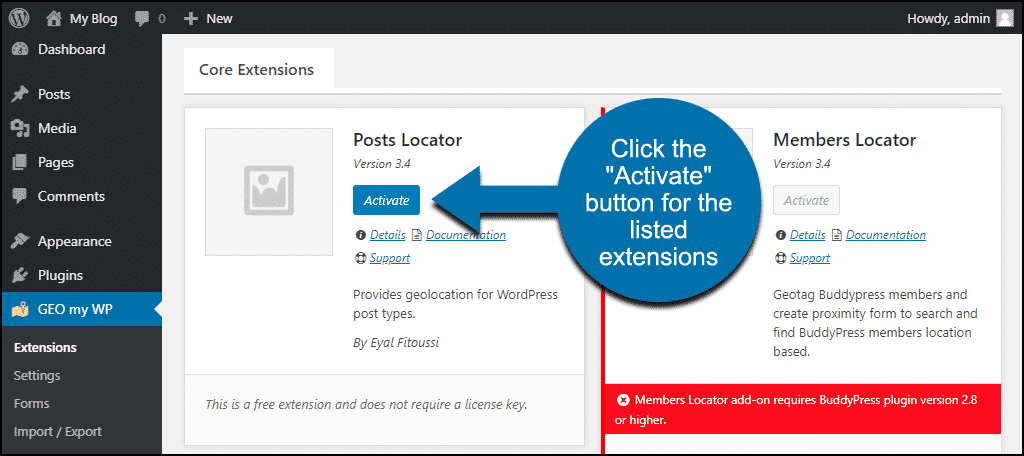
Click the “Activate” button for the following extensions:
- Posts Locator
- Single Location
- Current Location
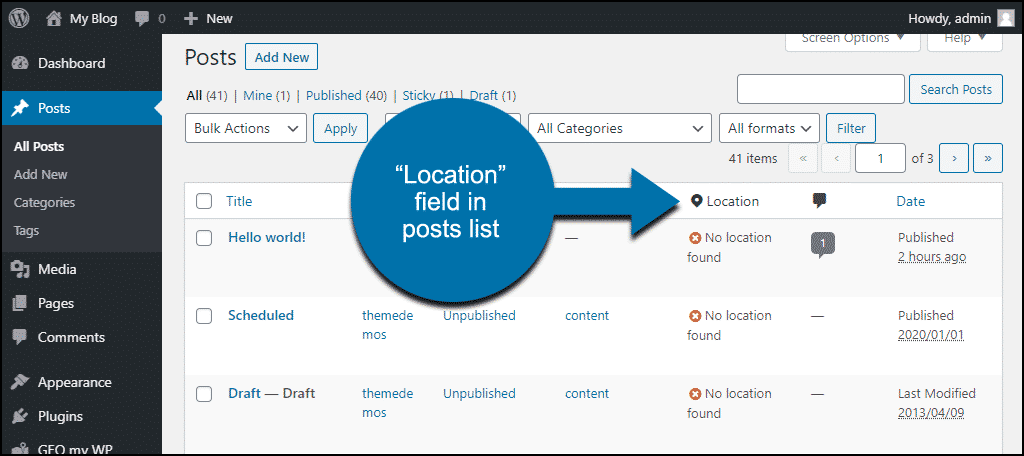
Now you’ll see that there is a location field in your posts list. Let’s put it to work.
WordPress Geolocation
Before we continue, if you see a “User denied the request for Geolocation” error when trying to add a location or view a map, your browser location settings may be preventing geolocation.
Check the settings for your particular browser to allow geolocation (or at least let your site to perform geolocation).
A geolocation error can also be displayed if your site doesn’t use HTTPS. Chrome and Firefox (and many other browsers) will not perform geolocation on an unsecured HTTP URL since they consider HTTP insecure.
But geolocation isn’t the only reason to use HTTPS. If your site doesn’t use an SSL certificate for HTTPS, you should remedy that problem.
Adding Location to a Post
We saw the location field in the posts list, now let’s take a look at how the location field works.
When you open a post or page in the WordPress editor, you’ll see a new “Location” link under the editor.
We’re using the WordPress Gutenberg editor; if you’re using the classic editor, the “Location” link is at the bottom of the editor page.
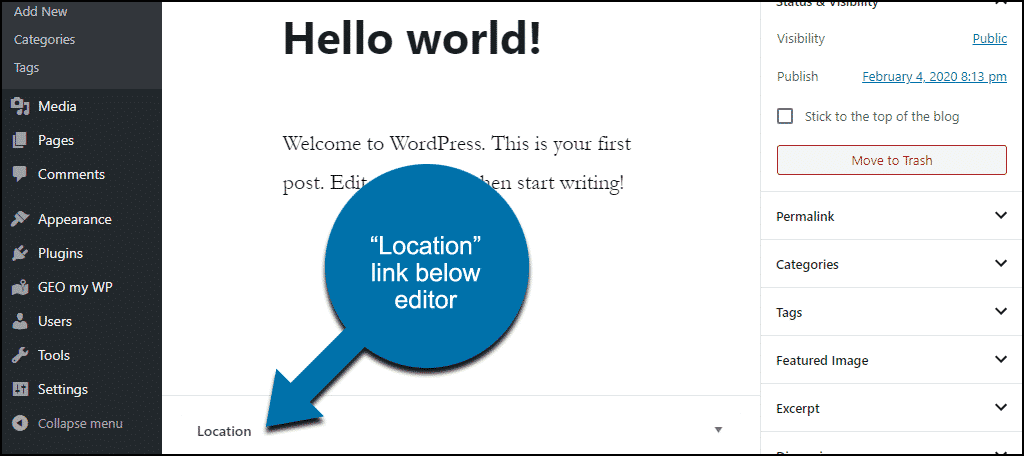
When the Location section is expanded, you can see the available options.
We’re going to add an address to the post. That doesn’t change anything when you view the post, but it adds a location. That makes the post searchable by location. We’ll implement that search function in a minute.
Enter the address in the Address field. Alternately, you can enter latitude and longitude coordinates if you need to enter a precise location.

Below the map, there’s a “Confirm Location” button. Click that.
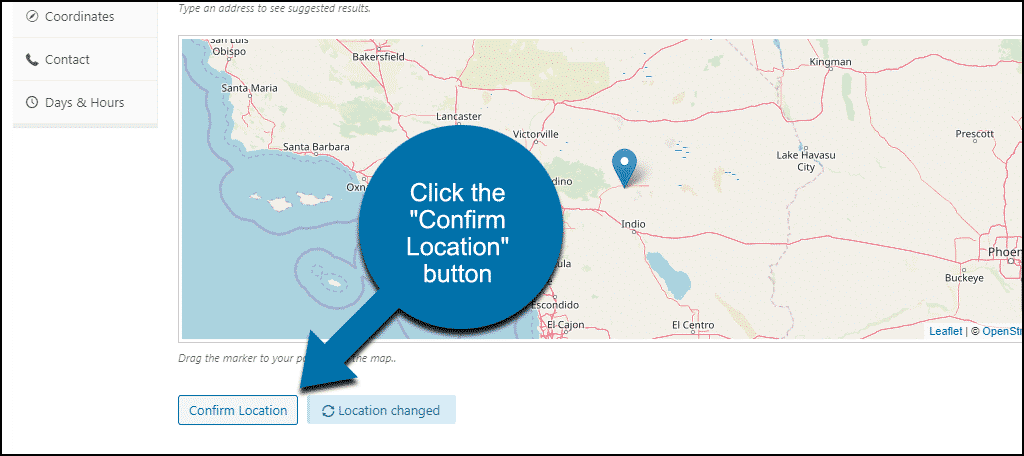
The map should change to the location you entered, and you’ll get a “Location confirmed” message.
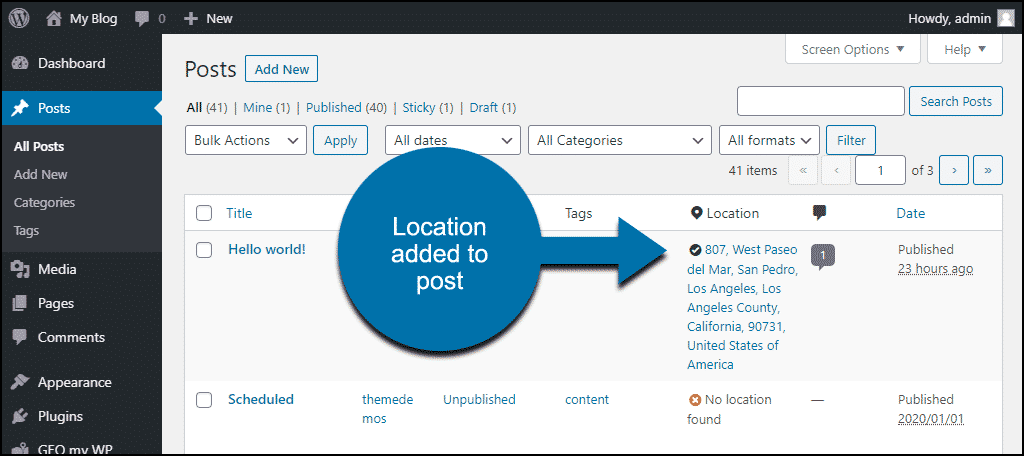
Save or update the post.
Now, if you view the post, you’ll see that nothing has changed. But in the posts list, you can see that the location has been added to the post.
Now let’s look at how we can use that location data.
Mapping a Location in a Widget
One of the most common uses of geolocation is to map a location in a widget.
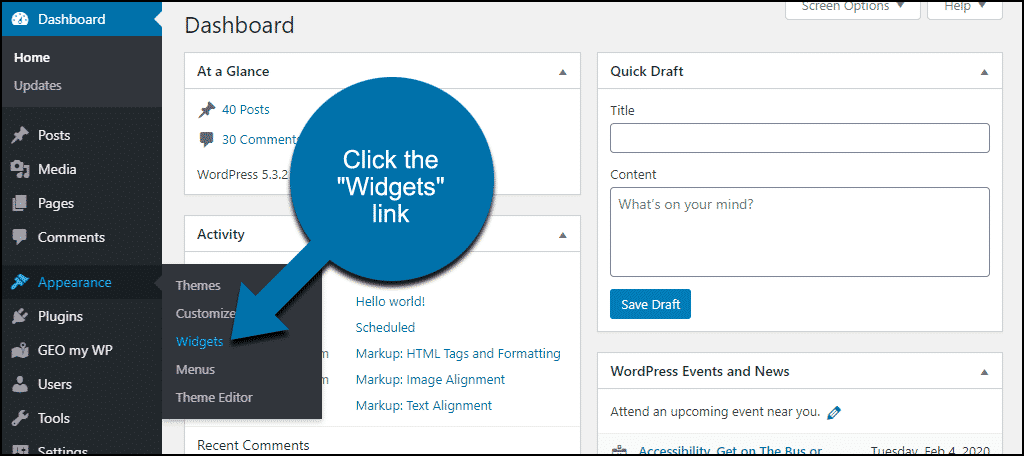
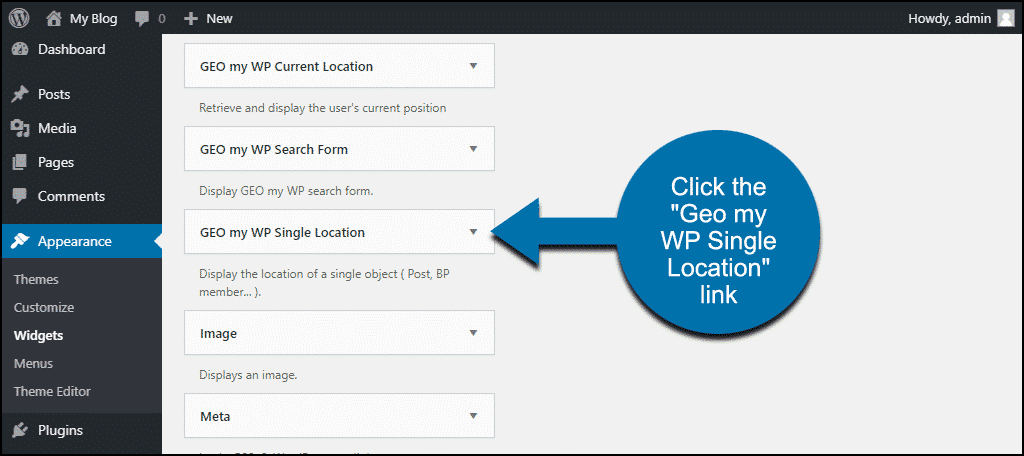
In the left column navigation, mouse over the “Appearance” link and click the “Widgets” link.
In the “Available Widgets” list, find “Geo my WP Single Location.”
Click the “Geo my WP Single Location” link.
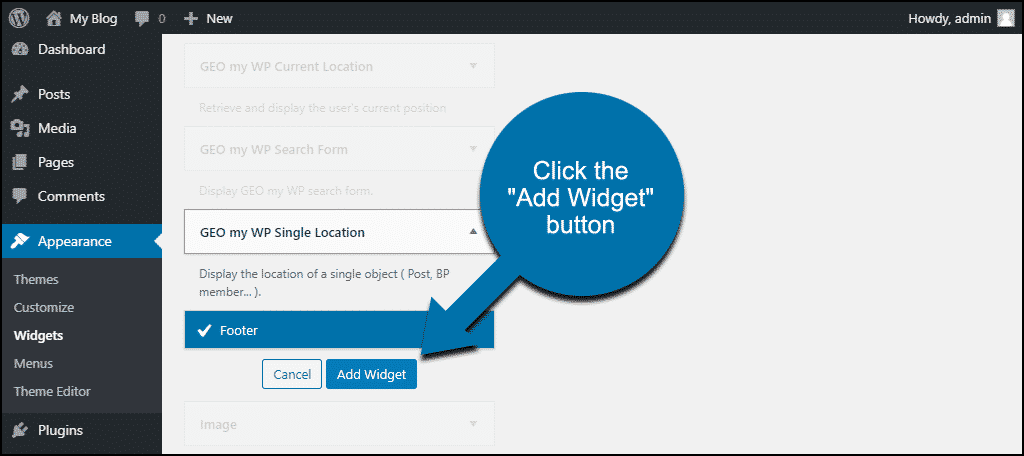
As you can see, “Geo my WP Current Location” and “Geo my WP Search Form” are also widget options.
Choose a widget area (in our example, the widget will be in the page footer) and click the “Add Widget” button.
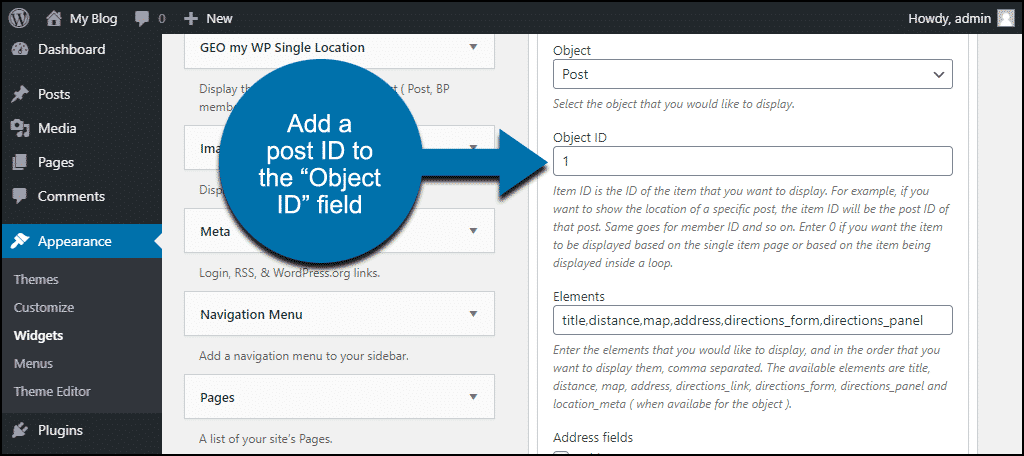
You’ll see a long list of widget options. We’re just covering the basics here, so we’ll add a post ID to the “Object ID” field. This guide will show you how to find post IDs.
What that will do is display the location information for that particular post in the widget.
Scroll down and click the “Save” button.
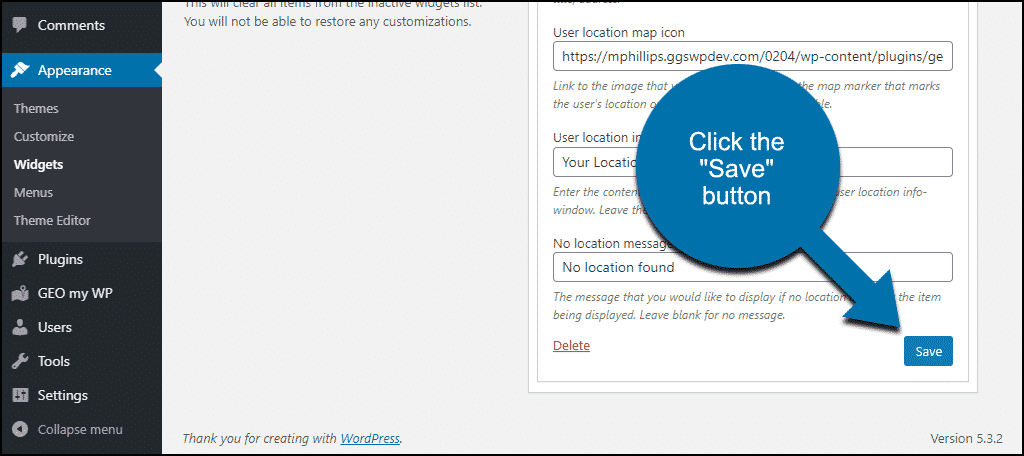
Now the widget displays a map of the location from the post that we specified.
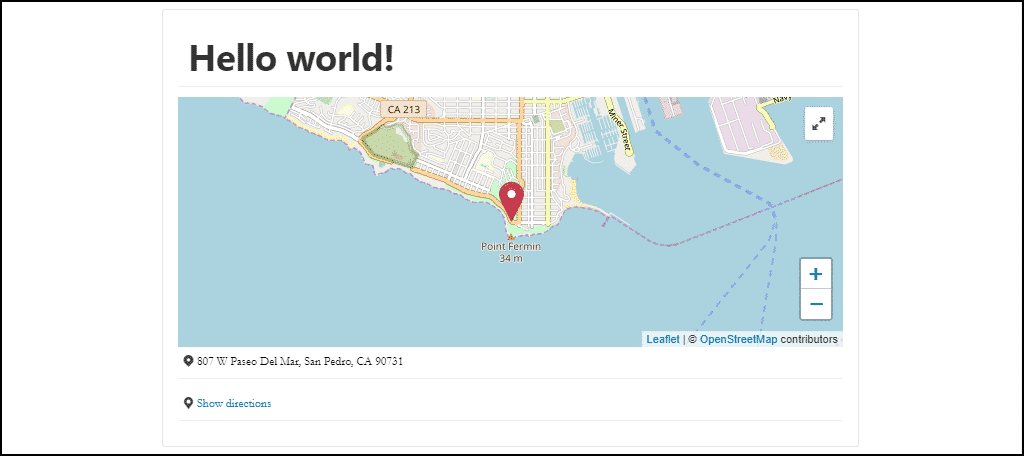
If you want to display an address or business hours along with the map, those are set in the “Location” section of the post that we’re referencing in the widget. So to add the address to the widget, edit the post that we entered in the “Object ID” field.
Making Posts Searchable by Location
When you add location information to a post or a page, it’s automatically searchable. But we have to create an interface to let visitors perform geo searches.
In the left column navigation, mouse over the “GEO my WP” link and click the “Forms” link.

In the “Create new form” drop-down, select “Posts Locator.”
Copy the shortcode that’s generated for the form.
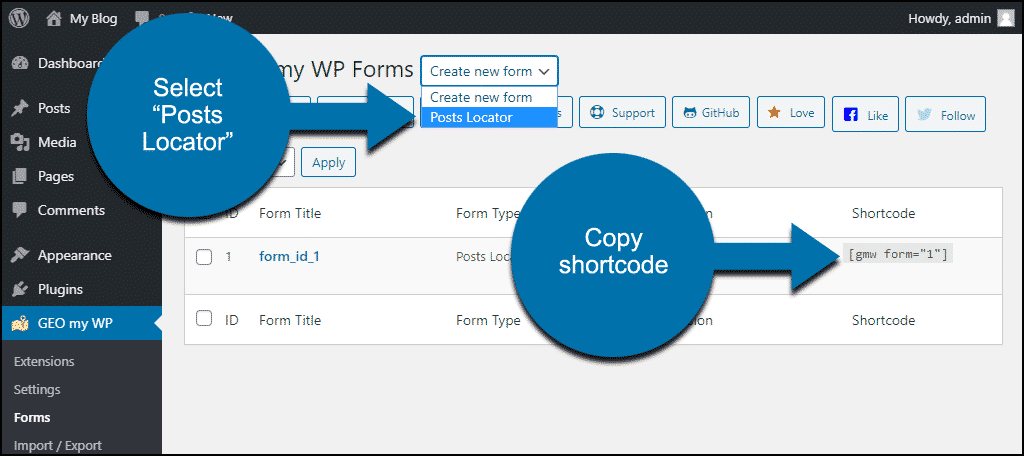
Our shortcode for the search for is [gmw form=”1″]. To display the search form, paste the shortcode into a page or post.
Here, we’re editing the sample page and adding the shortcode.
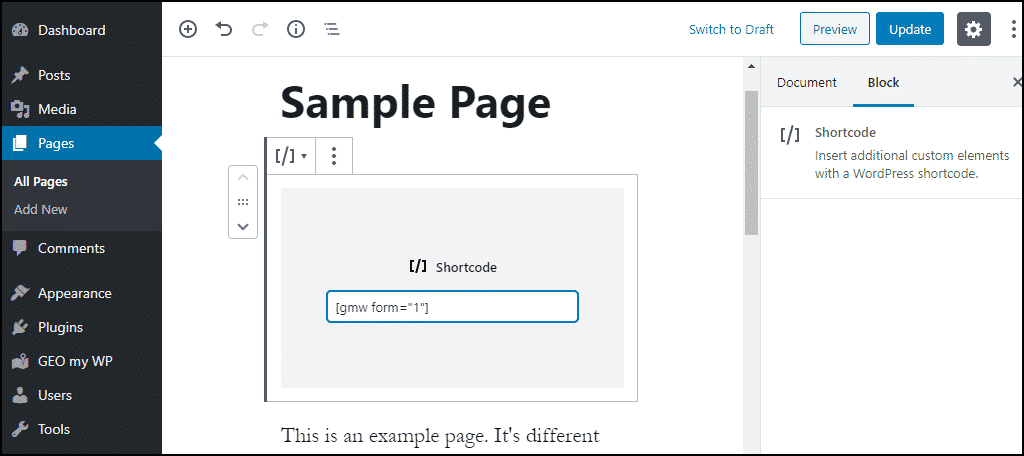
Update or save the page.
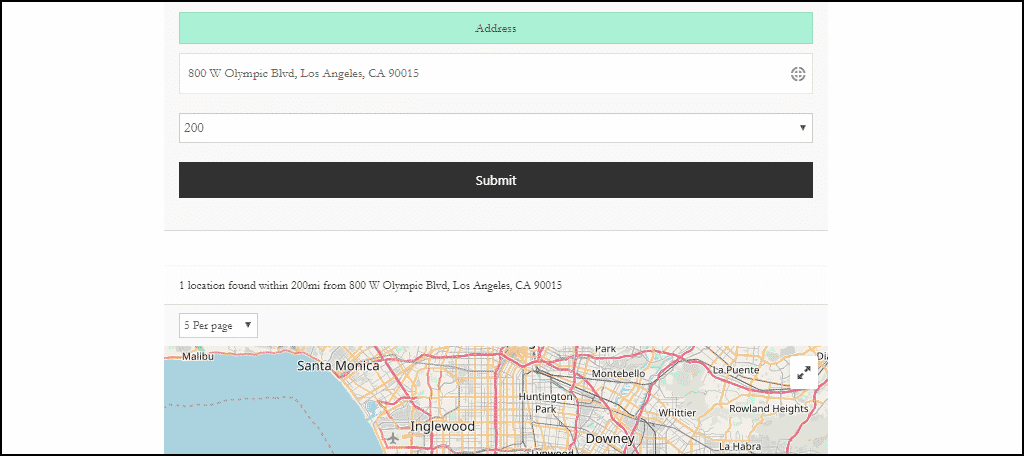
Now when a visitor enters their address, a map is generated that displays locations within a certain radius of his or her location.
How to Geo-Search Post Types
So far, we’ve seen how to add location data to posts and pages and how to show posts and pages near a given address to a site visitor.
In my original example of a travel blog, you can see how this would be useful. If a visitor wants to see all of your articles about a city or a country, they can find them with a search.
But you can make those searches even more specific. There are two “taxonomies” used in WordPress: categories and tags.
Chances are you’re already using categories, and you may be using tags as well. If not, you can start using them to narrow down or classify the kinds of searches available to your visitors.
Let’s see how to add category and tag selection to the search form that we already created.
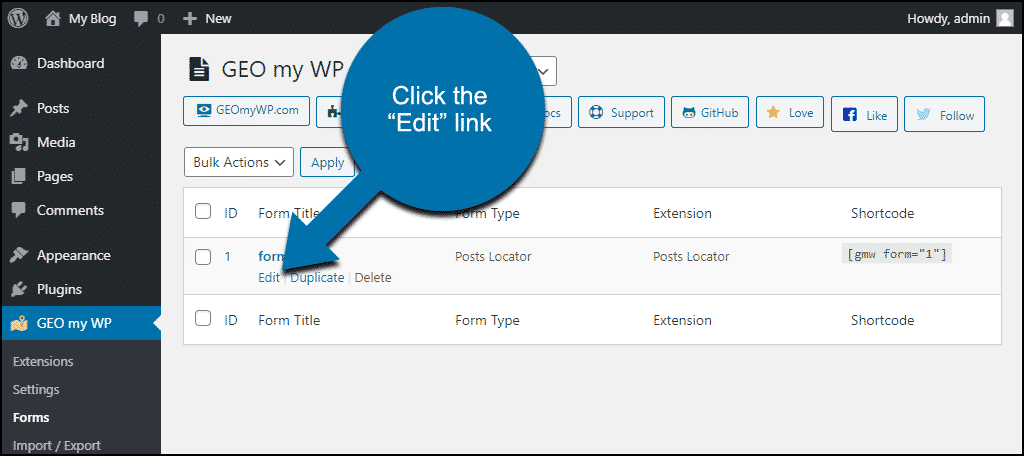
In the left column navigation, mouse over the “GEO my WP” link and click the “Forms” link.
Click the “Edit” link for the form.
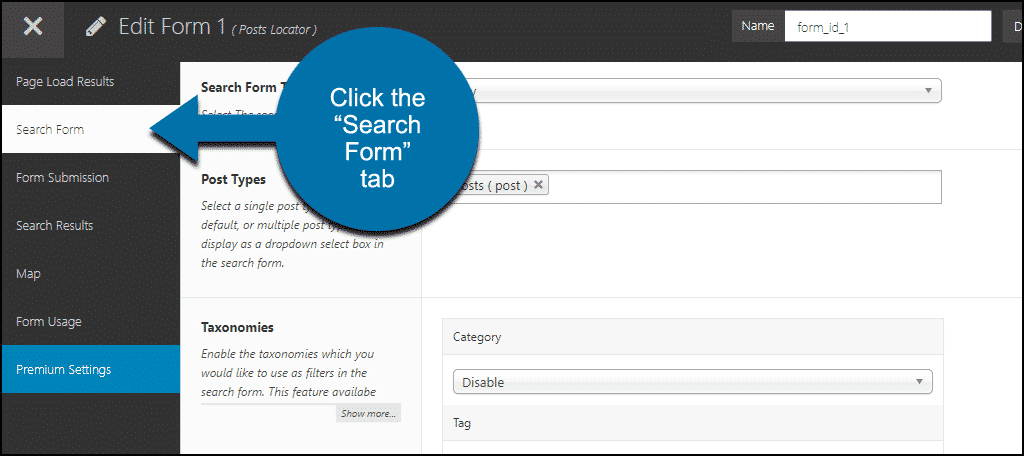
Click the “Search Form” tab.
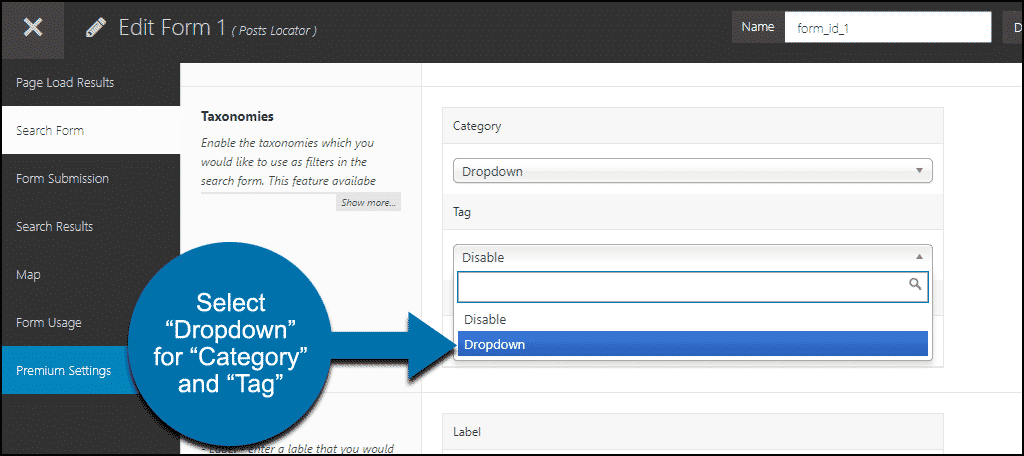
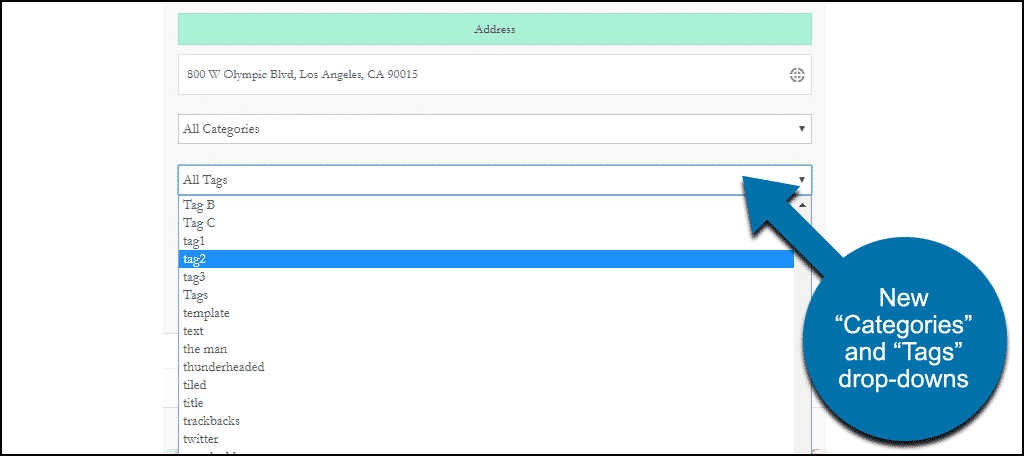
In the “Taxonomies” section, change “Category” and “Tag” from “Disable” to “Drop-down.”
Click the “Save Changes” button.
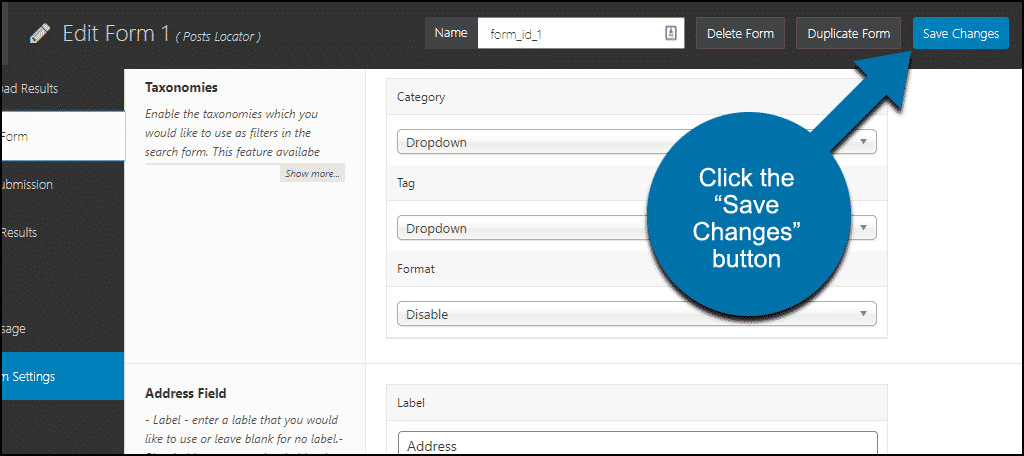
Now your search form has two new drop-downs, and visitors can narrow down their search results by choosing a category and/or tag.
Show My Current Coordinates
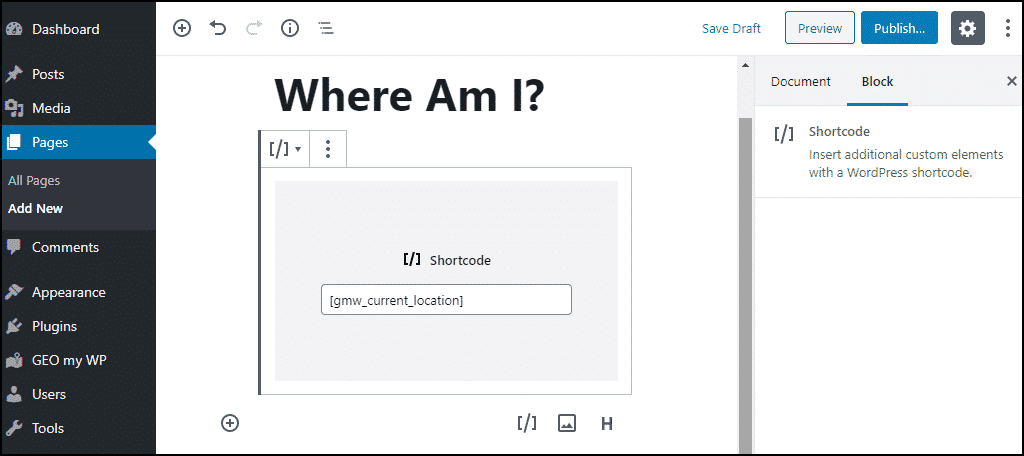
If you want to show visitors their current coordinates, you can do that with a widget or a shortcode in a page or post. The shortcode method is very flexible, so we’ll use that for our demonstration.
In its simplest form, you add visitor coordinates to a page by adding the shortcode:
[ht_message mstyle=”info” title=”” show_icon=”” id=”” class=”” style=”” ][gmw_current_location][/ht_message]
That shortcode is extendable in a number of ways, you can find the details in the plugin documentation.
Let’s add the shortcode to a new page.
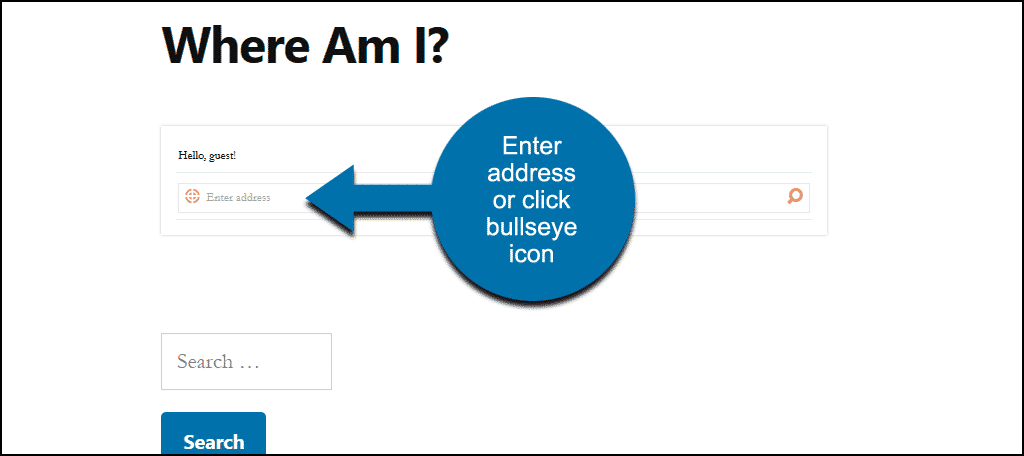
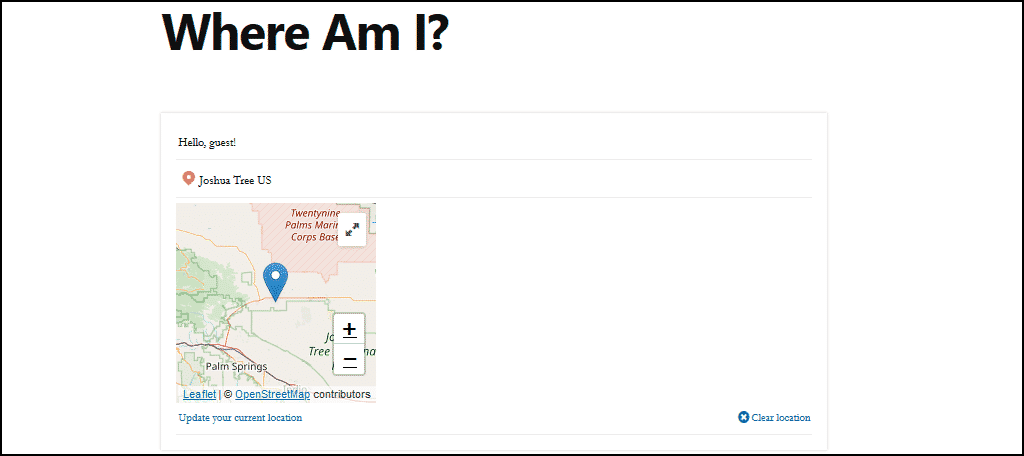
Now your visitors can either click the bullseye icon or enter an address to get a map of their current location.
What Happens if You Uninstall the Plugin
If you uninstall the GEO my WordPress plugin, pages and posts that used the plugin will be affected. For instance, the plugin shortcodes will stop working. So the shortcodes themselves will be displayed anywhere they were used.
Taking Geo-Search Further
We’ve covered the basics to get you started here. But when you want to geo track on a larger scale, there are many options.
The category and tag searches can be broken down further into custom WordPress taxonomies.
You can create geo profiles when you integrate with BuddyPress. We used the free mapping service in this tutorial, but with Google Maps APIs, there are even more options available.
It’s a wide world of possibilities.
I was involved in a project years ago that published poetry broadsides and placed them in books in bookstores around the world. People could go to a website and register their finds.
But we didn’t have anything like geolocation. Or smartphones for that matter.
So you can imagine how a project like that could be so much greater now with geolocation tech attached to it.
Have you used any geolocation technology on your website in the past? Has this article given you any ideas for potential uses that we didn’t discuss? Let me know in the comments.
God bless you, Michael Phillips
I don’t know if I deserve that, but I appreciate it. 😉