Do you run a WordPress website and love Twitter? You can combine both of them by sending out automatic tweets every time you post on WordPress. Social media is crucial to success as a website in today’s world. This is due to the fact that they are the most visited websites in the world. Facebook alone has a billion monthly users.
Thanks to facts like these, social media is considered mandatory to be successful. It can be quite troublesome if you post regularly and have to also regularly send out tweets to inform your community. A better method is to automatically send out a tweet to your community whenever you create a new post on WordPress. Today, I will demonstrate how to automatically send a tweet every time you post on WordPress using the WP to Twitter plugin.
Why Set Up Automatic Tweets
Running a website is time-consuming and is a full-time job, but the same can be said of running successful social media accounts. They take just as much effort and will most likely get more attention than your own website. Creating automatic tweets is a great way to shave time off of your daily activities. It also informs all of the regular visitors that you have new content on your website.
As much as every web developers hopes that their visitors visit every day to see new content, it is not common. Social media is the perfect way to stay connected with your community when they are not on your website. Creating user engagement outside of your website is just as important as creating user engagement on your website.
How to Automatically Send a Tweet Every Time You Post on WordPress
Today, I will demonstrate how to automatically send a tweet every time you post on WordPress using the WP to Twitter plugin. The plugin is very easy to set up and allows you to create a custom message that will be displayed everytime you create a new post. The plugin is not limited to just posts. You can also have it send out tweets when new pages are created or edited.
Installing WP to Twitter
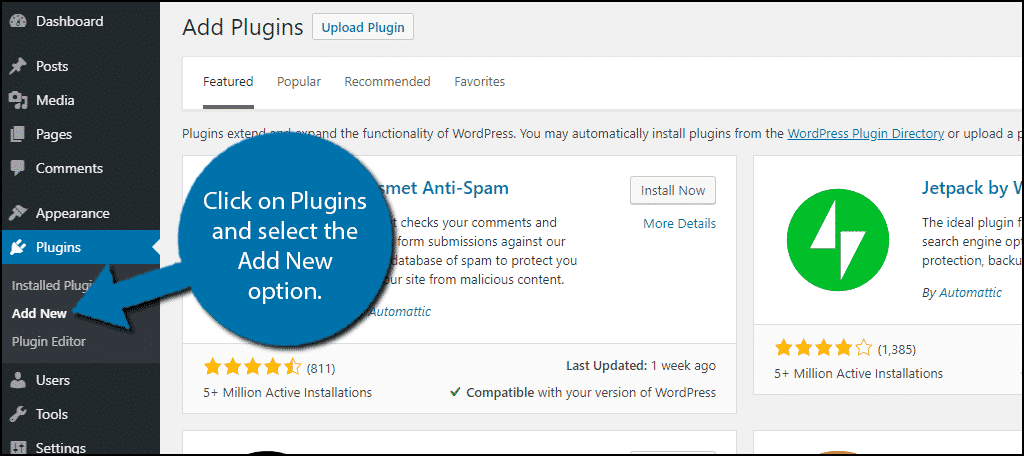
Let’s start off by clicking on Plugins and selecting the Add New option on the left-hand admin panel.
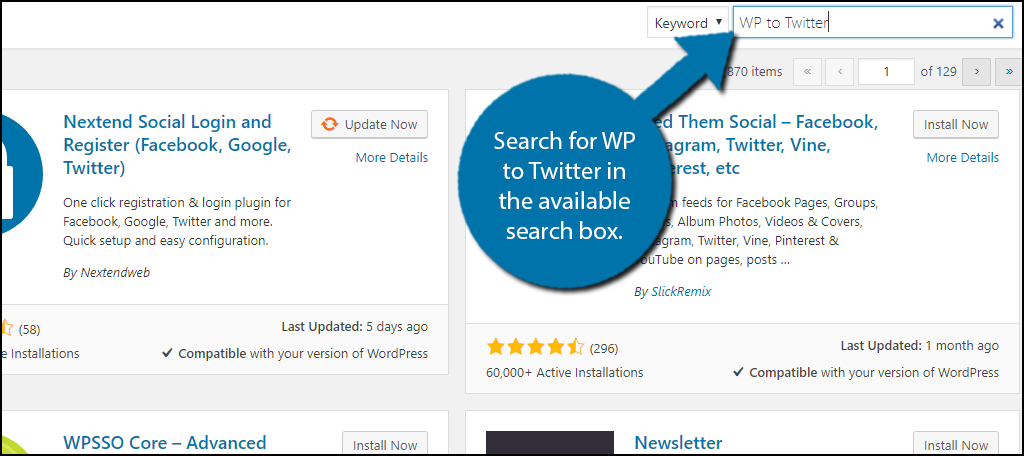
Search for WP to Twitter in the available search box. This will pull up additional plugins that you may find helpful.
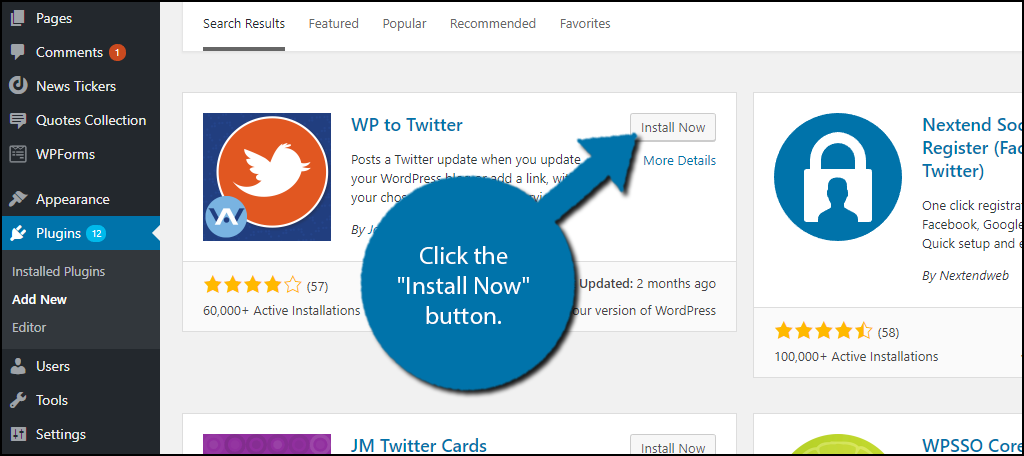
Scroll down until you find the WP to Twitter plugin and click the “Install Now” button and activate the plugin for use.
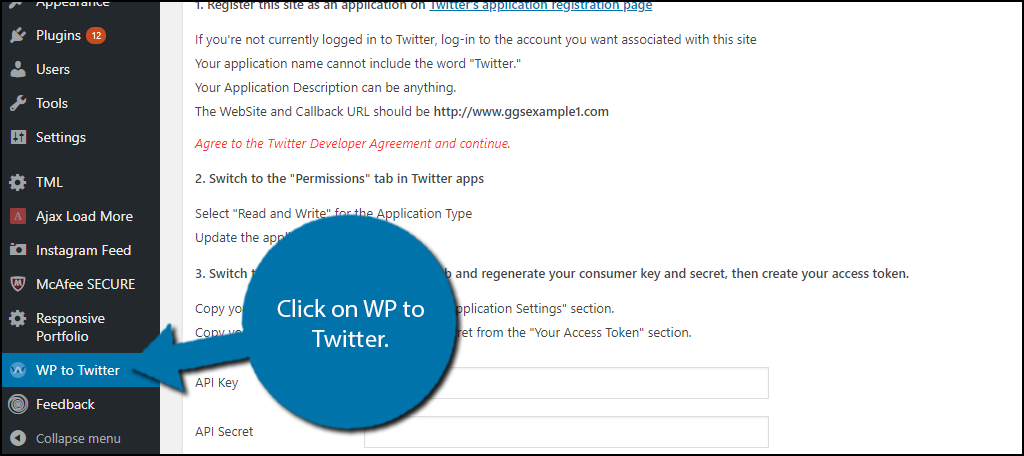
On the left-hand admin panel click on WP to Twitter. This will pull up the main settings page.
You now need to link your Twitter account and WordPress website.
Linking Your Twitter Account
The process of getting a Twitter API Key and a Token is very simple and the directions are outlined in the main settings page of the plugin. Before you begin, you need to make sure you have a mobile phone number attached to your Twitter account.
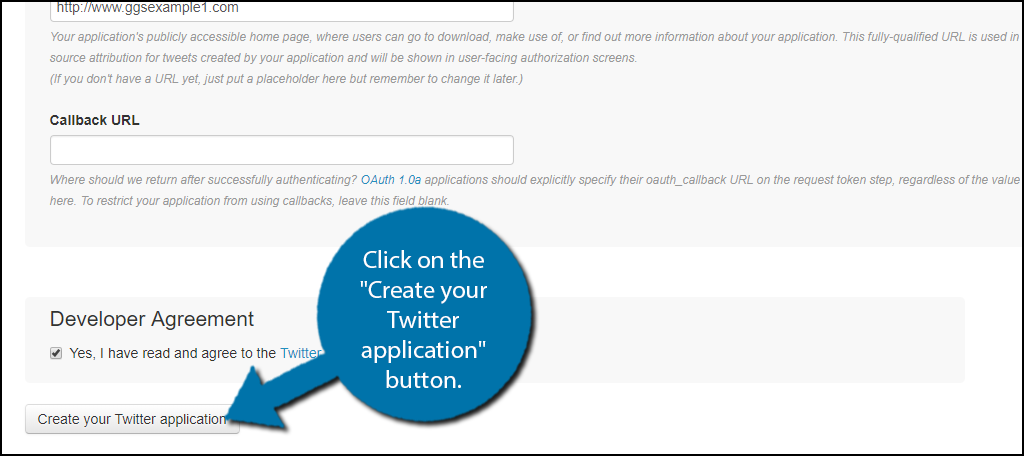
Click on the link in the plugin to visit the application creation page from Twitter. Fill out all of the information on the page and click on the “Create your Twitter application” button to finish.
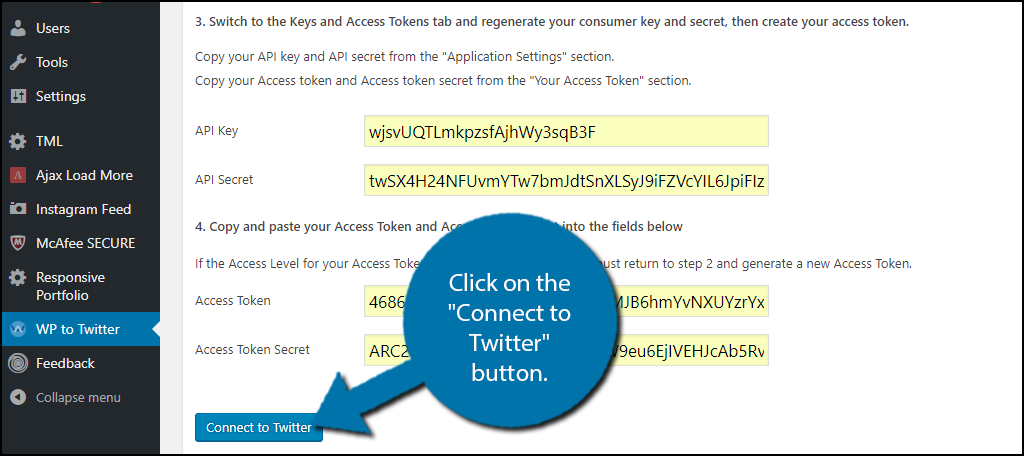
You will now see that your application was successfully created. If not, it will show an error message. Click on the Keys and Access Tokens tab. Generate the Access Token and copy the API Key, API Secret, Token, and Token Secret.

Paste all of the authentication information into their appropriate boxes and click on the “Connect to Twitter” button at the bottom.
Your account should now be linked.
Setting Up WP to Twitter
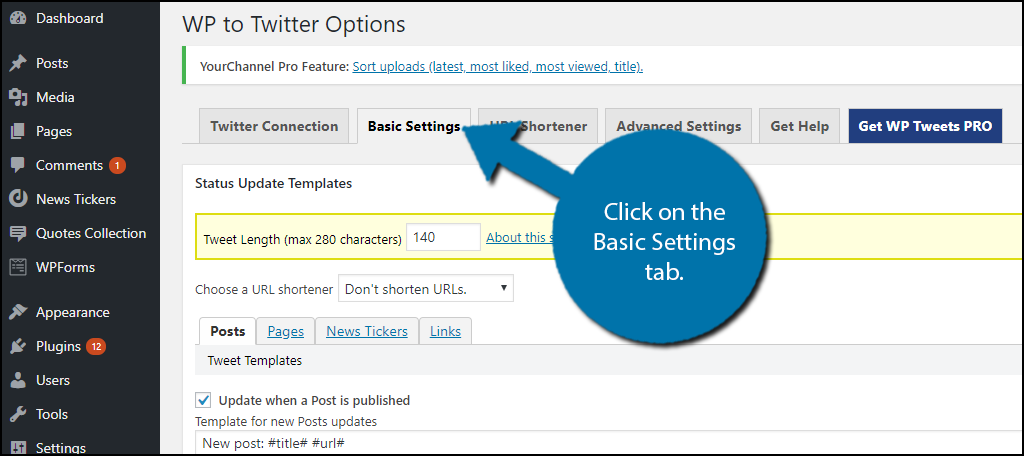
Click on the Basic Settings tab. On this tab, you can set up when a Tweet is created and what it will say.
There will be four tabs related to your Tweets, Posts, Pages, News Ticker, and Links. For our needs, only the Posts tab will be examined, but the rest work similarly and can be used to enhance your social media presence.
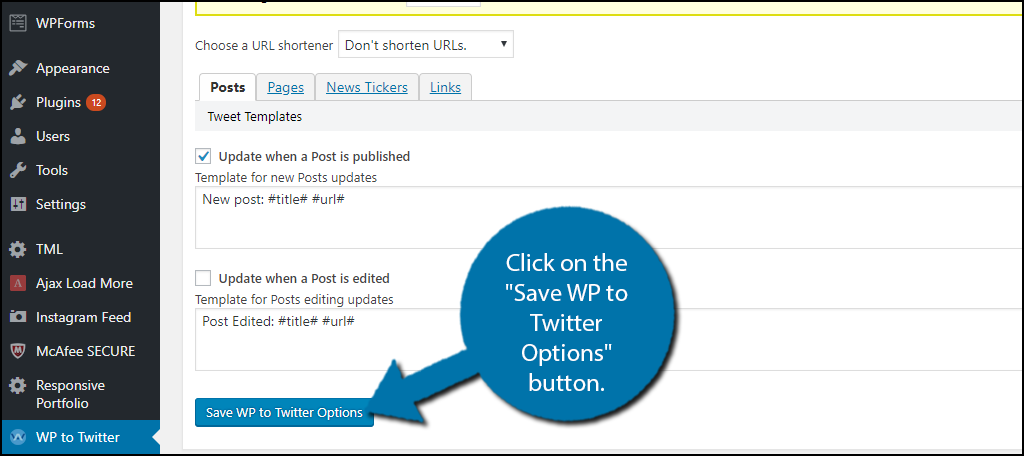
By default, your tweet will say the title of your post and the URL of the post. You can edit the message to whatever you want, but remember the character limit on tweets. There will also be an option to send a tweet when a post is edited. This is really important if there is a critical mistake that was fixed. The choice is up to you. Click on the “Save WP to Twitter Options” button when you are done.
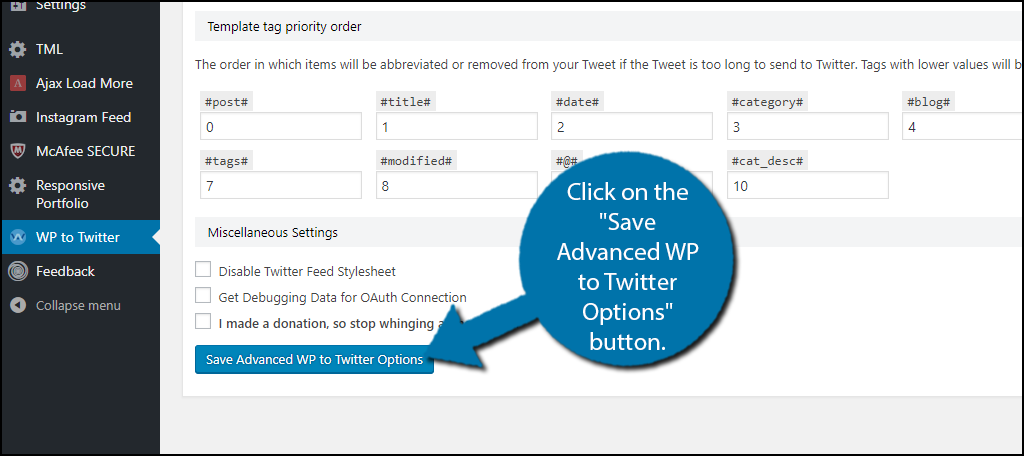
Click on the Advanced Settings tab. Here you can change additional settings. One of the most important ones is whose content will generate a tweet. This right should be reserved for your Authors and Editors. You can change this in the Permissions section. When you are finished, click on the “Save Advanced WP to Twitter Options” button.
Congratulations, you have successfully set up the WP to Twitter plugin. The settings can be changed at any time from the plugin’s settings page.
Beware of Spam
Sending out automatic tweets is a good way to share your news and save time while doing it. Unfortunately, it also comes with a negative side, spam. Twitter is very active, but if you create multiple posts a day, it can be a bit much for some Twitter followers. Turning away Twitter followers is the last thing you want to do.
Take some time to analyze how many times a day you create a new post and whose post deserves to be shown on your Twitter feed. Keep in mind that other social media platforms and WordPress can connect with all of them. Facebook is the largest social media website and is very beneficial to set up WordPress to automatically post on Facebook.
How many times a day do you post? Do you feel you save a lot of time by setting up automatic posts?
Thanks a lot for help
You’re welcome.