Do you want to enable retargeting ads on your Facebook page? Facebook is the largest social media website in the world and has some insane stats to prove it. A large percentage of every marketing team is focused on Facebook advertisements because the platform gets so much traffic. Like all advertisements, not all of them will pertain to your users.
Because of Facebook retargeting pixel ads and services like Google Adsense, you need to try to show ads that matter to the viewer. Marketing is very expensive and you do not want to waste money on ads that no one likes to view. Today, I will demonstrate how to enable the retargeting pixel ads for your website on Facebook.
What Exactly is a Retargeting Ad
Retargeting ads are experienced after you visit a website and it is very easy to spot them. Everytime you surf the web you are usually viewing a product or service at some point. A retargeting ad will remember what you were looking at or for and start showing advertisements for that product or service.
For example, I was recently shopping for a new computer chair, I then began to see computer chair advertisements for the following two weeks. This is a very effective advertisement plan that has proven successful, but it is not perfect. In my case, I decided on my chair within the day, but I still saw chair ads for two weeks. As you can imagine it does not always work out for visitors and can be quite annoying to see ads that no longer apply.
How Do These Help Your WordPress Website
As I said, marketing is expensive. It is important to maximize any returns from your marketing campaign while spending as little as possible. Adding a retargeting pixel on your website will help send your website’s ads to Facebook visitors. This will help redirect Facebook visitors to your website. Of course, you should make sure that your website’s Facebook page is also maintained and updated regularly with new posts to maximize the effect.
How to Enable Facebook Remarketing and Retargeting Ads in WordPress
Today, I will demonstrate how to enable the retargeting pixel ads for your website on Facebook. You will need access to both your Facebook account and WordPress website to complete this tutorial. You will not need any additional plugins to do this, but I do recommend using the Insert Headers and Footers plugin to add the pixel code. Keep in mind that it is not free to advertise on Facebook, but the returns should outweigh the costs. If it does not, you need to reexamine and reevaluate your marketing.
Generating a Facebook Pixel
The first step is to actually generate the Facebook pixel. This pixel is how Facebook optimizes your advertisements. It collects and uses data to make sure your ads are viewed by people interested in what your website offers. Facebook makes it extremely easy to obtain the pixel code.
Log in to your Facebook account and visit the Ads Manager on Facebook. Here is where you can manage all of your advertisement related to Facebook. In the available search box, type “Pixels” and select the Pixels option.
![]()
A Facebook Pixels tab will now open. Click on the “Create a Pixel” button.
![]()
A pop-up window will appear. Use the text box to name your pixel. Click on the “Create” button once you are ready.
![]()
You will see a green checkmark when it is completed. Facebook will present three ways to add the Facebook Pixel to your website. Select the “Manually Install the Code Yourself” option.
![]()
Facebook will now generate the Pixel code. Copy the Pixel code for the next step.
![]()
The code must now be entered into your website’s header.
Adding the Facebook Pixel to WordPress
The Pixel code you just copied needs to be inserted into your website’s header, which can be done in multiple ways. My favorite way is to use the Insert Headers and Footers plugin. It makes it extremely easy to copy code into these areas of your website.
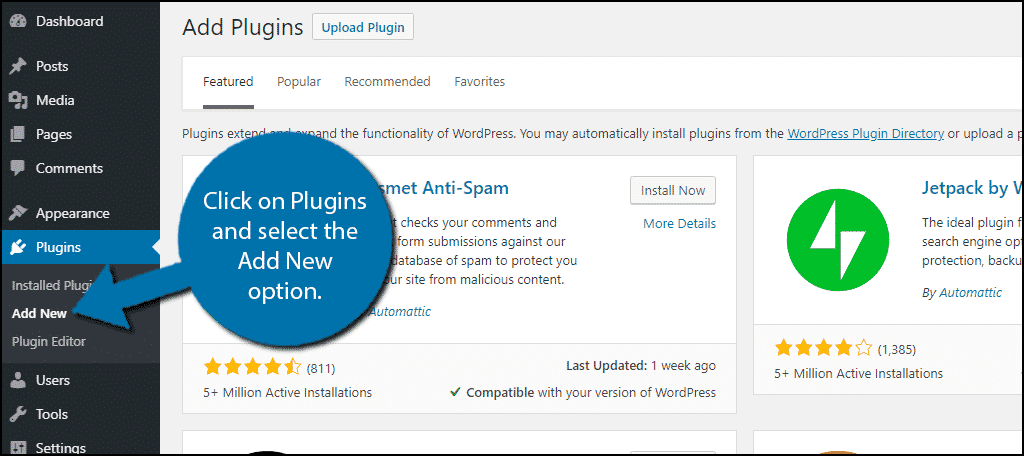
Start with clicking on Plugins and selecting the Add New option on the left-hand admin panel.
Search for Insert Headers and Footers in the available search box. This will pull up additional plugins that you may find helpful.
![]()
Scroll down until you find the Insert Headers and Footers plugin and click the “Install Now” button and activate the plugin for use.
![]()
On the left-hand admin panel click on Settings and select the Insert Headers and Footers option. This will pull up the main settings page.
![]()
Paste the code into the header text box. Click on the “Save” button to activate the Pixel on your website.
![]()
Create a Custom Audience
Now that you have the Pixel set up, there are only two things left to do. Create a custom audience to target and to create the actual Facebook ad. In the same manner, as you found the Pixels tool, type in “Audiences” and select the Audiences option. Click on the “Create a Custom Audience” button.
![]()
Facebook has several options to choose from. Click on the Website Traffic option. The ad will target anyone that has visited your website. Give your audience a name and click on the “Create Audience” button.
![]()
Now Facebook will target this audience with your advertisements. All that’s left is for you to create an ad for your website.
There is Plenty to do on WordPress with Facebook
Facebook is the largest social media website and WordPress is the most popular website building platform. There are many things you can include on your website related to Facebook, which includes automatic Facebook posts, display Facebook events, add a Facebook like box, allow visitors to login with Facebook, and much more.
Remember, Facebook is not the only social media website. Twitter and Instagram are both huge social media websites. YouTube is the most popular video-sharing website. Use multiple websites to get the best results.
Have you found the process difficult? What other websites do you advertise on?