Do you want to use a content slider to display featured content on your WordPress website? Content sliders are a great way to display your content to your visitors. You can see demonstrations of them being used on major websites like Yahoo. Take a few of your most popular or newest pieces of content and add them to the slider to be displayed.
The slider can be added anywhere, but it is most appropriate on your website’s homepage. The homepage is generally the first page a visitor will encounter, which makes it the best location to advertise on. Today, I will demonstrate how to add and use a content slider in WordPress by using the Smart Slider 3 plugin.
Why Use a Content Slider in WordPress
Content sliders can help make your new content stand out on a page. They can also be very nice to look at and spice up a page if there is not much going on. A content slider consists of displaying different pictures and most of the time, these pictures are directly tied to content on your site.
Of course, you could just use the slider to only display images. People love looking at images, which is why so many websites focus on photo galleries. Another use is for product advertisement. For example, if you have a product on your website, you could use a content slider to show the product from different angles. This will give the visitor all of the information they need and it will all be from one place.
How to Use a Content Slider for Featured Content in WordPress
Today, I will demonstrate how to add and use a content slider in WordPress by using the Smart Slider 3 plugin. The plugin is very popular with over 200,000 active installs and it is completely free to use. Of course, there is a Pro version if you want to upgrade that offers even more options and premade templates. It has as many features as many paid plugins offer. The plugin is extremely user-friendly and should be easy to use regardless of your skill level.
Installing Smart Slider 3
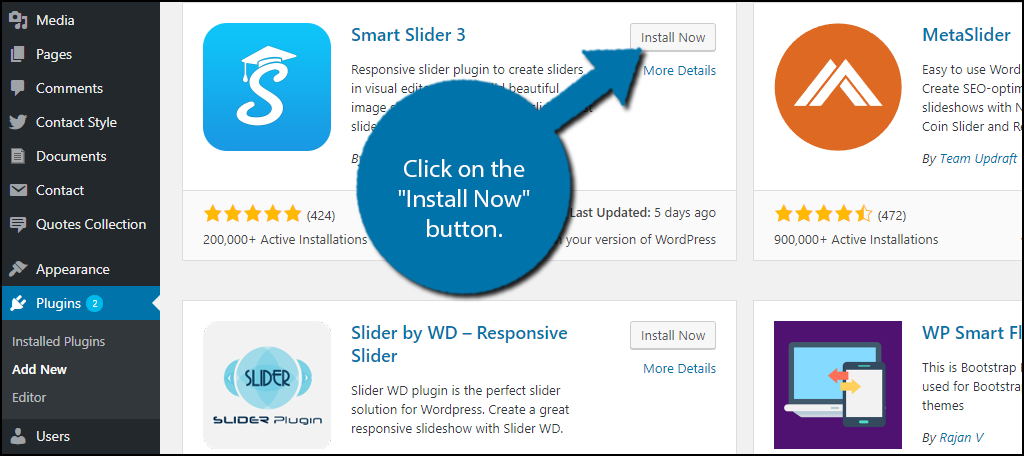
Start by clicking on Plugins and selecting the Add New option on the left-hand admin panel.

Search for Smart Slider in the available search box. Do not include the 3 because you will get zero results. This will pull up additional plugins that you may find helpful.

Scroll down until you find the Smart Slider 3 plugin and click on the “Install Now” button and activate the plugin for use.
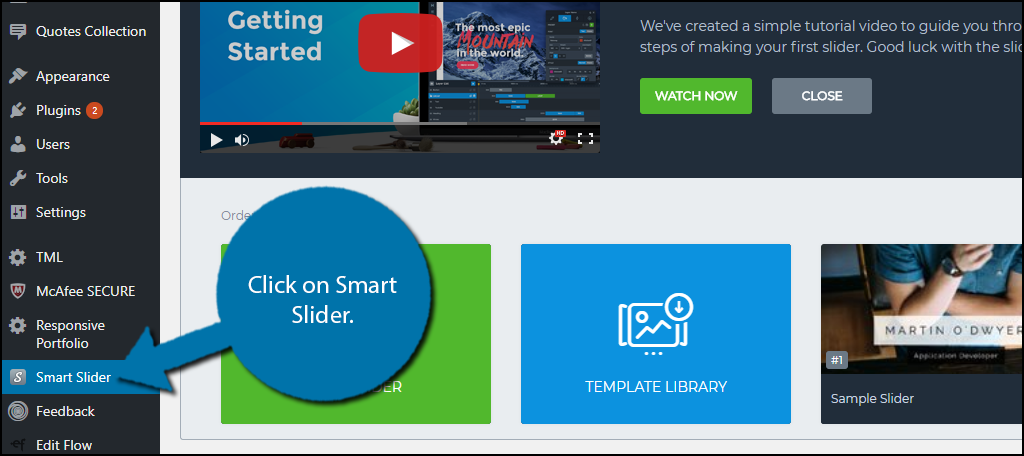
On the left-hand admin panel click on Smart Slider. This will pull up the main settings page.
Using Smart Slider 3
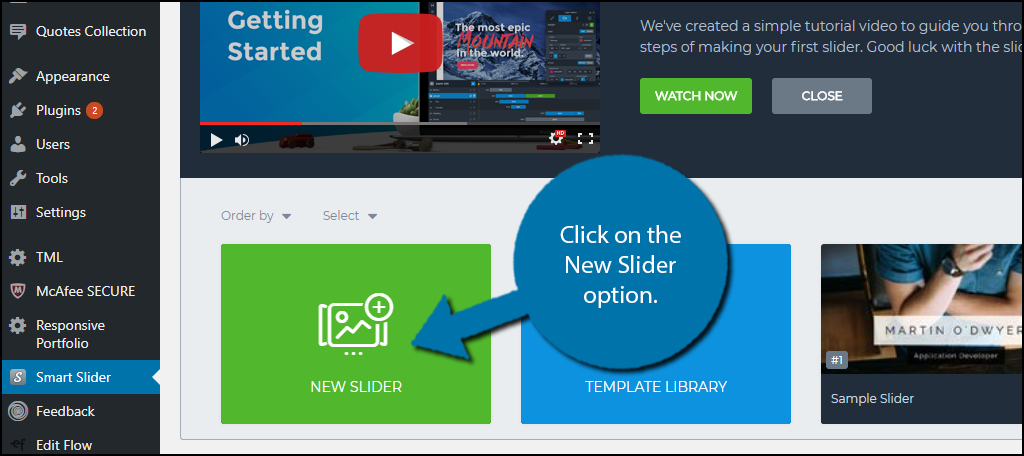
Smart Slider 3 can be used to create image, video, and post sliders. There is a great tutorial video on the settings page. I suggest watching it to gain a better understanding of the plugin. The plugin has some default slides to choose from, but I would recommend creating your own unique ones. Whichever you choose to use, make sure they blend in with your website’s theme.
Click on the New Slider option to begin building your own unique content slider.
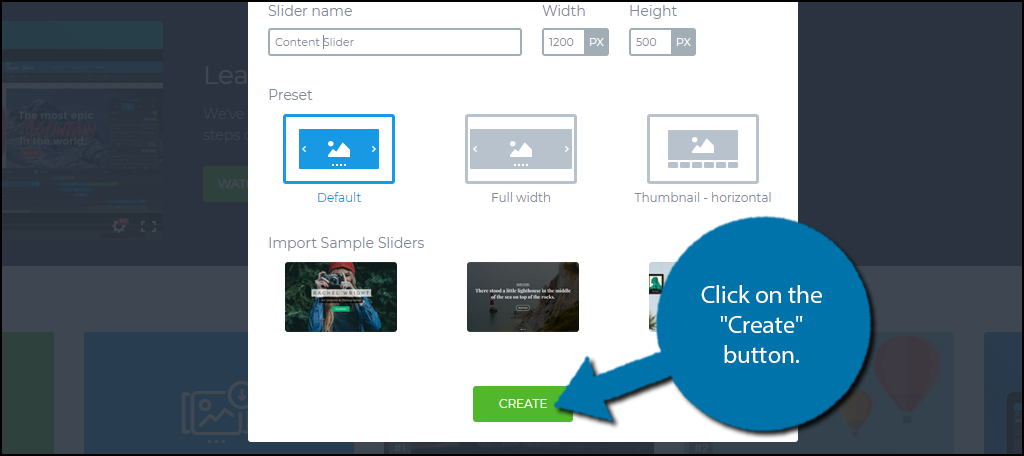
A pop-up window will appear. Here you can name your new slider, choose the size of the slider and how your slider will look. Make sure to pick the slider size in relation to the image size you will use. There are three options to choose from for your slider’s appearance. My personal favorite is the default, but you may prefer the other option. It will not affect the slider creation in any way, so pick what you like and click on the “Create” button.
You create your content slider one slide at a time. Clicking on the New slide option will open the media library. You can choose to use any image as the background of your slider. Alternatively, you can click on the Slide Library and pick from the five free background image templates as well. More images are unlocked with the Pro edition. Once you make your selection you will see the image appear in the slide 1 slot.

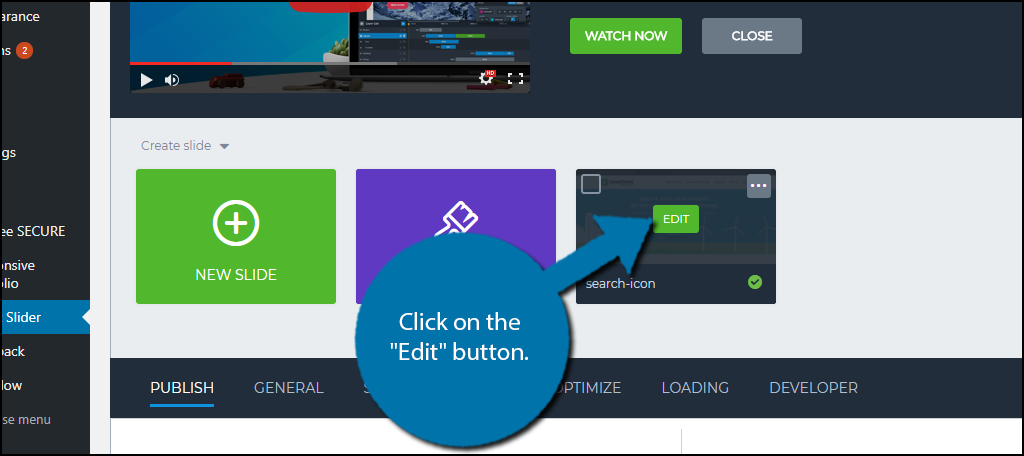
Hover your mouse over your image and click on the “Edit” button.
Creating a New Content Slider
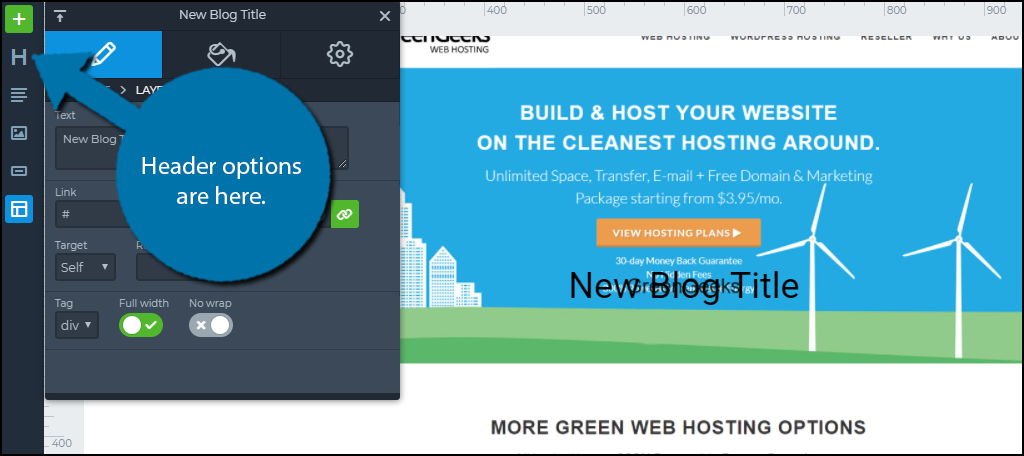
You will now see your plain image if you selected one from your media library or a template slide. The template slide will already come with information fields. If it is a custom image, don’t worry, it is easy to add information fields. You will see five buttons on the left-hand side of the image.
The first one will be the header options represented with an “H”. Use this option to add a title, For example, if you are using this slider to show off your newest articles or blogs, use the name of the article or blog. You can select the font type, font size, and the color as well. Make sure the text is visible on the background image! There is also a link option to make the header clickable and you can have it lead to the new content.
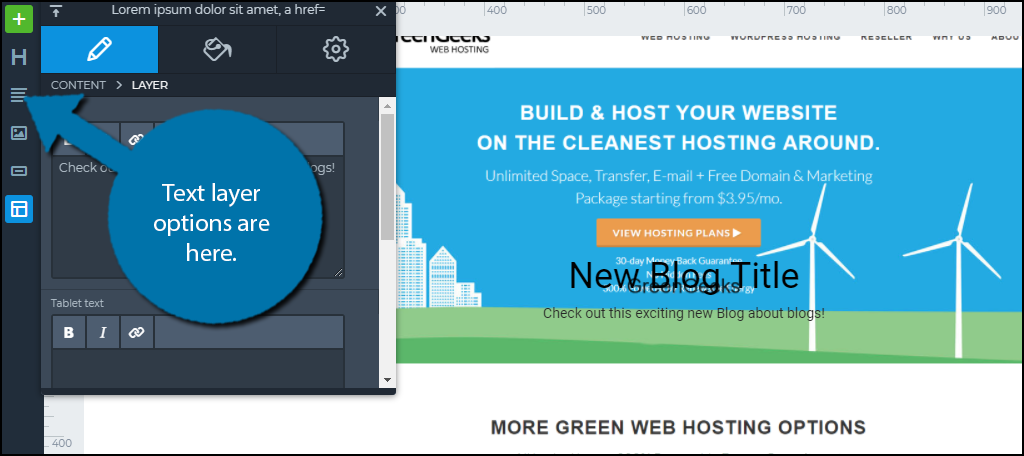
The next option is the text layer. Use this to add a short attention-grabbing description. You can also choose to copy and paste the intro from the content itself. You will have the ability to change the font size, color, type, and use bold, Italic, and paragraph alignment. Don’t go overboard here, a short description that can catch a visitor’s attention is the best option.
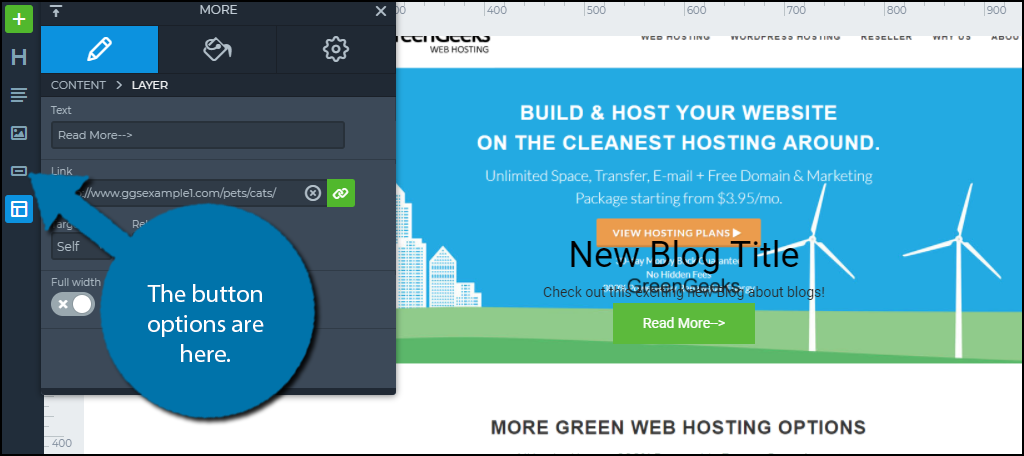
The next option is the image option. I do not recommend placing another image, but you can if you want. The following option is far more important, the button option. Here you can create a button to place on your slide. I recommend creating a “Read More” button that links to the content you are featuring.
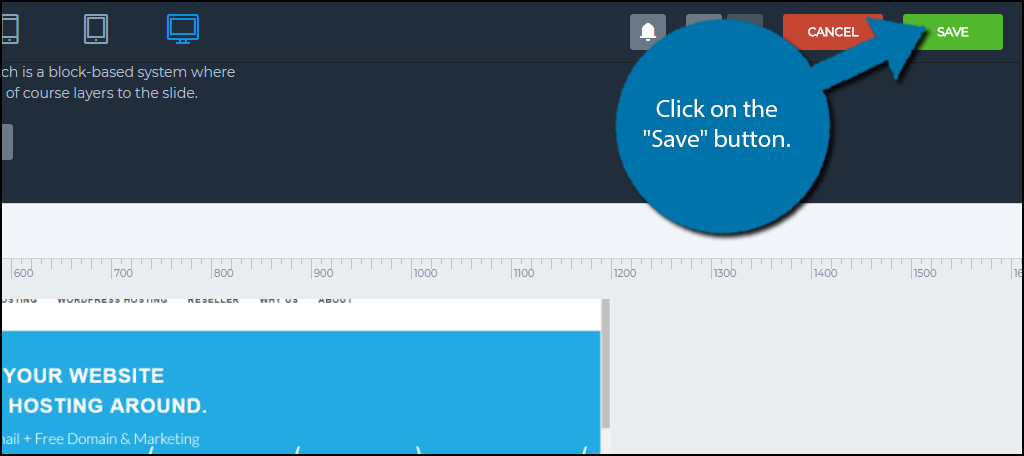
The last option is structure, but the default option is preferred by many websites. However, of course, feel free to change the structure. Once you are happy with your slide, click on the “Save” button.
Create as many slides as necessary or copy the one you just made and update it for different content. Now it is time to add it to your website.
Adding the Content Slider to Your Website
This plugin utilizes shortcodes to add the sliders to your pages and posts. I recommend placing it on your homepage, but that decision is up to you. You will find the shortcode for your content slider within the content slider under the publish section.
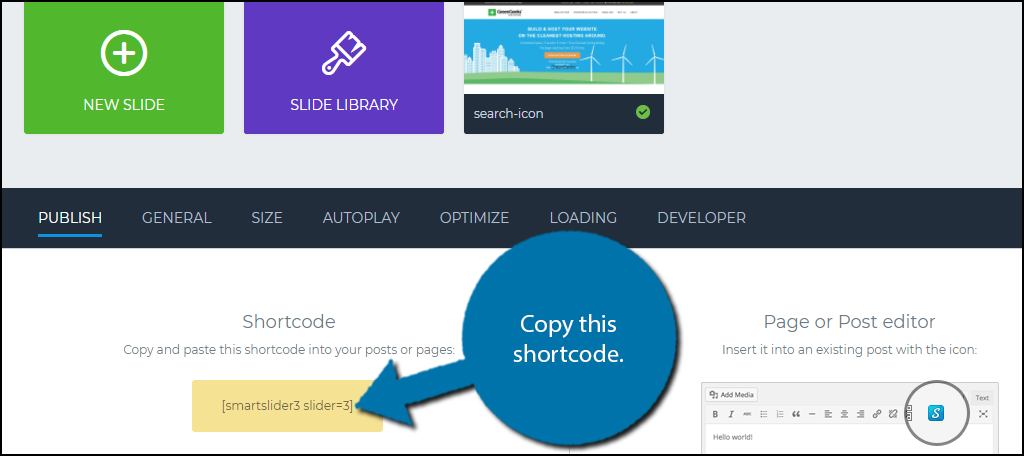
Copy the shortcode and paste it on to any page or post you desire. You will then be able to see the content slider on your website.
Congratulations, you have successfully created and added a content slider to your WordPress website.
Get the Word Out About New Content
Getting visitors to look at new content is not easy, but is very important for the growth of your website. Using the content slider can help spread the word about new content, but you should also consider other ways. Some popular ones include an email subscription and using social media platforms like Facebook or Twitter to spread the word. There are plenty of ways to tell people and the more you do, the better the odds.
How many slides have you created? Have you created a custom background image or used a template?