Search Engine Optimization, or SEO, is the most important aspect of your website next to content quality. This is because SEO is how search engines rank your posts and pages. The higher it ranks, the more traffic you will attract. And standing at the top of these plugins is Yoast SEO for WordPress.
Yoast is, by far, one of the most powerful SEO tool in WordPress and offers websites an unmatched repertoire of SEO tools to take advantage of. Not only does it help you write SEO-friendly content, but it can also help you write content that is easier to read.
Today, I am going to cover how to use Yoast SEO to give your search engine rankings a boost.
Why Is Yoast SEO The Best?
WordPress has no shortage of SEO plugins to choose from, which raises the question, why is Yoast SEO the best?
Yoast is the easiest SEO plugin to implement on a website regardless of whether it is new or has been around for years. It doesn’t have a lot of complicated settings to configure, and its interface is easy to understand.
As a result, content creators of any skill level can take advantage of Yoast.
A big way it accomplishes this is by making every component of the plugin informative and easy to utilize. You will never look at a setting or option and not understand what it means. Instead, everything has an explanation attached.
Some might even have links to full blog posts by the Yoast team on a specific topic.
Simplicity is truly the most important aspect of any plugin.
How to Use Yoast SEO
Step 1: Install Yoast SEO
While the biggest benefit of Yoast SEO is its simplicity, developers can still spend a lot of time setting it up. I’m going to streamline the process and show you how to get the most out of the plugin in the quickest way possible.
It is important to remember that when it comes to SEO changes, it can take several months to see the benefit to your website. Thus, do not expect your rankings to improve overnight.
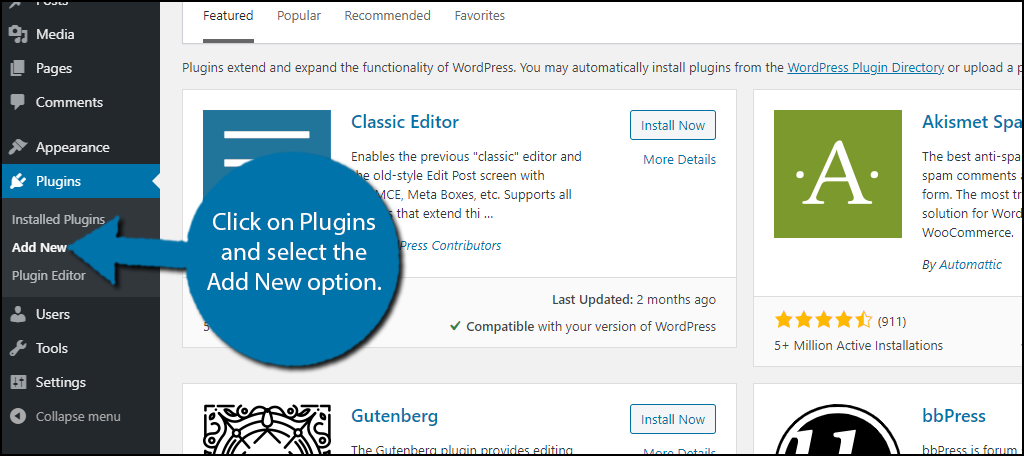
Let’s start by clicking on Plugins and selecting the Add New option on the left-hand admin panel.
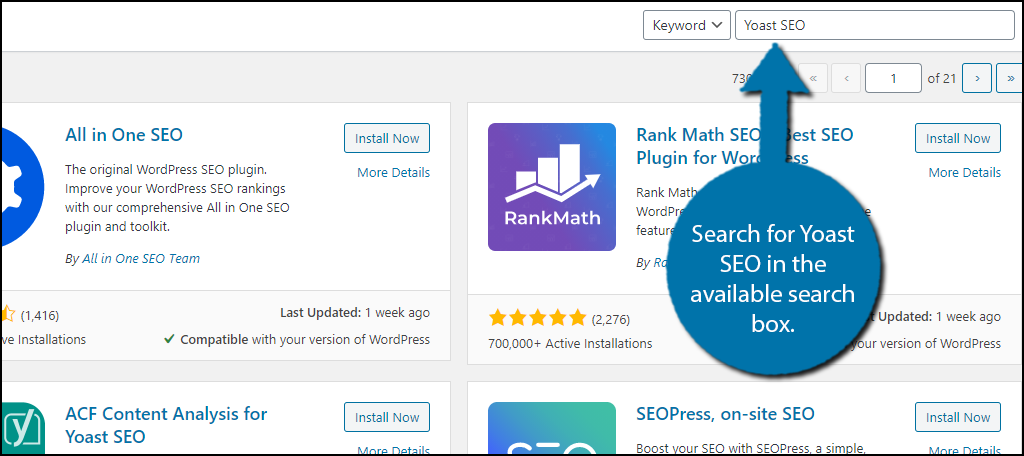
Search for Yoast SEO in the available search box. This will pull up additional plugins that you may find helpful.
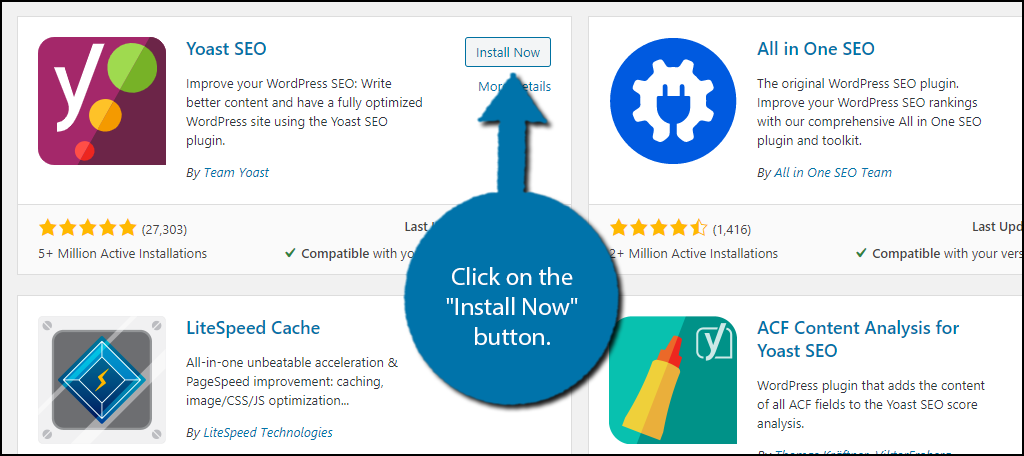
Scroll down until you find the Yoast SEO plugin and click on the “Install Now” button and activate the plugin for use.
Step 2: SEO Data Optimization
Upon activation, you should see one new Yoast SEO notification. This notification will tell you to optimize your SEO data, which will help Yoast run better and give you the best results. It will also boost the performance of your website to make sure it is loading pages quickly.
Thus, it should be the first thing you do after activation.
On the left-hand admin panel click on SEO and select the General option.

Locate the Notification section and click on the “Start SEO data optimization” button.
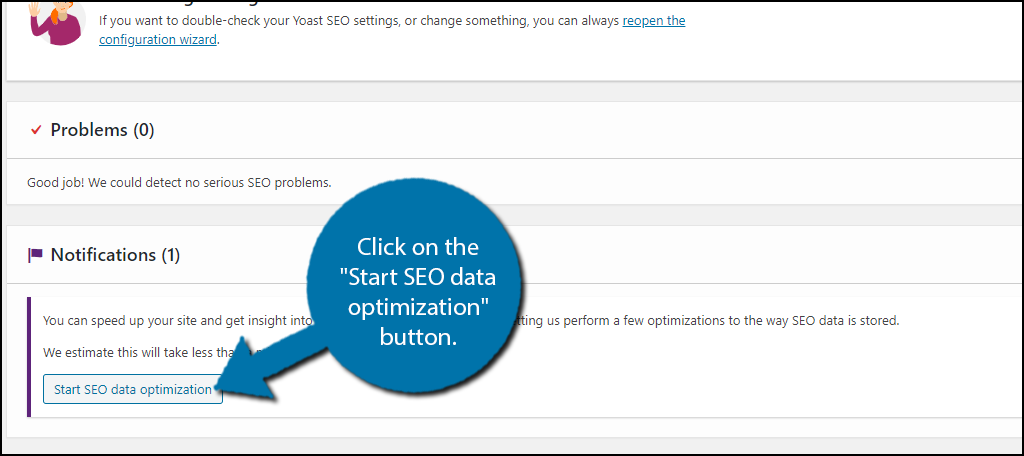
The amount of time this process takes depends on how much content your website has. If it is a new website with a handful of posts, it will take less than a minute. However, if you have an established website with hundreds of posts, then expect the process to take several minutes.
When the process is done, you will see a green notification telling you that the SEO data optimization is complete.
Step 3: Configuration Wizard
The fastest way to get Yoast SEO setup on your website is by using the configuration wizard. This will bring you through all of the significant settings that the plugin deems essential and will only take a few minutes to go through.
In the General settings section, click on the configuration wizard link.
Note: If this is not your first time using Yoast SEO, you will see a “reopen configuration wizard option.
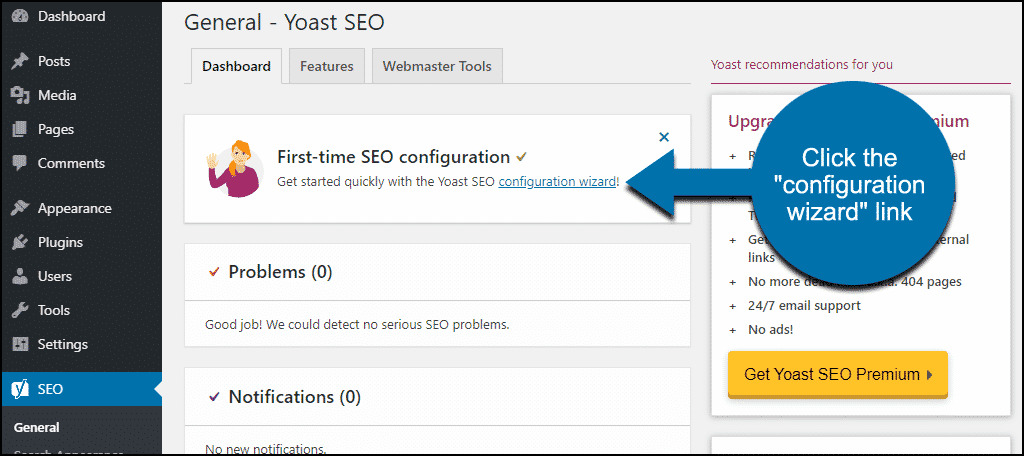
The configuration wizard will ask you to make some simple choices along the way. It’s a good way to quickly configure the plugin for your website.
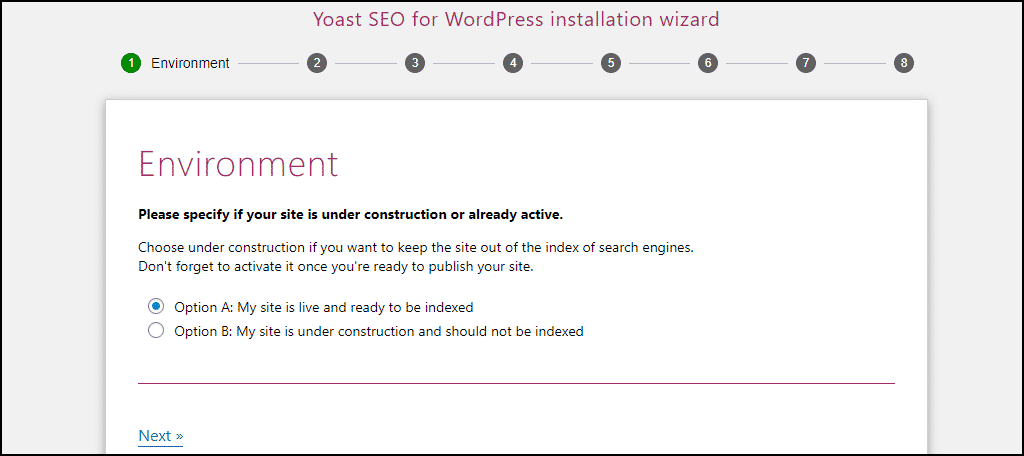
Environment
The first option is telling Yoast if the plugin was installed on an existing website where the content is ready to be indexed or if the website is still under construction.
Note: If you choose option B, make sure to come back and turn indexing on when your website is no longer under construction.
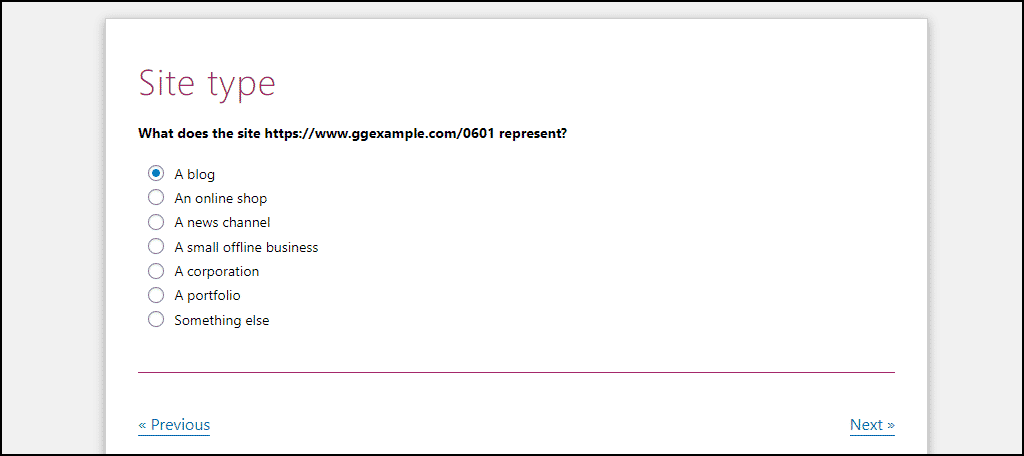
Site Type
The next option allows you to tell Yoast what type of website you run. This choice will determine the format for some of the schema data Yoast generates. So make sure to pick the one that best represents your website.
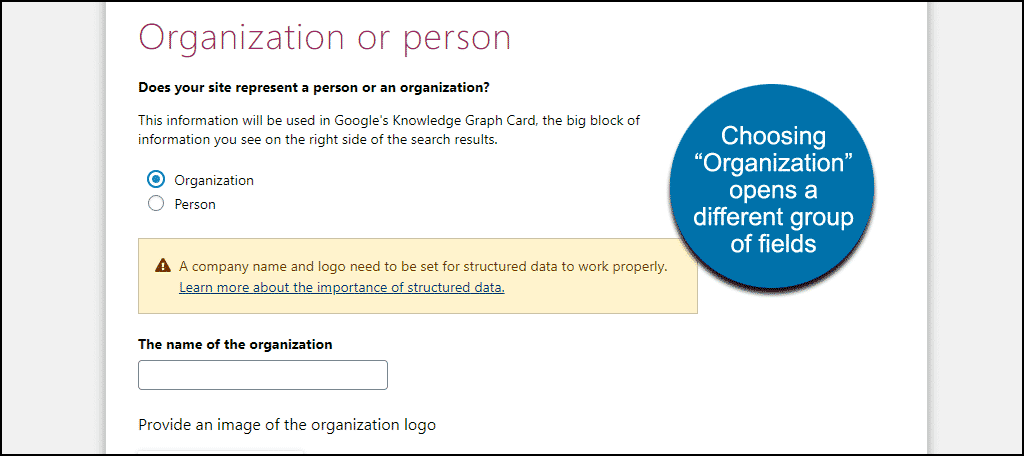
Organization or Person
You now need to tell Yoast if an individual owns the website or an organization. If you are just a person, you simply need to tell Yoast who you are. The plugin will then just use your user profile for things like social links.
However, if you are setting up an organization, you will need to upload your company’s name, logo, and all of the social media links associated. Once again, all of this information is used to determine the best schema data so that search engines (Google) fully understand your website.
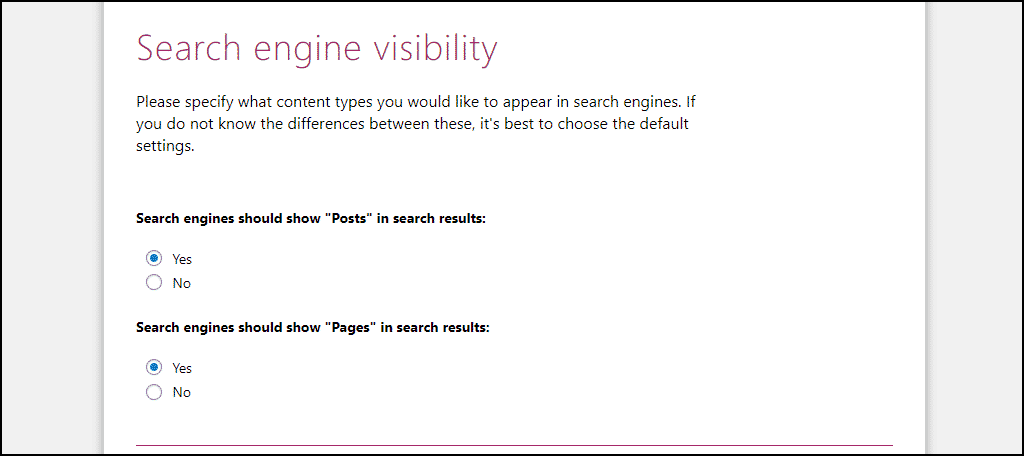
Search Engine Visibility
The search engine visibility options determine if new posts and pages will be added to your website’s sitemap. The default options are set to yes, and I highly recommend leaving them that way. Posts and pages listed in your sitemap will be indexed faster by search engines.
Thus, they start attracting visitors quicker.
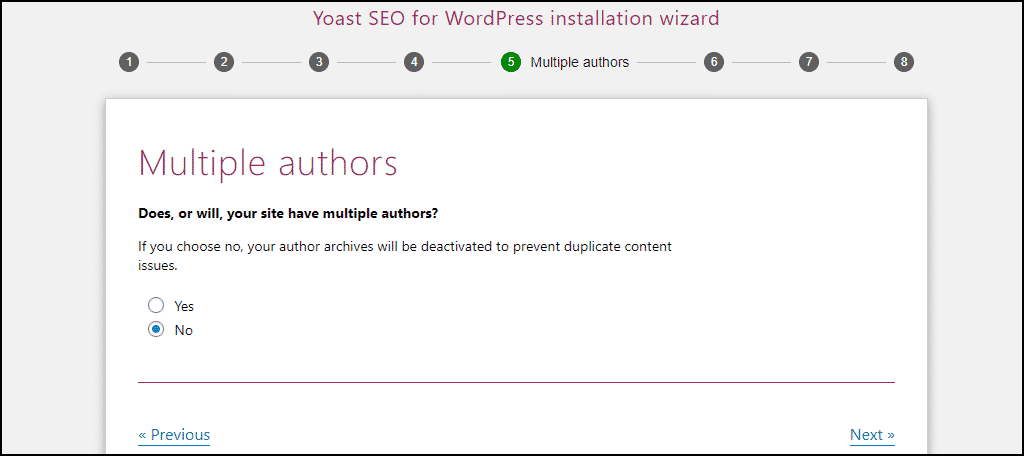
Multiple Authors
Now you need to inform Yoast if your website will have multiple authors. This is important because if you are the only writer for your website, there is no need for pages that sort by author. This can be seen as “duplicate” content by Google.
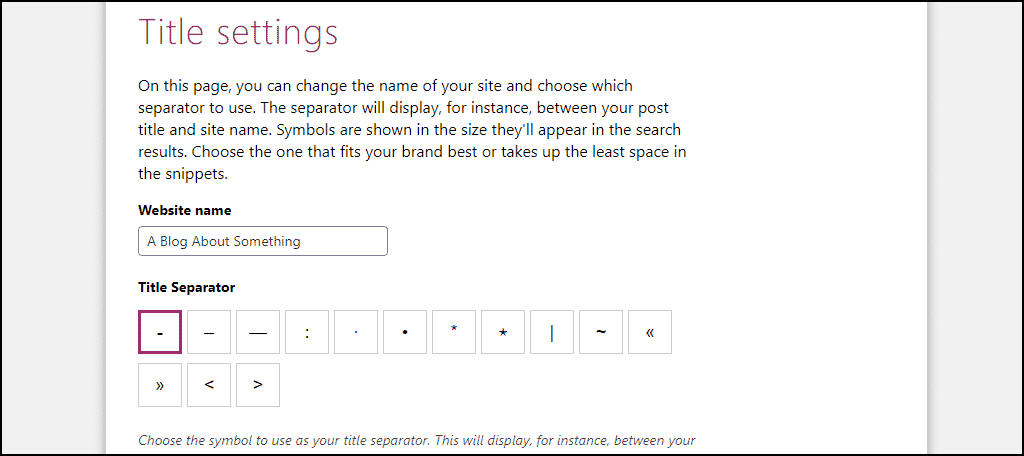
Title Settings
The title settings determine what will separate your website’s name and the post name when they appear in a search engine. For instance, for this post, you would see “How to Set Up the WordPress Yoast SEO Plugin -GreenGeeks” in Google.
The separator is the “-” and our website name is GreenGeeks. All of the separators will have the same effect, but the first option is the most popular.
Configuration Steps 7-9
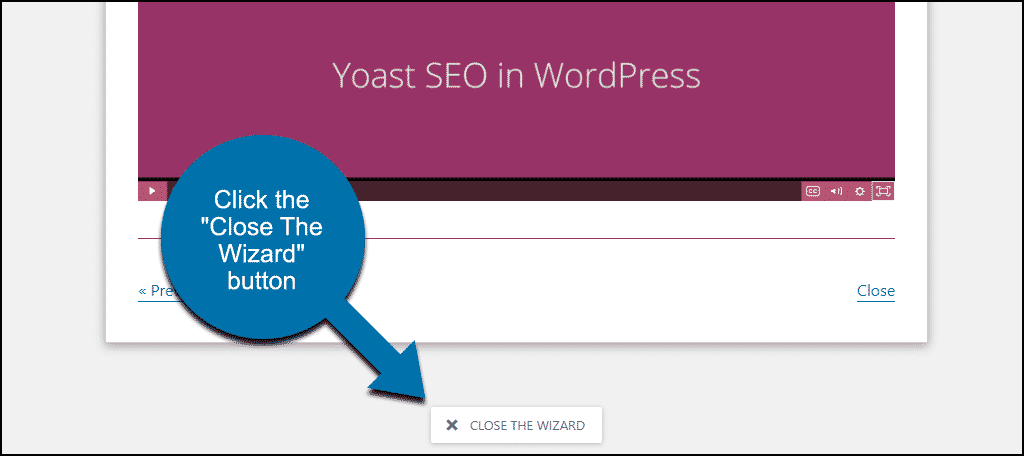
The next three steps do not actually impact your website’s SEO. Step 7 is asking you if it is okay for Yoast SEO to collect data to improve the plugin. Step 8 provides additional learning material. And finally, step 9, simply tells you congratulations.
Click on the “Close The Wizard” button at the bottom.
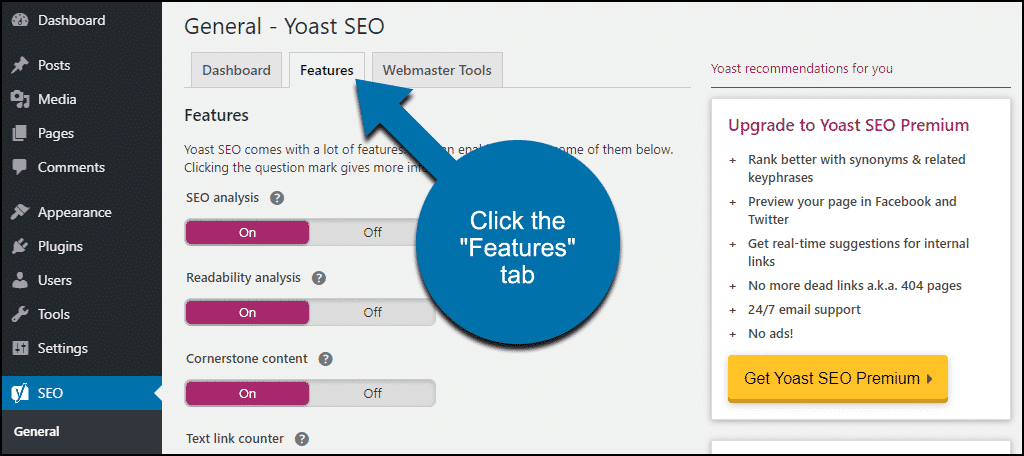
Step 4: Features Settings
You should now choose to enable or disable the features you want to use in Yoast. However, by default, they are all on and I recommend keeping them set as default. Thus, you can safely skip this step if you want all of the features.
Click on the Features tab in the General settings.
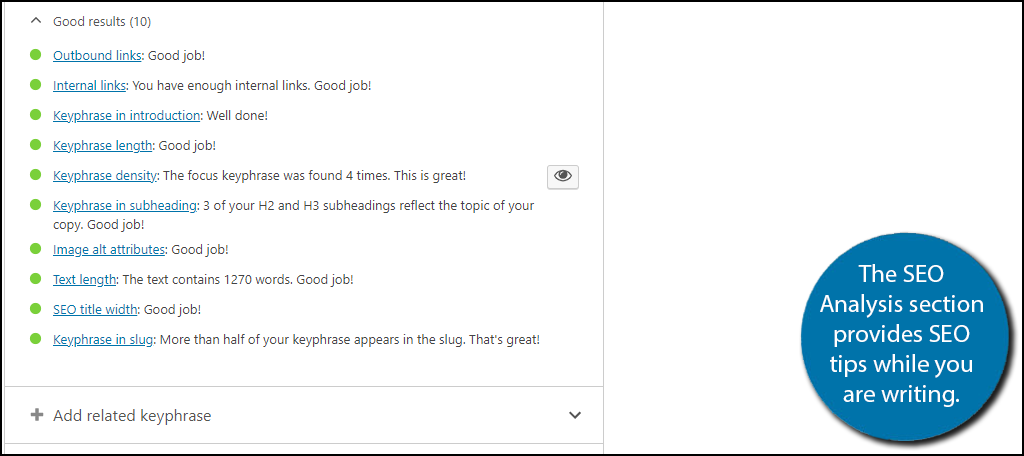
The first option is the SEO Analysis option. These are the SEO tips that appear when writing a post. They provide critical information like keyword usage, tracking outbound and internal links, meta description tips, reminders for image alt text, text length, and much more.
It is the key feature of Yoast SEO, and if you do not want it, the plugin will not be beneficial.
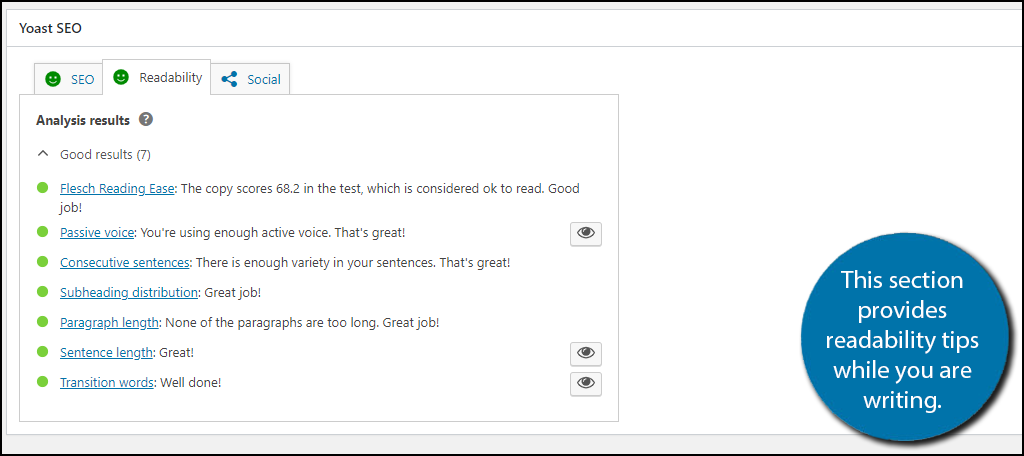
The second option is the Readability Analysis, which is the second most important part of Yoast. This provides a plethora of tips to improve the readability of your content to enhance the reader experience.
This includes things like a Flesch reading score, tracking passive and consecutive sentences, subheading, paragraph and sentence length, and more.
The remainder of the settings should be left on, and for further information on them, simply click on the question mark next to them it will provide a bride description of what each one does. Some may even provide links to the Yoast blog for a deeper analysis.
If you did make any changes to the features section, make sure to save them before leaving.
Step 5: Webmaster Tools
Every website should be taking advantage of the free webmaster tools provided by search engines. For example, Google provides Google Analytics so you can view important website statistics and find problems that may be hurting your rankings.
These tools can be linked to Yoast SEO. You simply need to provide the appropriate verification codes.
In the General settings section, click on the Webmaster Tools tab.
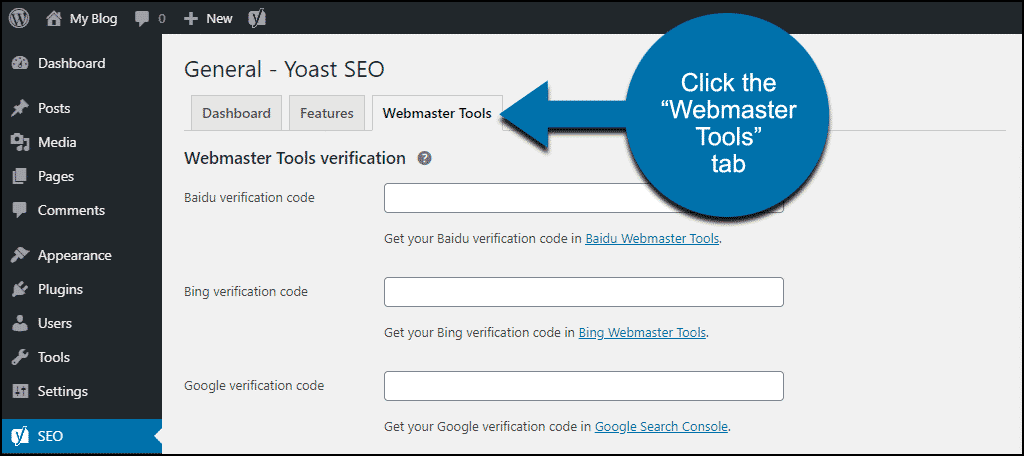
You will see a text box for each code and a link underneath them. The link will bring you to the respective search console to get a code. Simply copy and paste the code into the text box.
When you are done, click on the “Save Changes” button at the bottom.
There are a variety of other customizable settings within Yoast, but for the vast majority of websites, these settings can be left alone. However, Yoast does an excellent job at providing a detailed description of what they do and why the default options are the way they are.
After taking the above steps, the Yoast SEO plugin for WordPress is fully configured and ready for everyday use.
Improving SEO Takes Time, So Start Now
Search engines are slow to update rankings and that is why you need to start today. The faster you begin optimizing your website, the sooner you will see results. And since nearly 93% of all web traffic comes from search engines, optimizing for them is critical for success.
How easy did you find the Yoast SEO configuration wizard to use? Have you noticed your rankings increase after following this Yoast SEO tutorial?
Hi. Can I use yoast seo plugin for my wordpress site that I have not hosted and if I can, how do I do it. My site is emmydesignsandjewelry.wordpress.com.
Hello Emmanuel,
As far as I know, Yoast SEO plugin can only be used for a self-hosted WordPress website. You should considering switching to a self-hosted version, it will give you the flexibility you need. Here’s an article to learn more about the differences between WordPress.org and WordPress.com.
Hi there,
I’m using Yoast on all my sites, but, now i’ve 1 that is in staging(development).
I’m wondering how to setup this with Yoast, so that when i’m moving this site, it’ll be all honky dory regarding SEO …
Gr, Ko
Hello Ko,
Yoast SEO allows you to set up the plugin as your side “under development”. When you’re ready to go live, simply switch it to a public website.