Google is the largest search engine in the world. By a long shot, they dominate the market and are usually very good at automatically detecting and listing new websites.
That being said, for one reason or another, sometimes you may not get your new website listed on Google right away. Since the Google search engine is the biggest traffic source for most websites, getting one listed on Google immediately can be very important.
In this tutorial, I will show you how to get your WordPress site listed on Google immediately.
Why is a Google Website Listing Important?
A website listing on Google is very important if you are serious about starting a small business website or blog. Google’s a top traffic source, so being listed as soon as possible is key.
If you are following WordPress SEO best practices, then usually search engines like Google can automatically detect and list your site. However, sometimes this can take some time. This extra time will cost you potential customers and traffic.
There is a fairly simple way to speed up the process and get your website listed on Google much faster.
Listing Your WordPress Site on Google
Before we start this process, you need to have a couple of things in place.
You need to create a Google Webmasters Tools account. This is also known as “Google Console” or “Google Search Console.”
If you aren’t sure how to do this, you can check out the GreenGeeks guide with step-by-step instructions on how to add your WordPress website to Google Webmaster Tools.
Make sure your new WordPress small business website or blog is designed and ready to be rolled out.
Step 1: Check WordPress Settings for Search Engine Visibility
Once you have set up a Google Webmaster Tools account, you need to make sure your WordPress website is visible to all search engines.
To check this, you can click on Settings > Reading inside your WordPress admin area, and then scroll down to the “Search Engine Visibility” box.
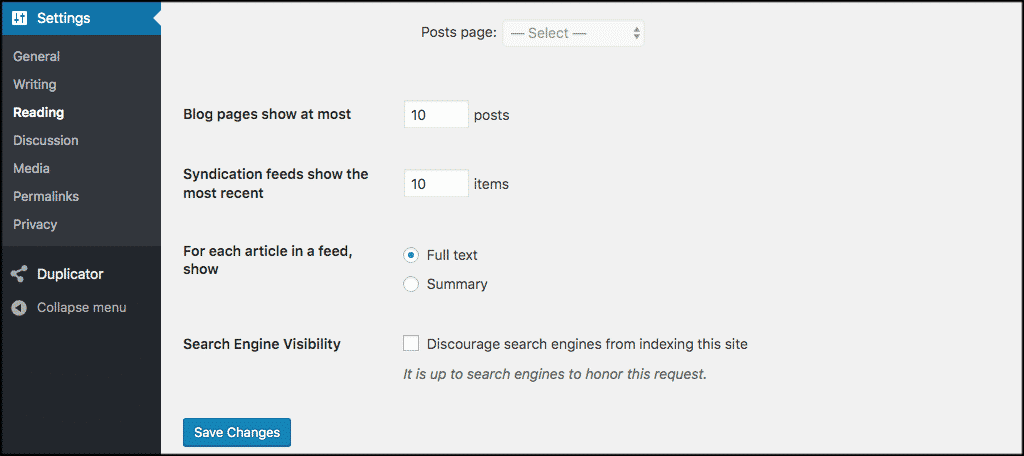
Make sure the box is NOT checked. This allows search engines to crawl your WordPress website. Click on “Save Changes” to store any updates you made.
Note: In case you were wondering, there is a purpose of checking the box. Usually, you would not want your site indexed if it is not complete as this could hurt your website in the long run. However, you should ensure the box is unchecked if your website is ready to go.
Step 2: Install the Yoast SEO Plugin
After this, you want to install and activate the Yoast SEO plugin. If you need help doing, this you can visit the GreenGeeks guide on how to install a plugin on your WordPress website
Once the plugin has been activated, you will see a new item in your WordPress admin menu labeled “SEO.” Click on that tab to see the plugin’s Settings page.
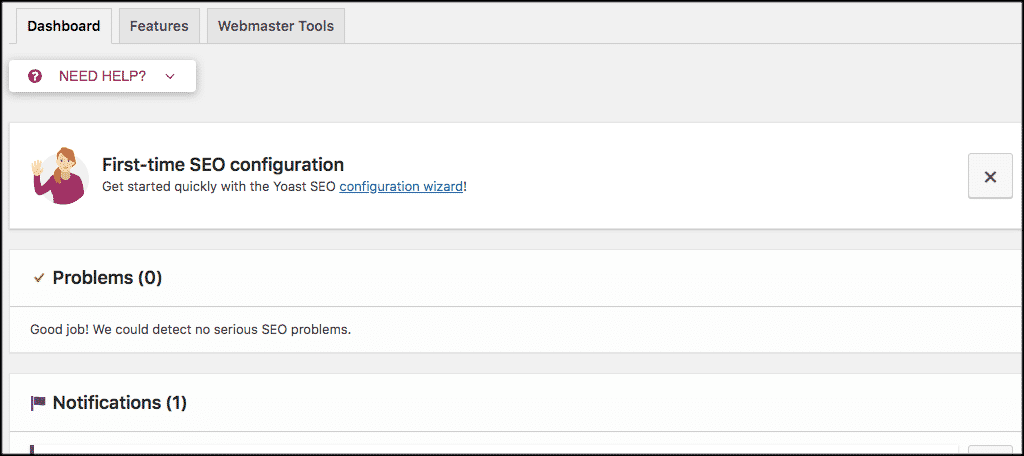
On the settings page, you will see the Webmaster Tools tab. This is what we will use to connect Google search console with your WordPress site.
Step 3: Connect Google Search Console to WordPress
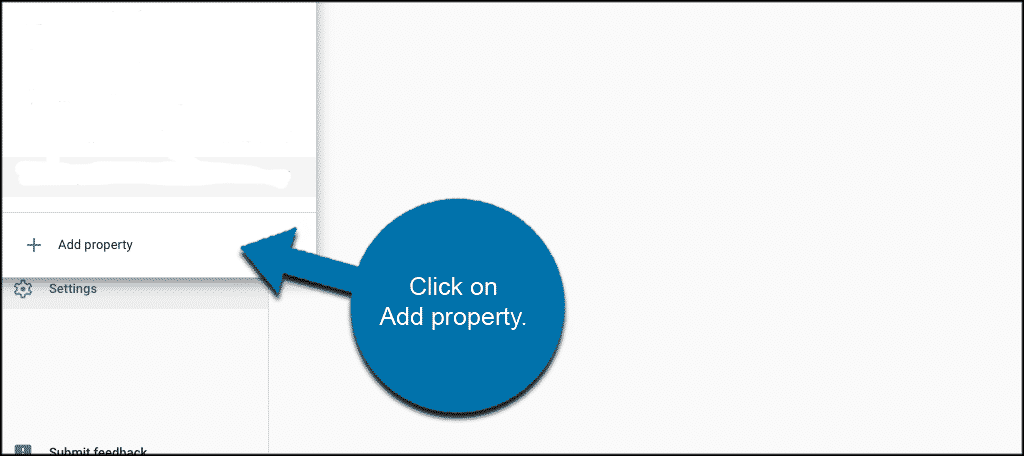
Now that Yoast SEO has been installed, you need to add your website to Google Search Console. Login to your search console account and you can do this by clicking on the “Add property” button that shows in the dropdown menu to the left.
A popup box will appear and you can add your domain and continue on.
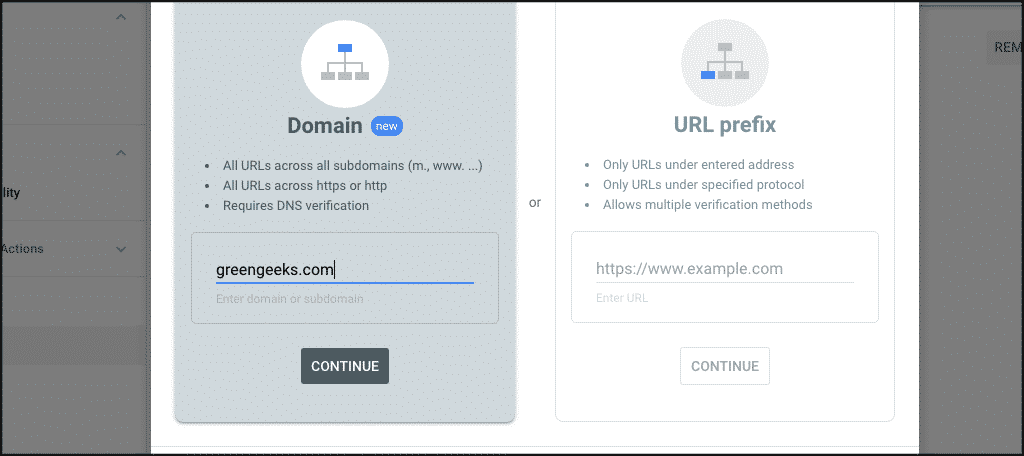
Another popup box will now appear. You have to verify that you own the domain so that you can move forward with your website listing on Google. Here is what that box will look like.
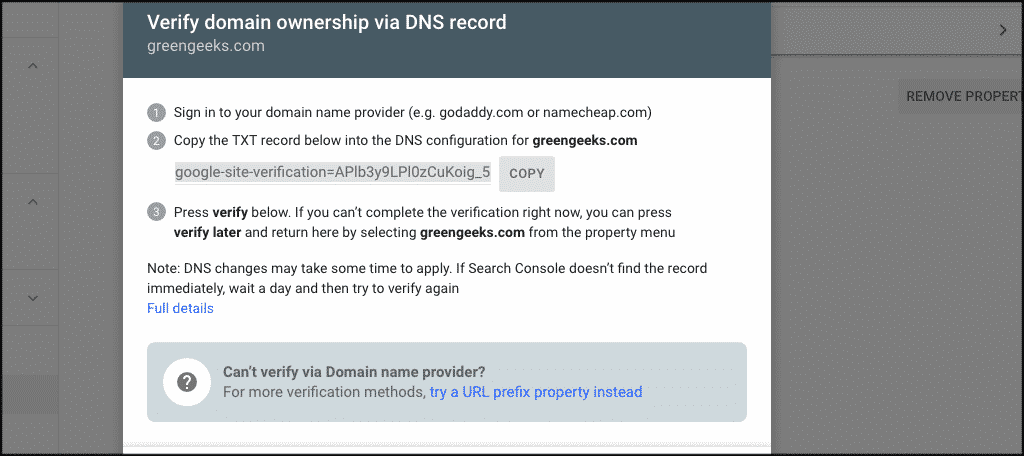
You want to copy that verification code that is given and go paste it in the Google verification code field back within the Yoast SEO settings.
To access that click on the “Webmaster Tools” tab and find the verification code field located directly beneath it. Go ahead and add the code there.
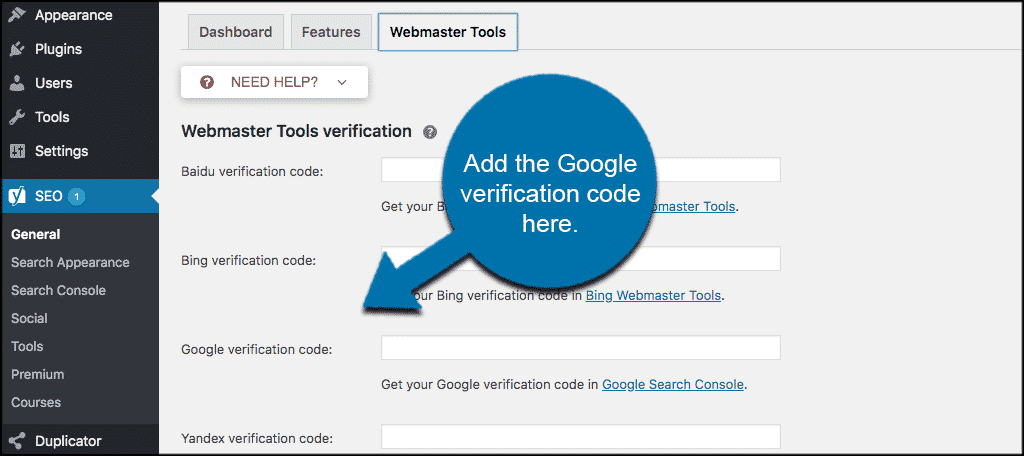
Once you are done, click on the “Save Changes” button. Now go back to your Google search console account and click on the Verify button. Your website ownership will be successfully verified.
Note: It may take a few hours for DNS configurations to propagate throughout the Internet. So if the verification fails, give it a bit of time and try again.
If you’re still having an issue, try using the “URL Prefix” verification instead. This option uses authentication from Webmaster Tools and usually works immediately.
Yoast offers other webmaster tools to help you achieve the best results. You may want to try getting your website listed on other search engines like Bing.
Step 4: Setting Up XML Sitemaps
Now that you have verified your website, it is time to set up XML sitemaps. To do this simply click on SEO > General in the WordPress admin area and click on the “Features” tab. Next, you need to scroll down to the XML sitemaps option and turn it on.
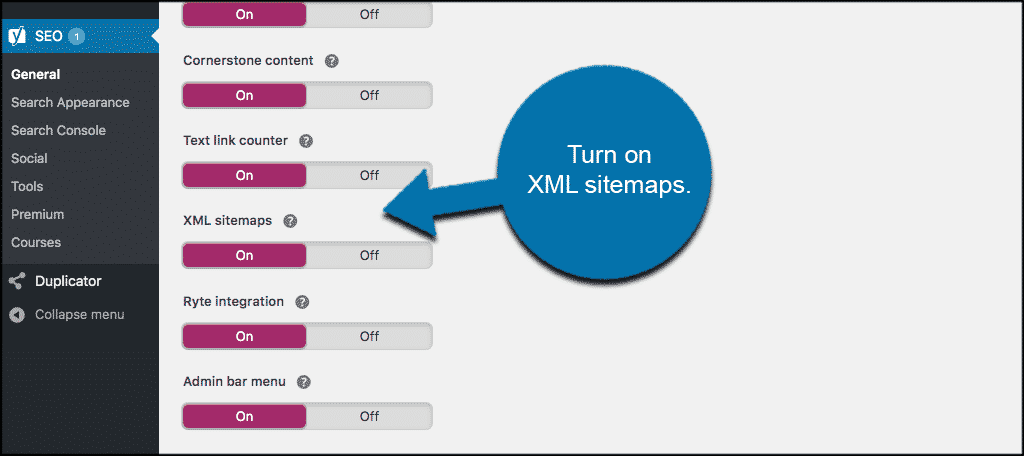
Once that is done click on the “Save Changes” button and your website XML sitemaps will be all set. Yoast will now automatically generate an XML sitemap for your website.
Step 5: Submit XML Sitemaps to Google Search Console
The last thing you need to do is take the XML sitemaps and submit them to Google search console.
To do this head back over to your Google Search Console account. Click on “Index” on the left sidebar and in the dropdown select “Sitemaps.”
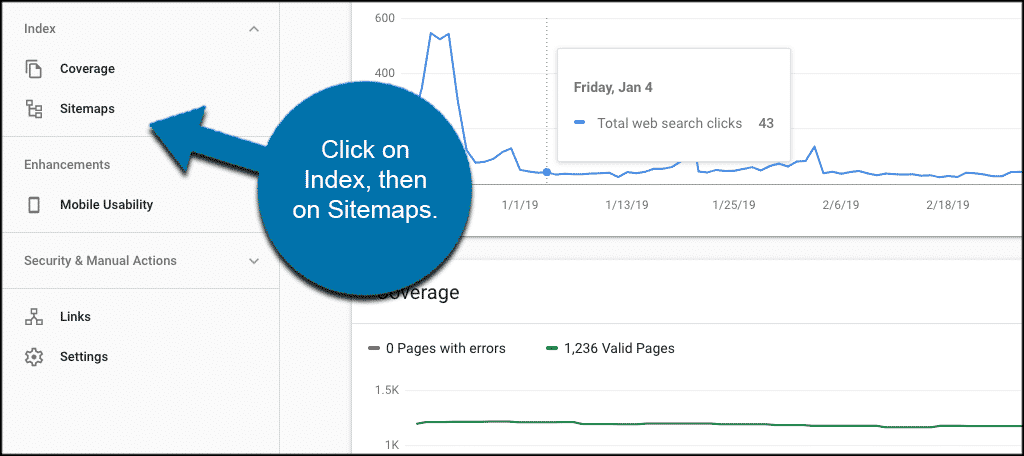
Now you can start adding all your new XML sitemaps. Your main sitemap file is sitemap_index.xml, and it has links to all other sitemaps on your site. You need to simply submit this main sitemap link from Yoast and Google will automatically crawl all other sitemaps on your website.

Now that you have completed the process, your WordPress website will be properly listed on Google in no time.
You can visit your search console account and check your listings. Once Google has crawled and indexed your website, you will start seeing reports in Search Console. The process should be completed within a day.
Make SEO Friendly Content
With your website listed on Google, you are still not in the clear. Now you need to get the best rank possible from Google. This is accomplished by following the hundreds of Search Engine Optimization (SEO) tips available.
If you do not make your website SEO friendly, you will not rank highly on Google and the amount of traffic you receive will suffer from it.
Luckily, writing SEO friendly content has become much easier over the years and you just happen to have installed the most helpful plugin for the job. Yoast SEO will analyze every post and page and explain what you can do to improve. It also provides detailed reasons on why you should do it on Yoast’s blog.
Conclusion
Getting your website on Google as fast as possible is very important when just starting out, but keep in mind that if you have a brand new website, you won’t receive much traffic. This is because you do not have a lot of content to work with, not because of the quality.
However, that will change over time. Just make sure you have realistic expectations when you start out. I hope this tutorial showed you how to easily add your XML sitemaps to Search Console and get your WordPress website listed on Google right away.
Did you have to perform this process to get your site listed? Was your site listed without adding your sitemaps to the search console?