It sounds like a contradiction: speed up your website by using technology with “lazy” in the name. But it works. In this tutorial, I’ll show you how to increase website performance by using WordPress “lazy loading.”
What is Lazy Loading?
Lazy loading is commonly used on video and images, and sometimes even libraries. We’re focusing on images, so lazy loading means not downloading or displaying images that are off-screen until the visitor scrolls and brings them on-screen.
You can imagine how loading a page and displaying only the images that are visible on-screen could potentially save a lot of time. If a user leaves a page without scrolling or viewing the entire page, the off-screen images are never loaded.
Lazy loading is one of those genius kinds of things that seem obvious once someone implements it. The early web, when bandwidth was expensive, could have really benefited from lazy loading.
We didn’t have it then, but we have it now, so let’s put it to use.
Installing the a3 Lazy Load WordPress Plugin
Lazy loading is typically done using scroll and resize event handlers, or an API called intersection observer. Recently a whole new world of browser-level native lazy loading was introduced.
Those are all very cool and impressive things. But what’s even cooler is leveraging all of that technology without writing a line of code.
Because saving time is also a genius kind of thing.
We’re going to do that by installing the a3 Lazy Load WordPress plugin.
Log in to your WordPress admin panel.
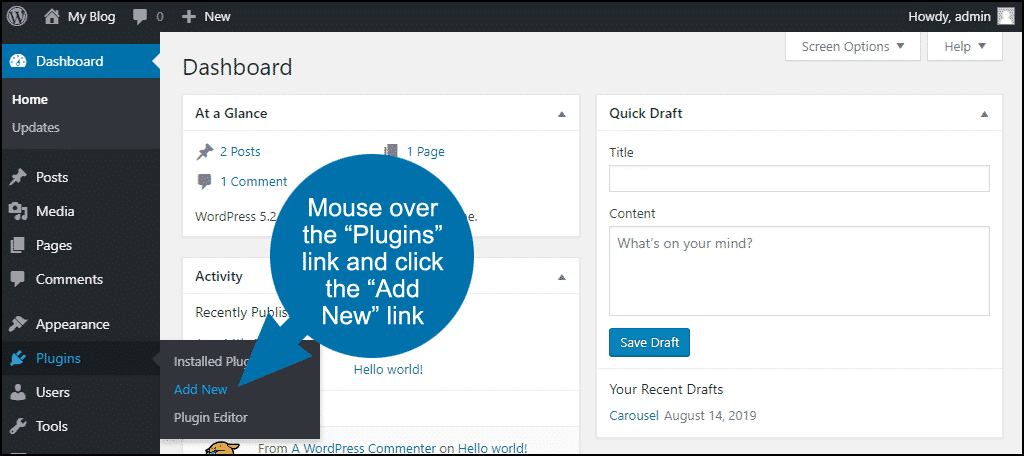
In the left column navigation, mouse over the “Plugins” link and click the “Add New” link.
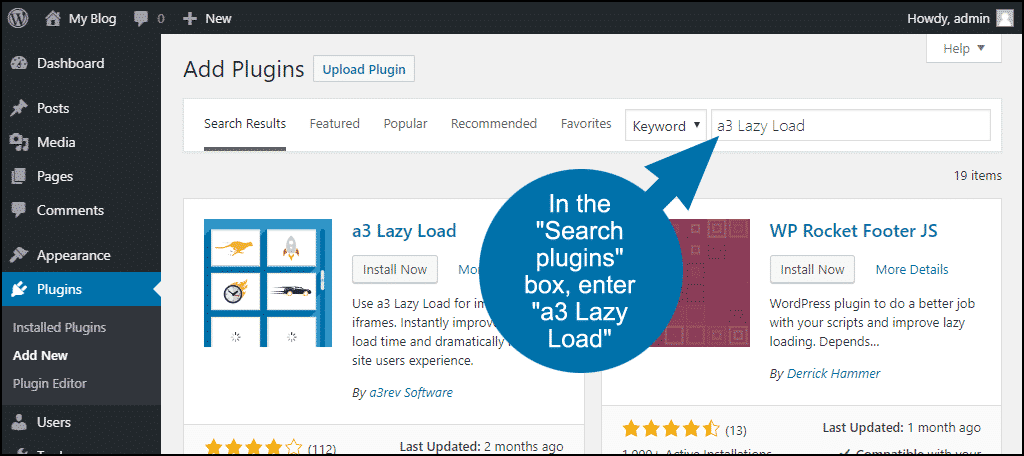
In the “Search plugins…” box, enter “a3 Lazy Load.”
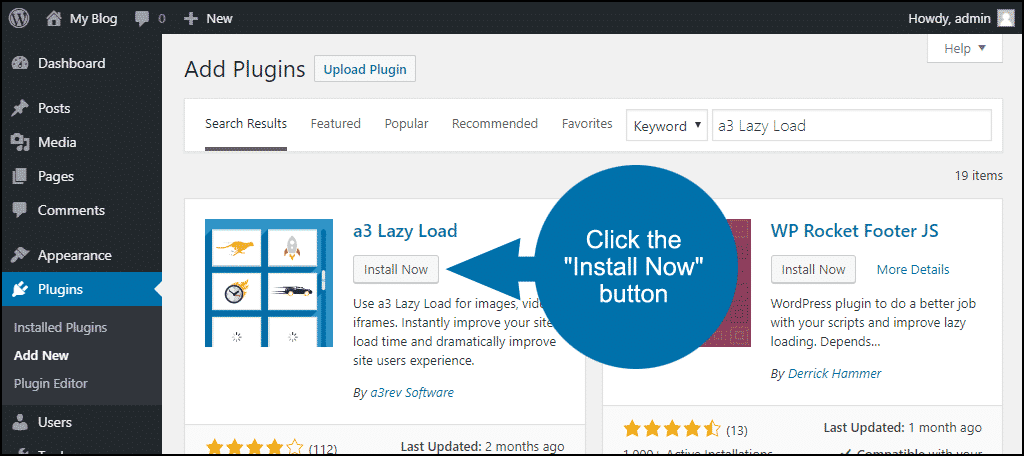
Once you have located the plugin, click the “Install Now” button.
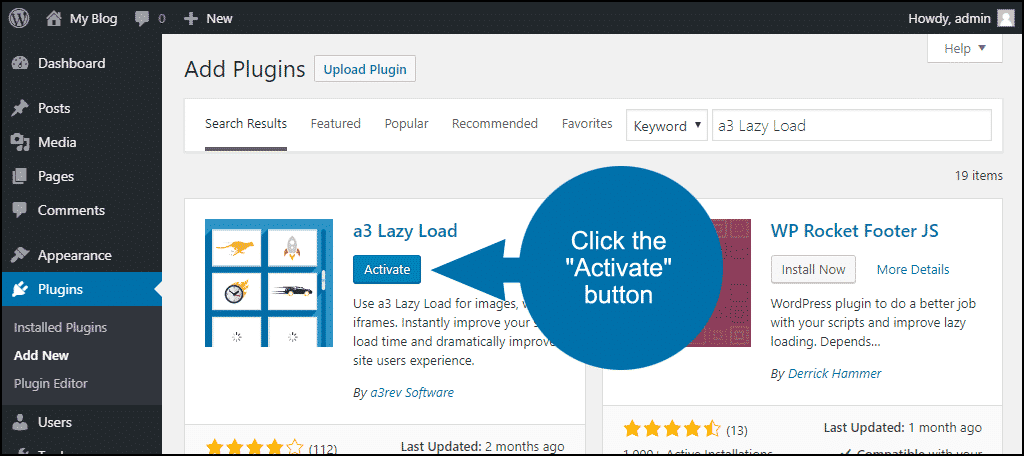
When the plugin has been installed, click the “Activate” button.
Configuring and Using Plugin
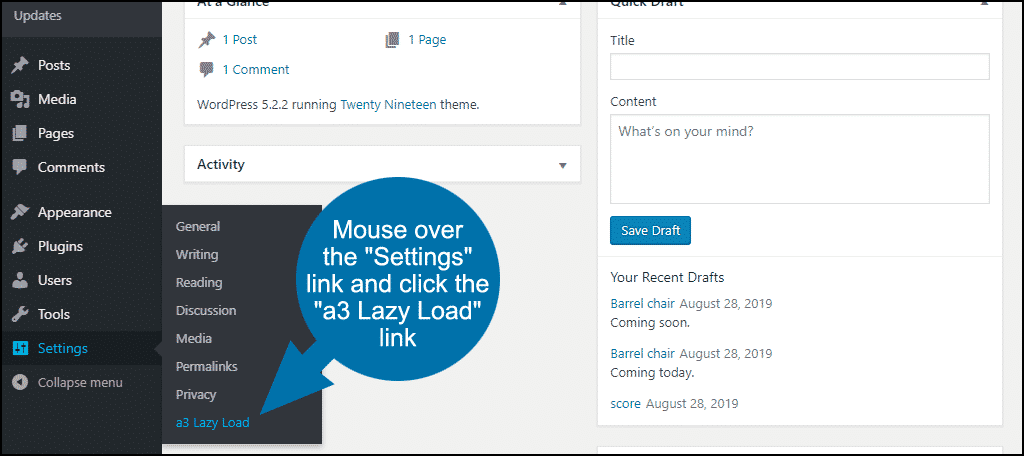
Okay, let’s set up WordPress to lazy load our images. In the left column navigation mouse over the “Settings” link and click the “a3 Lazy Load” link.
The a3 Lazy Load configuration page presents you with a lot of options. We’re going to focus on a few important sections.
Note that any changes made here have to be saved by scrolling down and clicking the “Save changes” button.
First, Lazy Load Activation. “Enable Lazy Load” should be activated (ON) by default when you activate the plugin.
The same with Lazy Load Images. All of the options should be enabled by default.
A useful setting here is “Skip Images Classes.” You can use that to ensure that images that you want to always load will bypass lazy loading.
For example, if you enter “skip” as a class name here, you could then apply that class to any images that you want to load, bypassing lazy loading.
To add the “skip” class to an image, insert the image into a post in the WordPress editor.
- In the Gutenberg editor, click the image, then in the right column, click “Advanced.” In the “Additional CSS Class” field, enter skip.
- In the classic WordPress editor, click the image and click the “Edit” icon. Click “Advanced Options,” and enter skip in the “Image CSS Class” field. Click the “Update” button.
The options in the Lazy Load Videos and iframes section also default to active. If you don’t use video or iframes, you can disable these options.
Exclude by URI’s and Page Types is similar to the image class setting we saw earlier. But rather than using classes, it excludes entire pages or URLs from lazy loading. There are also “Page Type Exclusions,” which are all disabled by default.
If you want to exclude a specific page type, toggle it on and scroll down and click the “Save changes” button.
Script Load Optimization controls where the a3 Lazy Load javascript loads; in the header or footer of your theme.
Effect & Style sets the loading images to use a loading “spinner” icon, or to fade in. The utilitarian spinner is the default setting, but the fade-in is much more elegant if you’re into visual style.
By default, images load when they become visible in the viewport. You can use the Image Load Threshold setting to expand the area where an image will load by adding a pixel value. For example, if you enter 50 in the Image Load Threshold field, images that are 50 pixels below the viewport (50 pixels away from being visible) will load.
WordPress Lazy Loading, Mission Accomplished!
That’s all there is to it. Even if you never change any of the a3 Lazy Load configuration settings, it will start lazy loading images right away. It’s really one of the most straightforward performance-enhancing steps you can take for your WordPress website.
You can see the effect of lazy loading using any good performance tool. I like Google Lighthouse, Test My Site, and PageSpeed Insights. But whatever you use to gauge performance, you’ll see an improvement when you lazy load images.
Other Lazy Load Plugins
We’ve focused on the WordPress a3 Lazy Load plugin, but it isn’t the only lazy loader in town. There are also lazy loaders that work specifically on comments, and several image manipulation plugins that also do lazy loading.
Smush Image Optimization, Compression, and Lazy Load
Over a million WordPress users can’t be wrong, and that’s how many sites have installed Smush. Compress, optimize, and fix PageSpeed performance with properly sized images, lazy load, next-gen WebP convert, image formatting, and more.
Don’t let that kind of creepy superhero spokesmodel cartoon throw you off. 😉 Smush is a serious performance tool.
It may be overkill if all you’re looking for is lazy loading. But for an all-around image optimizer, it can’t be beat.
Autoptimize

Autoptimize is another heavy-hitter with over a million installs. It’s also a jack-of-all-trades that optimizes JS, CSS, images (including lazy loading), HTML and Google Fonts, asyncing JS, removing emoji cruft, and more.
I don’t know what “emoji cruft” is, but I’m pretty sure I don’t want it hanging around on my website.
Lazy Load by WP Rocket
Lazy Load is a good, basic, lazy loader without a lot of frills, chills or spills. You just install it, activate it, check a few boxes to indicate what you want to lazy load, and you’re ready to go.
If you want lazy loading without a lot of other functionality (and plugin bloat), go for Lazy Load by WP Rocket.
Website Speed Is Everything
You can spend months and big piles of cash developing and promoting a website. But if it isn’t fast and responsive, you’ll never get out of the starting blocks. Speed is a significant factor in search results ranking, so if you’re serious about the success of your website, you have to be serious about improving performance.
Boosting speed can involve a lot of esoteric and dense, difficult work. It can also be as simple as installing a plugin, as we’ve seen here. I mentioned before that saving time can be considered a genius kind of thing, and I stand by that.
I love to grind out code from scratch in a text editor, but if I don’t have to, if someone has done all the dirty work for me, I’d be a fool not to take advantage of that.
Take advantage of a lazy loading plugin! It’s all reward and no risk.
Do you use any performance benchmarking tools to test your website speed? Does lazy loading sound like something you’ll try?