Internal linking is a very important aspect of SEO on a website. You always want to link internally, as this keeps people on your site longer and helps with overall exposure in search engines. However, sometimes internal linking can be tedious. Not anymore, as I am going to show you how to use the Internal Link Juicer plugin.
What is Internal Linking?
Internal links are links that point from one link in a domain to another link in that same domain. More simply put, an internal link is one that points to another post or page on the same website.
This other link can be a page, post, image, or document. Internal linking drives traffic to a site and keeps readers interested longer by allowing them to jump around to other relevant articles.
Today, I am going to show you how you can boost your internal link SEO by using a smooth plugin that helps get this all done quicker and easier. Let’s take a look at the plugin together and see all that it has to offer.
Internal Link Juicer: SEO Auto Linker for WordPress
Internal Link Juicer: SEO Auto Linker for WordPress is a smooth, high-end solution that will allow you to more easily build internal links within your post content. Instead of you trying to link internally manually, you can use the plugin to do it for you. It works by using a built-in intelligent per-post configuration of your desired keywords.
The plugin works to improve your on-page SEO and overall user experience. It boosts your internal linking standards by using a number of excellent tools and features that are already built-in. Some of these include:
- Maximum Diversification
- Automation
- Full Control Over Linking Pages
- Customize Link Output
- Configurable Linking Behavior
- Stay in the Loop
- Perfect Workflow
- Best Possible Performance
Whether you are a blogger, running a website for an agency, business, or yourself, Internal Link Juicer has everything you need to build on-page SEO and do it well.
Note: The plugin does have a pro version that gives you access to more options. However, the tutorial below is based on the free version of the plugin. It gives you a full list of features and all the tools you need.
How to Build Internal Links on Your Site
There are a few things we need to do before you can actually start automatic internal linking on your website. Let’s go over the step-by-step process together and you will be up and running with this anchor text generator in no time at all.
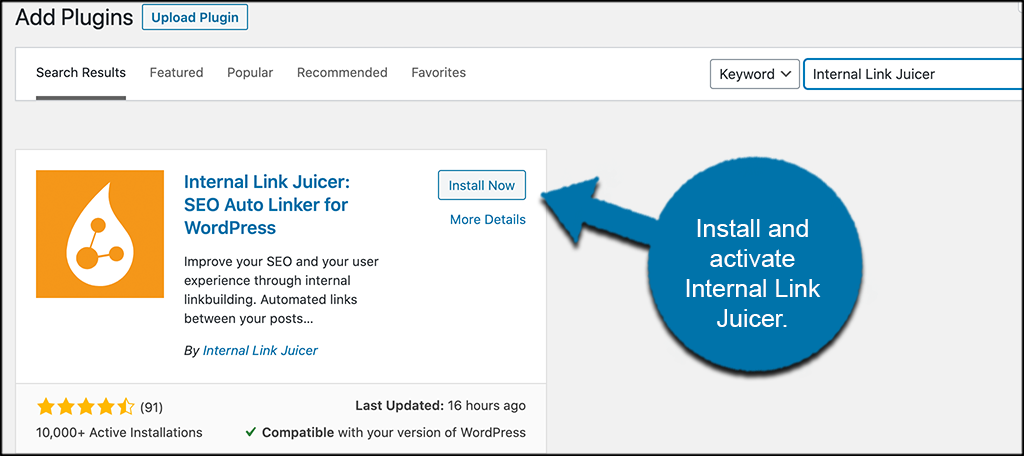
Step 1: Install and Activate the Plugin
In order to use Internal Link Juicer, you first need to install and activate the plugin. You can do this by hopping over to the Plugins page in the WordPress admin dashboard.
Simply use the search field to search the plugin by name, then install and activate it from there.
Step 2: Access the Plugin Settings Page
Once the plugin has been installed and activated, it is time to access the main settings and configuration page. This is where you can set it all up how you want.
Click on Internal Links > Settings located in the left-side menu area of the dashboard.
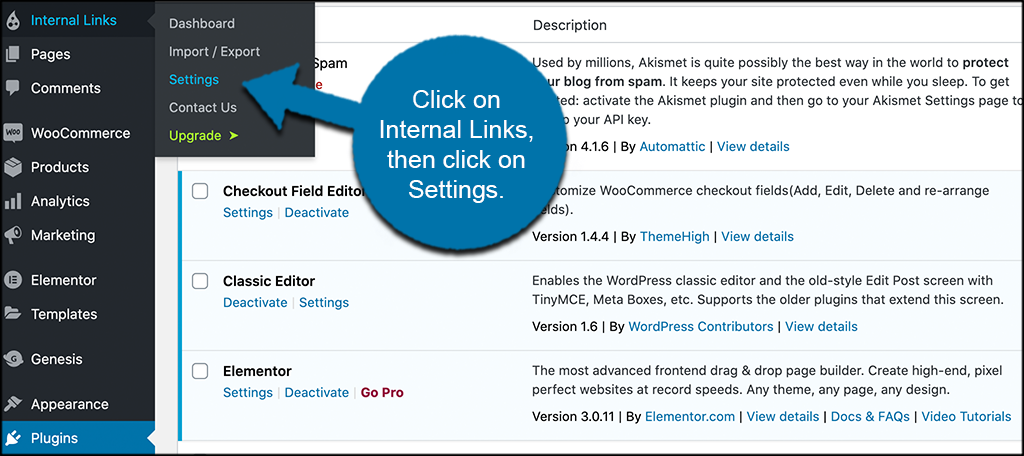
You can see that this is now an available option after you activated the plugin.
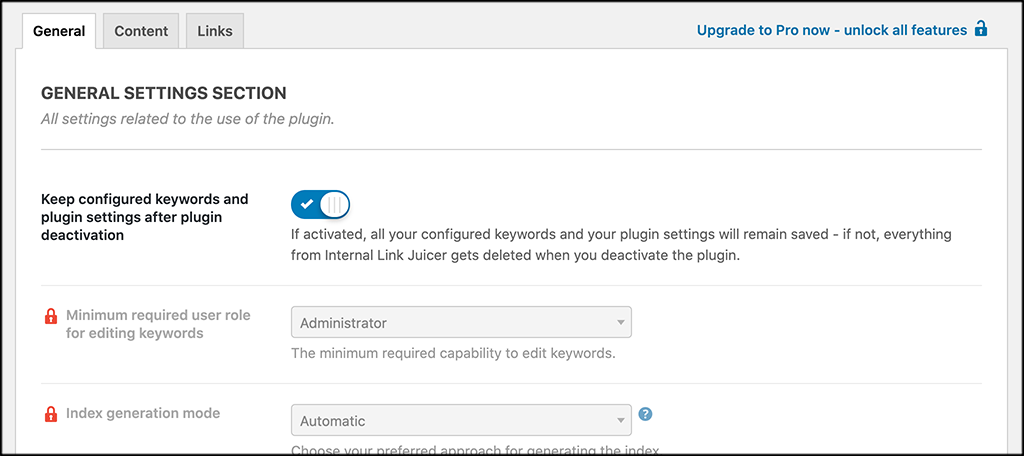
Step 3: Configure the Plugin Settings
At this point, you have reached the main settings and configuration page for the Internal Link Juicer plugin. You see that there are three main tabs on the page. These include:
- General
- Content
- Links
Let’s go through these together real quick.
General
This section is the general settings for the plugin. You will see that some settings are blocked out as you need the pro version to access them. Just modify the available settings as you wish.
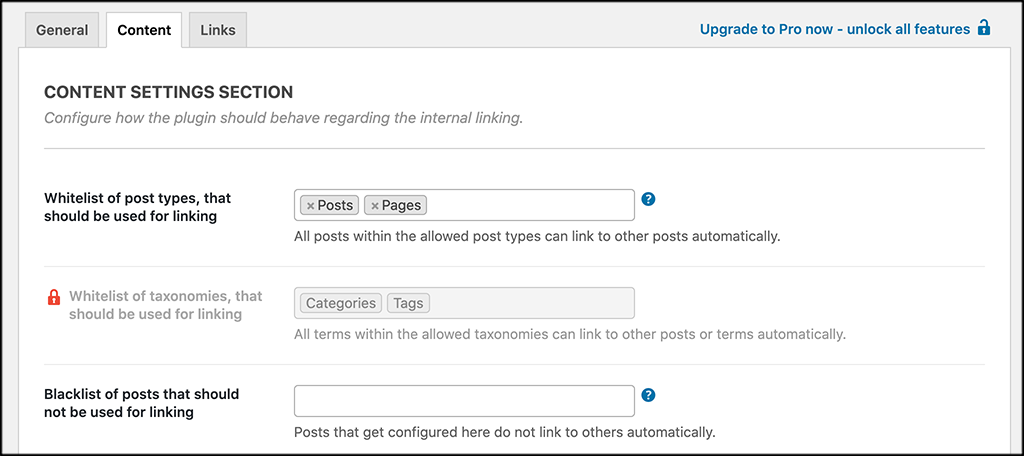
Content
These are all the content settings that are available. There are quite a few that you can use to set up the exact things you want happening when using the plugin. Go through them and make sure you have the configurations you want.
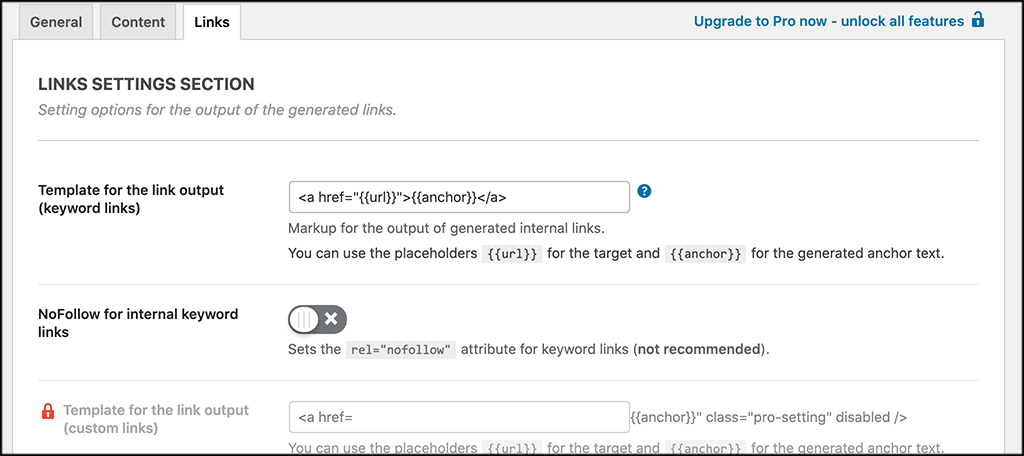
Links
These are the available configurations for the links that you set. Create a template and decide whether they will be follow or nofollow links.
Save all your changes and that’s it! You are all set to start adding keywords and building internal links for SEO.
Step 4: Add Keyword to Posts
At this point, your settings are in and you can start adding keywords to your posts. Head over to a post you have an open it up.
Scroll down a little in the post editor and on the right you will see a new widget box titled “Internal Links.”
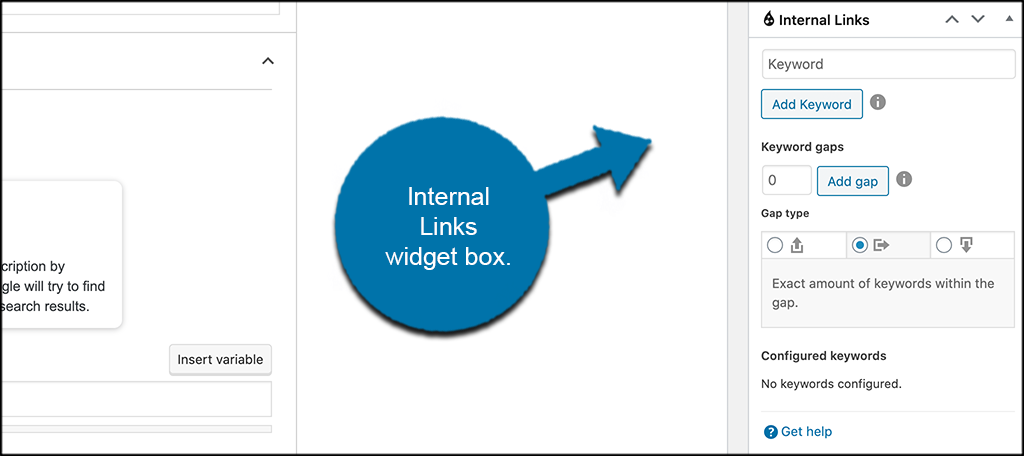
You can go ahead and add the keywords you want here. You may also add keyword gaps and a gap type of you feel so inclined.
Note: Configure the gap dimension. This represents the number of keywords that appear between your other keywords dynamically. How you set this is totally up to you.
That’s it. When you click on the “Update” button, your current article will be dynamically populated with internal links using the keywords you put in the widget box.
Remember, this always works best is you have a decent amount of content already on the site, as there is more to choose from.
Plugin FAQs
You should have no trouble using this plugin, as it doesn’t conflict with anything else. However, here are some questions you may run into while you are using the plugin. These answers should help you solve anything you come across.
Will Internal Link Juicer Slow Down My Site?
No, not at all. Despite being packed with functionality and features, the plugin is lightweight and ready to roll. It won’t slow down your site at all. The plugin is designed for fast loading times and maximum performance. It solves the problem of generating links using its own index.
Will the Plugin Really Improve My Search Engine Ranking?
No guarantee can ever be made regarding SEO and overall ranking. However, building solid internal links is a basic of on-page SEO. If used correctly, your overall SEO will be better.
Does this Plugin Change My Site Content?
No, not at all. The plugin uses its own index. This is where links that need to be created are stored. Whenever a page is rendered, the links are generated before output and your existing content is enriched with them.
Can I Disable Linking to Specific Post and Pages?
Yes, you can. You simply use the blacklist feature that is in the plugin settings area.
Final Thoughts
Learning how to use internal linking can really improve your on-page SEO and keep people on your website much longer. You can do this manually, or you can use a plugin like Internal Link Juicer to help you get it done quicker and easier.
Once the plugin is installed and activated, you simply go to your posts and pages and start adding keywords in. The plugin will do the rest and before you know it your on-page SEO will start to look a lot better.
Have you been internal linking manually this entire time? Do you prefer to keep doing it that way, or would you like to try the plugin?
hi there
is it possible to open intenral link in new window?
You can right-click on any link and you will get an option to open it in a new tab, new window, incognito window, etc.
Ini sudah versi pro apa belum?
Hello, no, in this tutorial, we’re only using the free version you can find in the WordPress plugin repository.