Looking to add navigation image icons to your WordPress menus? In reality, these small graphics are helpful to visitors and give your site a slight visual appeal for many. Icons are often universal and make it easier to identify certain functions or features.
Think of it, what image comes to mind when you think of the “save” button? A lot of people would envision the old floppy disk, hard drive or some other common storage device.
In reality, there is evidence to support how logos and icons are more recognizable than actual text.
In this tutorial, I’m going to show you how to add custom menu icons in WordPress. It’s something extra that only reinforces one to click exactly what he or she is looking for.
Using the Menu Image Plugin
One of the best menu icon plugins for WordPress is “Menu Image.” This tool simply adds a new feature to menu items that allows you to use a graphic alongside text.
Although this plugin hasn’t been updated in a while, I still verified it was working for WordPress 4.9.
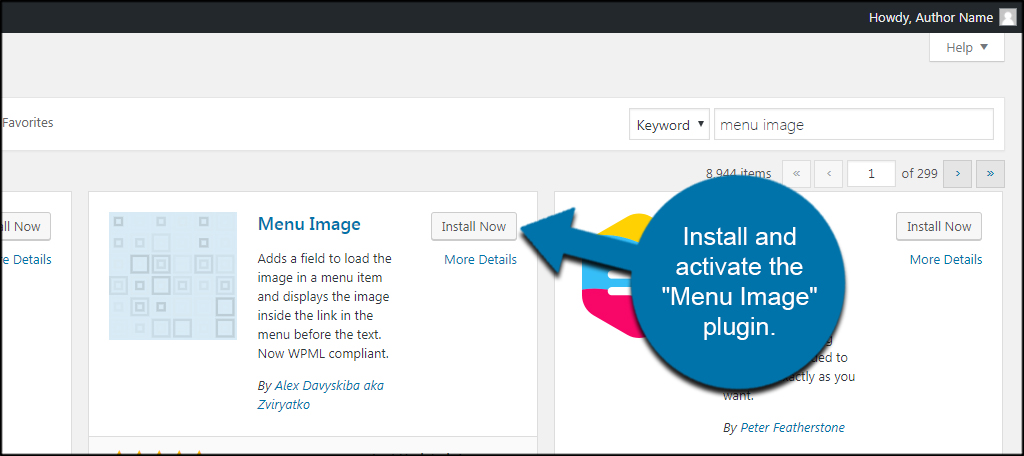
Install and activate the “Menu Image” plugin. You can find this by easily adding the keyword, “menu image” in the text field in WordPress.
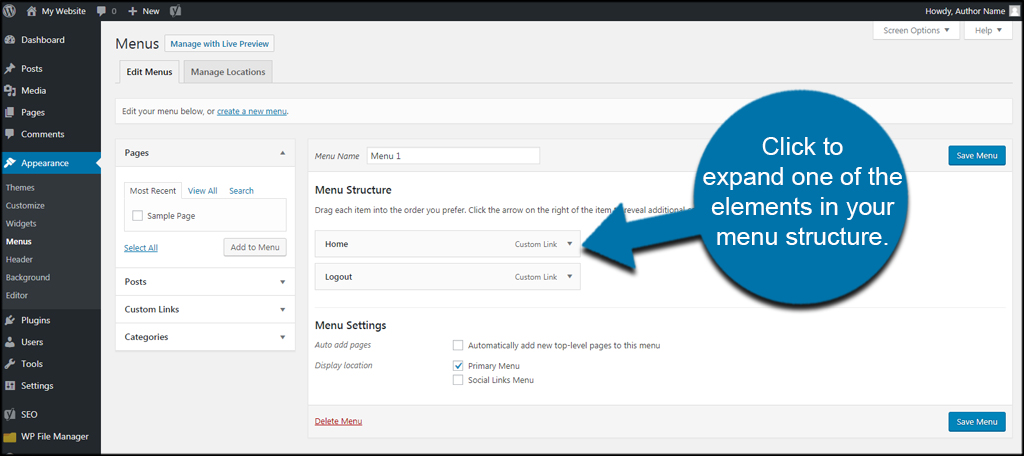
Go to Appearance and click, “Menus.”

Click to expand one of the elements in your menu structure. In this case, I’m going to open the “Home” menu item.
Inside each menu item will be a control for Menu image, Image on hover, Image size and Title position.” Let me go over these real quick.
- Menu image: This is the default image that shows when someone visits your website.
- Image on hover: If you want, you can change the image when someone hovers a mouse over the menu item.
- Image size: You can select from a variety of sizes used to show the icon. WordPress will size it accordingly.
- Title position: This feature lets you choose where you want to place the text next to the image. If you select “Hide,” the text is removed but the icon remains.
Click the “Set image” button under the navigation label.
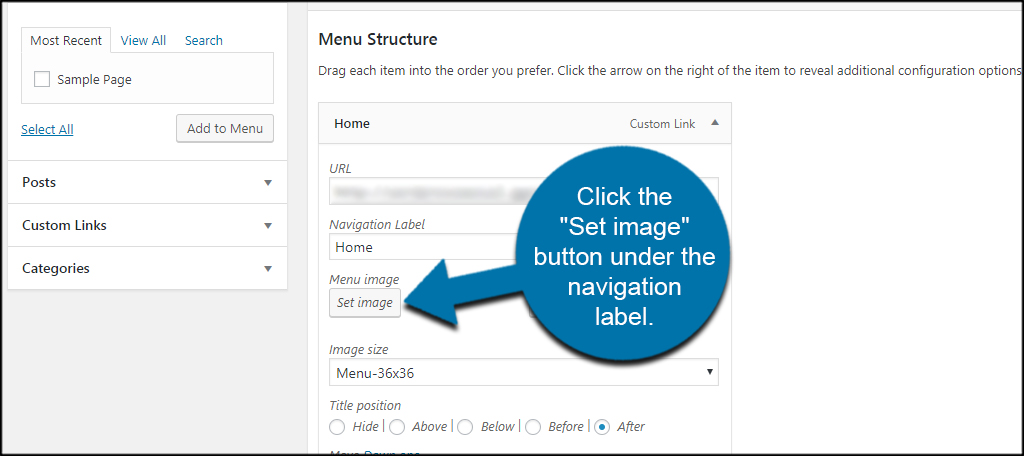
This will bring up the Media folder in WordPress. Essentially, you can use any image you already have stored on your website. For this tutorial, I’m going to upload a new image of a house to represent “home.”
You can upload new images to WordPress for the menu items if you’d like.
Choose your image and click the “Select” button.

For now, let’s leave the “Image on hover” option alone. If you want to change it later, you simply add an image just like you did for the menu item.
I’m going to leave the rest of the settings as they are. However, you can alter the shape of the icon to fit your menu. You wouldn’t want to use a full-sized 1000 pixel wide image for navigation.
After you modify your settings, click the “Save Menu” button in the top right.

Once you click save, your changes will become live.
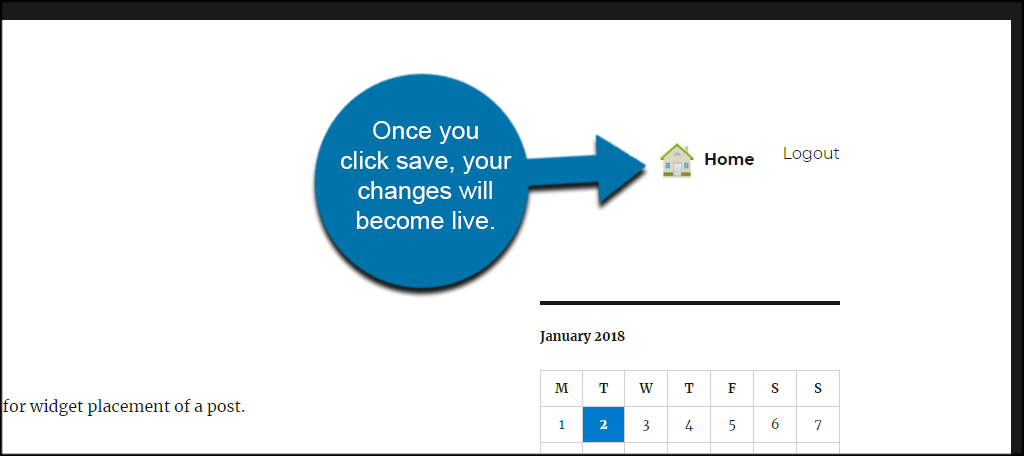
Check your website to see how the icon looks. You may want to adjust the size or location to make it appear better.
A good practice is to use PNG image file types. For this purpose, they are superior to JPEGs. For one thing, backgrounds of PNG files are transparent as opposed to the white field you would see in a JPEG.
Adding Menu Icons with CSS
Another method to add images to the menu bar in WordPress is through CSS coding. With a few simple lines, you can tell your theme to look for the image and show it in the navigation menu.
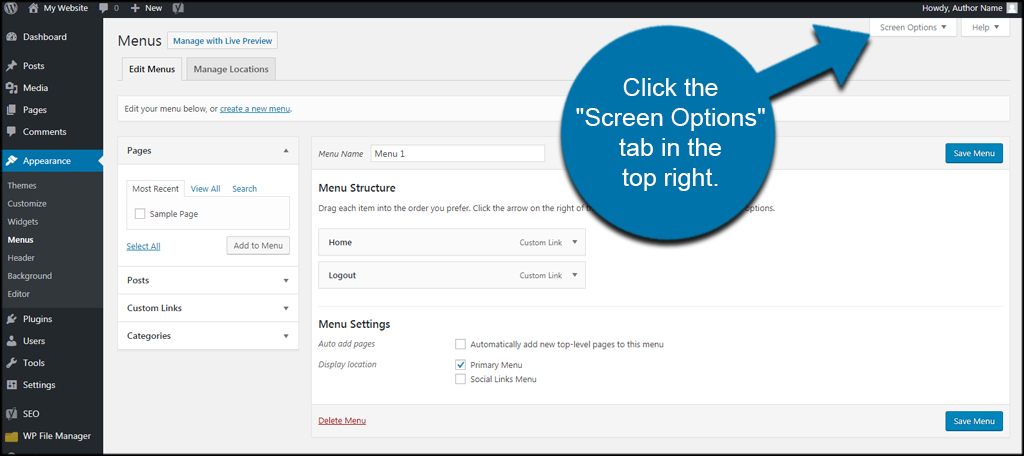
From the Menu area, click the “Screen Options” tab in the top right.
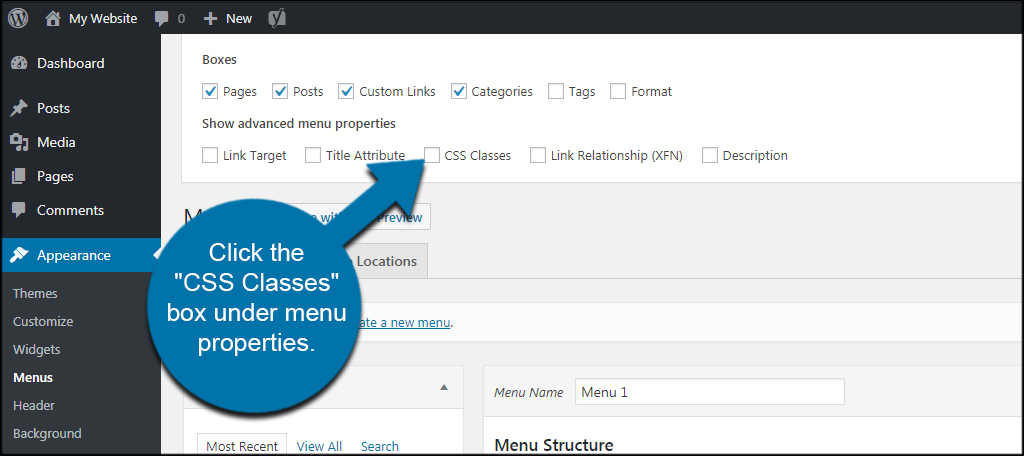
Click the “CSS Classes” box under menu properties. This will automatically add a new function within menu items.
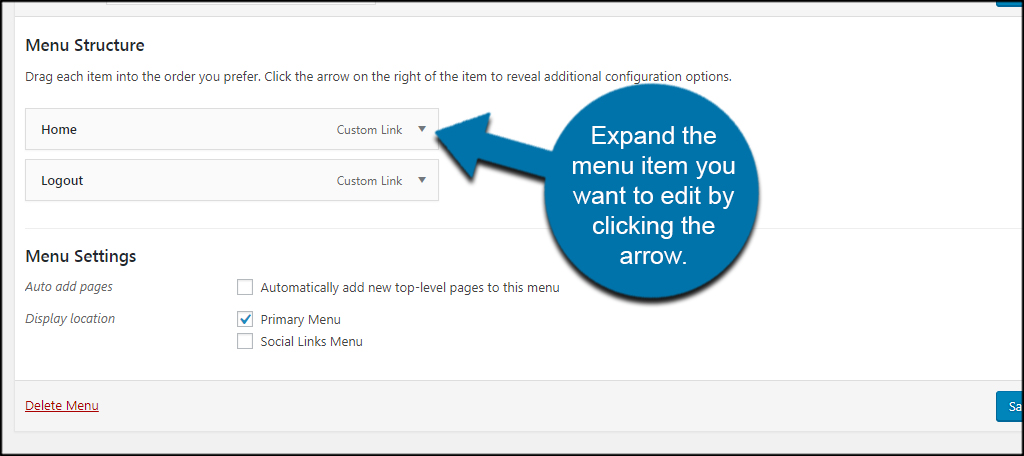
Expand the menu item you want to edit by clicking the arrow. In this instance, I’m going to use “Home” again.
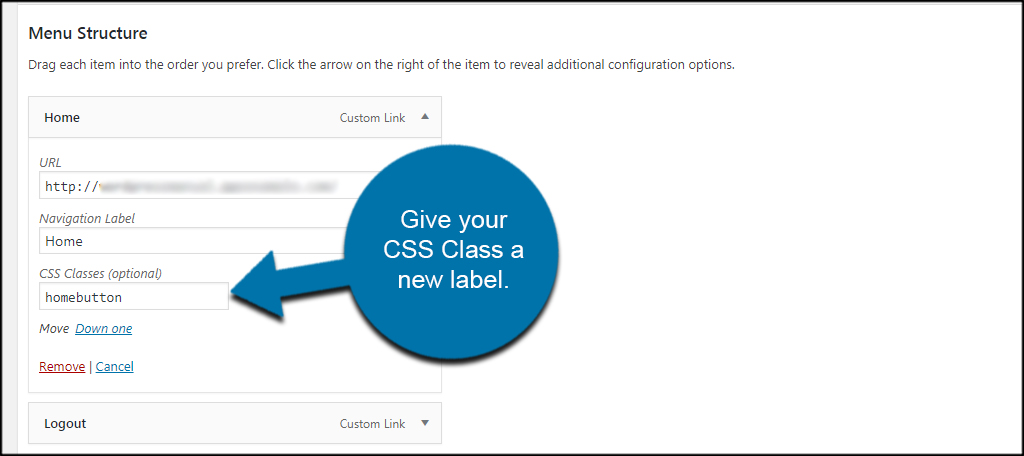
Give your CSS Class a new label. For example, I’m going to call this “homebutton” because that’s what I am adding. This name is important as you’ll need it in your CSS code in the next step.
Click the “Save Menu” button.

It’ll probably help to know how to view and edit theme files in WordPress.
Access the style.css file of your website. You can do this one of several ways. You can use FTP programs like FileZilla, access the file through cPanel‘s File Manager or use the WordPress editor. For this tutorial, I’m going to use the WordPress Editor to save time.
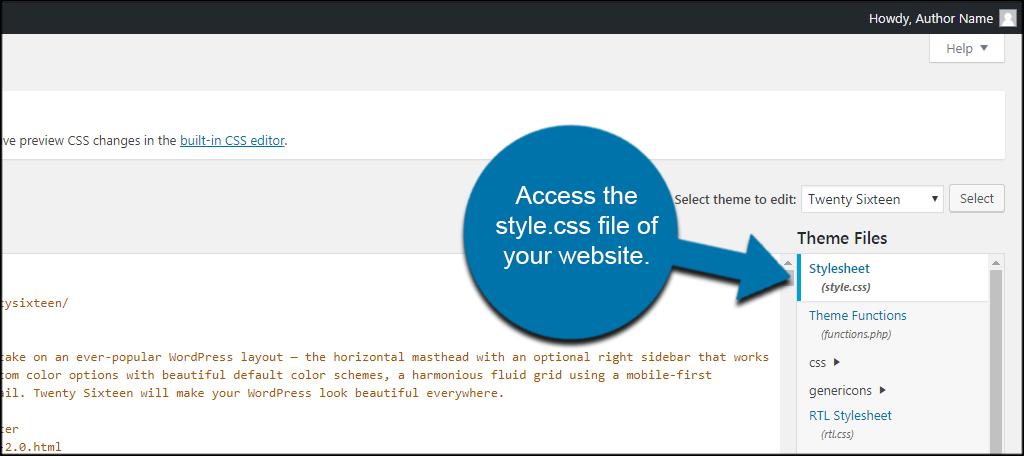
If you access WordPress editor from the Appearance section, Stylesheet should be the first file that is available by default.
Enter this code at the end of the style.css file (replace “ggexample.com” with your domain):
[ht_message mstyle=”info” title=”” show_icon=”” id=”” class=”” style=”” ].homebutton {
background-image: url(‘https://www.ggexample.com/wp-content/uploads/2017/1/HouseOriginal.jpg’);
background-repeat: no-repeat;
background-position: left;
padding-left: 5px;
}[/ht_message]

Make sure you change the “.homebutton” to the name you gave your menu item earlier. Also, change the URL of the image from “ggexample.com” to the location of the image you want to use. You can get this URL from the Media tool in WordPress.
Click the “Update File” button to save your changes.

The problem with doing this in code is having to make modifications to make it fit. For example, your image may be too large, so you’ll need to edit the coding above to resize it accordingly.
If you need help with CSS, W3 Schools has a good site for teaching people how to program for websites.
Fine Tune the Navigation Menu
Adding a custom menu icon in WordPress is fairly easy. The only thing you’d have to worry about now is making sure the menu bar is responsive for mobile devices. Regardless of what you want to add, modifying the navigation menu is a start when giving visitors a way to manage your site.
What kind of modifications have you made to the navigation menu? How often have you used CSS coding to customize the appearance of WordPress?
Hello,i try with css to replace on hover the image.Is this possible?
Thank you
Yes it is, check out the “Adding Menu Icons with CSS” section of this tutorial.
Menu Image no longer works and adding the code to the CSS file doesn’t work either as of WP 5.2.1 on May 22,2019.
Thanks! We’re in the process of updating our WordPress tutorials to make sure everything works with WordPress 5.x, so this article will be updated soon.