How often do you look at the admin screen and wish elements were laid out a different way? Perhaps you would like to customize the WordPress admin menu to add, edit or even hide certain features. Whatever the reason, you can alter and rearrange how the WordPress admin menu appears.
All it takes is a flexible plugin that gives you those features at the click of a mouse.
In this tutorial, I’ll show you a quick and easy way to customize the WordPress admin menu to your liking. It’ll streamline the appearance and help you control what elements are available for other users.
Why Edit the WordPress Admin Menu?
The admin panel in WordPress is easy to edit to some degree. The system already comes with a few ways in which you can customize the admin area.
What if you have a lot of plugins installed for various purposes? The left panel can become quite long at times, and you could have to scroll pretty far to find the tools you need. Editing the menu layout will give you the chance to make it easier on yourself.
For example, you could create separate menu items for various tools and keep them organized. This would drastically cut the amount of space used in the left panel.
Another reason to edit the menu is to customize the layout to fit your needs. You could create a menu item called “My Tools” and fill it with the functions you use most in WordPress. Perhaps you want to change “Posts” to the word, “Content.”
The bottom line is you can modify the WordPress admin menu to be more flexible according to your specific needs. You don’t need to simply rely on the out-of-the-box experience.
Let’s dive in by first taking a look at the plugin we will be using today to customize the WordPress admin menu.
Admin Menu Editor
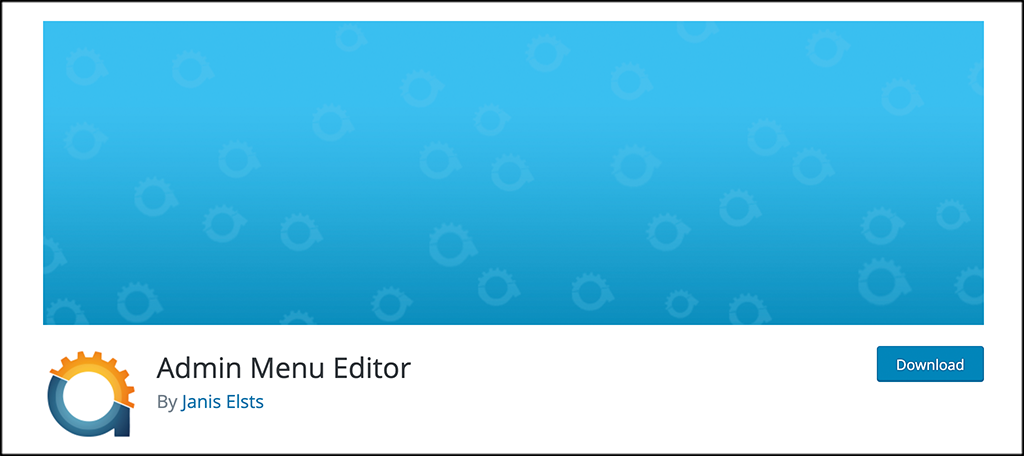
Admin Menu Editor is a great little plugin that will allow you to easily and quickly edit the WordPress admin dashboard to your liking., This allows you to make it more personable based on what you want.
Once the plugin is installed, you will be able to do things like reorder the menus, show or hide specific items, change permissions, and much more. The plugin is basically a tool that allows you to customize your admin menu almost any way you want. Some of the great features included are:
- Ability to change menu titles, URLs, icons, CSS classes
- Drag and drop to organize menu items
- Change menu permissions and roles
- Move menu items to sub menu
- Create custom menus that point to any part of the dashboard
- Point any menu item to an external link
- Hide or show menu items
Basically, the plugin gives you everything you need to create a customized admin menu within your WordPress dashboard.
Let’s get it installed and set up together.
Note: This plugin does have a pro version available. It offers more functionality and customizations. Some of the things you might try to do can only be done using the pro version. If you think this is something you need on your site, then feel free to give it a look. The tutorial below is based on the free version of the plugin.
Customize Your WordPress Admin Menu
Step 1: Install and Activate the Plugin
Before you can start creating and editing menus, you first need to install and activate the “Admin Menu Editor” plugin. You can do this by jumping over to the Plugins page in the WordPress dashboard.
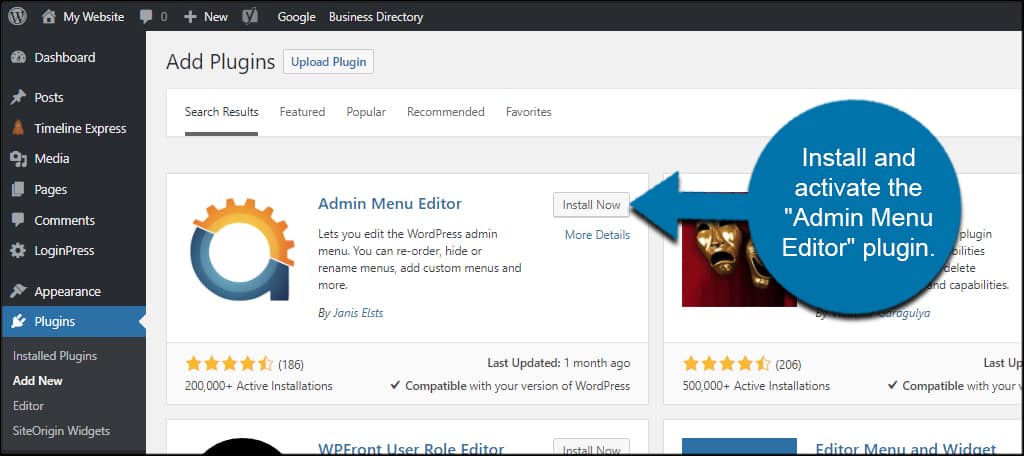
You will see an available search field to search for plugins by name. Type the plugin name in the field. When you see it pop up, install and activate it right from there.
Step 2: Access the Menu Editor Settings
Now that the plugin has been installed and activated, you want to access the settings page. To do this, click on Settings > Menu Editor, located on the left side menu of the dashboard.
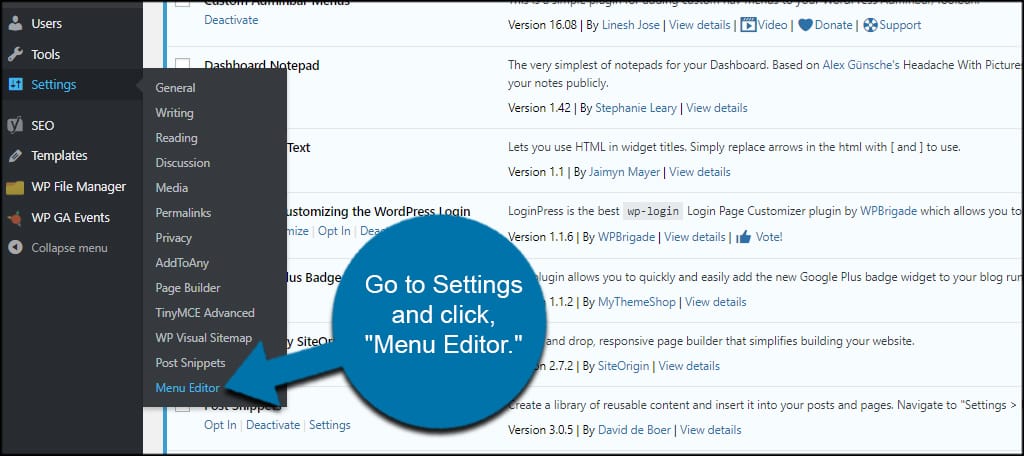
This is a new option that is now available because you activated the plugin.
Step 3: Adjust and Configure Settings
The Menu Editor screen shows you an interactive layout of your admin side panel. By clicking on any of the sections, you can see what submenu items are available. But first, we need to make sure the plugin is behaving as we want.
Click the “Settings” tab from the top of the screen.
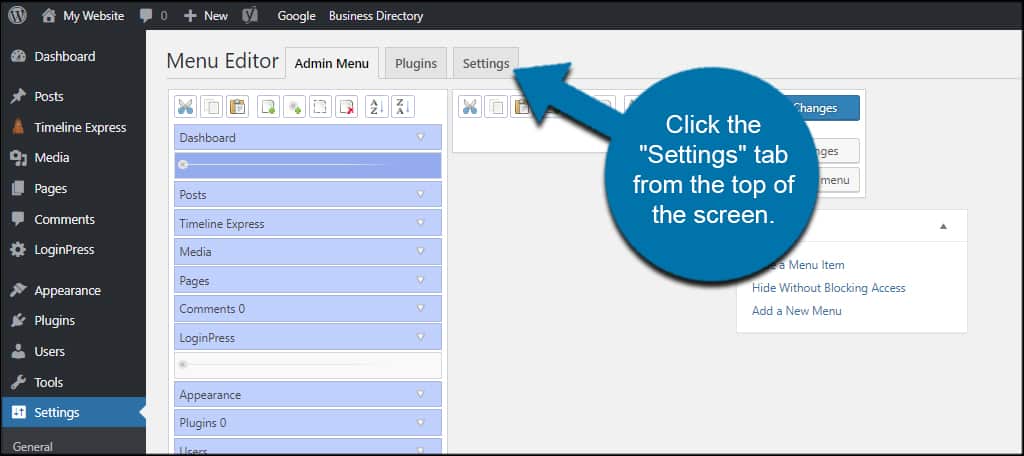
In this screen, you can change who has access to the Menu Editor, modules or plugins you can change, the color scheme, and where the menu appears.
You should note that Admin Menu Editor supports WordPress multisite abilities. This means you can alter how the menu appears across your website network.
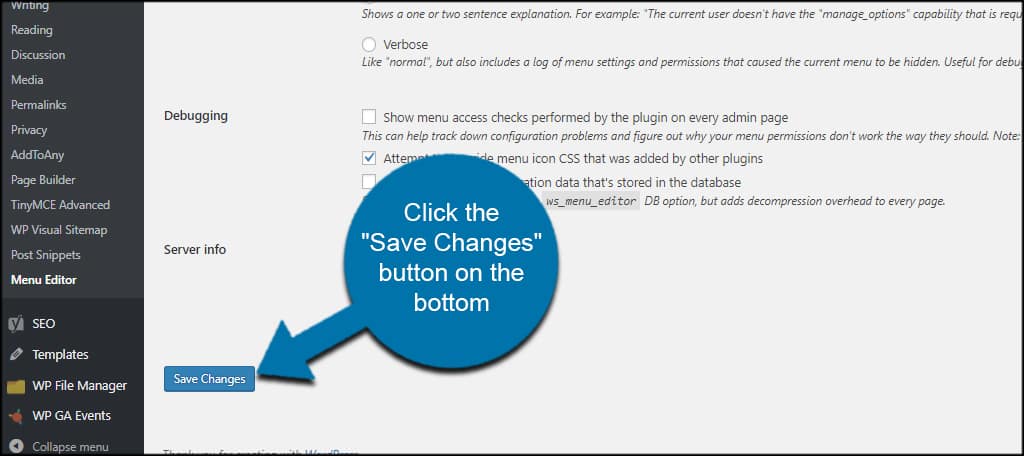
For this tutorial, I’m going to leave the settings as they are. However, you can change anything you need. Click the “Save Changes” button on the bottom when you’re done.
Step 4: Modify the Admin Menu
This plugin uses a drag-and-drop function to rearrange the WordPress admin menu. For instance, let’s say we want to list the “Page” tool to appear directly under “Posts.”
Just drag and drop the item where you want it.
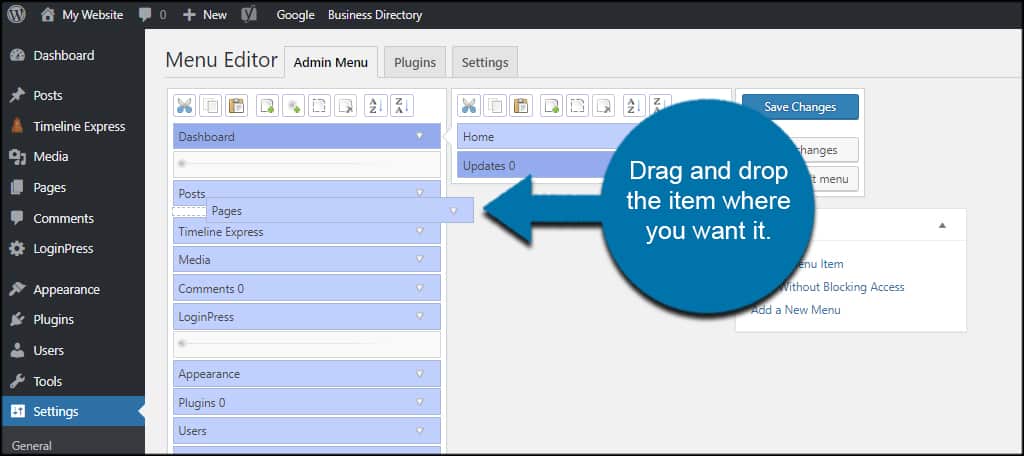
This means you can change the WordPress admin menu order according to what makes the most sense for you and other users.
It’s all about streamlining the process of creating content to get the most out of one’s time.
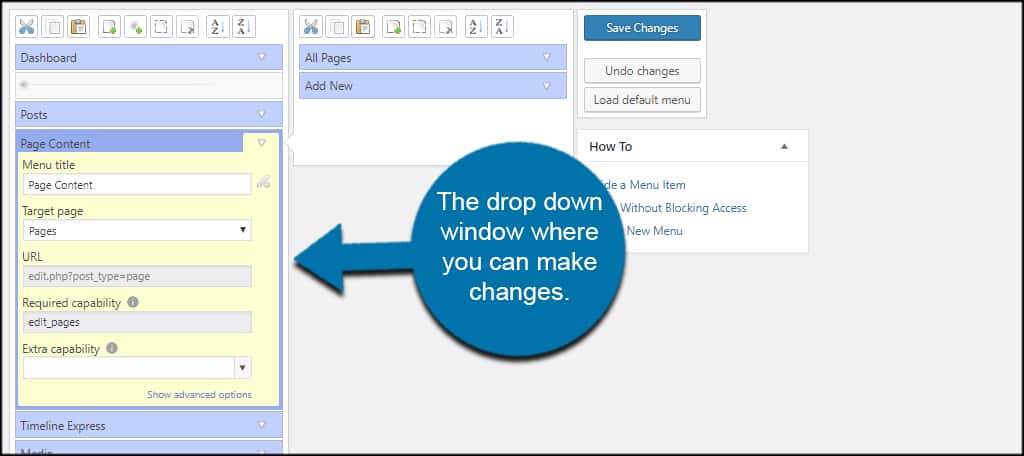
What if you want to rename the function or change where it links to? Click the small down arrow on the right.
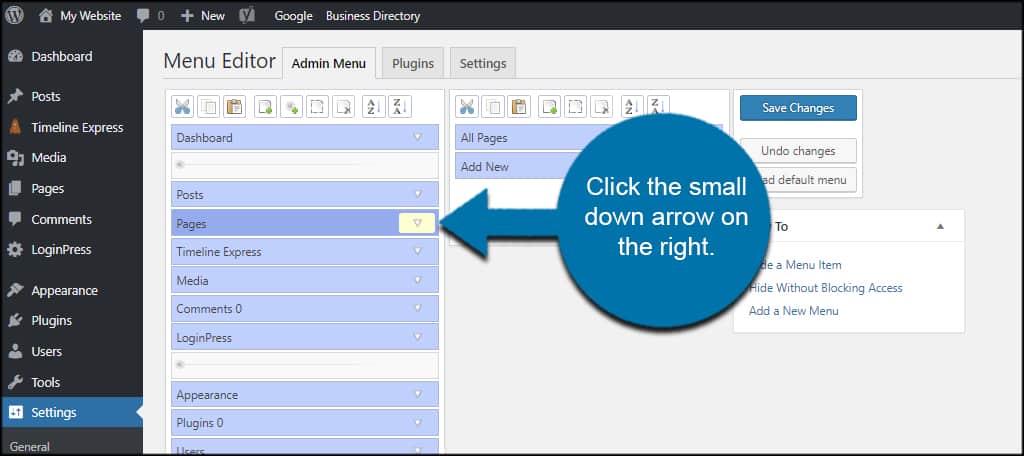
This opens a drop-down window where you can make changes. For example, you can edit:
- Menu title: You can use this to rename admin menu items in WordPress.
- Target page: You can choose to have the menu item link to any page in WordPress or add your own URL. This is helpful if you create new menu items specifically for external sources to help you write content, advertise or link to social media profiles.
- URL: This becomes editable if you choose something like “Custom” on the target page. You can add the URL of the site you want to access.
- Require capability: Only users with specific capabilities will be able to see the menu item. In the case of creating Pages, a user would need the “edit_pages” ability linked to his or her account. It’s not available in all options of the target page.
- Extra capability: From here, you can hide admin menu items from specific users in WordPress. This lets you choose certain roles and capabilities of users who can access the menu. It’s a great feature to have in a team environment.
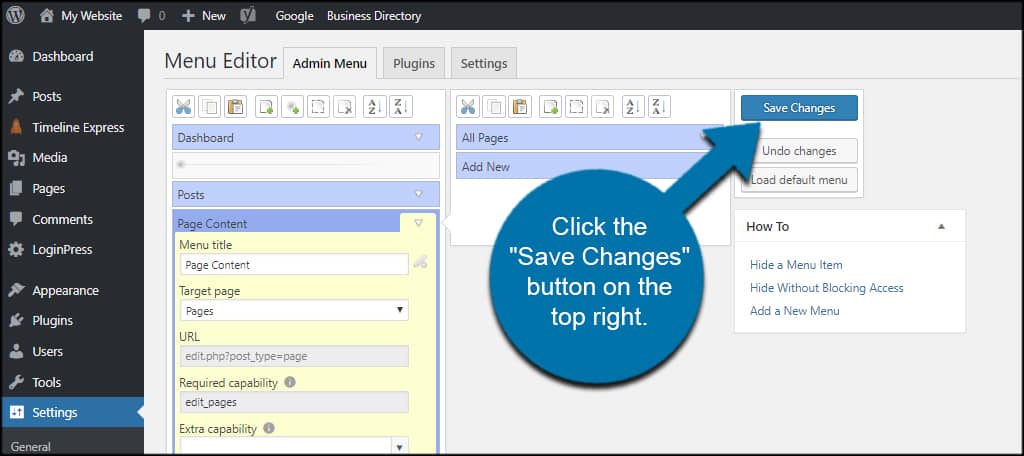
Step 5: Save All Changes
When you’re done making adjustments, click the “Save Changes” button on the top right.
It’s All in the Customizations
Customizing the WordPress admin menu is a great way to help you keep materials organized. And if you buy the “Pro” version of Admin Menu Editor, you can take customization even further.
It’s all about what helps you build the best website possible. And having quick and easy access to your tools only improves the experience.
What kind of additions do you have to streamline the creation of your website? What would you change to improve the functionality of the admin panel?
It might be useful for you to know that you can now add an admin menu to the frontend – see https://wordpress.org/plugins/prothemeswp-frontend-admin-menu/.
Can’t Find Menu Option in Settings on dashboard i have installed plugin it was not working now i have updated it but still it’s not working nor settings page
There must be a plugin conflict or a core update is needed. I am currently using it and it works fine everywhere.