Did you know that WordPress navigation menus can be fully customized? There are a number of ways to customize a WordPress menu. You can add icons, styles, different fonts, and colors and so much more. However, what if you want to add custom post types to WordPress menus?
Creating a custom navigation menu in WordPress is a great way to drive user traffic to particular posts. However, I want to take it a step further and in this article show you how to add custom post types in WordPress navigation menus.
What are Custom Post Types?
Custom Post Types are basically different post types you can create inside WordPress. By default, WordPress houses a lot of different content types. These are essentially called “Post Types.”
A single item is called a “post.” That being said, this is also the name of a standard post type called “posts.”
By default, your WordPress installation comes with a few different post types. These are all stored in the database under the wp_posts table.
If you are not certain what default post types are included in a WordPress installation, then here is a list for you. These types of posts are all available unless they have been removed:
- Posts
- Pages
- Attachments
- Revisions
- Navigation Menus
- Custom CSS
- Changesets
So, from regular post types, you can jump up to custom post types. These custom post types can be things like video posts, images, gallery pieces, and other custom-built content. WordPress lists in detail its post types, so you can get a better feel for what each of them is used for.
Why Add a Custom Post Type to WordPress Navigation Menus
WordPress navigation menus are an important part of site structure. They allow you to customize and create a navigational structure for site users to see and follow. Using custom post types in a WordPress menu will allow you to direct site users to the most important content on your website.
There are many different ways to create and use WordPress navigation menus. Menu placement, structure, and custom functionality all play a role in the overall user experience.
Oftentimes website owners add pages and category links to their WordPress navigation menus. You will see this more often than not. There are also many instances where you will visit a website and see all sorts of custom items built around the WordPress menu.
Let’s take it a step further and look at how to add custom post types into your WordPress navigation menus.
You actually do not need any plugin or any code to add custom post types to menus. The ability to do this is already built into your WordPress installation. It is just a matter of figuring out the steps and process.
Let’s go over exactly what you need to do to accomplish this.
Adding Custom Post Types
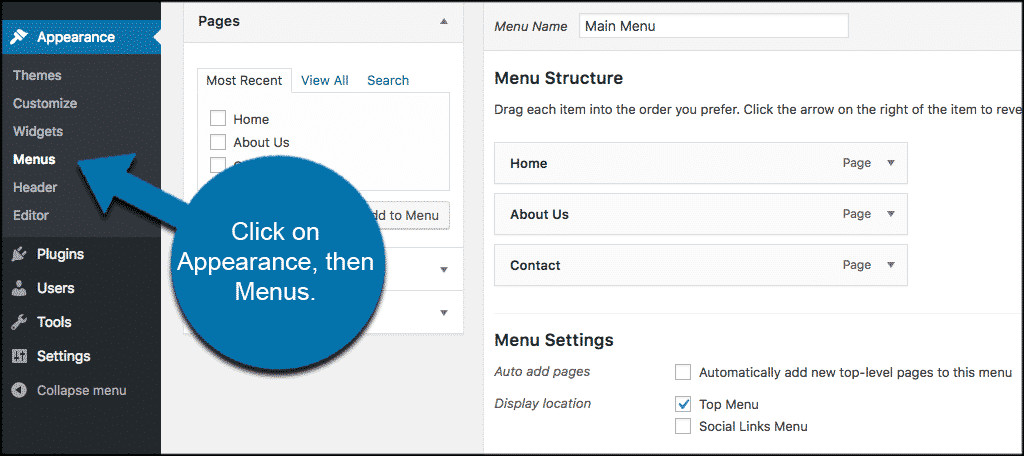
Step 1: Access Your WordPress Menus
The first thing you want to do is go to the menus page of your WordPress admin area. To get there click on Appearance > Menus. You will see these available options on the left side menu of your WordPress admin dashboard.
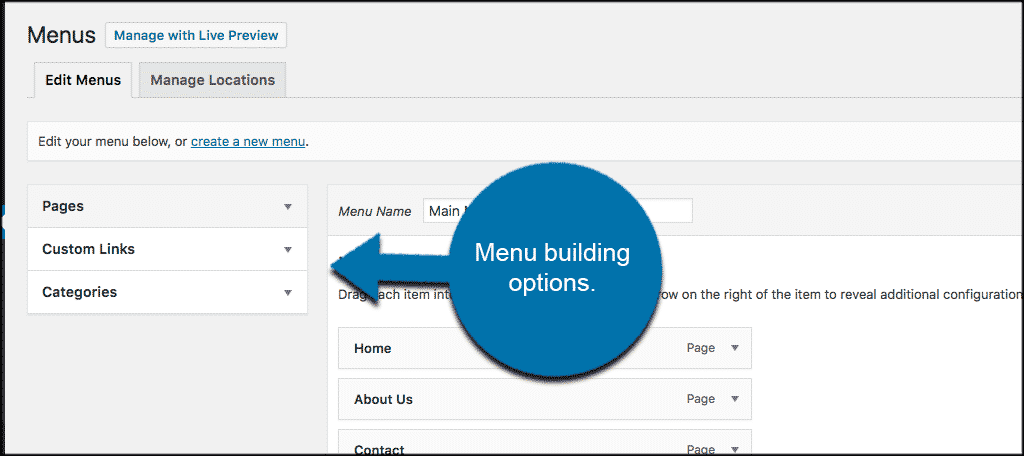
Most likely, you already have a menu built. If you don’t, then go ahead and create your first WordPress navigation menu. After that, you will be able to use that menu to add custom post types.
When you have selected a menu to work with, you will see the customary Pages selection. You will also see Custom Links and Category boxes to the left.
This is where you add menu options and build your menu. You can click on any of those tabs and the box will expand for you. Simply enter the information you choose and add it to the WordPress navigation menu.
Remember, it doesn’t matter where you are using your menus. That is to say in the header, footer, or sidebar. The custom post types will properly display no matter what menu you add them to. It is simply a matter of where you want them to display.
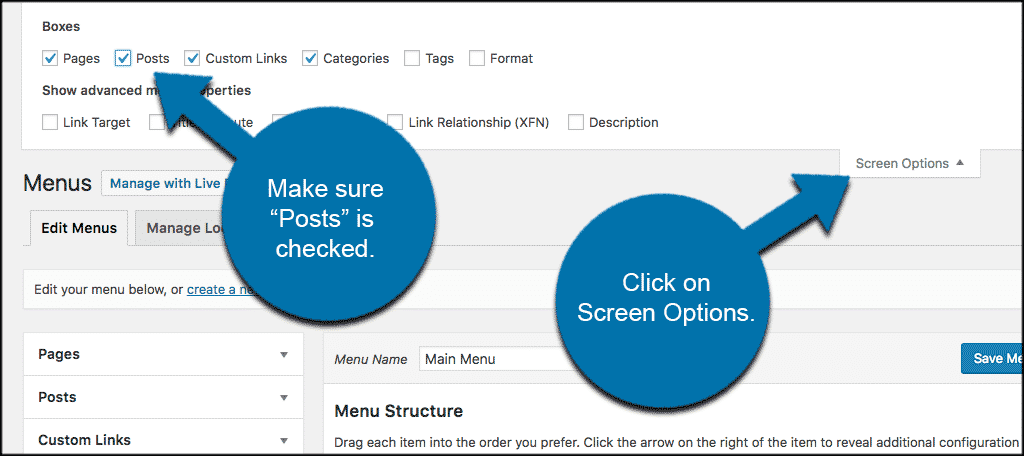
Step 2: Add a Custom Post to Screen Options
Now that you have access to your WordPress menus, it is time to add posts (custom). You can do this by accessing the link boxes to the left of the menu you have chosen to add the custom posts to.
If you do not see a “Posts” tab available (oftentimes you won’t), you can simply add it by clicking on the “Screen Options” button at the top right of the page.
A box will drop down full of different menu options and you simply check the “Posts” box. This will automatically add it to the sidebar tab of the menu section. If you need or want to, you can also add a lot of other options to your menus as well.
Things like link types, link target, custom CSS, description, and link relationship can all be added. You can use these options for other things down the line if needed.
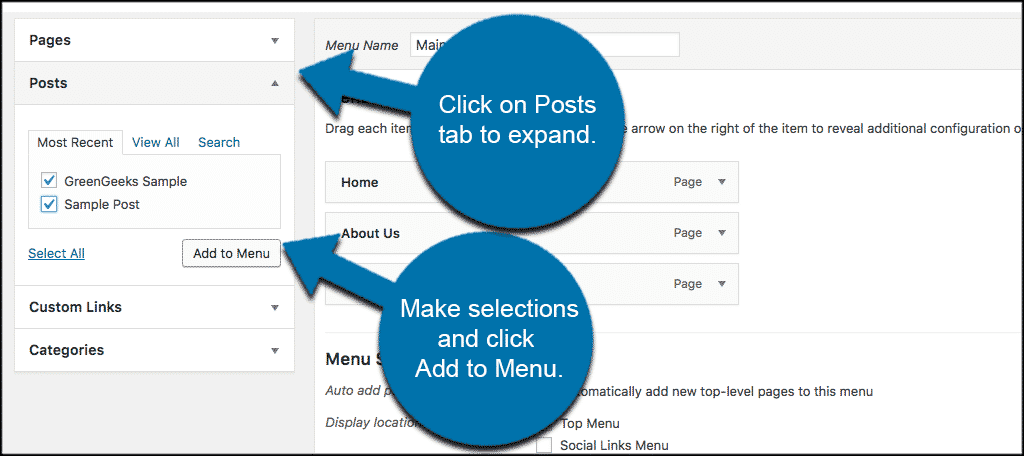
Step 3: Add a Custom Post From the Box
Now that the “Post” box has been added, you will need to click on that tab to expand it and choose any of your custom post types that you would like to add to your WordPress navigation menu.
When you select a post from the menu click on the “Add to Menu” button and the custom post type will be added to your WordPress menu. All of your available post types will show in this view.
If you have a lot, then you may have to take a minute to search for the right one you want to add.
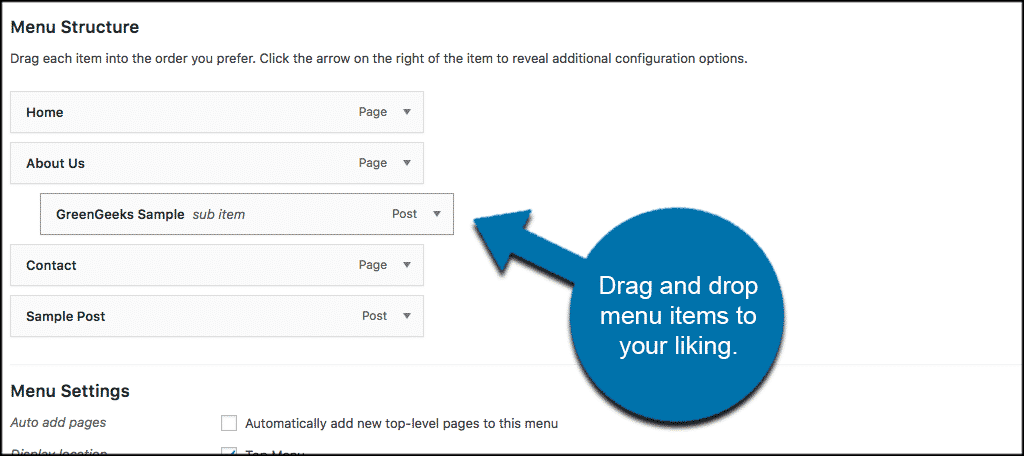
Step 4: Set Menu Structure
After adding the custom post types, you can then drag and drop them wherever you like within the WordPress navigation menu. Add them above or below other menu items. You can even add them as sub-menu items to a parent.
In that case, they will drop down in a menu when the parent item is chosen.
Step 5: Customize the Navigation Label
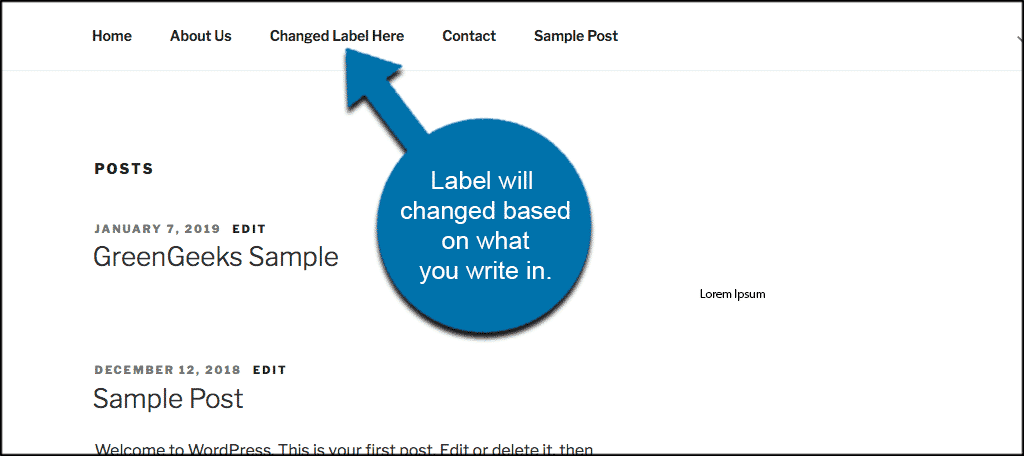
You can also customize the navigation label of the post. This will make it appear shorter in the menu heading on the front end of the site (if needed).
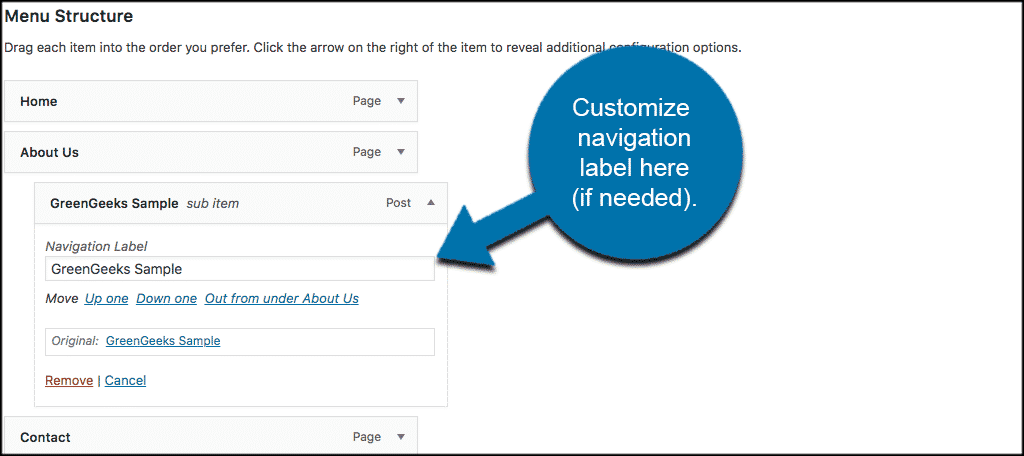
The change will appear on the front end of the site and display in your WordPress navigation menu exactly how you structured the layout.
That’s it. At this point, you have successfully added a custom post type to your WordPress menu. You can repeat this process as many times as you want. Go ahead and add as many menu items as you would like.
Other Post Type FAQs
How Many Post Types are There?
There are actually 5 different post types that are usually available in WordPress. They include:
- Post (Post Type: ‘post’)
- Page (Post Type: ‘page’)
- Attachment (Post Type: ‘attachment’)
- Revision (Post Type: ‘revision’)
- Navigation menu (Post Type: ‘nav_menu_item’)
How Do I Create a Custom Post Type When Using WooCommerce?
By default, if WooCommerce is set up and running, then it will automatically register a post type related to the functionality of the plugin. This is the case for other related plugins as well.
Can I Create a Custom Post Type Widget?
Yes, you can do this by going and getting the Custom Post Types Widget plugin from the WordPress repository and using it.
Final Thoughts
Sometimes you just need to add important content like custom post types to your WordPress navigation menus. You may want to do this because you want someone to easily find or link to something you have created. Or, you may have certain design options in place that you want to take advantage of.
I hope this article showed you a clear and easy way to direct people to the most important content on your site. Adding these types of custom posts to a menu will allow your visitors to find the most relevant and important content you want on display.
Have you added custom post types to your WordPress menus before? Did you find that adding this content into your menus gave users an easier time navigating your website?