Are you looking for a way to add image zoom in WordPress? A magnifying image zoom can help your visitors see more small details in your images. However, WordPress does not come with this feature built into it, but like most things in WordPress, there is a plugin that can add it.
Keep in mind that this feature is recommended for websites that have high-resolution images. If the images are of a lower quality, visitors will see fuzzy pixels and other less desirable effects. Today, I will demonstrate how to add image zoom in WordPress using the WP Image Zoom plugin.
Why Add Image Zoom in WordPress
Image zoom is an extremely popular feature for websites that sell products, especially when they are used items. Why would this matter? Well, the major problem with selling used items is the condition. Even on websites like eBay and Amazon, products are not always as described.
Both of these websites utilize a magnifying image zoom to let visitors see every detail in an image. While you can definitely argue that they may just upload a fake image, an image zoom can help websites that sell items by allowing visitors to see every detail.
What if my website does not sell items at all? This is still a handy feature as long as you have images on your website with smaller details. For example, in video games and movies it is quite common to hide very small Easter eggs in the backgrounds on promotional material. The magnifying image zoom can help you locate even the smallest detail.
How to Add Image Zoom in WordPress
Today, I will demonstrate how to add image zoom in WordPress using the WP Image Zoom plugin. This plugin offers you all of the tools and features you need to customize how image zoom will work on your website. It also fully supports mobile devices to help keep your website as mobile friendly as possible. You can select which images will have a zoom effect and which will not.
Installing WP Image Zoom
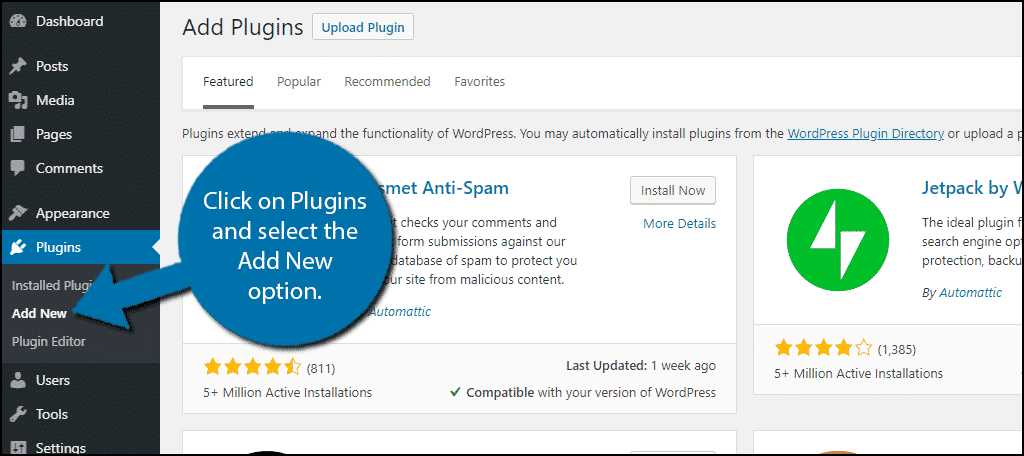
Let’s start off by clicking on Plugins and selecting the Add New option on the left-hand admin panel.
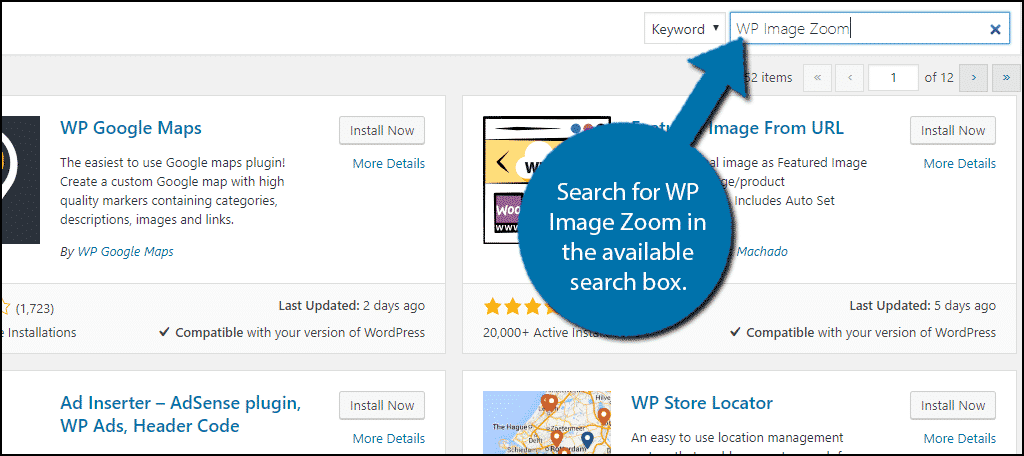
Search for WP Image Zoom in the available search box. This will pull up additional plugins that you may find helpful.
Scroll down until you find the WP Image Zoom plugin and click on the “Install Now” button and activate the plugin for use.

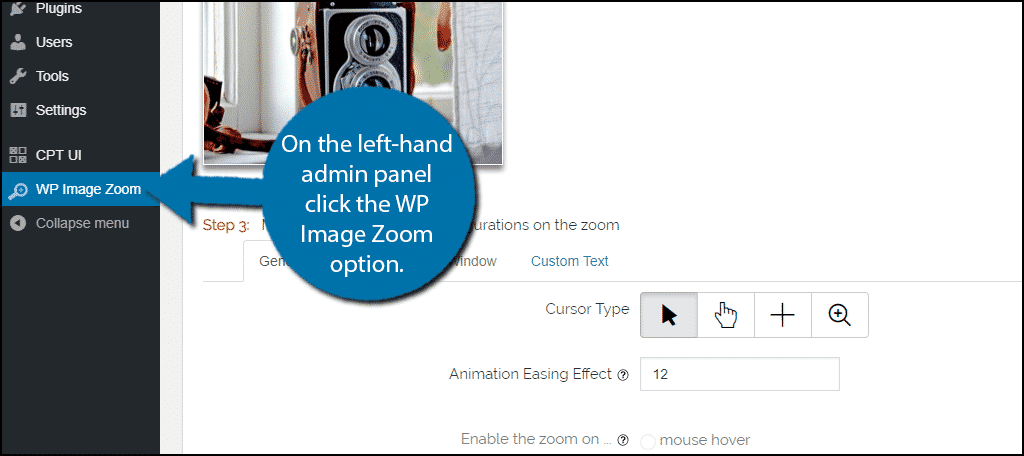
On the left-hand admin panel click the WP Image Zoom option. This will pull up the main settings page.
Setting Up WP Image Zoom
For many websites, the default options will actually be more than enough. You may want to skip this step entirely and add the zoom effect to an image in a post or page and see it in action.
However, other sites probably already have their own idea of how they want the zoom to work and you’ll be happy to know this plugin should let you bring your vision to life.
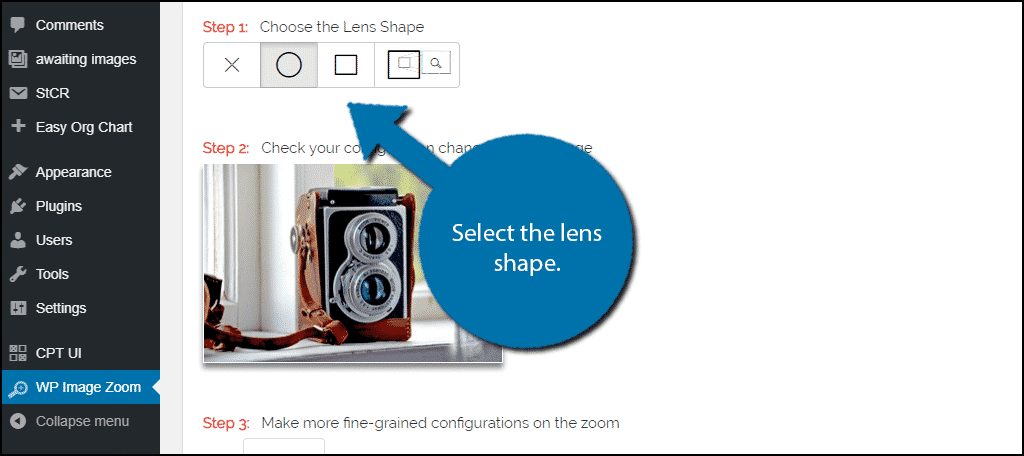
The first thing you need to select is the lens shape. You have four options to choose from. The first is actually not a shape, it is no lens. This option makes you zoom in whereever your mouse is on the picture. The second option is a circular lens like a camera. The third option is a square-shaped lens. The final option is to use a zoom window to zoom in. Select the one you like best.
You can check what the lens looks like by hovering it over the image below the choices.
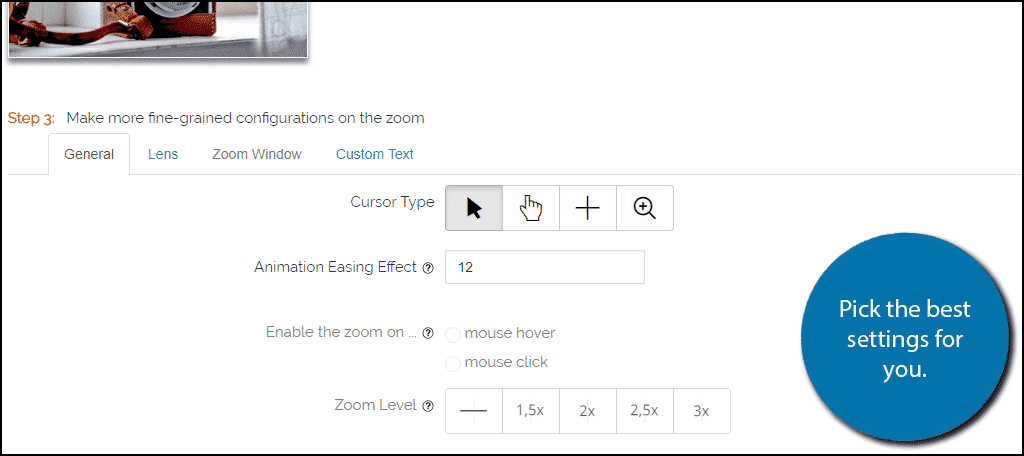
Next, you can customize exactly how the zoom works. There are four tabs to look through. They include General, Lens, Zoom Window, and Custom Text. You can alter things like the zoom level, add lens colors, lens size, and much more. It is important to mention that some of these features are only available in the Pro edition of the plugin, but there is still a good number of options in the free version.
Once you are done setting up the plugin, click on the “Save Changes” button.

Now that the plugin is set up, all that’s left is to actually make the images zoomable.
Making An Image Zoomable in WordPress
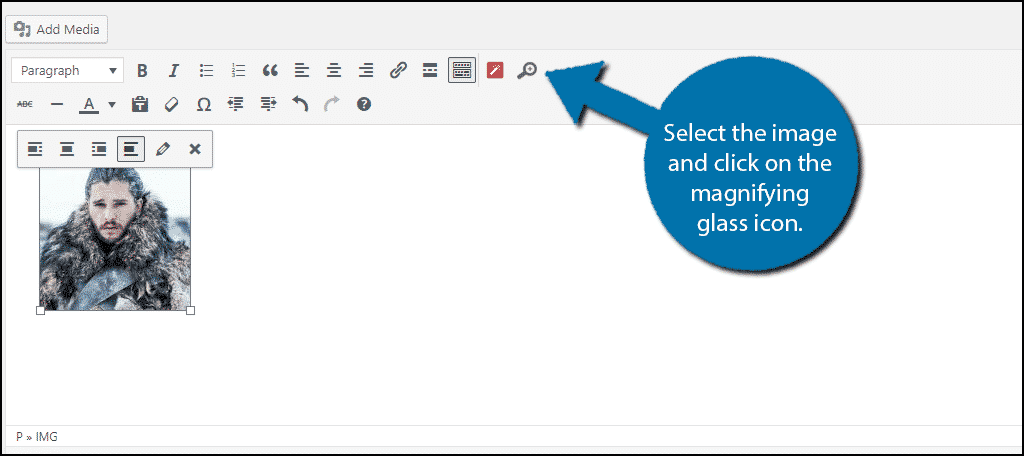
Making your images zoomable in your posts and pages is easy, but you will have to manually select each one you want zoomable. This can be a very tedious process if you have a lot of images. Go to an existing post or page or make a new one. Then add an image to it.
Select the image you want to add a zoom effect on. Then click on the magnifying glass icon.
You can now go to your website and zoom in on the image. Keep in mind that since the zoom effect is best used on high-resolution images, these will take a little longer to load.

Congratulations you have successfully added a zoom effect to your WordPress images. Remember that you need to manually select each image to have the zoom effect. This can be very tedious if you have a lot of images.
Add the Zoom Effect When Needed
Like special effects in movies, the more you use them, the less impactful they become. The zoom effect in WordPress is no different. Not every single image you upload needs to have the zoom effect. This is best reserved for the products you are selling, promotional content, or content that has a lot of minor details. Overuse of the effect can actually make it more of a hindrance.
Why do you want to add a zoom effect in WordPress? Which lens shape have you picked?
Dear Chris, first of all thank you for this very vell done article. In my case it’s says ” you can add the zoom feature only to non full-full size images.”…what should I do?
Hello Chirstina, it sounds like your images might already be too large? Other than that, I’m not sure. You might have to contact the plugin developer.