Many people will use WordPress to show off an image portfolio of their photographic abilities. It makes for a great method to market oneself as a professional photographer. Displaying EXIF tags for photos can add a bit more interest to those images.
When you use EXIF tags for photos in WordPress, you add a bit more engagement by displaying various information about the image itself. It’s also beneficial if you’re creating a tutorial or how-to photography website.
In this tutorial, I’ll show you an easy way to add that metadata to your WordPress posts and pages.
What is an EXIF Photo tag?
The exchangeable image file format, or EXIF, is data most new cameras store within the photograph. This can include data about the date, time, various settings, shutter speed, and more regarding individual photos.
And if you use a mobile device, even the GPS location may be included in these tags.
Why Make EXIF Information Available?
Using EXIF metadata in your content displays a variety of information for the photo. You can show off various aspects of the shot to give visitors further details regarding the image.
For instance, perhaps you’re showing visitors how to take the perfect photograph of the Grand Canyon during a certain time of the day. You can let WordPress use the photo metadata to show various settings such as shutter speed, date, and time.
Another aspect to consider is how you can add copyright information to the EXIF metadata as well. This can help keep your photos from being spread without your permission.
How to Use Exifography
Today, I am going to feature the Exifography plugin. However, before I do it is worth noting that it has not been updated in some time, but I can confirm it worked perfectly with WordPress version 5.5.1 and the plugin’s author still regularly answers support questions.
It’s an easy tool that lets you pick and choose what metadata to include in your posts including customizing HTML layout. Every photo you upload will have a shortcode that you can paste underneath it to display all of the EXIF data.
This is automatically added, so all you really need to do is upload a photo and copy & paste the shortcode. Plus, you can include a Google Map to show others where you were when taking the picture.
So let’s get started!
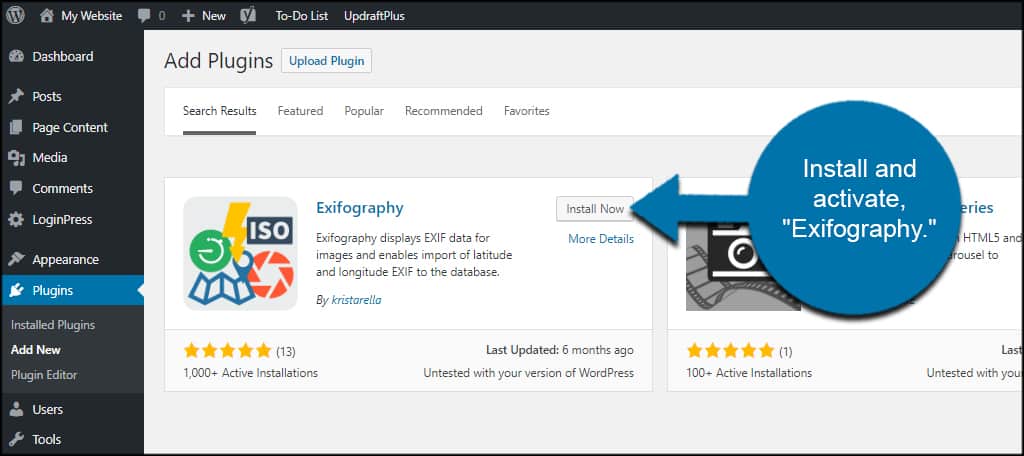
Step 1: Installing Exifography
As you might already know, before you begin you are going to need to install and activate the Exifography plugin for use.
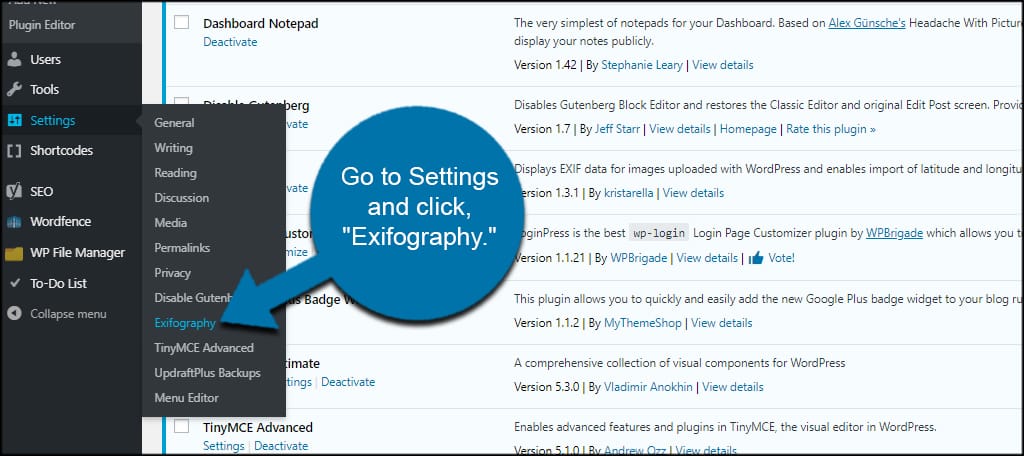
Once, installed, click on Settings and click the Exifography option.
Step 2: Selecting EXIF Data to Display
The Default EXIF section is at the top of the page. This allows you to choose which information to display. Simply check the boxes of all the elements you want to use.
Note: Keep in mind that if a specific element does not apply to the photo you upload, it will not display.
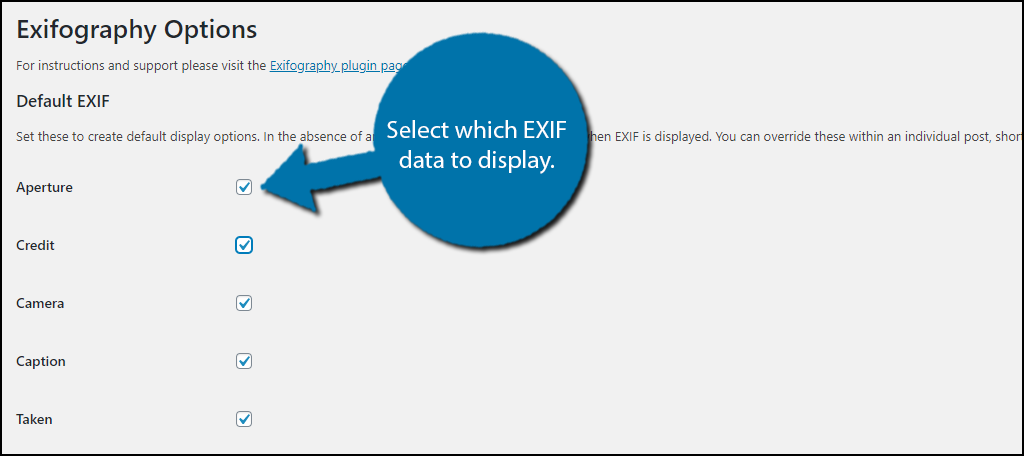
This is the information the plugin will use to show details in your WordPress posts or pages. If your camera supports any of these options, visitors will see the data you choose.
Step 3: Auto Insert into Post
You now need to choose whether to auto-insert EXIF data for the first image added to your content.
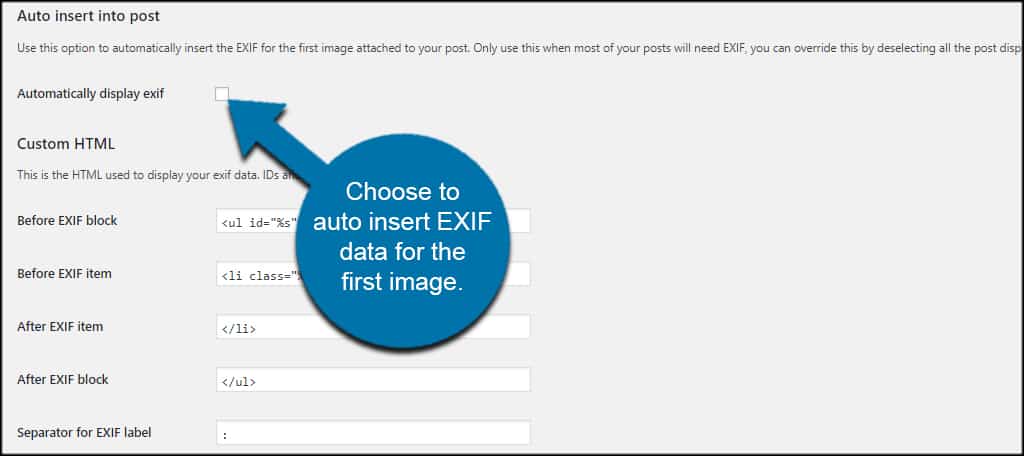
This option is best suited when most of your content will use the EXIF metadata of photos, such as building a photo gallery or online portfolio. It is not recommended for a standard blog.
Step 4: Setup Custom HTML & Google Maps
Customizing the HTML of the layout is purely optional. By default, Exifography will display the metadata in a table within your content. However, you can add your own elements to fine-tune the coding if you wish.
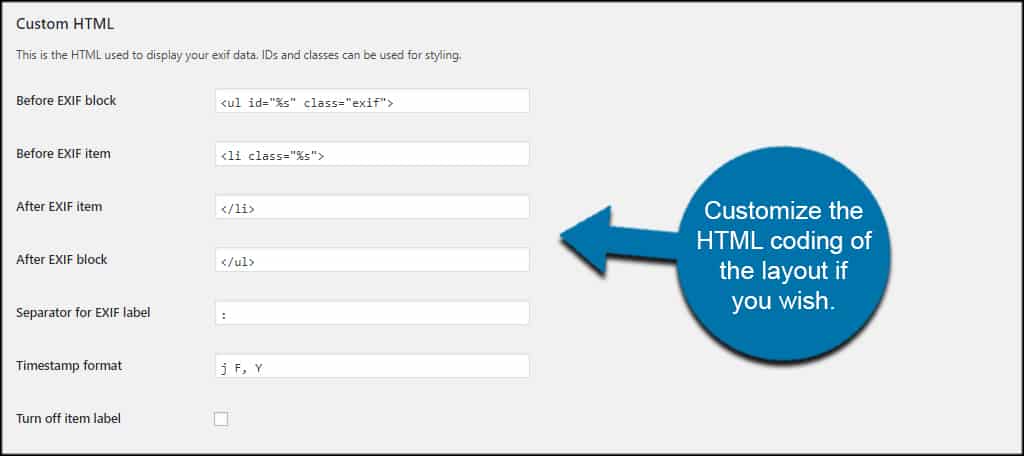
This information includes links to Google Maps, zooming in, map width, and timestamp format you want to show. I recommend seeing the plugin in action before you decide how to customize it.
If you do choose, to use the map functionality, Exifography gives you the opportunity to add Google Maps to your website according to photo metadata. If you want to expand what you can offer, add your Google Maps API key for this project.
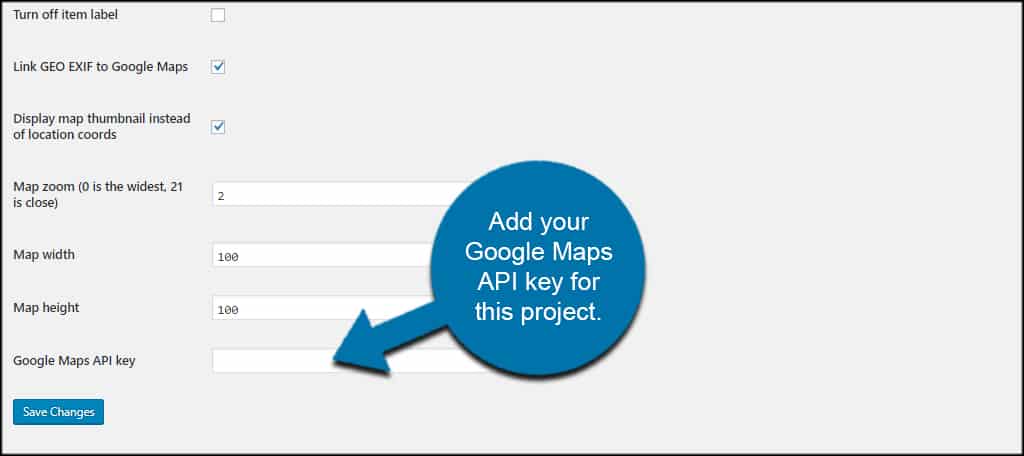
Using Google Maps is an optional setting. You don’t really need this when showing EXIF data for WordPress images. However, it does add engagement if you’re highlighting a specific location in the photo.
Note: The map will not show in the EXIF metadata without having an API key from Google.
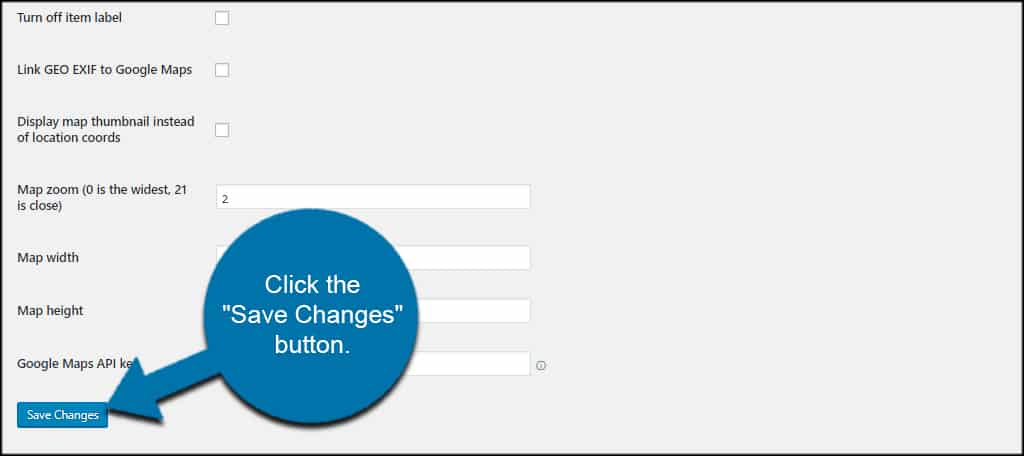
When you’re done with fine-tuning your settings, click the “Save Changes” button.
Note: Google Maps now requires an API key and a billing account. However, you get a $200 credit on the account which gives you quite a few page loads per month. This helps smaller websites as it keeps the price within reason.
That concludes the plugin’s settings, you are now ready to display EXIF data in WordPress.
Step 5: Adding an Image to WordPress with EXIF Data
Let’s open a new or existing WordPress post or page. You can display EXIF data using both an Image or Gallery block in the Gutenberg editor.
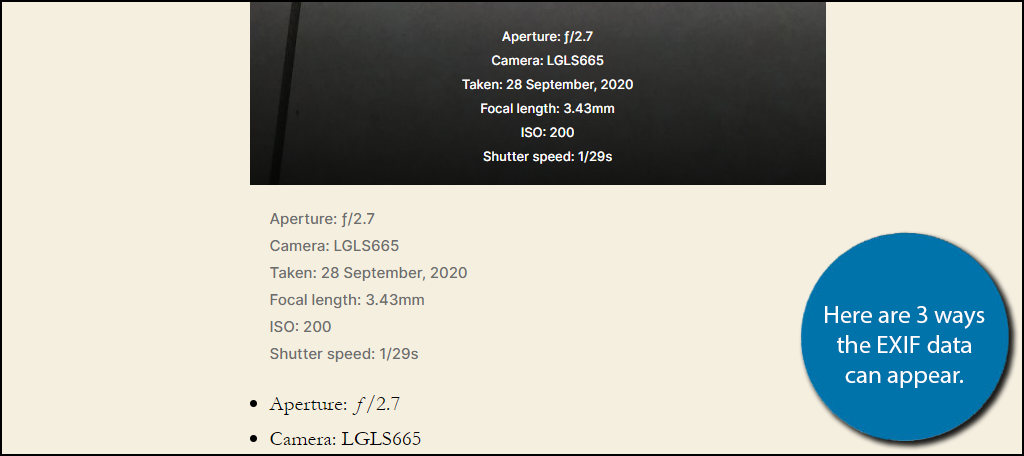
I personally prefer the Gallery block because you can add the shortcode as a caption at the bottom of the photo, however, if there is a lot of EXIF data, it may block something in the image.
Regardless of what block you choose to use, when you select the photo, scroll to the bottom to find the shortcode and copy it.

Note: Every image will now have a shortcode available to show any metadata you selected above. This includes images that were not actually photos, which means you will have to know which ones are which.
Paste the shortcode where you want the EXIF data to appear. In my example, I will be showing the data as an image caption and underneath the image. Here is what it looks like:
Note: If you do not see location information, the device your photo was taken on either does not support it or the feature is turned off. Consult the device’s manual for information on how to enable such features.
If you do have the Google Maps feature enabled, the location will become a link that allows you to view the exact position the image was taken.
Congratulations, on setting up the Exifography plugin to display EXIF tags for photos in WordPress.
Show Off EXIF data in WordPress Images
Exifography is one of the easier WordPress image metadata plugins to use for displaying the information. If you choose not to show the data, simply don’t add the Exifography shortcode. Using it sparingly might have better results than adding it for every photo.
However, using the EXIF data has a wide range of possibilities for photographers. For example, you can compare the image quality of various cameras while taking a picture of the same subject.
One thing to be mindful of is taking photos at your home if you display the location information. This will result in posting your home address on your website, which can be quite dangerous in today’s turbulent times.
What kind of graphic add-ons do you use to engage your website visitors? Do you find your own photos perform better for engaging traffic as opposed to stock imagery?