More and more WordPress users are really starting to come around to the idea of the WordPress Gutenberg block editor. Aside from the fact that you can easily update existing WordPress content using the Gutenberg editor, Gutenberg continues to show why it is better.
One of the reasons for this is the ease of adding and aligning images.
Adding images in the classic editor was never really an issue, but aligning images definitely was. Between text spacing and image sizing, most beginners had difficulty aligning images the way they wanted them.
The Gutenberg block editor has really come through for adding and aligning images. Because of the WordPress block editor style, a user can very easily add and align images in Gutenberg.
The new WordPress block editor has made it easy to add and align images and allows you to create beautiful content in a much easier fashion. Let’s take a look at how to easily add and align images in the WordPress Gutenberg block editor.
Images and Alignment in WordPress
The classic WordPress editor gave the option of aligning images to the left, right, or center. So the option was there, but sometimes it was still difficult to get the look you wanted because of image size.
The layouts were wrong, image sizes were off and sometimes text was where it wasn’t supposed to be. Fixing it could take hours, if you could fix it at all.
The WordPress Gutenberg block editor fixed a number of these issues. Not only can you now very easily add a cover image or featured image in the WordPress block editor, but taking care of image alignment issues has become easier than ever.
Add Images
Before you can align images in Gutenberg, you need to add them to a post or page. So let’s start there. Open a new or existing WordPress post or page and click on the “Add New Block” button to select the type of block you want to add.
The WordPress Gutenberg block editor comes complete with the following types of image blocks to choose from:
- Image
- Inline Image
- Gallery
- Media & Text
- Cover
For this tutorial I am going to just use the image block. Select the “Image” block to bring it up.

When the image block is placed inside your editor, you will notice there are three options to choose from.
- Upload
- Media Library
- Insert From URL

You can add your image file via any three of these choices. Once selected, WordPress will automatically add it to the image block to your post or page, and it will be there for you to align and manipulate how you want.

Align Images
Now that you have the image inserted into the WordPress block editor, you can start the process of aligning the image. With the image, added you see a toolbar at the top of the image block.
Use the align image options there to align the image how you want.
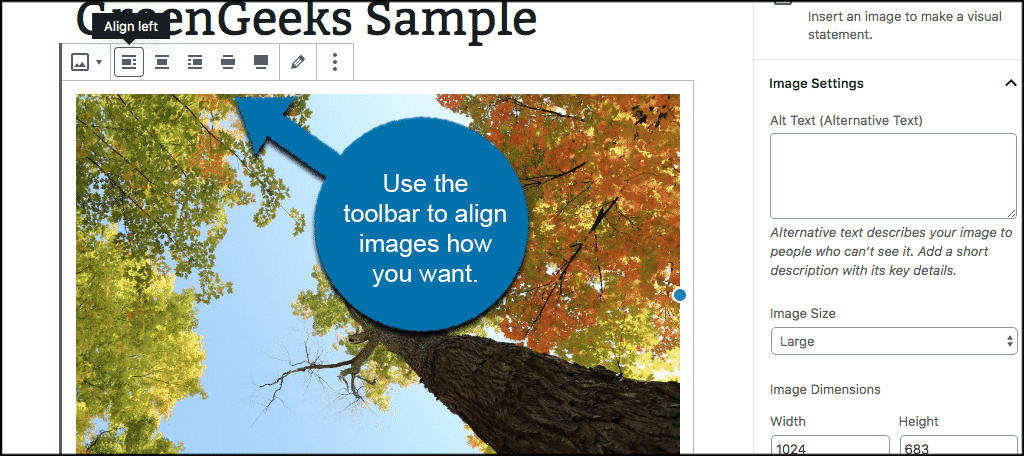
The following image alignment options are available for you to choose from:
- Align Left
- Align Center
- Align Right
- Wide Width
- Full Width
I am sure you have an alignment style in mind. However, here are some things to consider when you align images in Gutenberg.
If you have uploaded an image into the WordPress Gutenberg block editor that is a little smaller in width, then you may see some text come up next to the image if you use left or right alignment.
If you use center alignment the WordPress block editor will automatically center the image on its own row, without any text beside it.
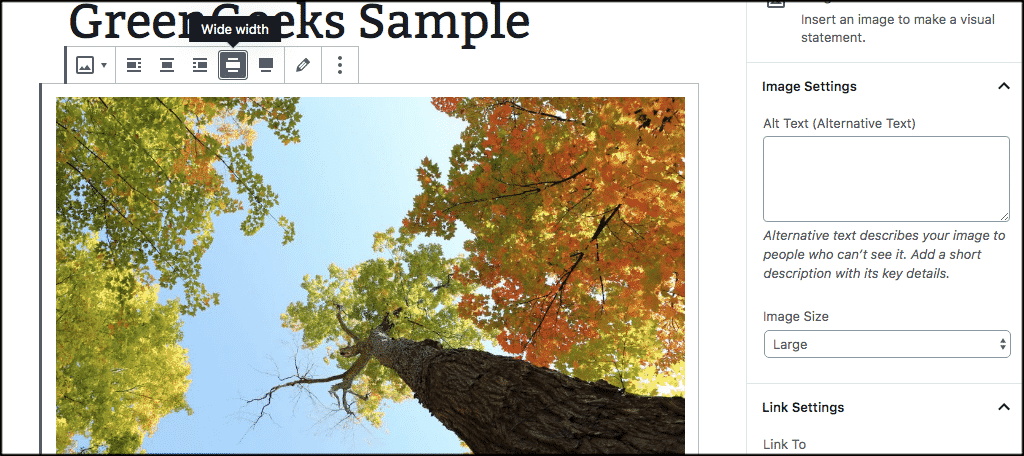
The WordPress block editor also offers two other alignment styles. You can choose to use the wide width option, which will make the image wider than the text area.
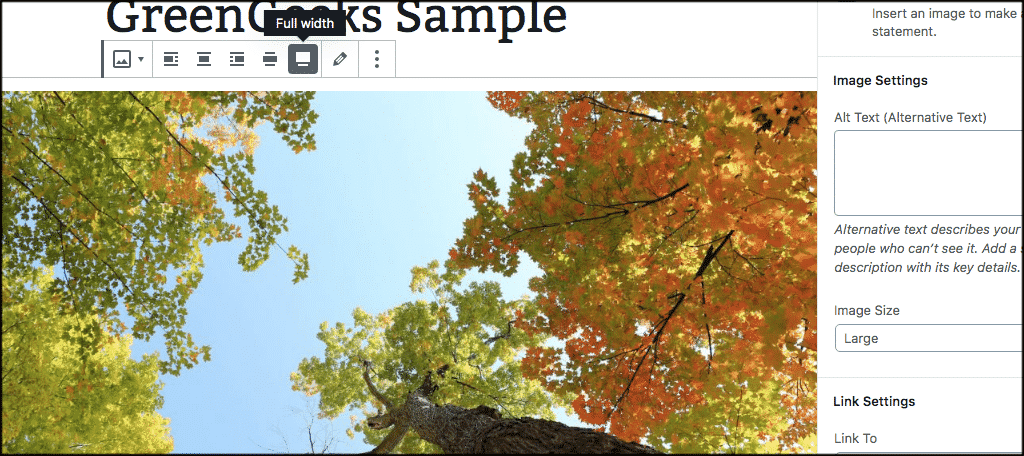
Or you can choose to use the full width option. This option will push the image all the way to the edges of the browser when being viewed live.
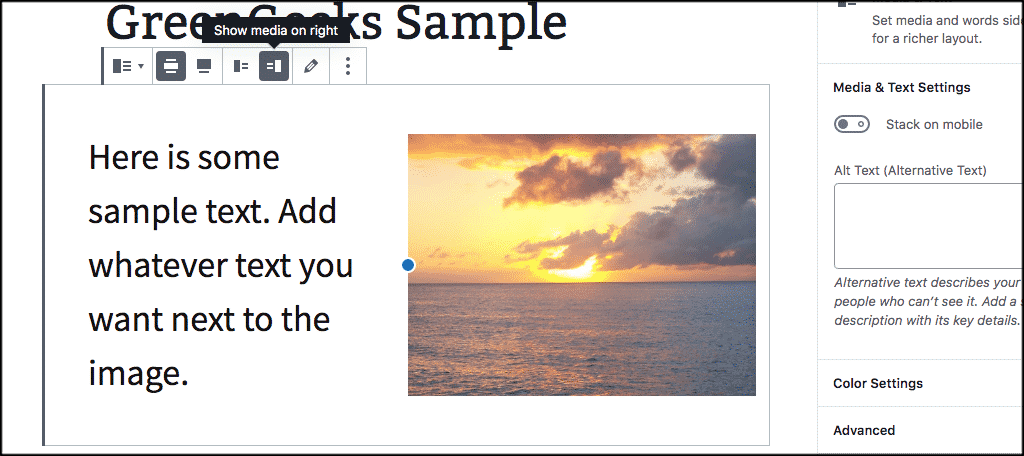
Align Images Next to Text in Gutenberg Block Editor
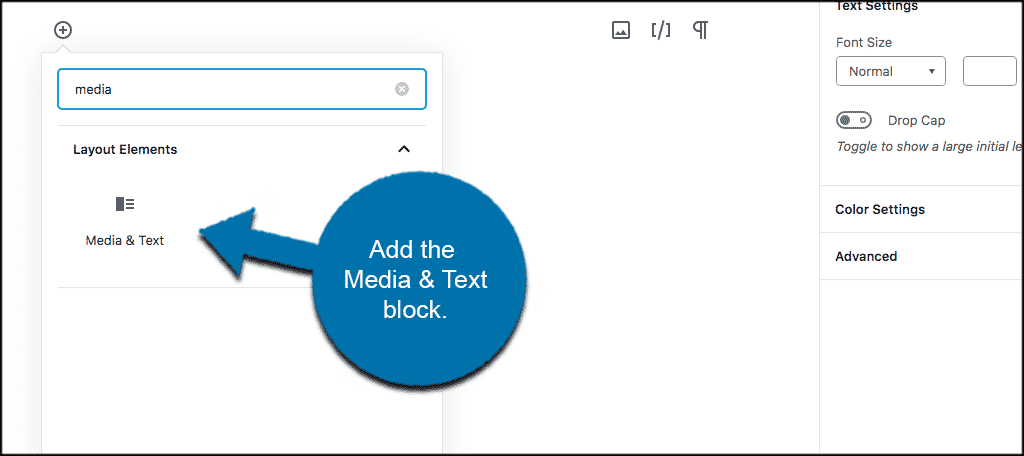
The WordPress Gutenberg block editor still gives users the option to align images next to text on the same row. However, you can be more precise and clean with the layout now using the column and block combo.
To align images in Gutenberg perfectly next to text, click on the Add New Block” button and select the “Media and Text” block.
This is a two-column block that allows you to easily add an image and text in the same column. One column is for media, and the other column is for text.
Note: You will find this block under “Layout Elements.”
Once the two-column block has been added, you can go to work. Simply add the text you want in the text field and upload the image you want into the media’s field.
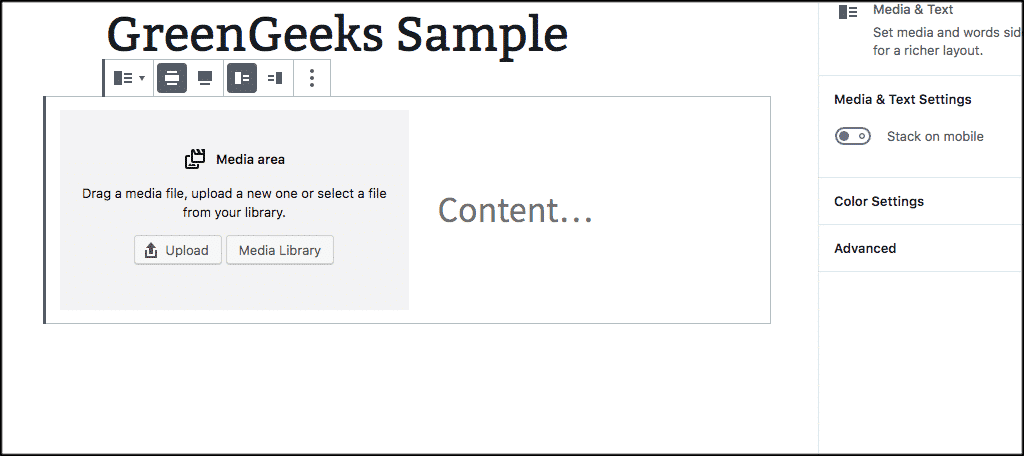
Once both are added you can play around with the alignment and spacing using the toolbar.
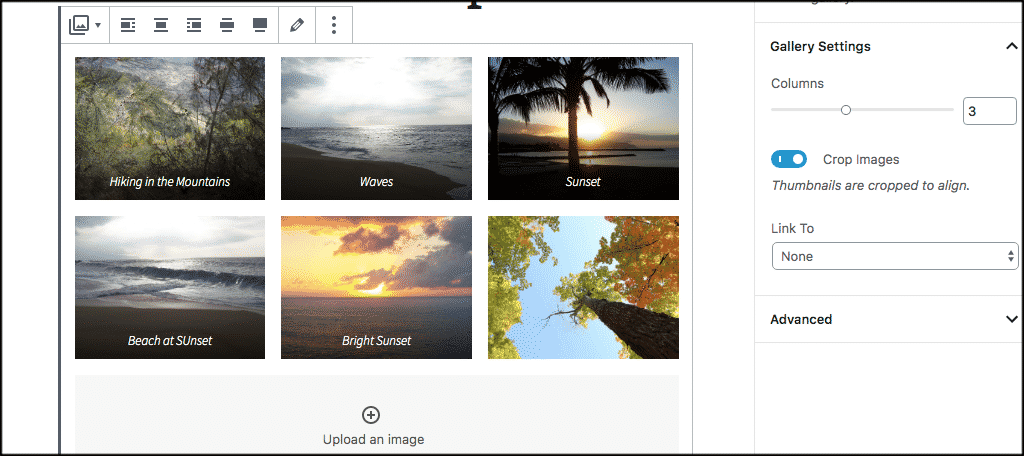
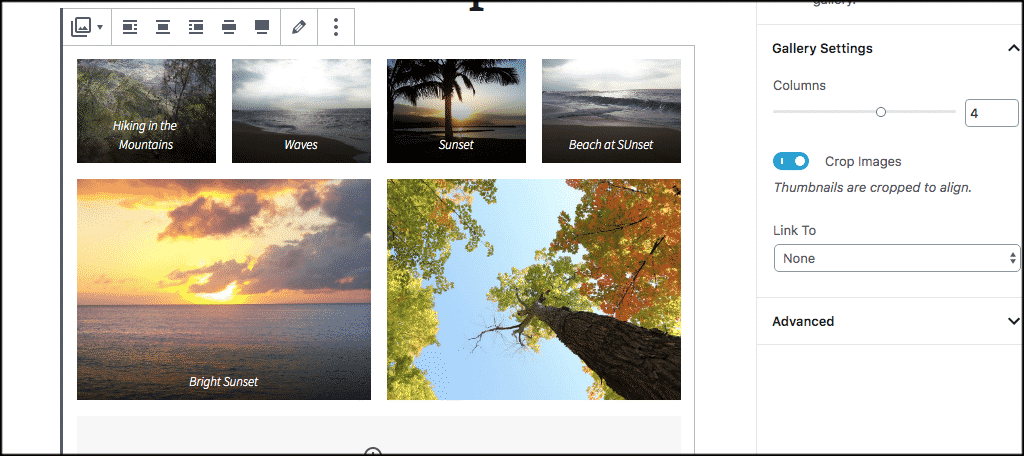
Align Gallery Images in WordPress Gutenberg Block Editor
There is also a function in the WordPress Gutenberg block editor to easily add and align full image galleries. You can add a “Gallery” block and from there add images.
Once the gallery is added, you have all the image alignment and styling options located to the right of the WordPress block editor. Pick the styles you wish to publish and you are all set.
Here are a couple different examples in the screenshots below.
Two-columns, three images across.
Two-columns, four images across, two images below.
The WordPress Gutenberg block editor has put in place some very easy-to-manage blocks that enable you to add and align images easier than ever. You can even save these image alignment blocks to export and import for use on other sites.
I hope this article has shown you how you can quickly and easily add and align images in the WordPress Gutenberg block editor.
Have you found that handling images in the WordPress block editor is easier than it was in the classic text editor? Do you still prefer the classic editor anyway?
HI, do you know how to stop the black line (border) from going around every image?