Have you ever tried to replace WordPress media files? Sure, we all have. So you know that while it isn’t difficult to replace media, it does take several steps. What if you could replace these media files much easier and faster?
Usually, to replace WordPress media files properly, you have to do all of the following:
- Upload a New File
- Rename the File
- Insert it Into the Correct Post
- Delete Old File
However, there is a much faster and easier way to replace media files in WordPress. You just have to use a great little plugin called “Enable Media Replace.”
Enable Media Replace
Enable Media Replace is a totally free and very lightweight plugin that lets you replace WordPress media files quickly and easily. By using this plugin, you can go around the steps of renaming, deleting, uploading, and replacing.
The Enable Media Replace plugin takes out all the work of having to rename files that are the same when you are uploading them. You simply replace any uploaded file from the media library by clicking on the file in question.
You can’t download your entire media library using this plugin, but you can replace anything you want.
The plugin gives you a couple of different ways to do this, which we will talk about below. You can easily replace the file, use a new file name, and update all file links. It just depends on what you need to do.
Install the Plugin
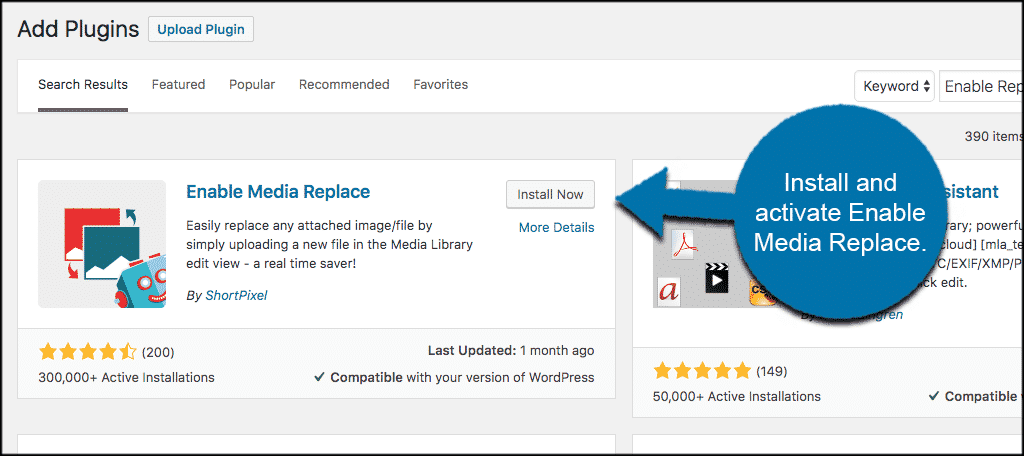
To easily replace WordPress media files, you first need to install and activate the Enable Media Replace plugin.
You can do this by going to the plugin repository page in the admin dashboard of your WordPress website.
Once the plugin has been installed and activated, you are now ready to replace any WordPress media files you need quickly and easily.
Replace WordPress Media Files
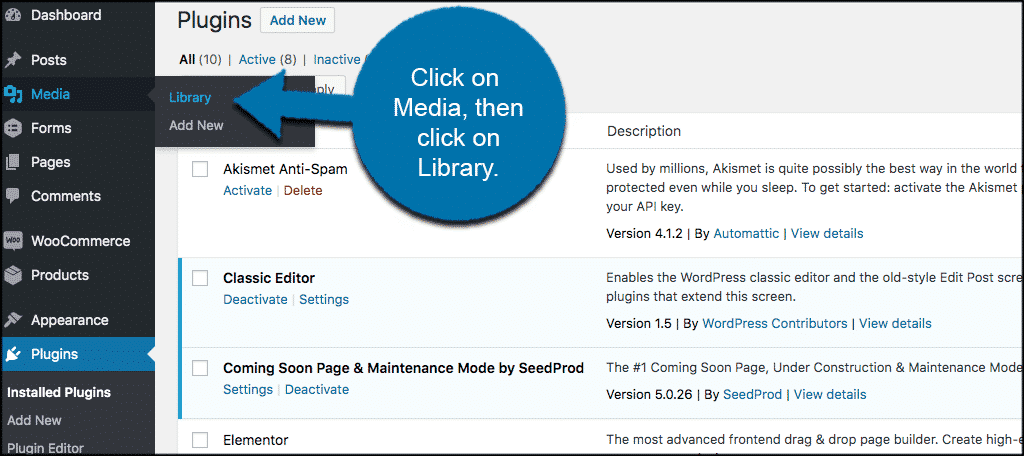
To replace a media file click on Media > Library. This will take you to your entire media library.
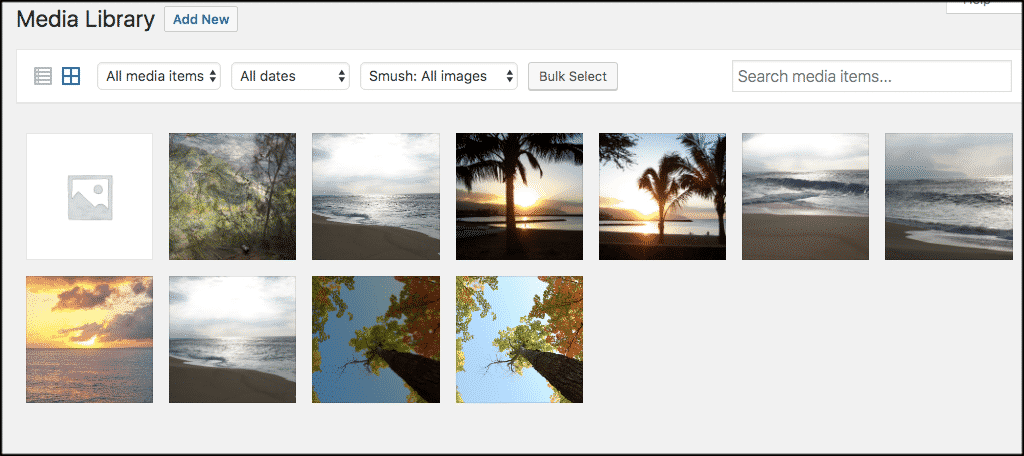
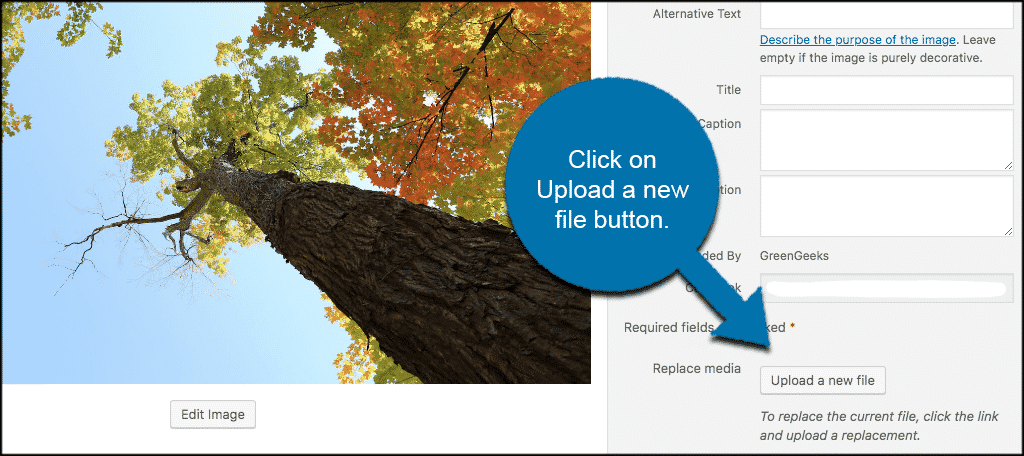
Once you are inside your media library, click on any image you want to replace.
The image selected will pop up into the WordPress media “Edit” screen. You will see that on the right side of the image-editing screen is now a button titled “Upload a New File.” Click on that button.
A “replace media upload” page will pop up. From here you have a couple of options when it comes to replacing the WordPress media file.
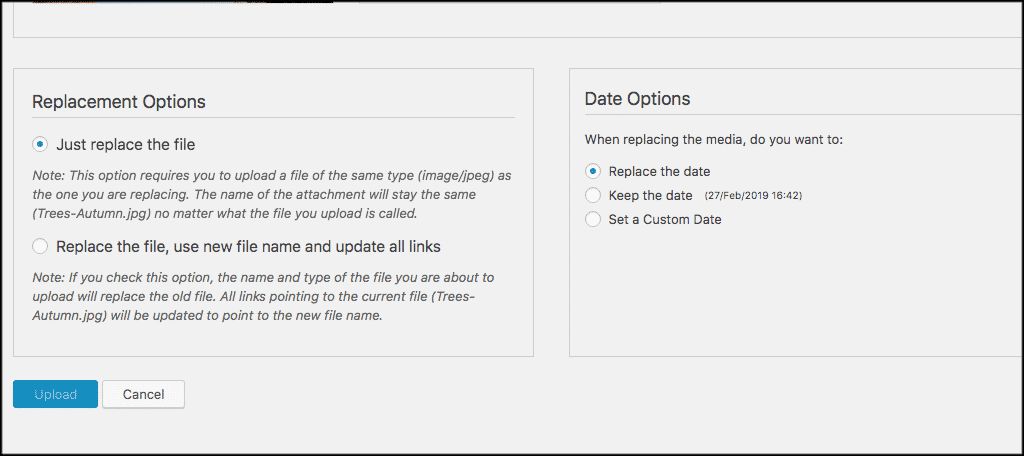
Replacement Options
Choose one of the two replacement options. You can replace just the file, or you can replace the file, use a new file name, and update all links.
Date Options
You can also choose the date options you prefer. Choose from replace, keep, or set a custom date if needed.
When you have set the options you prefer, simply click on the blue “Upload” button and upload the replacement file you want.
All done! You have successfully replaced a WordPress media file without having to worry about all the other hassle.
Things to Remember
A couple of things you may want to remember when using this plugin.
On the “ replace media upload” page, you will see that there is a maximum file size limit. This limit will be based on your hosting provider limits and how you have them set in your account. It is a good idea to have a hosting provider that allows you to increase your file size limits.
Another thing to consider is that the Enable Media Replace plugin is very compatible with other media-related tools. So using it will not interfere with other things you are trying to do with your media.
Finally, also consider that you are able to replace other media files as well, not just images. So videos, PDFs and anything you store in the media library is subject to swapping out.
Final Thoughts
If you are working with WordPress, then you have to deal with the media library. Gone are the days of having to replace media in WordPress using a set of steps to make sure everything is done right.
Using the Enable Media Replace plugin makes this process much easier and much faster. This helps by freeing you up to focus on creating more content.
Have you ever tried to replace WordPress media files using this plugin? Do you still prefer to replace your media the old way?
there is also a plugin called WXY Tools Media Replace that is easier to use and works anywhere you can upload an attachment. It also preserves any alternate text, descriptions, or categories for attachments. Hope this is helpful.
Thank you for the recommendation Clarence.
Hi,
I have tried all the steps you mentioned.. But it doesn’t replace the different sizes of that particular image.