If you’ve been running a site for a while, you may be wondering how to delete unused images from WordPress. When you delete a post or a page, the images stay in the Media Library.
So older sites can be storing a lot of images that are no longer needed.
To make matters even worse, for every thumbnail image you see in the Media Library, there are anywhere from three to six different versions of the same image in your website file system.
Storing and backing up a lot of unneeded files can become a significant waste of resources. This is why a lot of WordPress users routinely delete unused images. Not to mention how each one takes up an inode in your web server.
So let’s take a look at the Media Cleaner plugin. It can automatically remove unused images from the WordPress Media Library.
How to Clean Your Media Library
Step 1: Install the Media Cleaner Plugin
Log in to your WordPress admin panel.
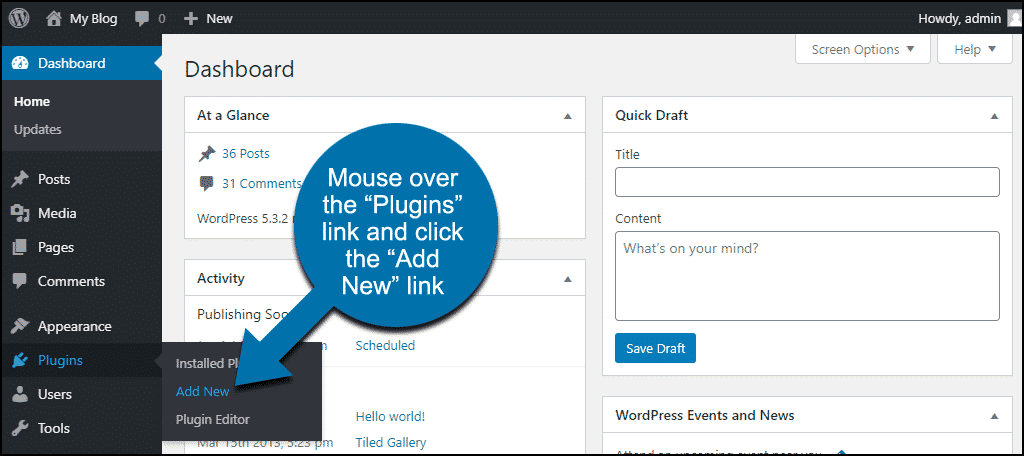
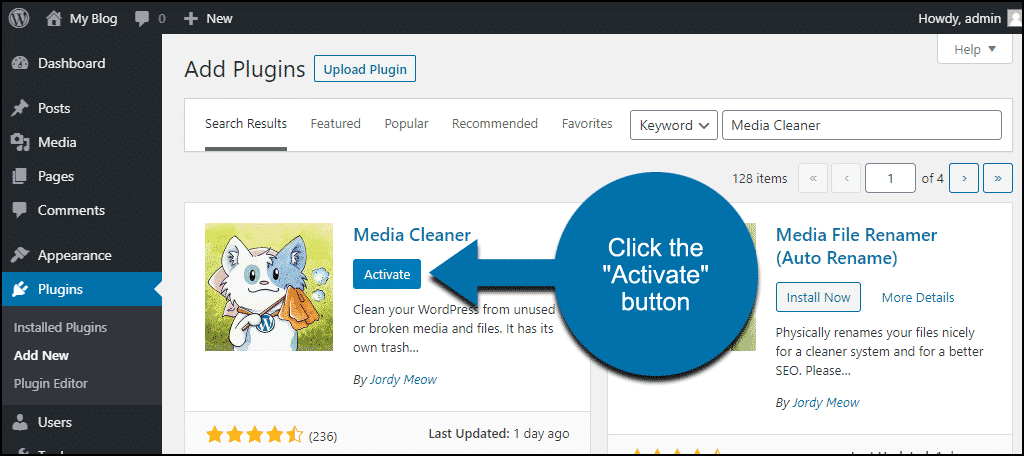
In the left column navigation, mouse over the “Plugins” link and click the “Add New” link.
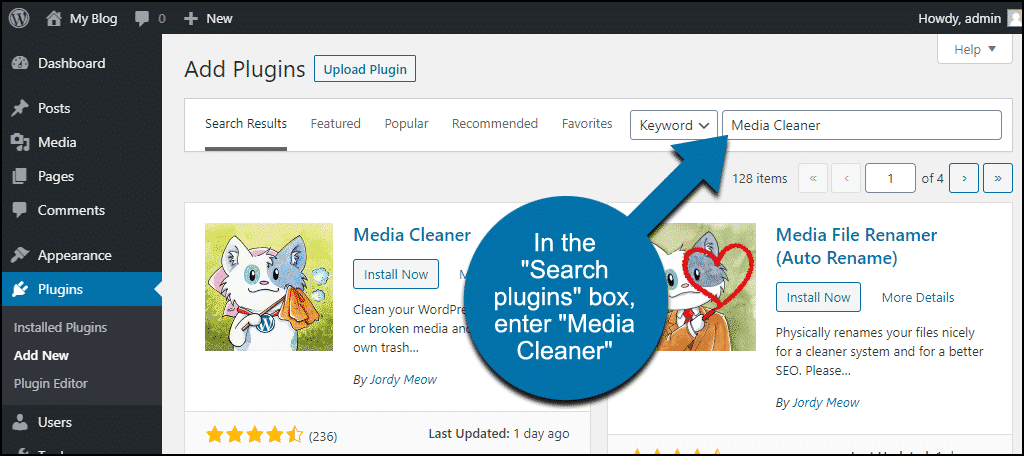
In the “Search plugins…” box, enter “Media Cleaner.”
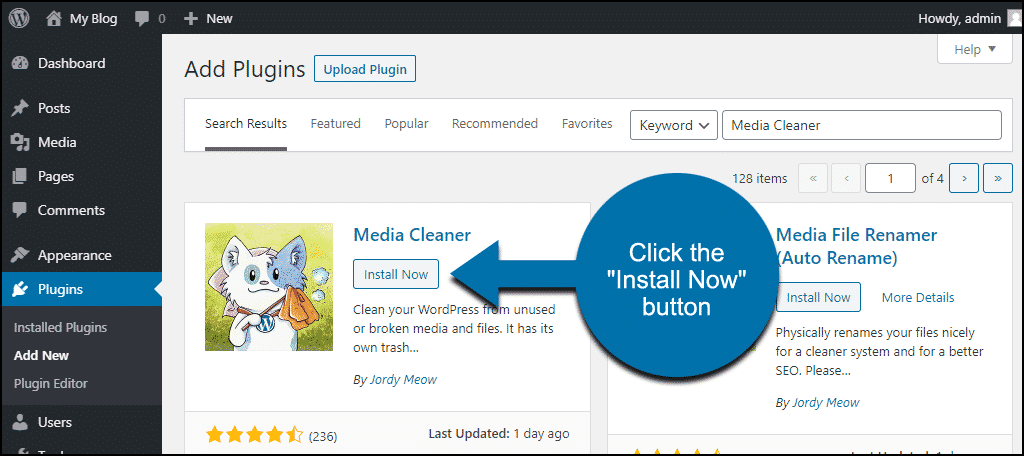
Once you have located the plugin, click the “Install Now” button.
Click the “Activate” button.
Step 2: Backup WordPress (Optional)
Before we talk about using the Media Cleaner plugin, let’s talk about backing up your WordPress site and database. Generally speaking, it’s always a good idea to make regular backups of your websites and databases.
But it’s especially important to back up before you use a tool like Media Cleaner. The plugin deletes files from your server, which is usually an irreversible action. What if you accidentally remove something you still need or plan to use in the future?
So keep regular backups, and make a backup before using Media Cleaner. Remember, you can’t have too many backups.
And while you’re backing up your websites and databases, back up your computers too. I know it can be inconvenient. Making backups and setting up automated backups takes a bit of effort. If you never need them, it seems like a waste of time and resources.
But then, on that horrible day that you do need a backup and you have it. Well, that’s a glorious day indeed. 😉
Step 3: Setup the Media Cleaner
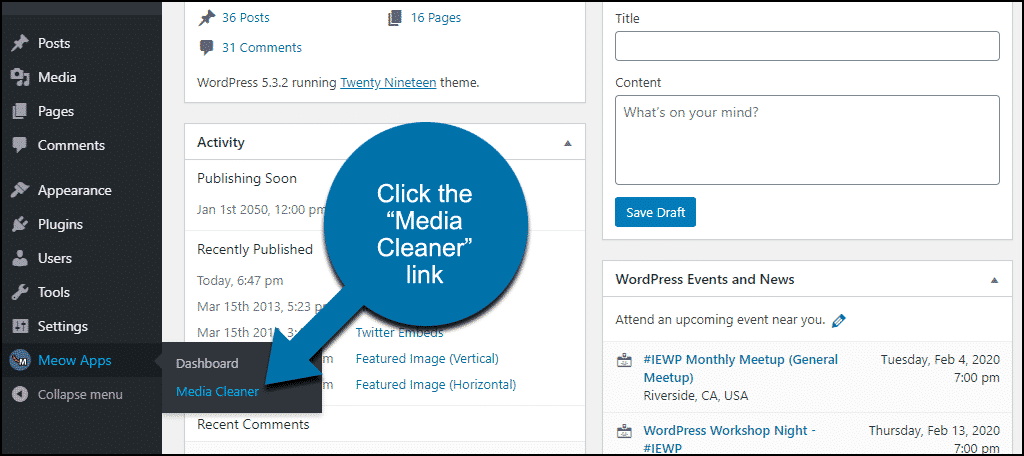
In the left column navigation, mouse over the “Meow Apps” link and click the “Media Cleaner” link.
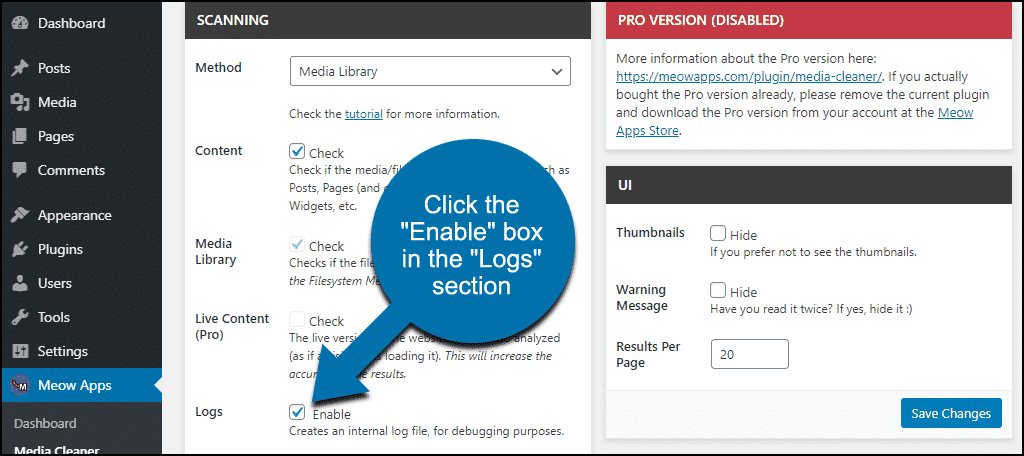
The free version of the plugin is limited to scanning the Media Library, so most of the settings can be left as they are by default.
This makes the WordPress library plugin an excellent choice as it is easy to use.
One thing you may want to do is check the box to save a log of what the plugin does. That way, if something is removed that you didn’t want to be deleted, you may be able to restore it from your backups using the information from the logs.
Click the “Enable” box in the “Logs” section.
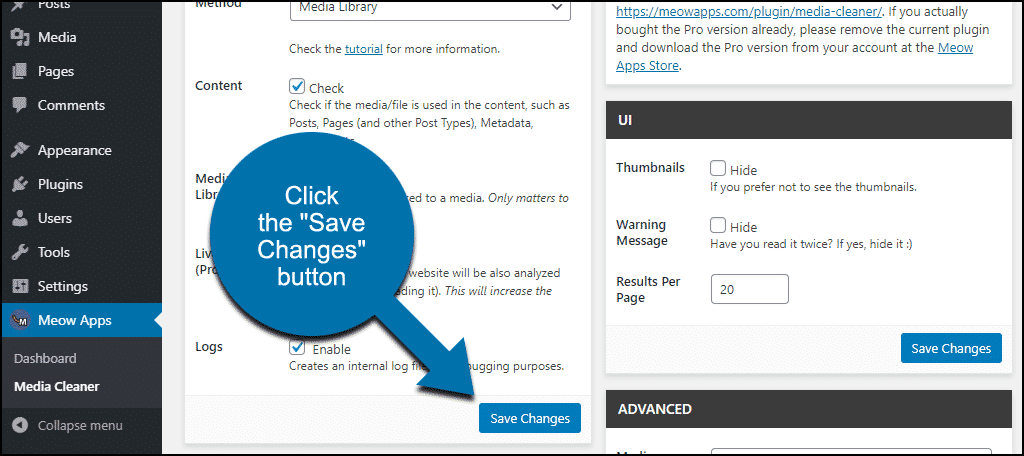
Click the “Save Changes” button.
Step 4: Clean the Media Library
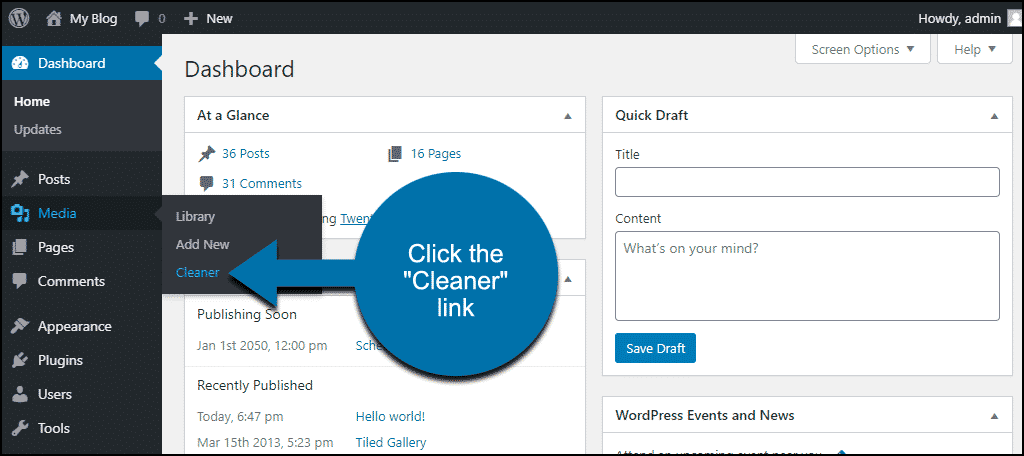
In the left column navigation mouse over “Media” and click the “Cleaner” link.
There are a lot of warnings and messages on the Cleaner page. Look for one that says, “The trash for the Media Library is disabled.” If you see that message, you can enable Media Library “trash” by adding:
define( 'MEDIA_TRASH', true );
to the top of wp-config.php. That should make it possible to retrieve deleted media files.
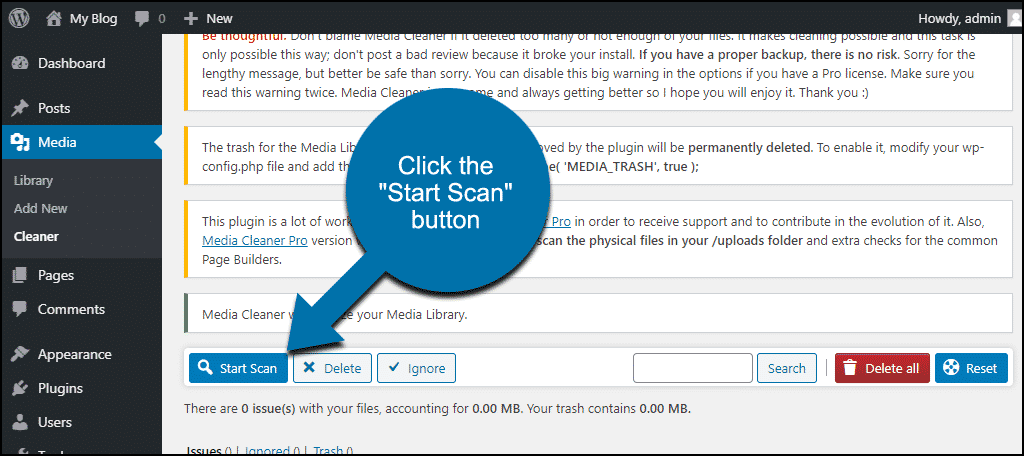
To begin cleaning, click the “Start Scan” button.
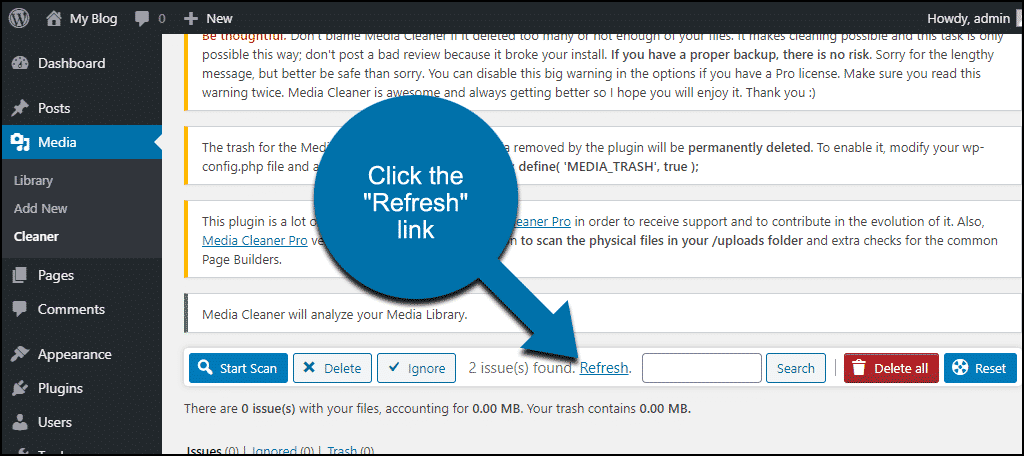
If the plugin finds images that are not related to a page or post, you’ll see an “issue(s) found” message. Click the “Refresh” link to display the unused images.
If the images appear to be safe to delete, you can select the image checkboxes and click the “Delete” button.
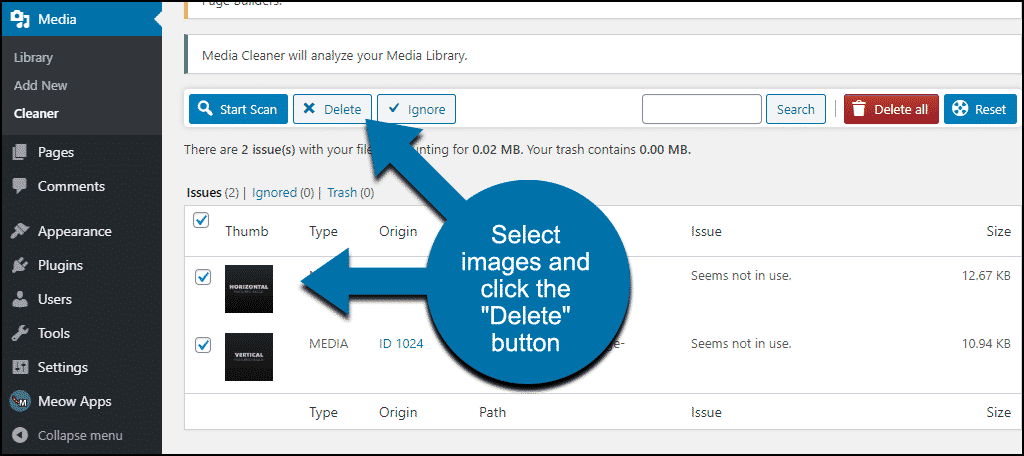
Or click the “Delete all” button.
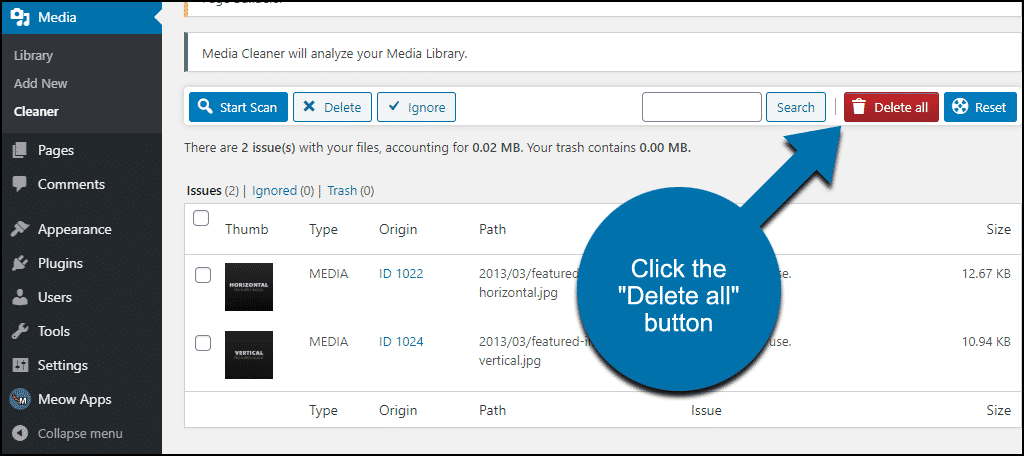
Either of these options will delete the unused images from WordPress.
Note: In my testing, I found it preferable to select the images and click the “Delete” button. Clicking the “Delete all” button sometimes permanently deleted images (even though Media Library trash was enabled).
Step 5: Restore Files (If Needed)
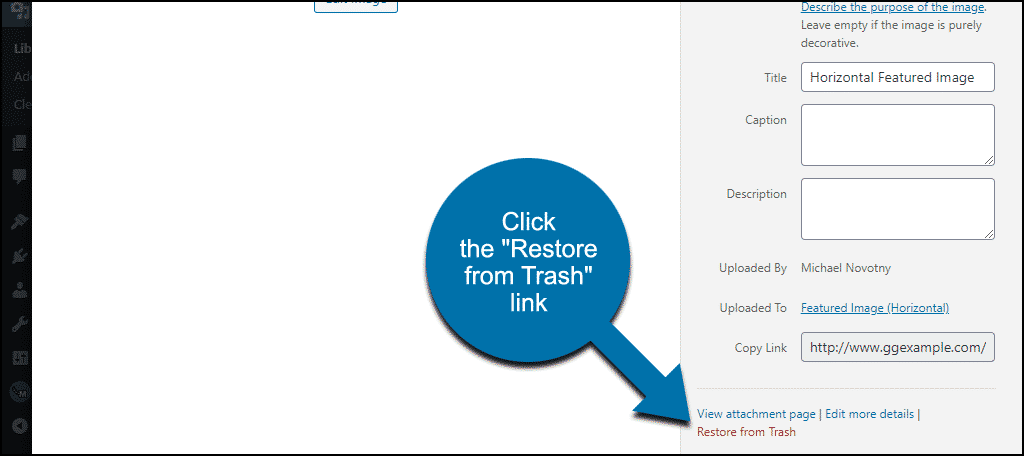
If you have enabled the Media Library “trash” by editing the wp-config.php file as noted above, you may be able to retrieve deleted images.
To see the files that have been moved to the Trash directory, open the Media Library and select “Trash” from the drop-down.

Click the image you want to retrieve and scroll down to the bottom of the popup window. Click the “Restore from Trash” link.
And that marks the end of the tutorial. Feel free to delete the plugin when you are done with your cleaning. You can safely reinstall it and delete it as many times as you need.
Any time you’re able to keep WordPress cleaned up only benefits its performance, this includes a media library cleanup. This is especially true if your hosting is limited in space or taking up too many resources.
To Clean or Not to Clean
It can be a little disconcerting using any plugin that deletes files. In fairness to Media Cleaner, the “pro” version is much more thorough and presumably safer to use. It may be the best plugin for cleaning WordPress media files.
But if you’re careful with the free version, you should be able to use it without any problems. And if you’re conscientious about your backups and have the Media Library trash enabled, you can get yourself out of any jams you happen to get into.
But the question of whether it’s really necessary to remove unused image files from your site is subjective. For most of us, it may not be necessary.
Yet, if you have an older site or a site where you’ve removed a lot of posts, a file cleaner can lighten the load and reduce your backup time and storage space needs.
And who knows, maybe you just like a tidy house. There’s nothing wrong with that either. This is just an easy way to clean the media library and keep your site organized.
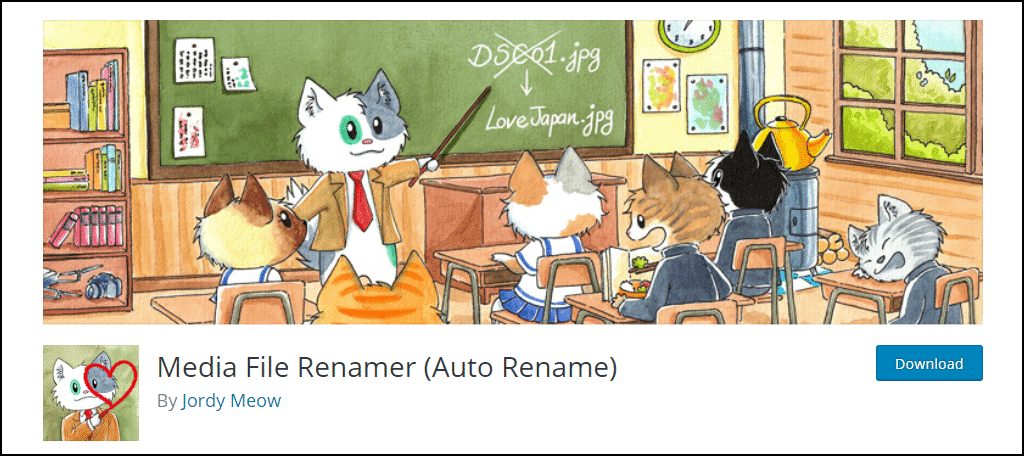
Bonus Plugin: Media File Renamer
The same fellow who brought us Media Cleaner also makes a plugin called Media File Renamer. I mention it here because I think it serves a valuable purpose.
This screenshot shows the image filenames in my WordPress test setup (I use WordPress Theme Unit Test data) and the names suggested by the plugin.
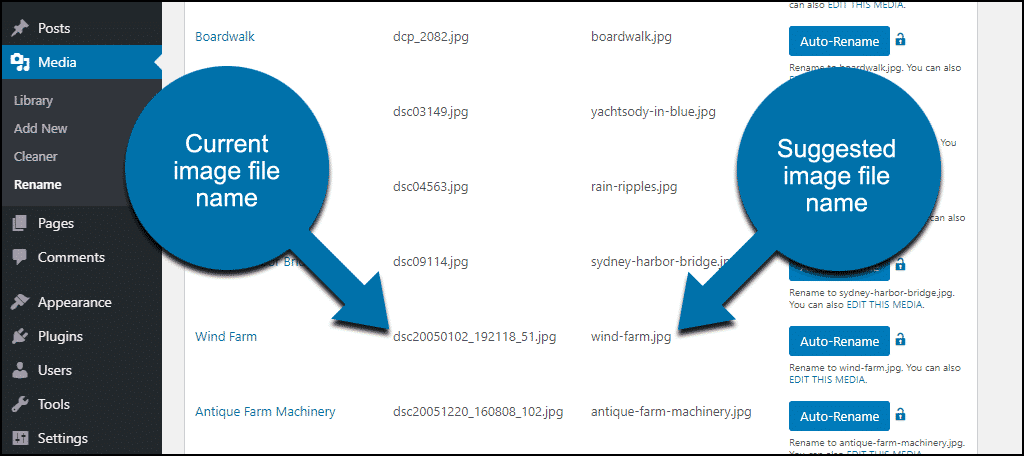
As you can see, the image name suggestions can be helpful when it comes to SEO. Google indexes images and they prefer a filename like wind-farm.jpg to dsc20050102_192118_51.jpg. The default camera filename doesn’t describe the image, wind-farm.jpg does.
So the Media File Renamer is worth checking out. You may have noticed that the image file name suggestions are taken from the image title entered when the image is uploaded. If you don’t title your images on upload, the plugin is going to be less useful, but it’s still worth a peek.
Save Space And Money By Deleting Old Files
Let’s not beat around the bush, if your website uses more server space, you are going to pay for it one way or another. Many web hosting plans give you a certain amount of space, and when you exceed that, you are going to have to upgrade your plan.
That can be really expensive in some cases.
It’s also worth thinking about the cost of backups and cloud storage. Every website has at least one backup, or at least they should. Some backup services charge you based on the amount of data, so once, again you can save money.
And also keep in mind that you need to store this backup. The bigger it is, the harder it becomes to save the data.
Have you ever considered cleaning out your WordPress Media Library? Do you back up your WordPress site files? Let me know in the comments.