Tags are how many platforms track data on the Internet. You may have seen something like this if you use affiliate links to make money from your site or through tracking data from platforms like Adsense. Google Tag Manager lets you manage those scripts from one location instead of trying to maintain each one individually.
In this Google Tag Manager setup guide, I’ll go over how you can use the platform with your website. It’s a bit of a long process, but it is easy to implement and has potential to save you a great deal of time if you handle a lot of tags for third parties on your site.
For this tutorial, I’m going to show you how to connect Google Analytics to the manager. This is because it’s one of the most common systems website developers install when first setting everything up.
While you can still follow along if you don’t have an Analytics account, you may want to set that up if you truly want to understand what is going on in this tutorial.
Adding Tag Manager to Your Google Account
Tag Manager is part of the suite for Google Analytics. It’s one of the many tools you can implement to drive data for doing everything from developing content strategies to ad marketing.
Go to the Tag Manager site and click the “Sign Up For Free” button.

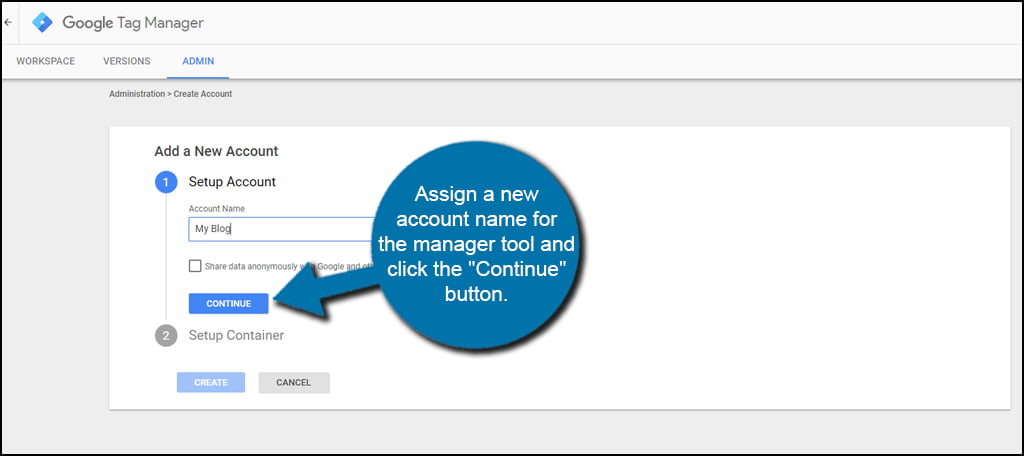
Assign a new account name for the manager tool and click the “Continue” button. You may want to use your company name or perhaps the name of your website.
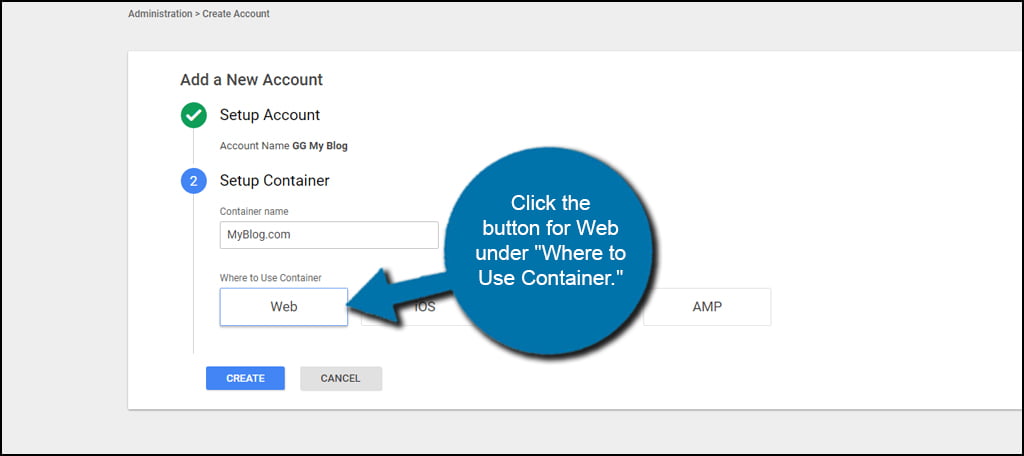
Next, choose a container name for the tag manager. For this example, you would use your domain name. You don’t need to add the “https://” for the website, though.

Click the button for Web under “Where to Use Container.” Tag Manager works with iOS, Android, AMP and Web devices. For this tutorial, we’re simply using the web version.
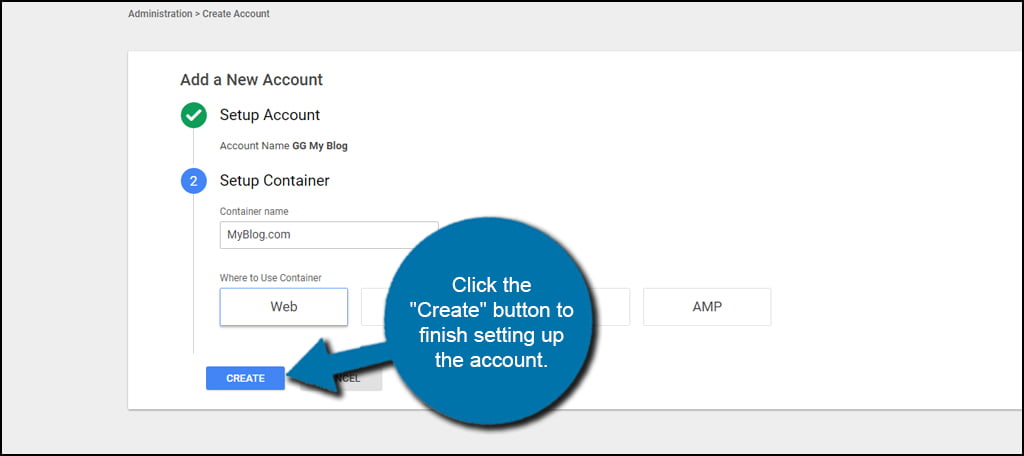
Click the “Create” button to finish setting up the account.
After you agree to the Terms of Service, you will be taken to the install page for Tag Manager. Leave this page open so you can copy the code for the next section.
Adding Tag Manager to WordPress
Now that you have the install snippet from Google for Tag Manager, we need to add it to the website.
There may be plenty of times when a tool or function you want to use will require code snippets to be added into the header or footer of your website. Luckily, this is incredibly easy to do with WordPress.
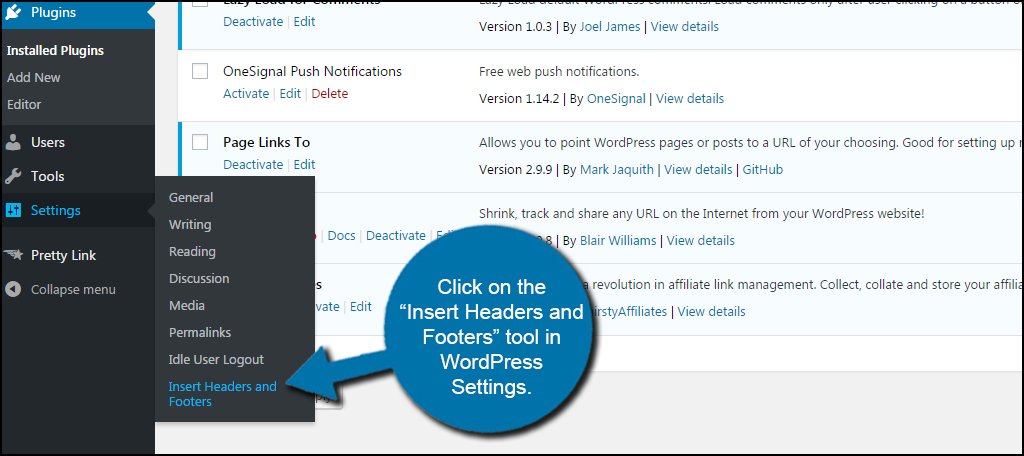
Install and activate the plugin, “Insert Headers and Footers.”

Click on the Insert Headers and Footers tool in WordPress Settings.
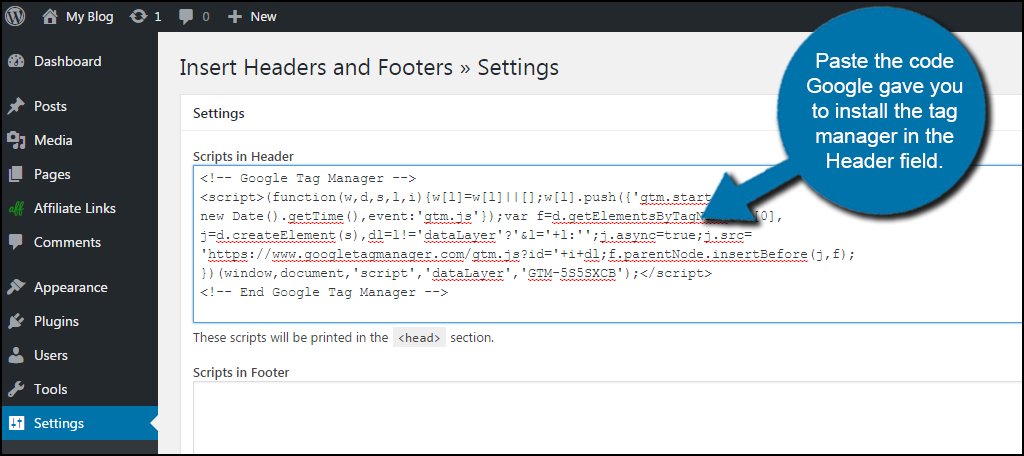
Paste the code Google gave you to install the tag manager in the Header field.
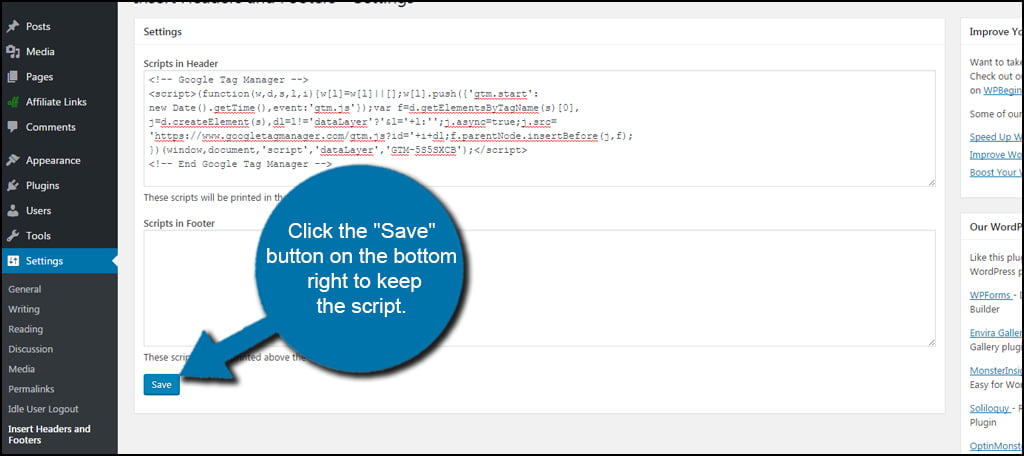
Click the “Save” button on the bottom right to keep the script.
Making Adjustments in Google Tag Manager
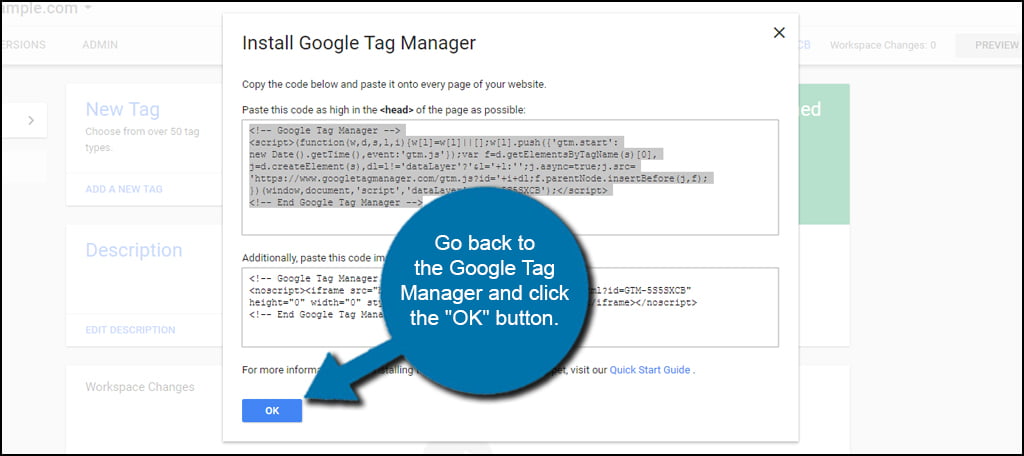
Go back to the Google Tag Manager and click the “OK” button.
Click the option to create a new tag.

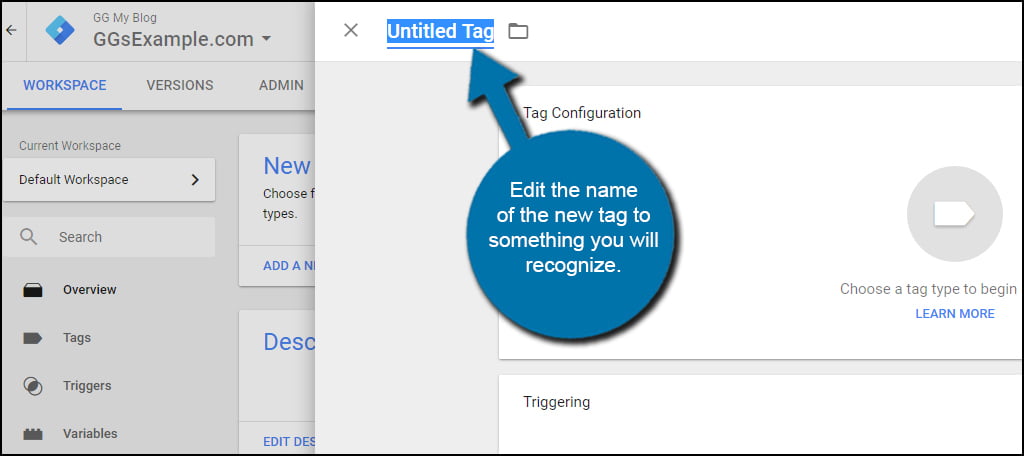
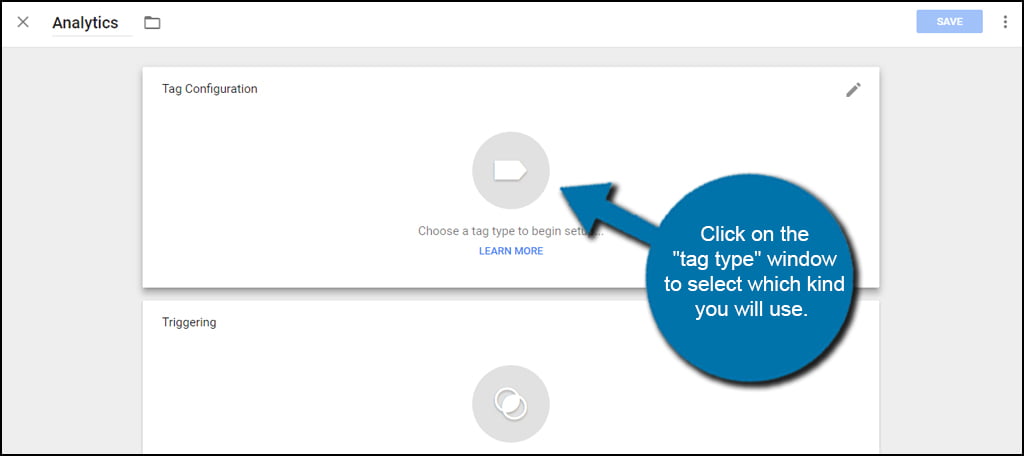
Edit the name of the new tag to something you will recognize. Since I am adding a tag for Analytics, I am going to name this one, “Analytics.”
Click on the “tag type” window to select which kind you will use.
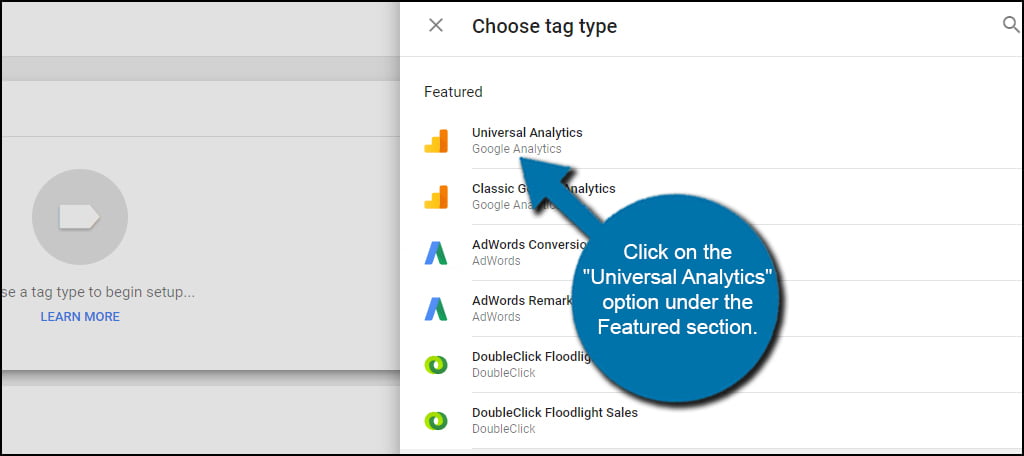
Google Tag Manager can be used to install all kinds of elements. It supports custom HTML, images and a long list of other web-based apps. For this tutorial, click on the “Universal Analytics” option under the Featured section.
Place the Tracking ID of your Analytics account into the text box.
![]()
Choose which tracking type you would like the tag to monitor. I am keeping it at “Page View” for now.
NOTE: There are also several advanced settings and other metrics you can assign to this property.
![]()
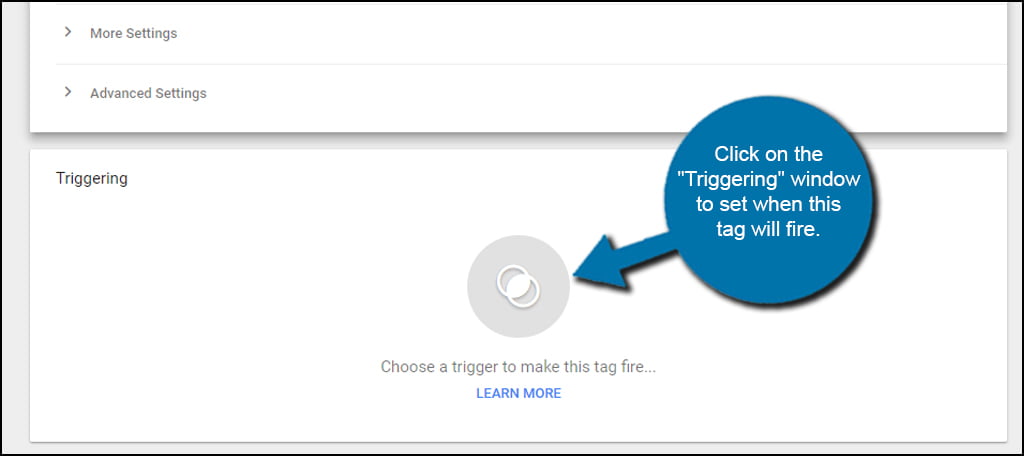
Click on the “Triggering” window to set when this tag will fire. In other words, this is an event that happens which causes the tag to activate.
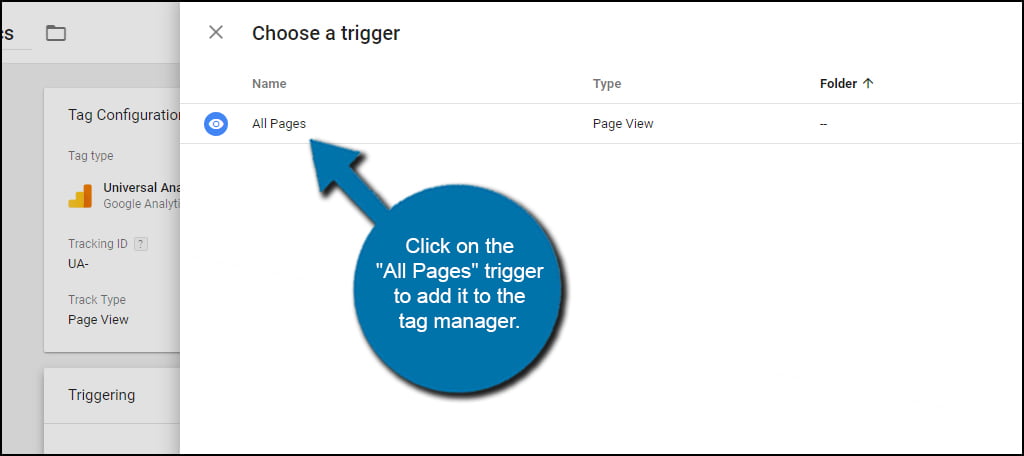
Because of the nature of Analytics, there is only one option available for triggering. Click on the “All Pages” trigger to add it to the tag manager.
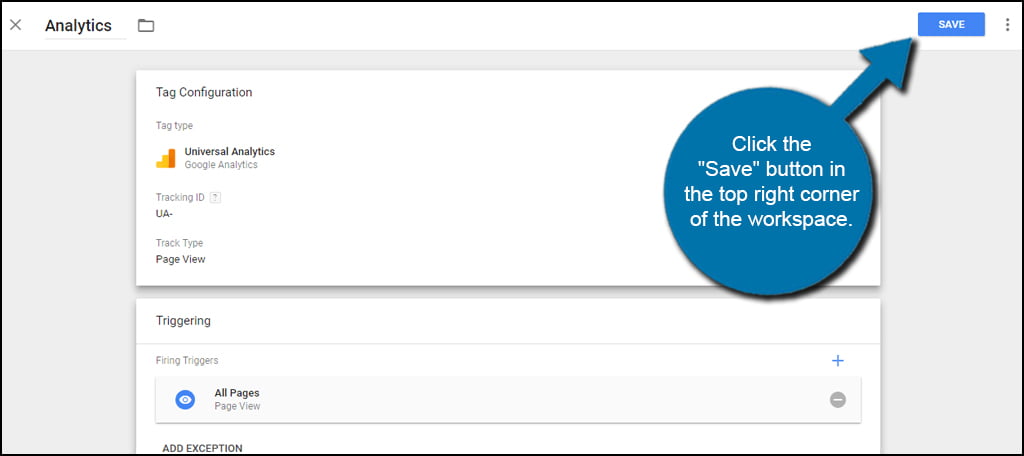
Click the “Save” button in the top right corner of the workspace.
Now, Tag Manager is connected to your website as well as its internal property for Analytics.
One of the reasons why many people enjoy the Google Tag Manager WordPress plugin is because of its versatility. It supports a very wide range of third-party apps and tools while allowing for custom HTML additions. This means it will work with most web hosting solutions quite easily. It’s flexible and may save you a great deal of time managing your tags from a single location.