Do you want to remove the Screen Options button on your WordPress website? The Screen Options button is extremely useful, but it can be problematic if the wrong person uses it. It can disrupt important settings on all of your content and it is best to avoid this by removing the button for certain user roles.
For example, if you have multiple authors, it is best not to give the author user role the permissions to use the button. This scenario is true for many things, which is why you should carefully spend time deciding who and what each user role is. Today, I will demonstrate how to remove the Screen Options button in WordPress using two methods.
What Does the Screen Options Button Do
The Screen Options button allows you to fully customize the admin area of your website and tweaks various settings on content. For example, when you are editing a post on your website, the Screen Options button will change the following:
- Tags
- Post Attributes
- Plugin Options
- Comments
- Author
- Categories
This is only a small sample of what the Screen Options button can do. What the button does changes as you visit other areas of your website. As you can imagine, this is a very important button that must not fall into the wrong hands. Take a few minutes and see what the Screen Options button is capable of and imagine what someone could so with it.
How to Remove the Screen Options Button in WordPress
Today, I will demonstrate how to remove the Screen Options button in WordPress using two methods. The first method involves using the Adminimize plugin. It is a very simple approach and is recommended for web developers that do not like to add code. The second method is removing the button by using code. It is always better to use code than a plugin, but if you do not feel comfortable don’t worry, it is not hard.
Method 1: Adminimize Plugin
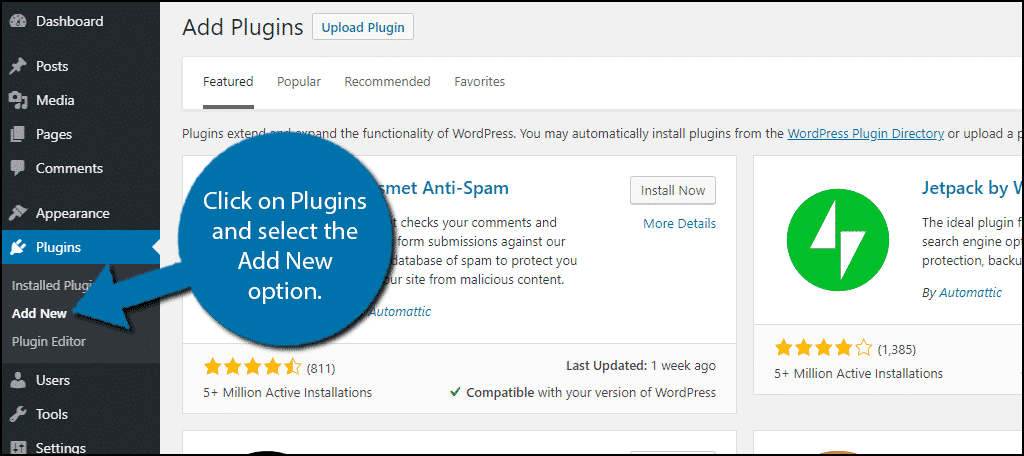
Let’s start by clicking on Plugins and selecting the Add New option on the left-hand admin panel.
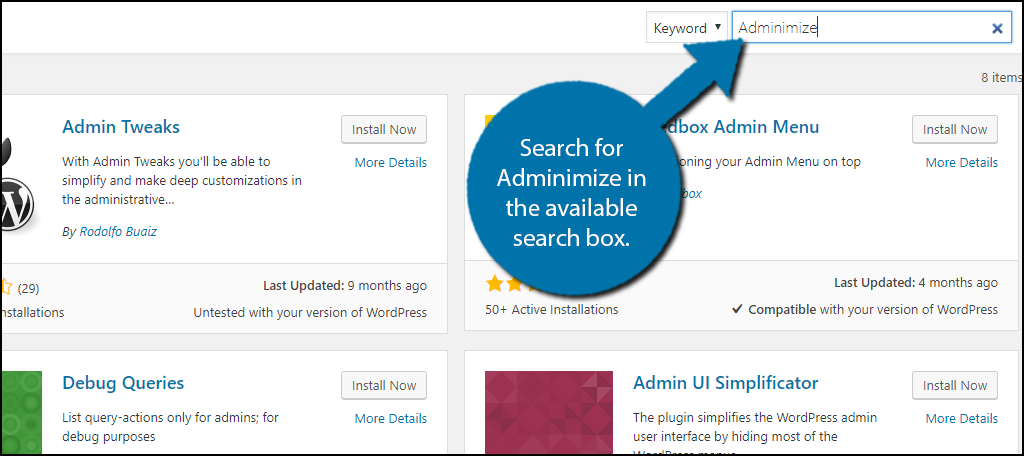
Search for Adminimize in the available search box. This will pull up additional plugins that you may find helpful.
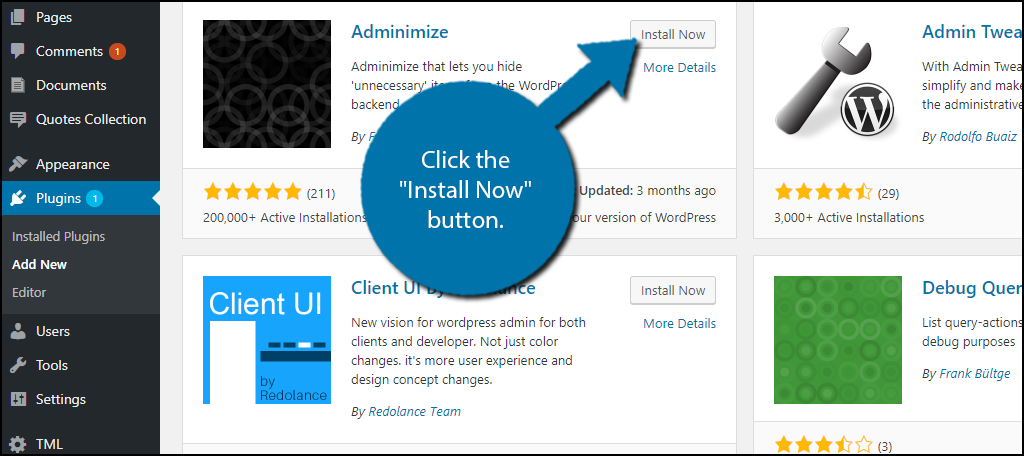
Scroll down until you find the Adminimize plugin and click the “Install Now” button and activate the plugin for use.
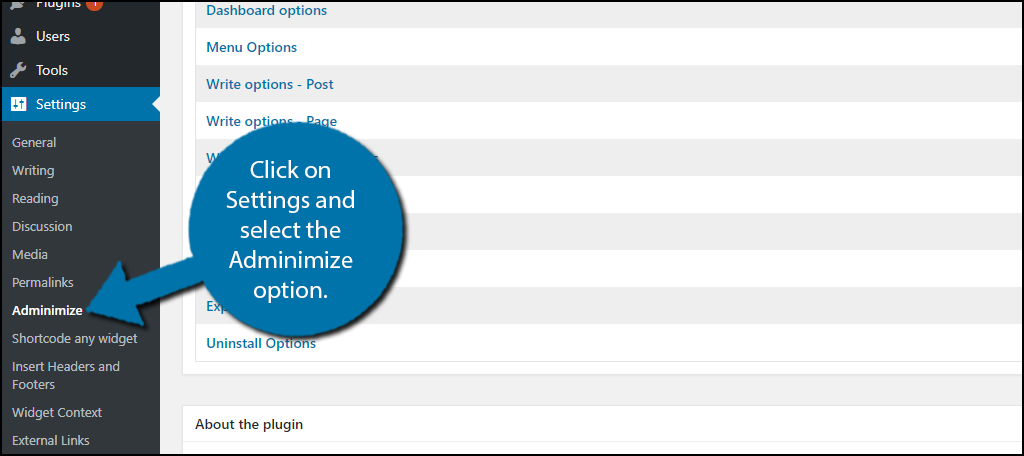
On the left-hand admin panel click on Settings and select the Adminimize option. This will pull up the main settings page.
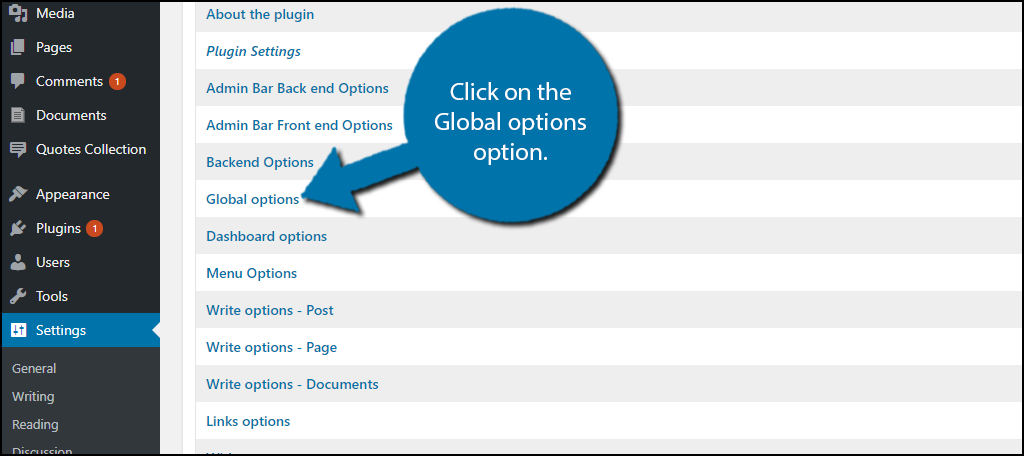
This plugin allows you to customize the various aspects of your website. Click on the Global options option.
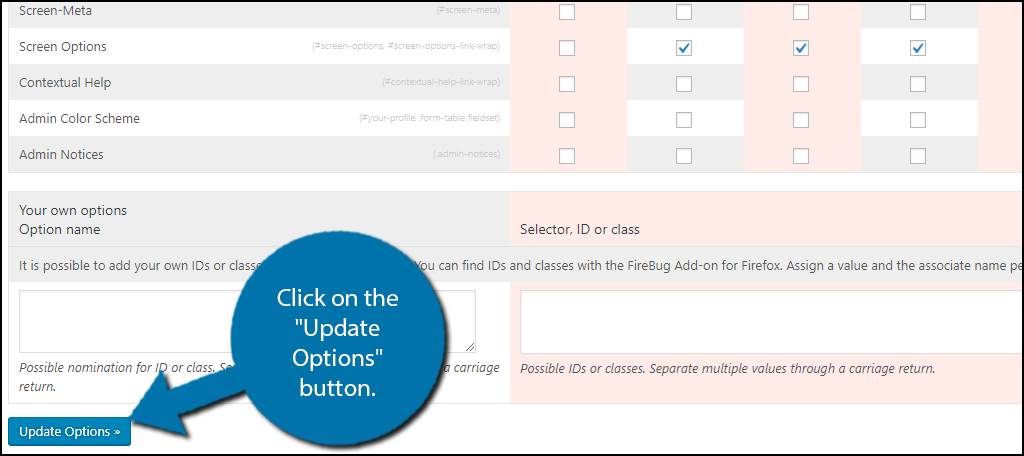
Here you can deactivate the button for specific user roles. Find the Screen Options row. Each column is a specific User Role that you can choose to deactivate by checking the box.
I would recommend only letting administrators use the button, but you may find other roles with a need for the Screen Options button. Check the boxes of the user you would like to deactivate the button for and click on the “Update Options” button.
Congratulations, only the User Roles that the button is not deactivated for will be able to use it. You can change who has access to the button at any time by repeating these steps.
Method 2: No Plugin
You will need access to your website’s cPanel, which is provided to you with your web hosting plans. You simply need to copy and paste the code into your theme’s functions.php file to use this method.
Let’s start by logging into the cPanel and clicking on the File Manager option. The File Manager will allow you to access all of the files related to your website.
![]()
You need to locate your theme’s functions.php file. Click on the public_html directory, then click on the wp-content folder. Inside of this folder, you will find all of the content related to your website. Click on the themes folder and enter the folder of the theme you are currently using. Finally, right-click on the functions.php file and select the Edit option.
![]()
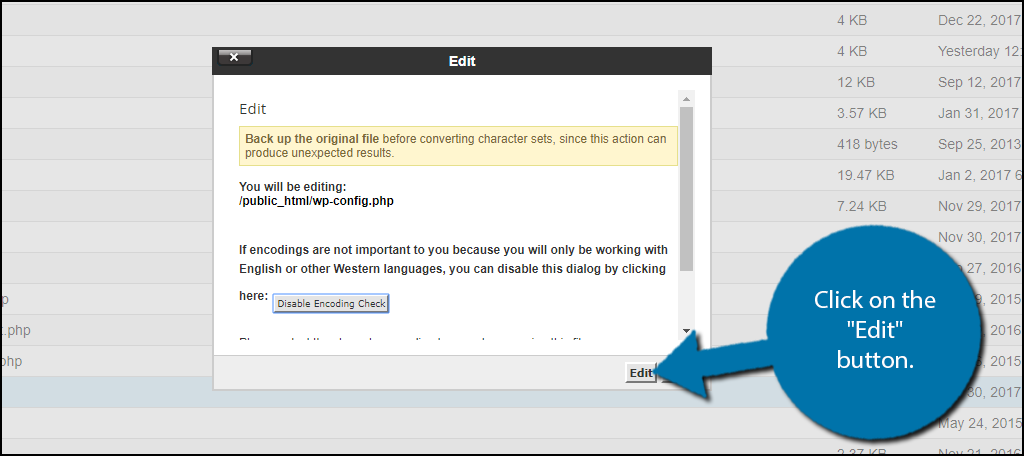
A pop-up window will show up. This box will warn you to create a backup of your files before editing anything. This will ensure that you can revert your website back to when it was working if something goes wrong. Click on the “Edit” button. A new tab will open containing all of the code from the file.
Copy and paste the following code into your theme’s functions.php file:[ht_message mstyle=”info” title=”” show_icon=”” id=”” class=”” style=”” ]function hide_screen_options() {
if(!current_user_can(‘manage_options’)) {
return false;
}
return true;
}
add_filter(‘screen_options_show_screen’, ‘hide_screen_options’);[/ht_message]
This code will only allow for administrator accounts to access the Screen Options button.
Once you have inserted the code into the functions.php file, click on the “Save Changes” button to finish.
![]()
Congratulations, only administrators will be able to use the Screen Options button. You can further modify the code, if you are skilled enough, to allow other roles to have access to the button.
Control Who Uses What On Your Website
Being in control of a website is a tough job and you need to make sure that only qualified individuals have access to important functions. The Screen Options button is one of many things that can be dangerous to give access to. They can easily mess up pages and posts on your website.
For these reasons you need to set the proper permissions and actions each user role can take on your website. You can also create new ones to fit the needs of your website. It’s not pleasant to think about what could go wrong, but it is necessary.
Which method have you used to hide the Screen Options button? Which roles have yougiven access to the Screen Options button to?