Do you run a multi-author website? If so, it can take up a lot of time to schedule each post one by one. However, there are ways to schedule multiple posts at once. One of the biggest advantages of the WordPress platform is the support for plugins. If there is a feature you need, there is a plugin to do it.
Scheduling content is important because it ensures that a constant stream of new content is added to your website. Today, I will demonstrate how to schedule WordPress posts in bulk using the Auto Post Scheduler plugin.
Why Schedule WordPress Posts in Bulk
If you are the only author on your website, the default WordPress scheduler is more than enough. However, once your website has multiple authors, it can become very tedious to schedule each one individually.
Being able to bulk schedule posts in WordPress fixes this.
Instead of taking the time to load every post and then begin to schedule them, you can schedule multiple posts from different authors all in one place. Not only does this save time, but it’s also convenient.
Installing Auto Post Scheduler
The Auto Post Scheduler allows you to schedule both drafts and live posts. Wait why would I want to reschedule a live page? In many cases, when a page gets too old, the amount of traffic it receives is quite small. By rescheduling it, you can make all of the content on your website look fresh.
This is also known as recycling your content.
However, it is worth noting that if you remove an indexed page, your SEO can suffer. If you plan on recycling pages, consider using a Noindex command.
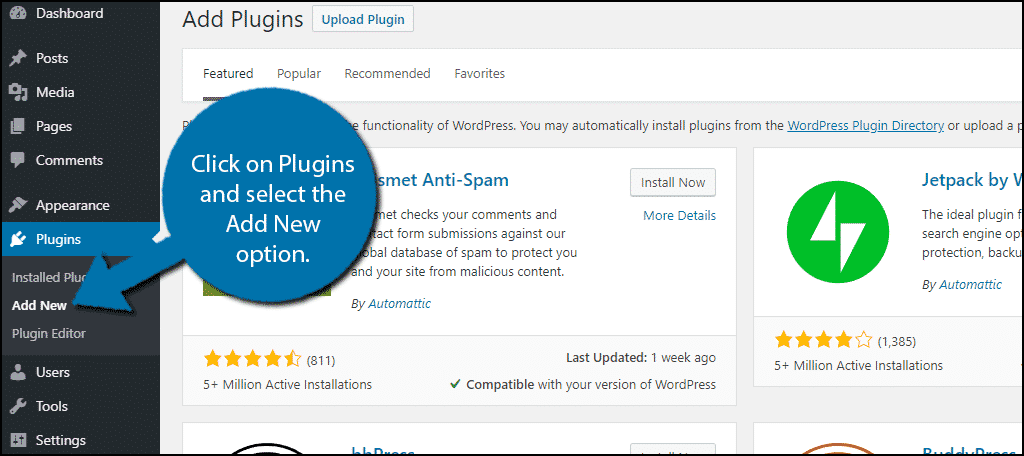
To begin, click on Plugins and select the Add New option on the left-hand admin panel.
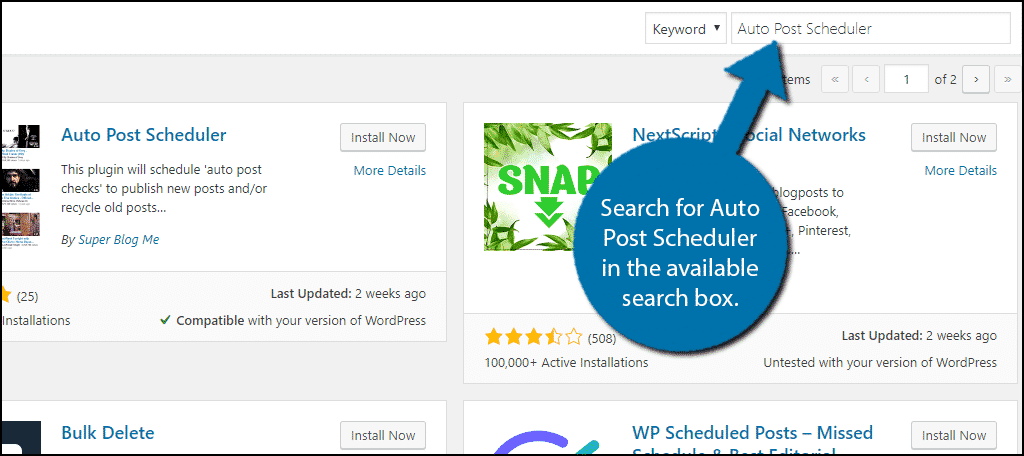
Search for Auto Post Scheduler in the available search box. This will pull up additional plugins that you may find helpful.
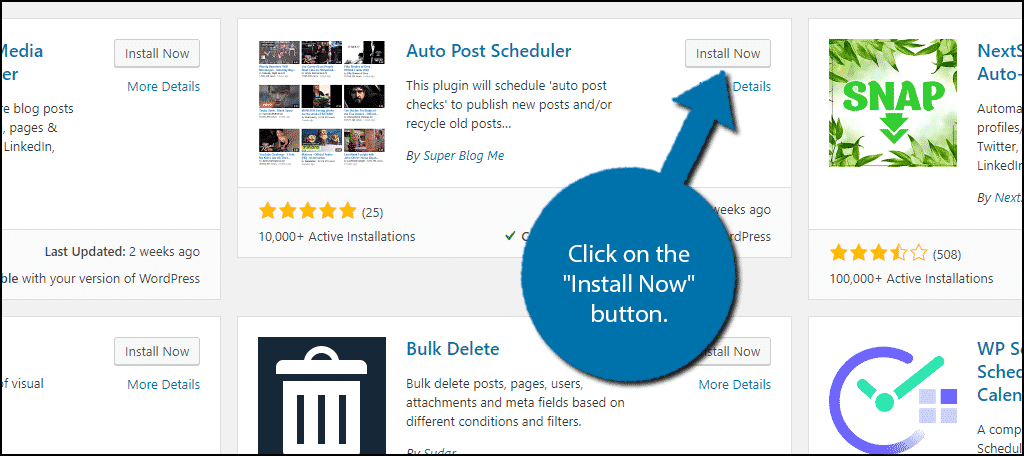
Scroll down until you find the Auto Post Scheduler plugin. Click on the “Install Now” button and activate the plugin for use.
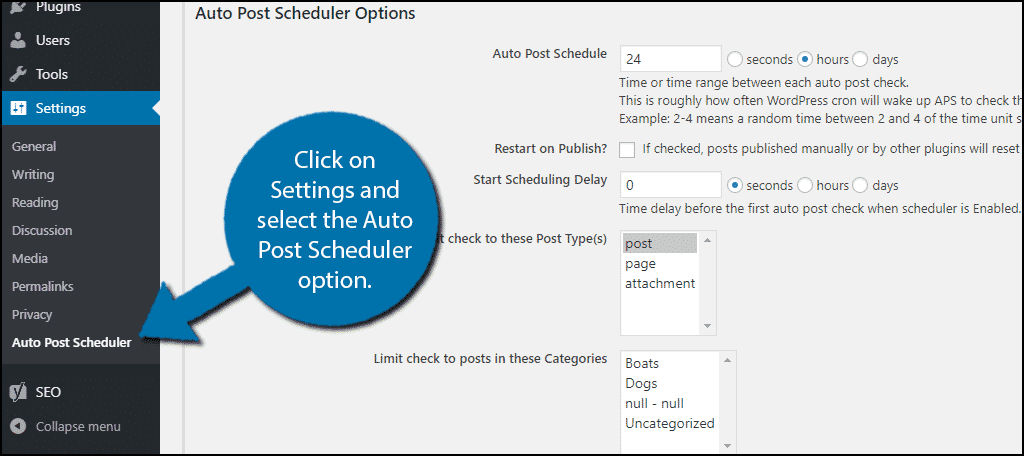
On the left-hand admin panel click on Settings and select the Auto Post Scheduler option. This will pull up the main settings page.
Using Auto Post Scheduler
Before going forward, it is important to understand what this plugin does. It allows you to set regular intervals for the plugin to check for posts to publish. You can have the plugin look for drafts, pending and published posts.
You can also choose to which posts to automatically post by authors or categories.
All of these settings can be changed to match your needs. While this can work well for some websites, the plugin does have one shortcoming. It doesn’t allow you to pick which post will be published.
Instead, you need to set the criteria, which can be problematic for websites that write a lot of content in advance.
The Problem
If your website has very exact scheduling, this probably isn’t the plugin for you.
Let’s say you have author A, B and C. Author A writes a fitness blog for Monday, B writes a diet blog for Wednesday and C writes a running blog for Friday. You would want the plugin to look for drafts at a specified time on those days.
So in the case of author A, you would want to specify A as the author, select the time for 1200 (military time) on Monday. But when you add authors B and C into the equation, it doesn’t work well.
Since you cannot select the post directly, it will take the oldest draft (or whichever status you select). On top of this, you need to select all of the authors the plugin will use. You cannot specify Author A on Monday, B on Wednesday and C on Friday.
What the plugin will actually do is look for the oldest draft out of the authors (or categories) and post it (or however many you select to publish) at the specified time.
What It Is Good For
The level of organization in the previous example is not something every website needs. In fact, many websites will try to publish a lot of content as fast as possible.
For these websites, this plugin is perfect. It will keep publishing content whenever you want. In fact, you could publish a post every hour if you desire. Just remember to make sure the draft is complete before it gets published.
Setting Up Auto Post Scheduler
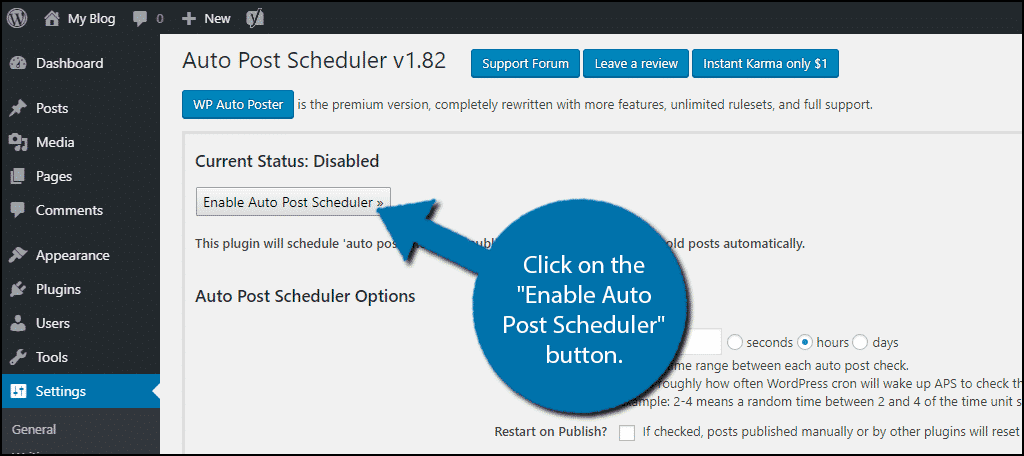
By default. this plugin is off. To enable the plugin for use, click on the “Enable Auto Post Scheduler” button. However, I advise you to wait. If you enable it now, it will begin working with the default settings, which might publish something on your website that wasn’t meant to be.
Instead, let’s go through the settings.
The first option is the Auto Post Schedule option. The default value is 24 hours. What this number means is how many posts will be published. Thus at 24 hours, it will be one post. If you want to publish 2 posts the number should be 12, 3 should be 8 and so on.

Underneath this option, you will find the Restart on Publish checkbox. This setting is for those who wish to recycle content. If you turn it on, it will restart the publish timer in the plugin on that post.
This option is followed by the Start Schedule delay option. By default, it is set to zero. What this means is that a post will be immediately published once you enable the plugin. This is why you should wait until you have configured the setting to enable it.
The next three options are what limits the plugin. You can choose the post types including posts, pages and attachments. There are options available for categories on your website and the authors. Select the settings that that best suit your needs.
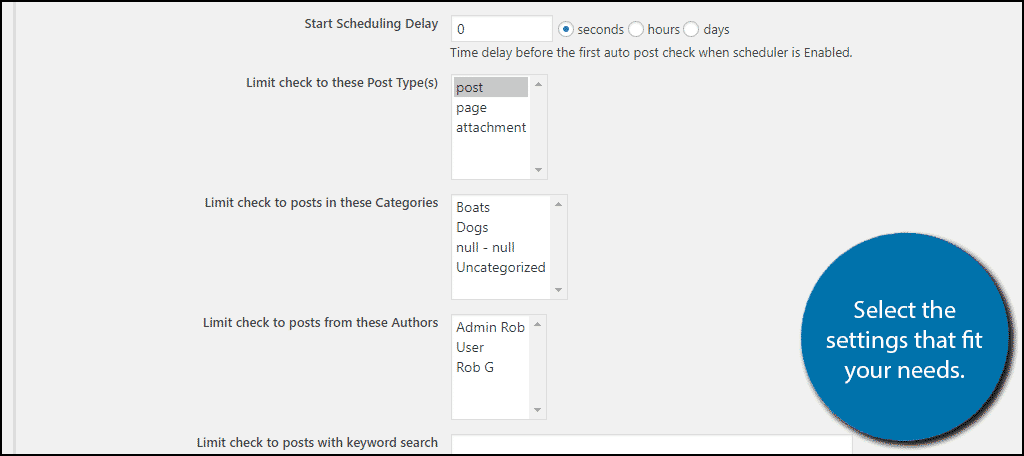
Underneath these choices, you can also use keywords as a factor in selecting posts to publish.
Now it is time to actually schedule your posts. You will see all seven days of the week. Simply enter the times, separated by a comma. For example, if you want to publish at 12 pm and 6 pm, you would enter “1200, 1800” in the text box. This tells the plugin to publish posts at this time on that day.
Enter the times for each day.
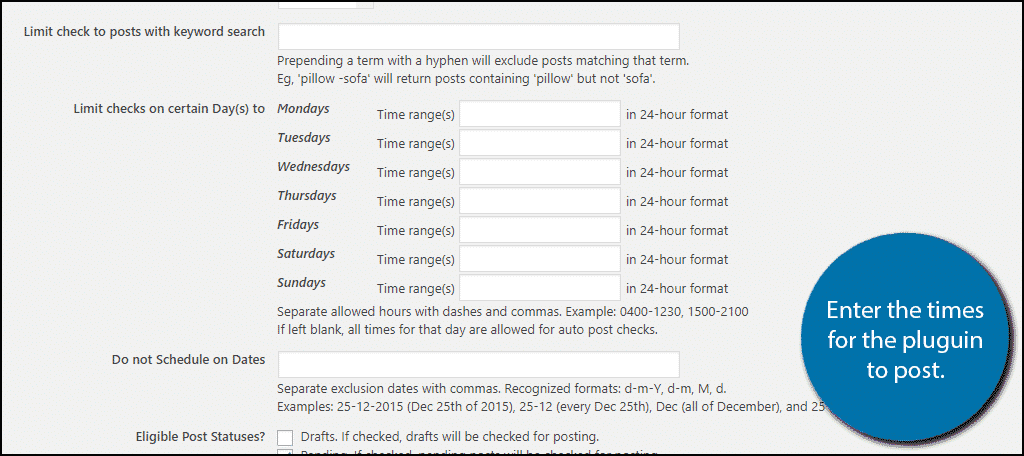
You can also add dates for the plugin to not publish below these options.
Note: If you have the plugin post multiple times throughout each day, you may notice the website will start to slow down. While this is not noticeable when you publish a few posts, the more you do, the more noticeable it becomes.
You now need to select which post statuses will be published. By default, it has pending selected. But you can also select drafts and published as options. You can select any combination of them.
The rest of the settings deal with recycling content options and should be set to meet your website’s needs. Once you are done setting up the plugin, click on the “Update Options” button.
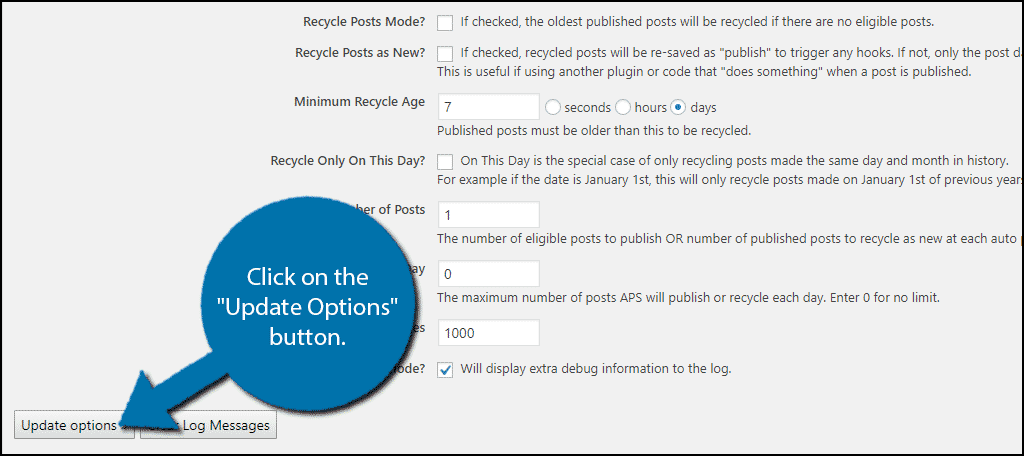
Finally, click on the “Enable Auto Post Scheduler” button. This will turn the plugin on and it will begin working.
Congratulations, you have successfully set up your website to schedule WordPress posts in bulk. You can change these settings at any time. If something is not working correctly, I recommend disabling the plugin and reviewing the settings.
Always Create New Content
While there are advantages to recycling content, new content should still be a priority. Loyal visitors will surely notice if you are recycling content and it can make them less likely to check back every day.
On top of this adding more content to your website is always a good thing. Do not rely on recycling your content.
How easy did you find the Auto Post Scheduler plugin to use? Do you recycle content often?