RSVP stands for répondez s’il vous plaît. A fancy way of saying, “please respond” in French. An RSVP request is usually sent along with an invitation to attend a wedding, conference, or some other formal gathering. Today, I’m going to tell you about an RSVP tracking plugin for WordPress that can save you a lot of time and trouble if you ever have to manage RSVPs.
If you’re reading this, I’ll assume that you are planning to send out an invitation that includes an RSVP request. RSVP management is important. If you don’t know who’s going to show up to your event, you may not have enough hummus on hand to feed everyone.
No one wants to be in the kitchen smashing garbanzo beans while guests are hungrily milling about.
I’m going to introduce you to an event plugin for WordPress that includes not only event page creation, registration, and reservation, but also RSVP forms, email promotion integration, and even PayPal and Stripe payment integration.
It’s called RSVPMaker.
It may be the king of all WordPress invitation plugins, and we’re going to walk through the basic steps for creating an event page and gathering RSVPs. For details on the million other things it can do, you can check the RSVPMaker documentation.
But before we get to how it works, we have to get the plugin installed and set up.
Installing RSVPMaker
Log in to your WordPress admin panel.
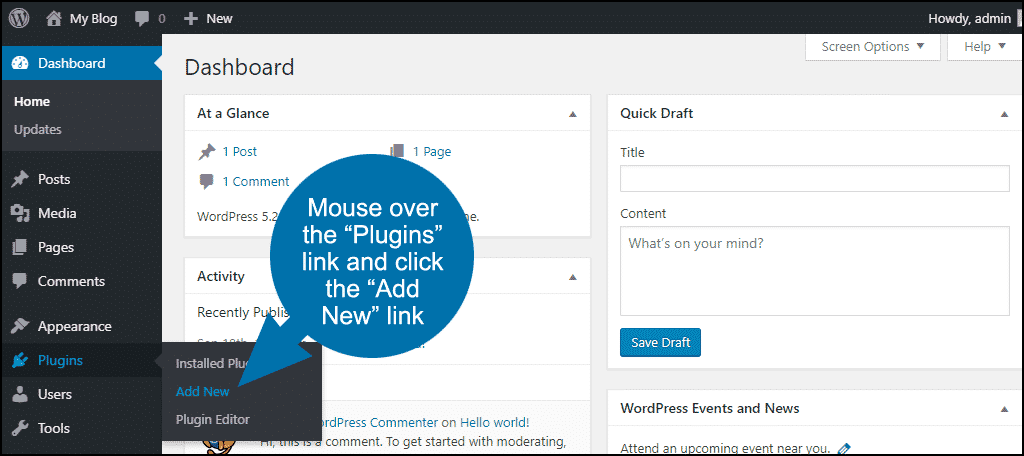
In the left column navigation mouse over the “Plugins” link and click the “Add New” link.
In the “Search plugins…” box, enter “RSVPMaker.”
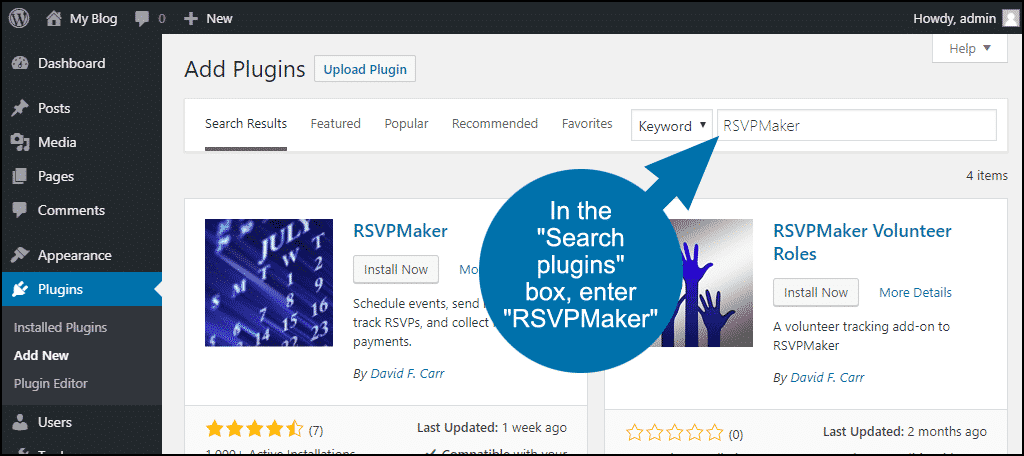
Once you have located the plugin, click the “Install Now” button.

When the plugin has been installed, click the “Activate” button.

Configuring RSVPMaker
As soon as you activate RSVPMaker, it’s going to pop up a few configuration notifications. The first is a privacy policy setting. If you are collecting RSVPs from anyone living in the European Union, you have to include the privacy checkbox.
So if you’re inviting any EU residents, don’t ignore that notice. This is all part of the GDPR compliance guidelines for privacy and collecting data.
The other notices are for a time zone setting and whether you want the plugin to add a calendar or events listing page to your site.
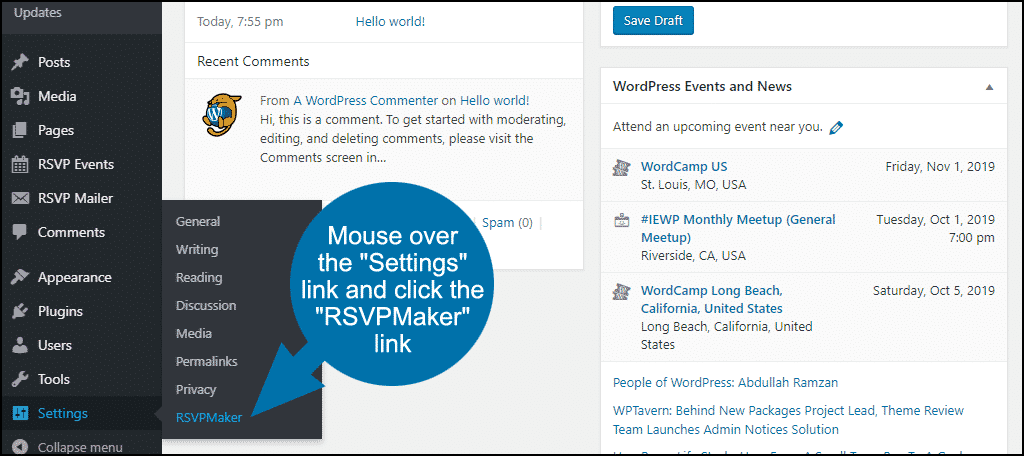
To access all of the settings, in the left column navigation, mouse over the “Settings” link and click the “RSVPMaker” link. Rather than go through all of them, we’ll cover the necessary settings as we go through the steps to create an event.
Creating an Event
When the plugin is activated, two items will be added to the menu on the left side of your WordPress admin panel: “RSVP Events,” and “RSVP Mailer.”
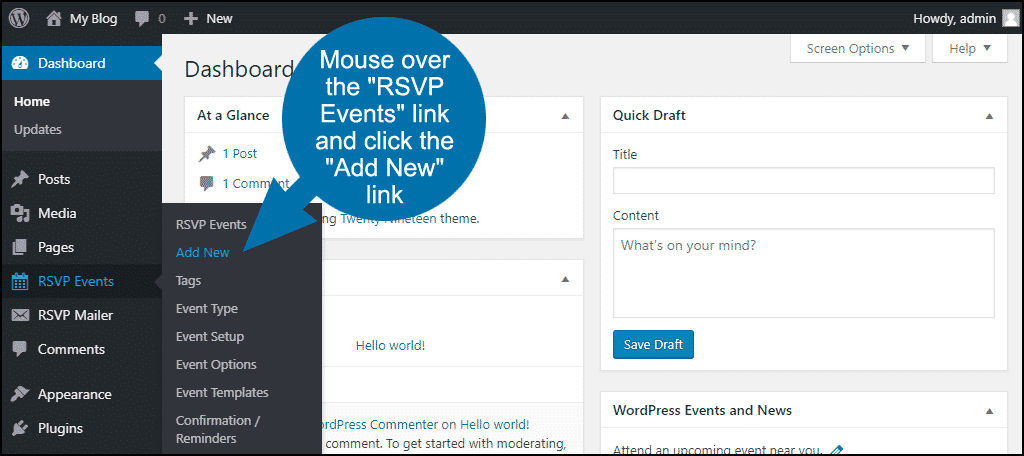
In the left column navigation, mouse over the “RSVP Events” link and click the “Add New” link.
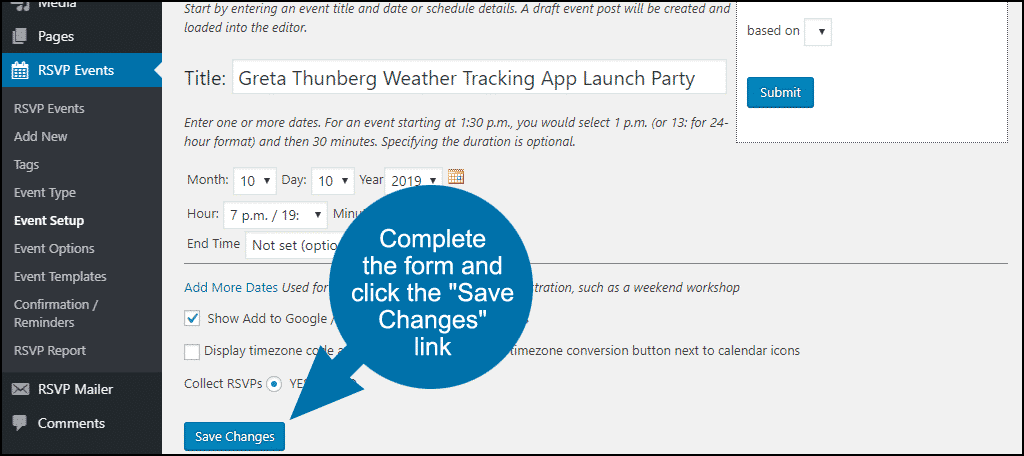
Enter the title, date, and time of the event.
There is an “Add More Dates” link if your event covers more than one date (a weekend, for example), a checkbox for Google Calendar and Outlook icons, timezone options, and a “Collect RSVPs” option.
You can change the defaults for these in the plugin settings.
Since we’re talking about RSVP management here, we’re going to make sure the YES option is selected for that. That creates a registration form for the event.
Click the “Save Changes” button.
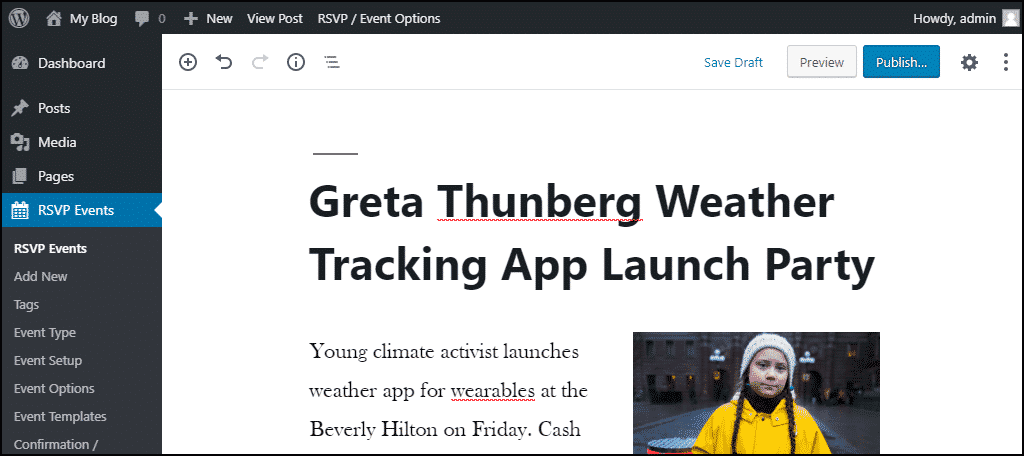
Next, we’re taken to the post-editing page with the title of the event prepopulated in the title of the post.
Create the rest of the post for the event.
Now when you publish the post, you can see that an RSVP form has been added.
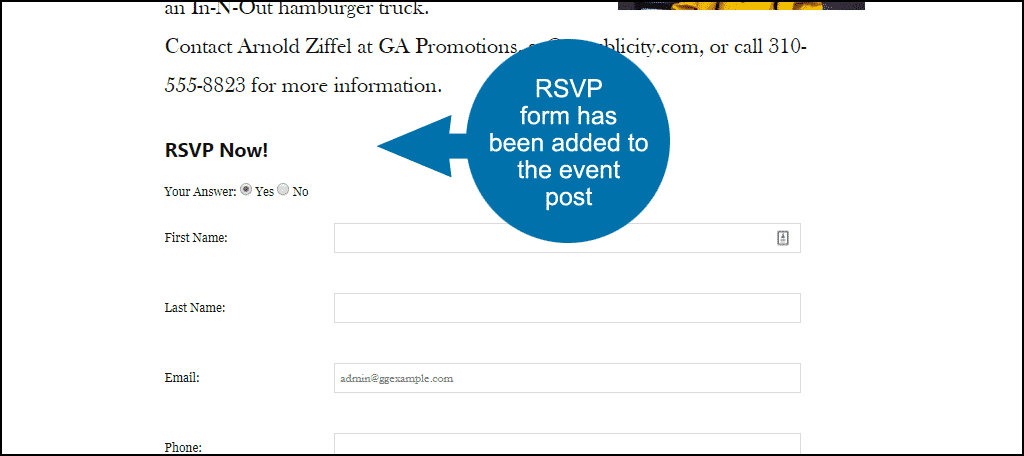
The format and information requested are customizable, of course. For details, check the RSVPMaker documentation.
NOTE: The event page is a custom post type, so you won’t find them under the “Posts” or “Pages” links. To get to your event pages, click the “RSVP Events” link in the left column navigation.
If we complete and submit the RSVP form, you’ll see that the RSVP information is presented on the page.

That information is also sent to the email address entered into the form. The email will include a link the recipient can use to update their response.
To edit the email that goes to the recipient, mouse over the “RSVP Mailer” link in the left column navigation and click the “Notification Templates” link.
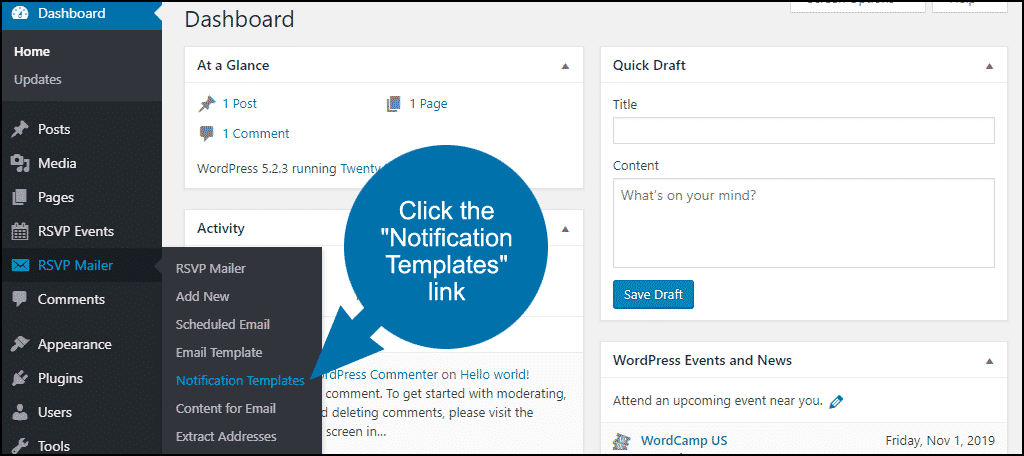
From this screen, you’ll be able to customize the message to fit your needs.
Managing RSVP Responses
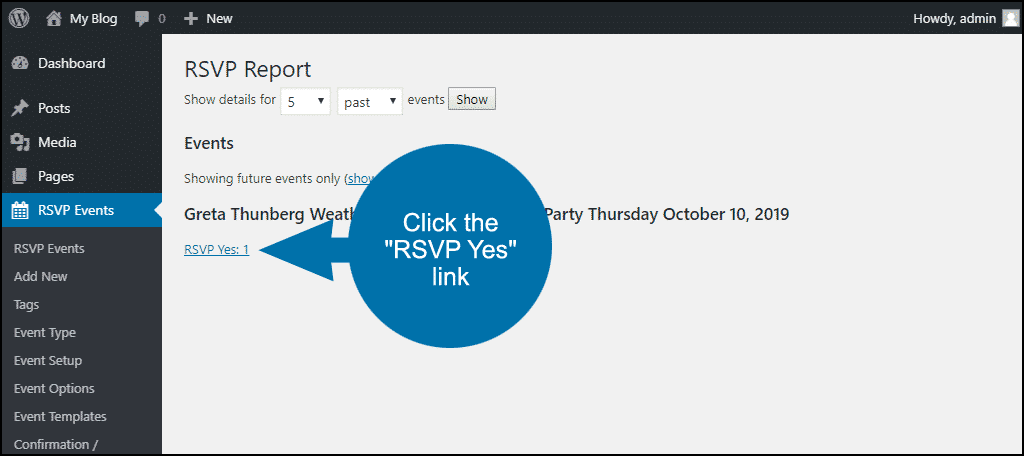
In the left column navigation, mouse over the “RSVP Events” link and click the “RSVP Reports” link.
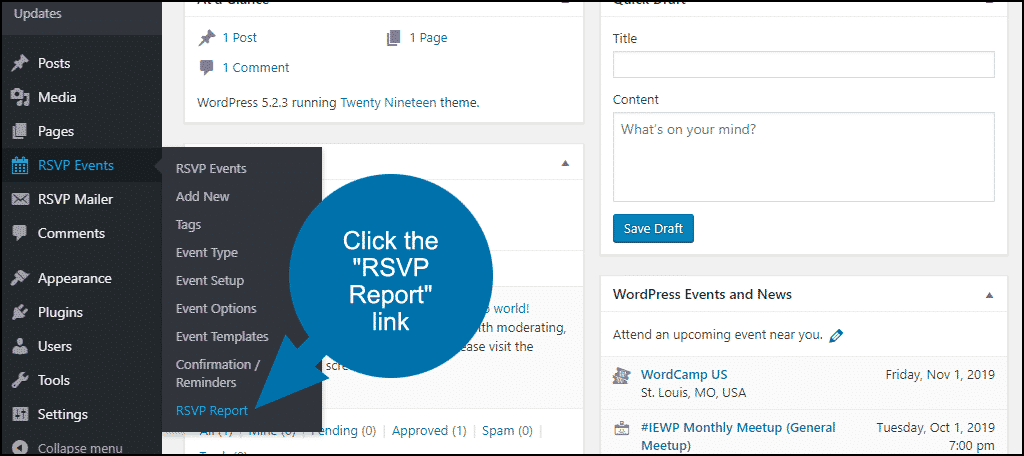
Click the “RSVP Yes…” link to see the details for each response. Both yes and no replies will be listed. You can print the RSVP Report or export it to a spreadsheet.
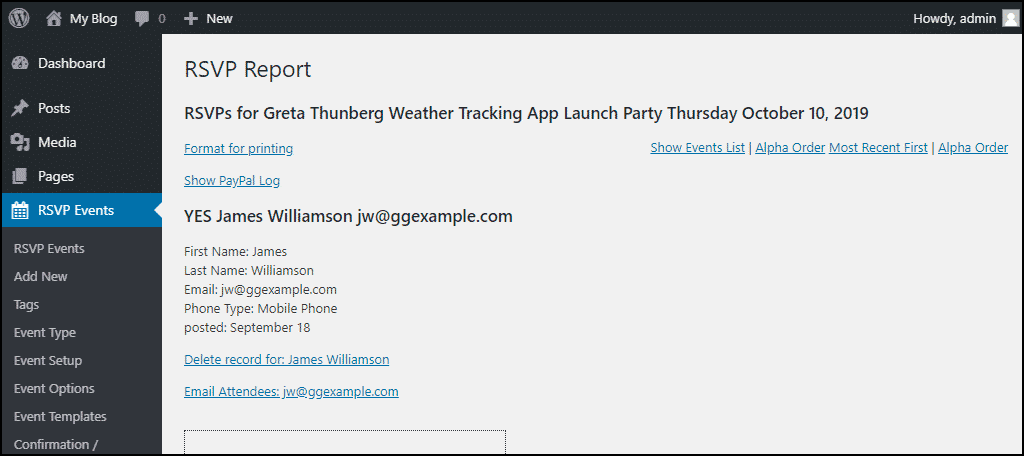
NOTE: There’s an “Email Attendees” link, but it includes the email addresses of people who RSVPed “no.,” So personally, I Wouldn’t use that link. I would assume that most people who respond “no” to an RSVP will not expect any further email from the event. Use the link at your own risk.
Accepting Payments with RSVPMaker
You can use PayPal or Stripe to process payments on your WordPress site with RSVPMaker.
In the left column navigation, mouse over the “Settings” link and click the “RSVPMaker” link.
Click the “Payments” tab.

Choose your gateway (Stripe or PayPal), and any other configuration you want to change. For this tutorial, I’m using Stripe, and I’ve entered sandbox keys (you get the API keys from Stripe or PayPal), and selected “Operating Mode: Sandbox.”

Now we’ll add payment information to the event post.
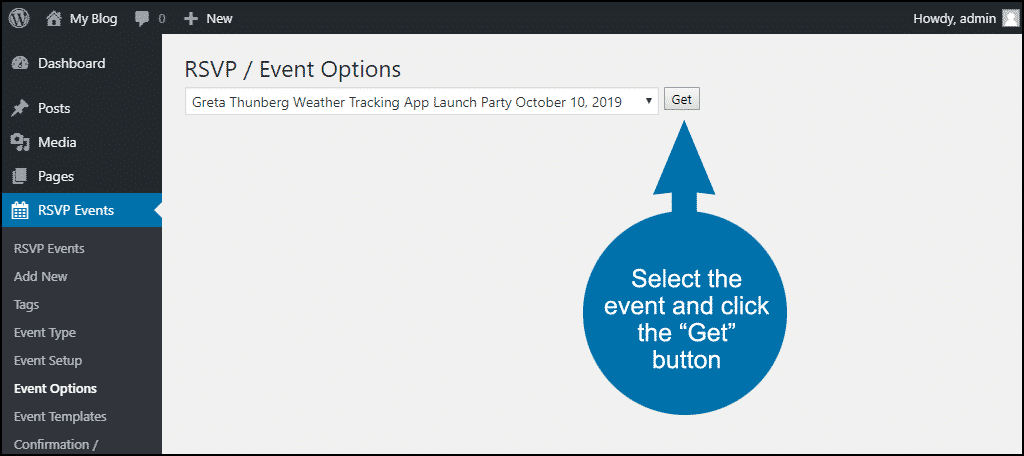
In the left column navigation, mouse over the “RSVP Events” link and click the “Event Options” link.
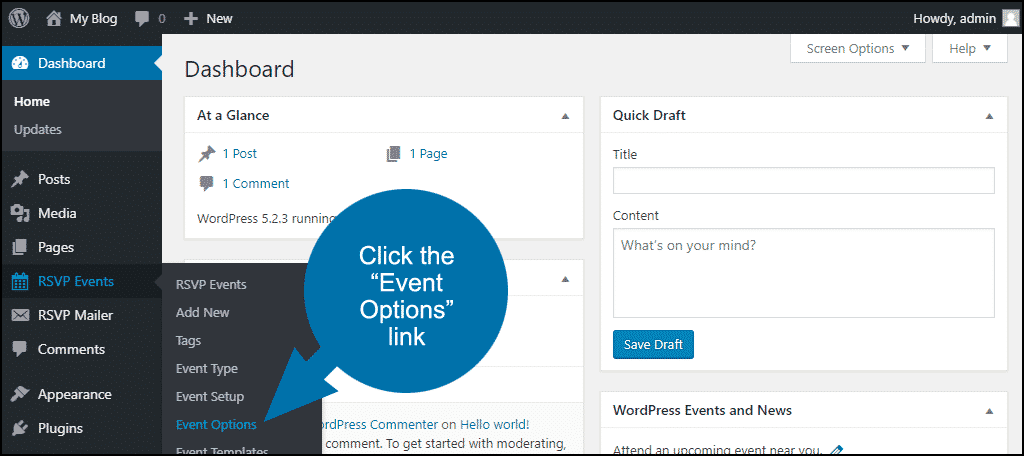
Select the event that you want to edit to add a payment option.
You can add the payment option when setting up a new event as well, but in this tutorial, we’ll edit an existing event to add a payment option.
Click the “Get” button.
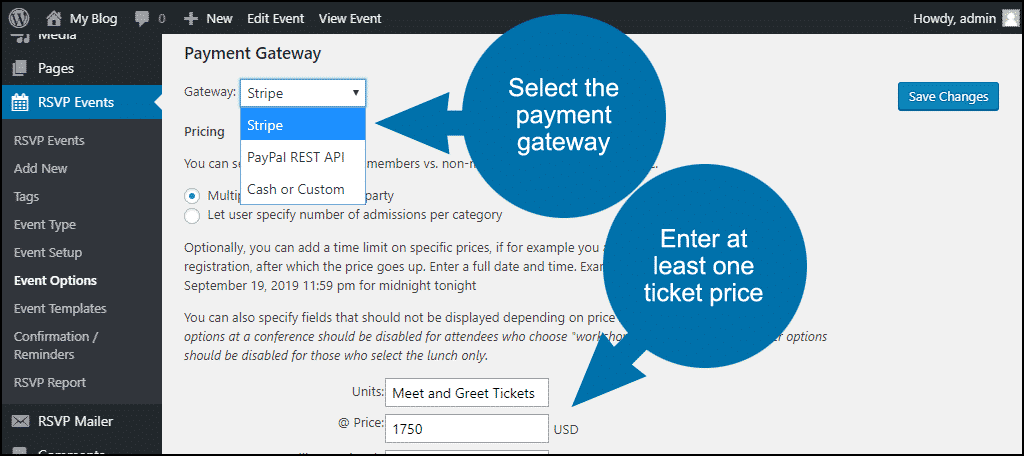
Scroll down to the “Payment Gateway” section. Choose your gateway and any other configuration you want to change.
Enter at least one ticket price.
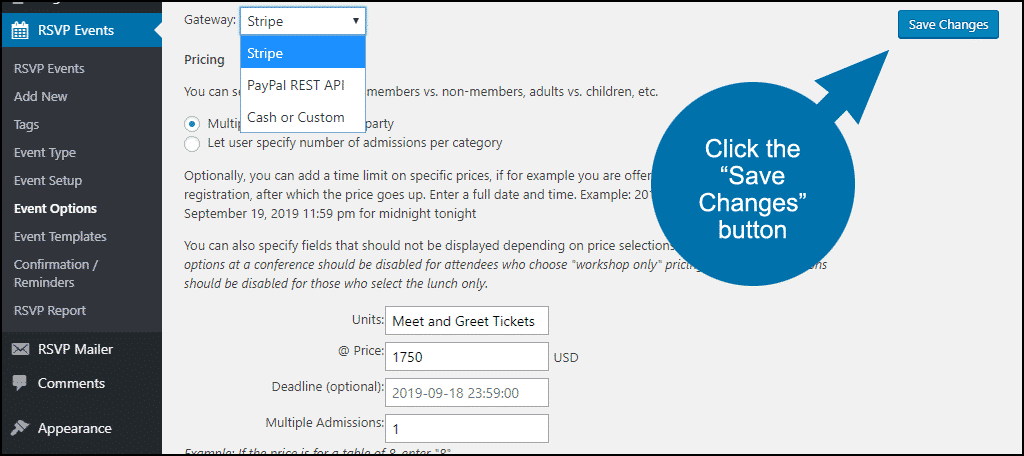
Click the “Save Changes” button.
After submitting the RSVP form, the registrant has the option to pay on the results page.
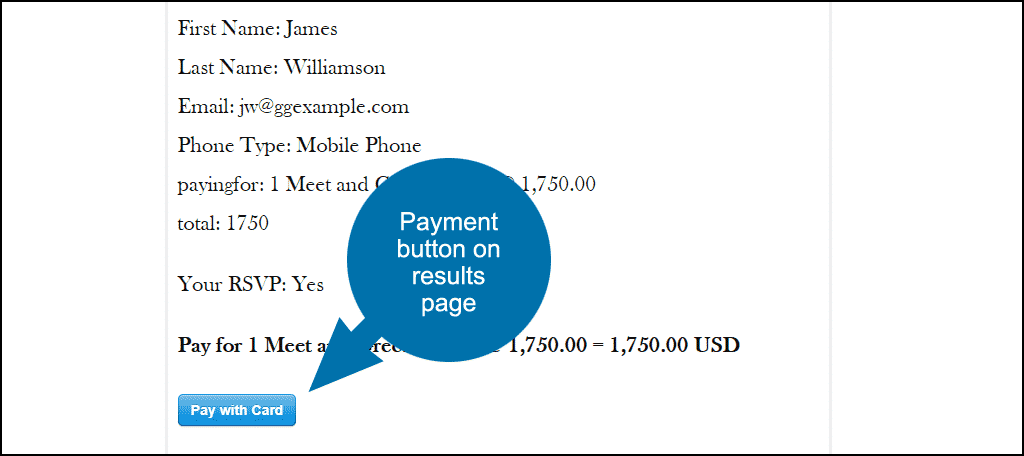
The payment link will also be in the confirmation email that they receive.
Now You Can RSVP With WordPress
If you’ve followed along, you now know how to set up an event page and allow visitors to RSVP and pay for tickets. You also know how to view the RSVPs and print or export them to a spreadsheet.
As I mentioned, the RSVPMaker plugin has a lot more features and configuration options. We can’t cover them in this basic set up tutorial, but they have good documentation for the plugin.
The documentation includes videos and a lot of articles on integrating payment gateways and even integrating with MailChimp, which we didn’t have time to get into here.
Overall, if it’s RSVP management you’re looking for, the RSVPMaker event plugin for WordPress is all you need.
Have you ever had to manage RSVP responses manually? Now that you know how easy it is to RSVP with WordPress, do you think you’ll use RSVPMaker? If you’ve had success with this, or you prefer another RSVP plugin, let us know in the comments.