
A thumbnail post is the small graphic and text excerpt that is displayed on a website. When a user clicks on the link or the image, the full-sized article is revealed. WordPress can be set up in a variety of ways to get more out of these posts.
This tutorial will show you how to set up the post thumbnails in WordPress and the various tools you can use. After all, you want your content to be easy to find by your visitors.
What’s with the featured images in thumbnails?
WordPress uses the featured image of a post as part of the thumbnail process. The system will shrink the graphic down to fit a specific dimension to be used as a “teaser” of sorts. Unfortunately, these images don’t always look ideal when cropped from the original resolution.
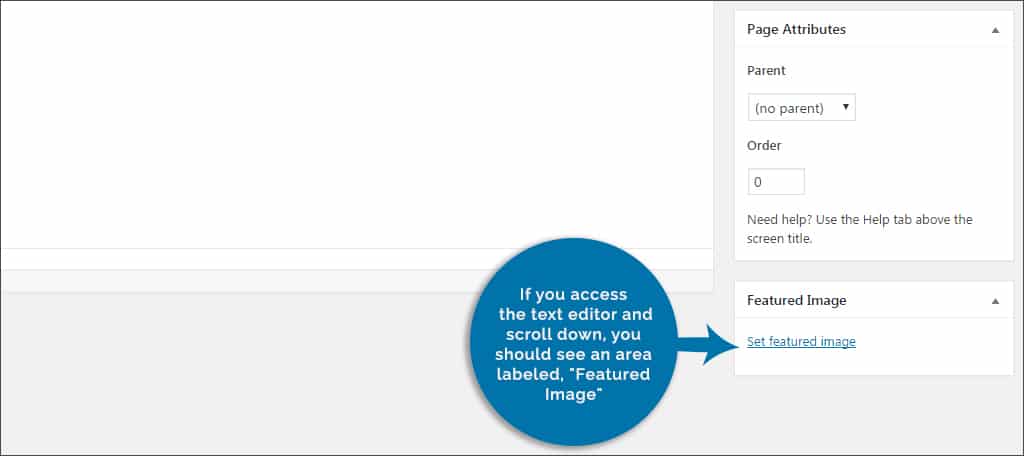
The featured image can be found in any post or page in WordPress. If you access the text editor and scroll down, you should see an area labeled, “Featured Image.” Any graphic you add to this section will become the one WordPress will use for the article’s thumbnail.
Because setting an external media library will import graphics directly into WordPress, the thumbnail process will work. The system simply takes whatever image is being used regardless of its origins and creates a much smaller graphic for the thumbnail.
What is a featured image, anyway?
A featured image is the graphic that usually heads a piece of content. It’s the picture that WordPress uses when it comes time to show thumbnails, share on social media or otherwise accentuate the material. If you want a specific graphic to be explicitly linked to the content, the featured image is what you want to use.
Here are three steps to creating amazing thumbnails that are functional and memorable.
1. Making a Thumbnail from Images on the Web
Not everyone has the ability to use graphics directly from their systems for a post or page. Perhaps you want to find images on the Internet but don’t want to take time out of your day to sift through them all. That is when Magic Post Thumbnail comes into play.
This plugin will use your title to find an image for you automatically and instantly add it to your media library as a featured image. This, in turn, is used to create thumbnails of your post or page without missing a beat. To use this plugin:
Step 1: Go to the plugin area of your WordPress admin panel.
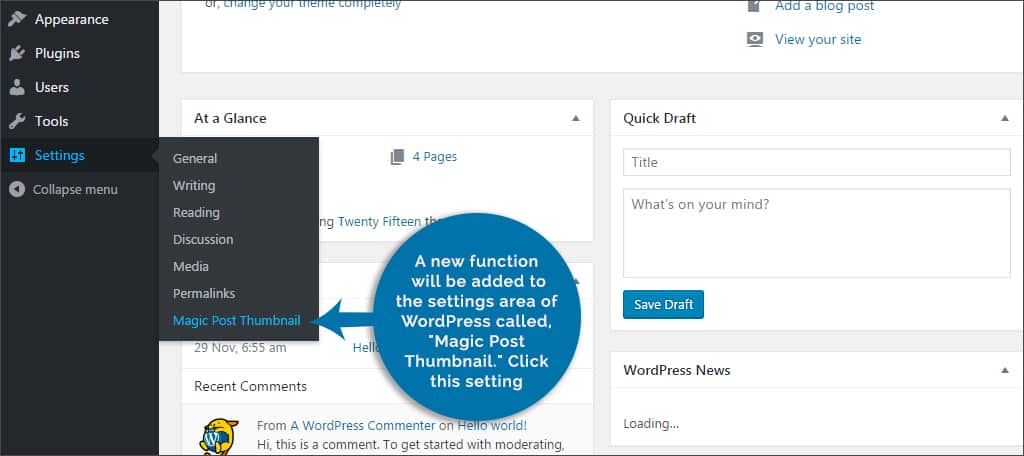
Step 2: Search for a new plugin called, “Magic Post Thumbnail.” Install and activate it.

Step 3: A new function will be added to the settings area of WordPress called, “Magic Post Thumbnail.” Click this setting.
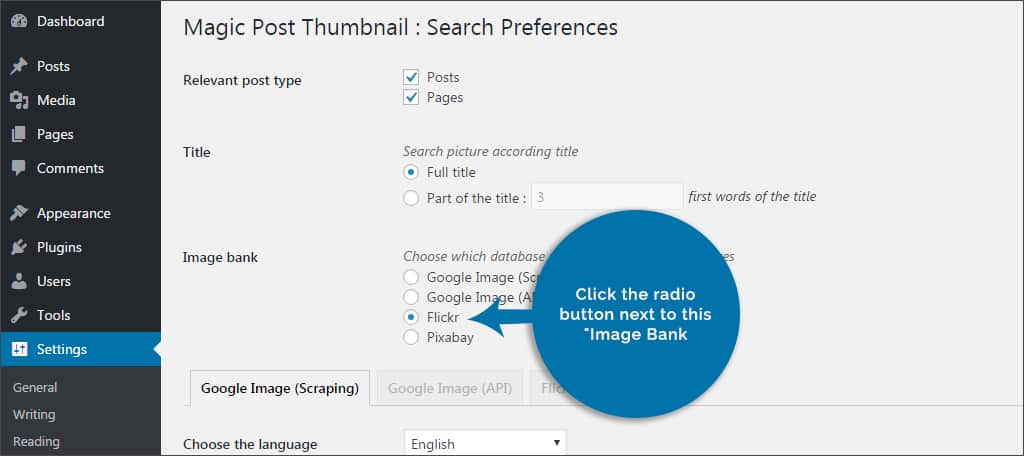
Step 4: This will bring up the search preferences screen of Magic Post Thumbnail. From here, you can determine which database for which you want to scan images. You can also make adjustments to how much of the title the plugin will use when looking for a graphic. In this example, we’re going to use Flickr. Click the radio button next to this “Image Bank.”
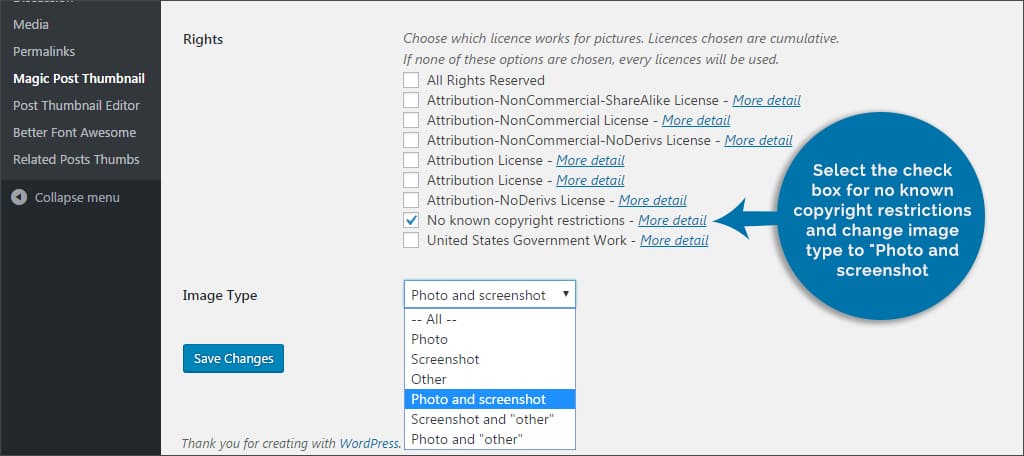
Step 5: Select the check box for no known copyright restrictions and change image type to “Photo and screenshot.”
Step 6: Click the “Save Changes” button on the bottom left.
With this plugin activated, your posts will automatically pull images from Flickr based on the title of your post. These featured images will then be used to create post thumbnails within WordPress.
2. Editing the Post Thumbnail Image
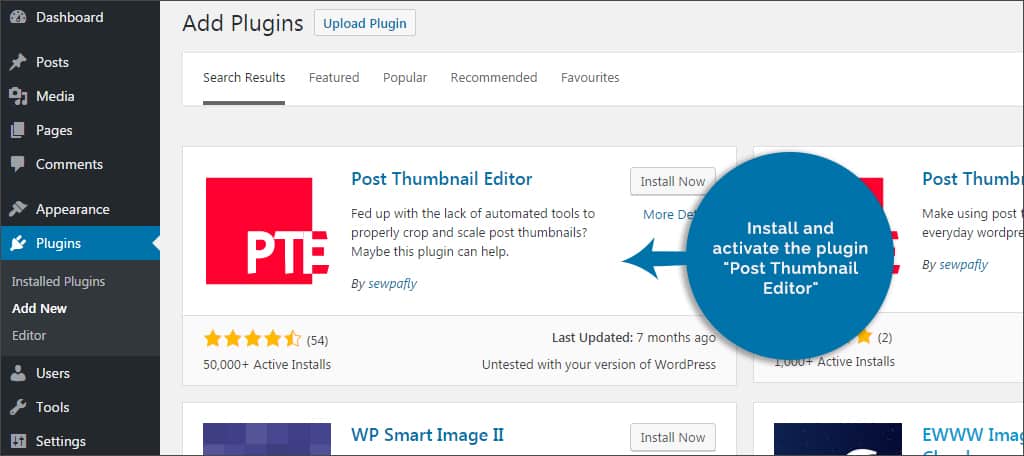
Sometimes WordPress has a poor capacity for automatically cropping a featured image for a post. For an easy way to make sure your thumbnails look extravagant, Post Thumbnail Editor is a great plugin for those edits.
To use this simple tool:
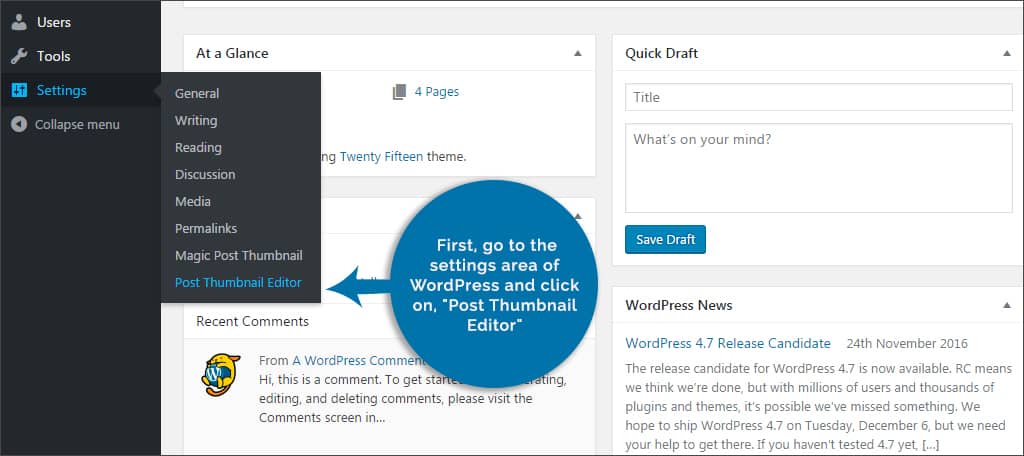
Step 1: Install and activate the plugin “Post Thumbnail Editor.”
Step 2: This plugin will install two new functions for WordPress: an image editor and customizable settings. First, go to the settings area of WordPress and click on, “Post Thumbnail Editor.”
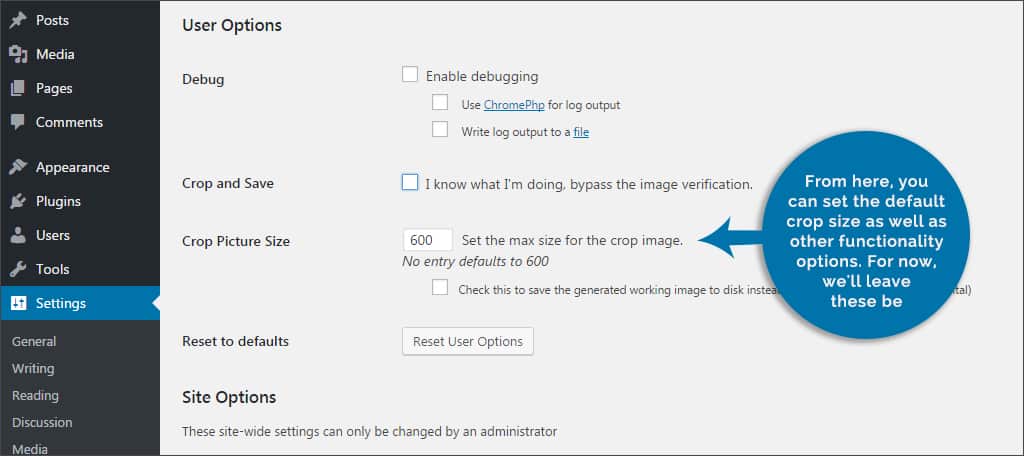
Step 3: From here, you can set the default crop size as well as other functionality options. For now, we’ll leave these be.
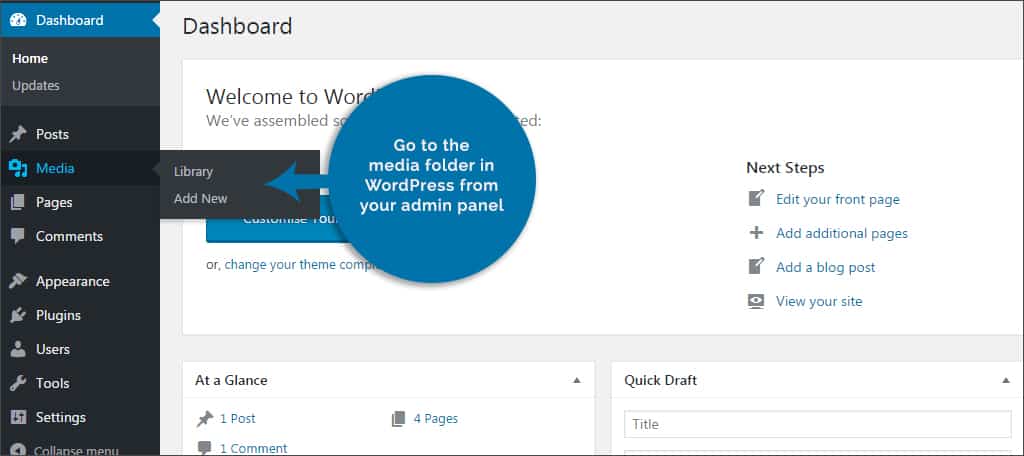
Step 4: Go to the media folder in WordPress from your admin panel.
Step 5: Select any image you wish to edit. You’ll see an option that will allow you access to the thumbnails of the graphic. Click on this link and the editor will load.

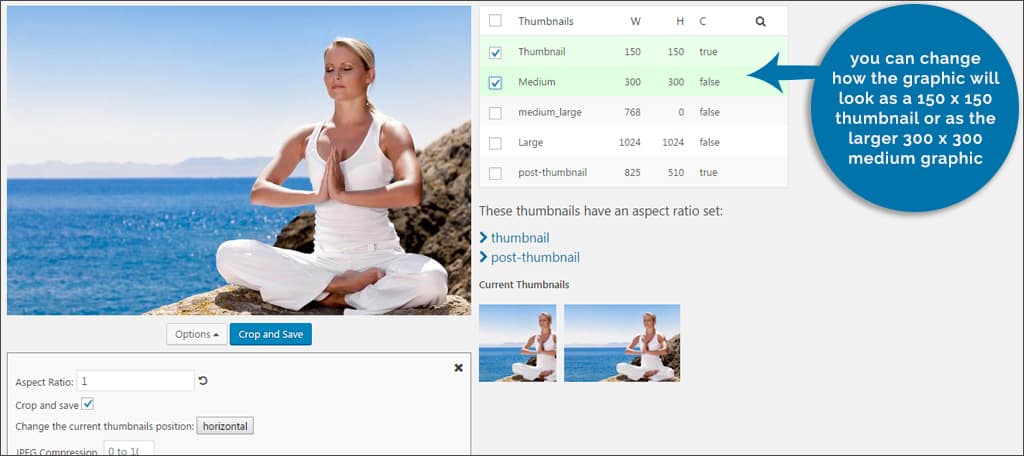
Step 6: From the editor, you can crop and resize the image according to the various resolutions WordPress uses. For instance, you can change how the graphic will look as a 150 x 150 thumbnail or as the larger 300 x 300 medium graphic.
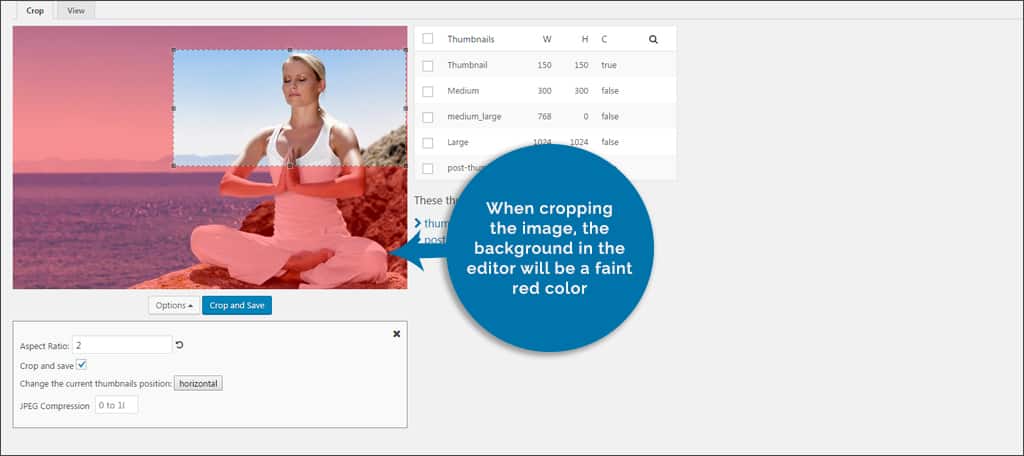
NOTE: When cropping the image, the background in the editor will be a faint red color. Once you adjust the cutting path, it will eventually turn to green. This means the image will fit into your selected thumbnail on the right.
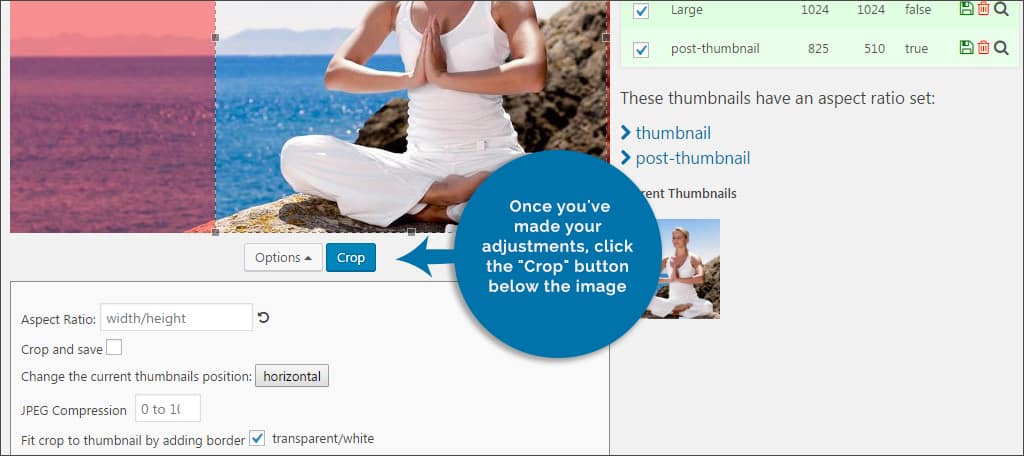
Step 7: Once you’ve made your adjustments, click the “Crop” button below the image.
Step 8: The next area will show you what the image will look like with your adjustments. Once you get the image just right, click the save button. This button will look like a miniature disk.

4. Placing Post Thumbnails within WordPress
Many WordPress themes have the capacity to automatically add post thumbnails according to things like categories or even the tags you use. However, sometimes it may be more ideal to place them manually. Plugins like Related Posts Thumbnails give you that capacity with easy-to-use options.
To use Related Posts Thumbnails:
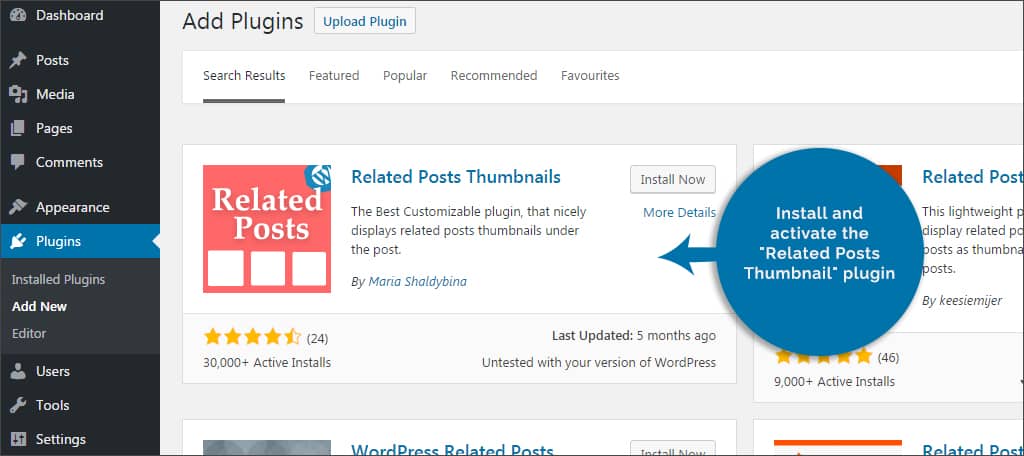
Step : Install and activate the “Related Posts Thumbnail” plugin.
Step 2: This plugin will add a new feature in the settings area of WordPress called, “Related Post Thumbs.” Select this to modify your options.

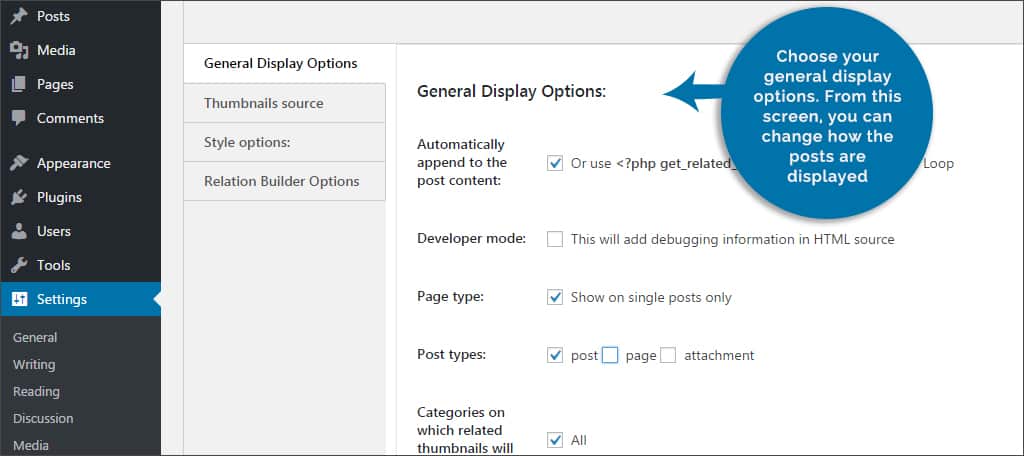
Step 3: Choose your general display options. From this screen, you can change how the posts are displayed. For instance you can select whether you want to show the relation on your pages or posts. You can also modify the header above the related post content to read anything you wish.
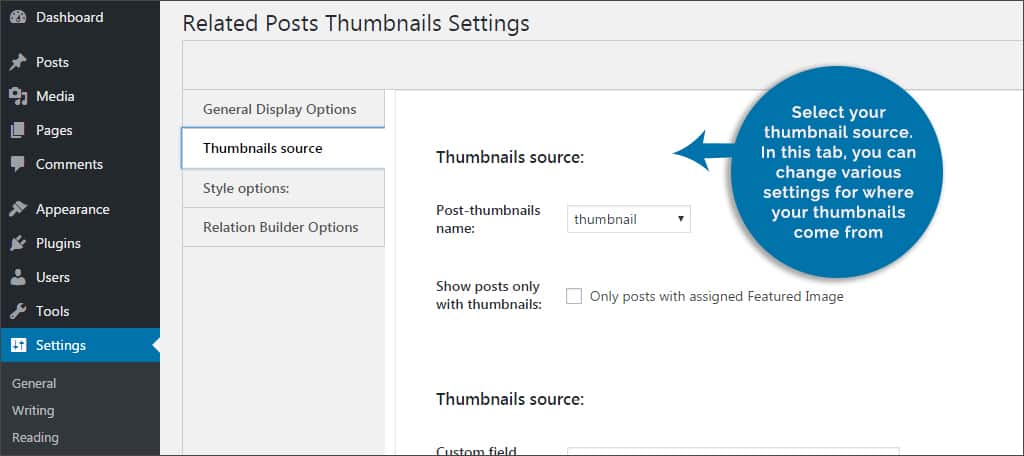
Step 4: Select your thumbnail source. In this tab, you can change various settings for where your thumbnails come from. You can even set up the plugin to pull post thumbnails that have featured images only.
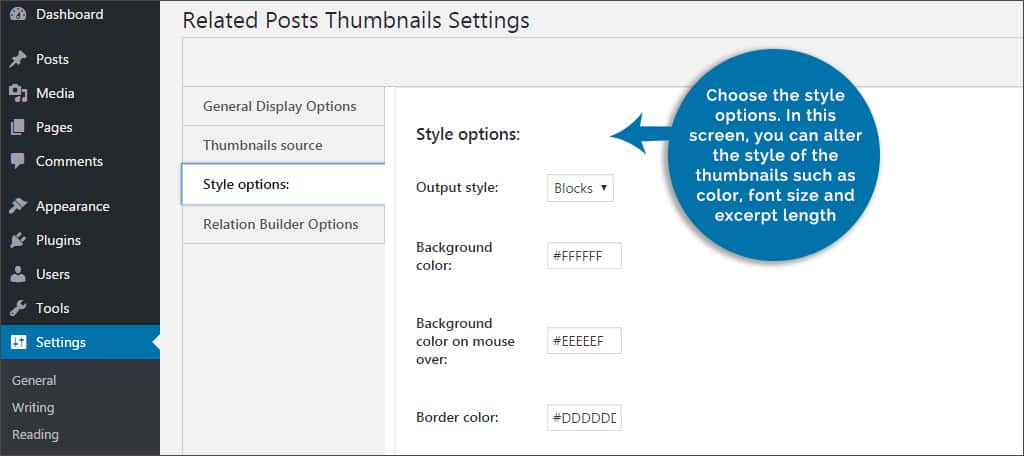
Step 5: Choose the style options. In this screen, you can alter the style of the thumbnails such as color, font size and excerpt length.
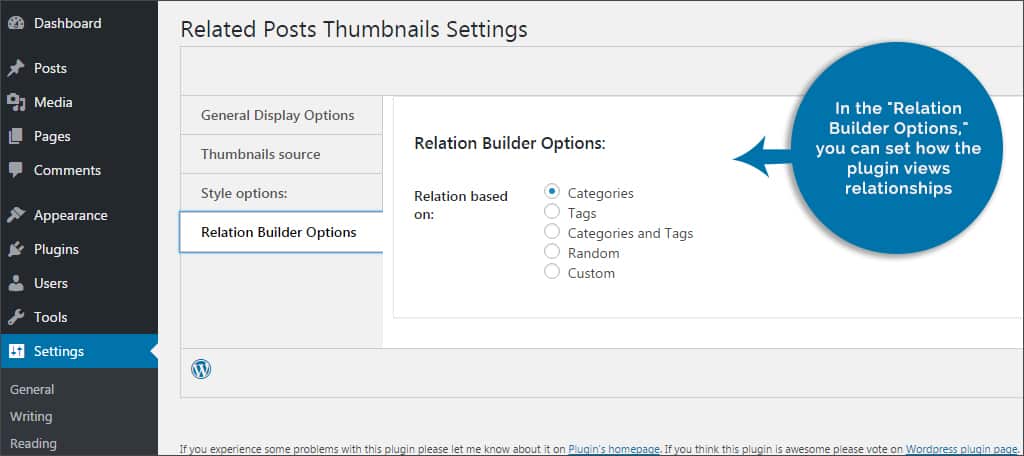
Step 6: In the “Relation Builder Options,” you can set how the plugin views relationships. For example, you can set WordPress to show thumbnails in regards to category, the tags you use or both.
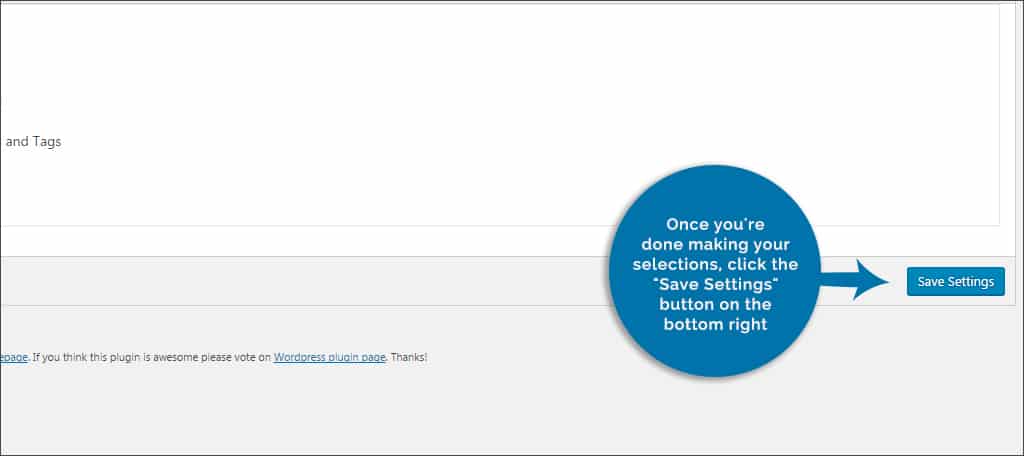
Step 7: Once you’re done making your selections, click the “Save Settings” button on the bottom right.
Thumbnails based on related material will now be delivered at the end of the post or page, depending on your settings. You can also input the shortcode for this plugin anywhere in your posts or pages by placing: “[related-posts-thumbnails].
Why is it important to display related posts? Because content that is related to a piece has a greater chance of being read by the visitor. It’s like an extension of the material and may prove to be helpful to the person reading your website.
Thumbnail posts can be used in a variety of ways. These are only a few of the many tools you can implement to give your thumbnails more versatility. From the featured image to placement on your site, it can impact how others view your content.
What kinds of tools do you use to enhance your site’s layout? What are some of your favorite places to find featured images?