
Content that is well-written keeps visitors engaged for a time. However, when they finish reading it, they are going to leave the post or page. Instead of letting this happen, display some random posts in WordPress to keep them engaged.
Giving a reader more information he or she may be interested in could keep them from leaving. This often causes what’s called a “Bounce Rate” to appear in Google Analytics. You want to keep the number of these as low as possible.
Showing additional content within the post or alongside it encourages the visitor to keep reading. This is why many will use random posts in WordPress. It provides additional information within the website the reader may be interested in.
In this WordPress tutorial, I’m going to go over a few ways you can easily add these random posts to your site.
Why Do You Need Random Posts?
Showing additional content works well to give visitors something else to read. Adding content the person may be interested in is a way to pique his or her interest. Instead of hitting the back button or otherwise leaving the site, the visitor may click on the next piece of content.
Random posts also work well when trying to boost the traffic to posts that may be performing poorly. Articles that receive little traffic before may experience a bit of an influx if they are displayed to a visitor.
Showing active posts improves search engine optimization as well. This is especially true if the random post is a piece of evergreen content. Every bit of traffic any individual post receives improves its popularity on sites like Google.
Here are three plugins that work exceptionally well to list posts randomly on your site. You will need to know how to install plugins in order to continue.
How to Display Random Posts in WordPress
Method 1: Using Random Posts and Pages Widget
The Random Posts and Pages Widget is a useful plugin if you want to show a random post article in your sidebar or footer area in WordPress. More importantly, it’s a truly random display.
What does that mean?
Well, instead of having a clean list of posts you may be interested in, you have a small box in which multiple posts are moving around in a seemingly random path.
While it is a great way to attract the visitor’s eye, it also makes it difficult to choose what you want.
It’s an interesting tool, to say the least. Let’s cover how to use it to display a random article in your widget area.
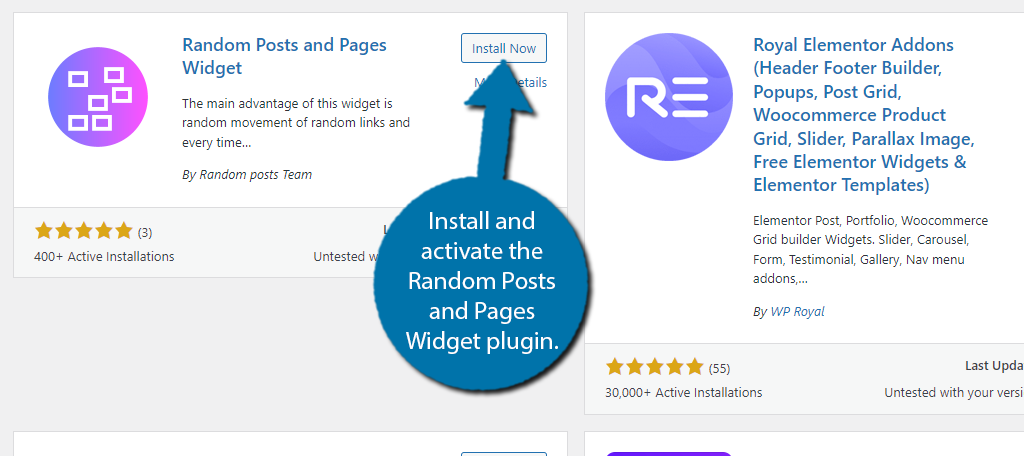
Step 1: Install Random Posts and Pages Widget
First, install and activate the Random Posts and Pages Widget plugin.
Unlike most plugins, there’s no settings area to configure. Instead, everything is configured directly through the widget.
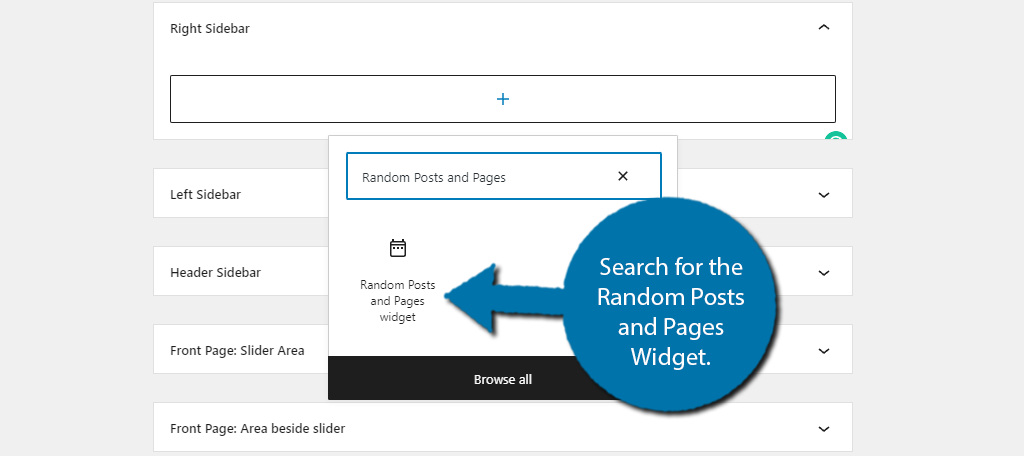
Step 2: Add the Random Posts and Pages Widget
Click on Appearance and select the Widgets option.

Go to the widget area you wish to add random posts to and search for the Random Posts and Pages Widget.
Step 3: Configure the Widget
The first thing you should notice is that there are a lot of options. As I said, all of the plugin options are in this widget. The good news is that it doesn’t really take a lot of time to set up as they are all pretty simple.
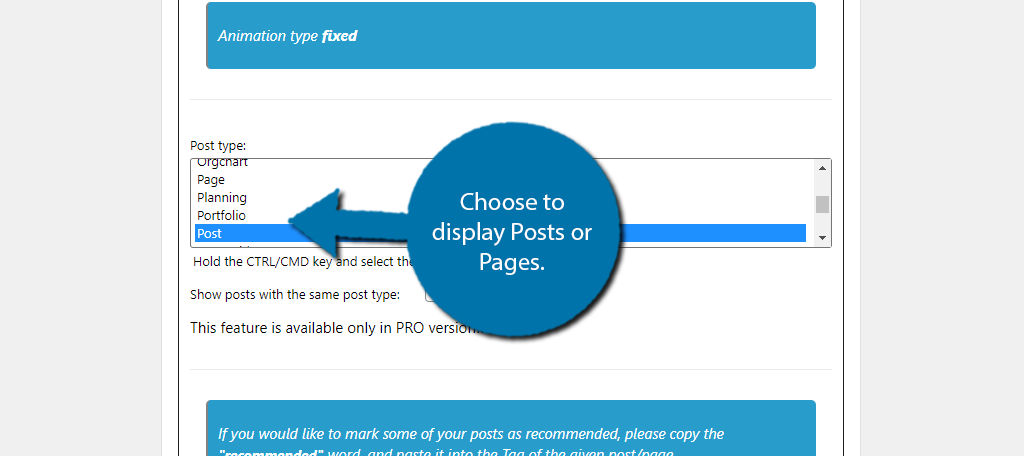
At the top, you will be able to enter a title, choose a theme (light or dark), and select an animation type. Past this, you will find the most important options, what kind of content to display in the widget.
You have a ton of options, but for the sake of this tutorial, pick either posts or pages.
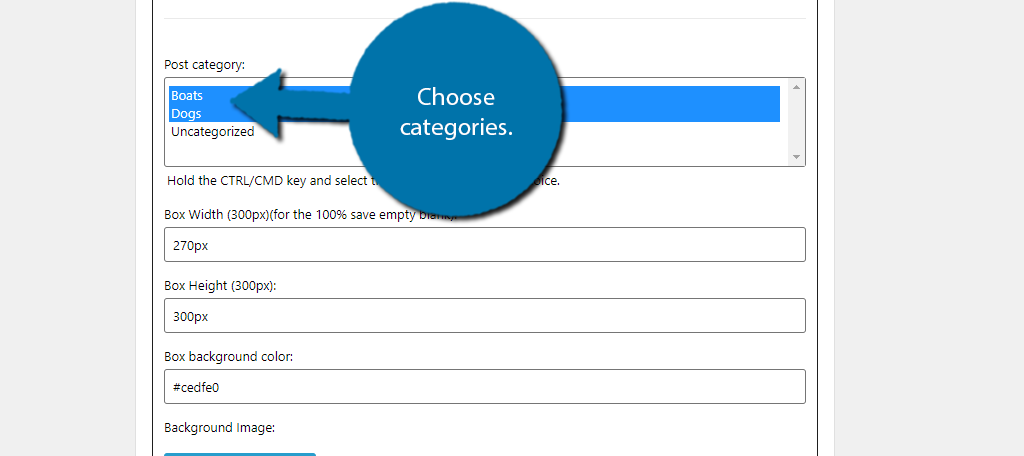
Below this, you will find a section to choose the category for the posts or pages you want to display. You can select multiple categories by holding down the CTRL/CMD button on your keyboard.
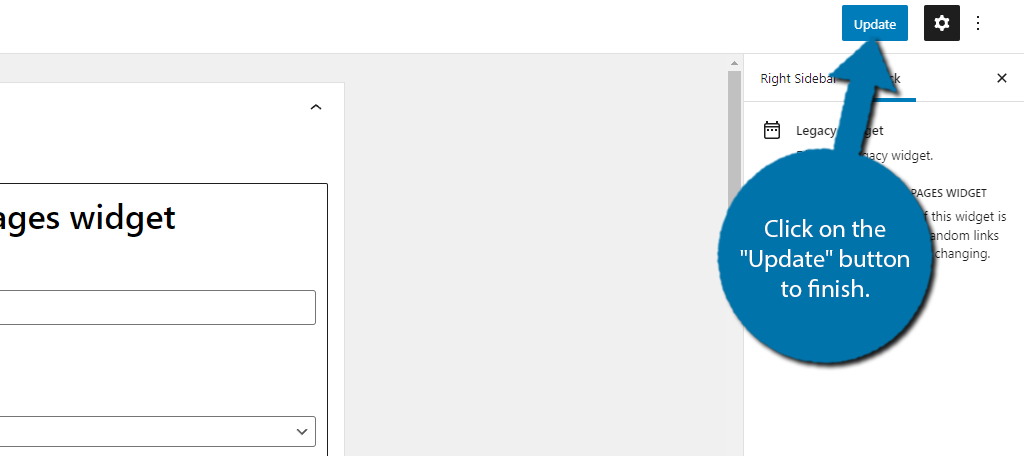
After this, you will just find a series of options that dictates the appearance of the widget. Configure those to fit your website. When you are done, click on the “Update” button to finish.
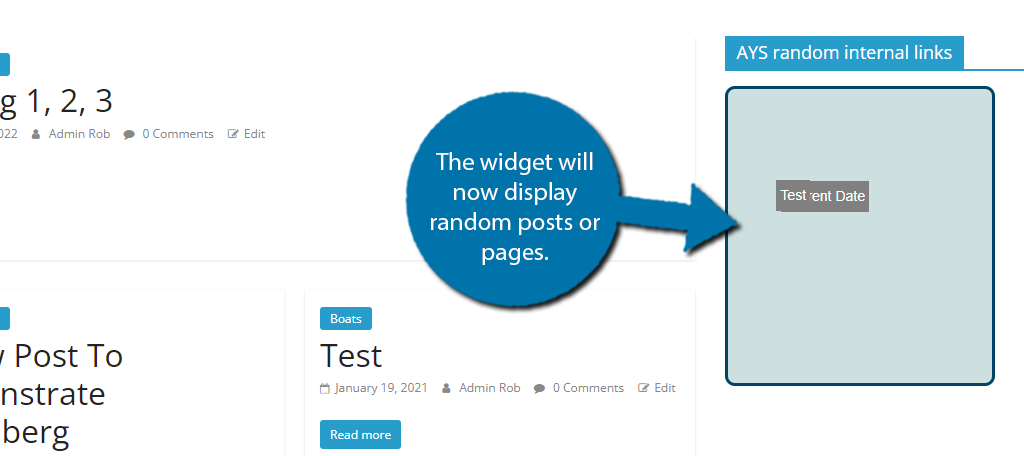
You can now see the random posts or pages appearing on your WordPress website.
Congratulations on learning how to use the Random Posts and Pages Widget plugin. It’s a great way to display a random article in a unique way, but it’s not for everyone.
If you are looking for a more traditional list, the next plugin might be more up your alley.
Method 2: Using WP Random Post Inside
The WP Random Post Inside plugin is a bit less flashy than the previous. Instead of focusing on the widget area, this plugin allows you to do it directly in the content itself. This makes it a great way to add a random article to the bottom of an existing one.
However, you are not limited to a specific location. You can add it anywhere within your content.
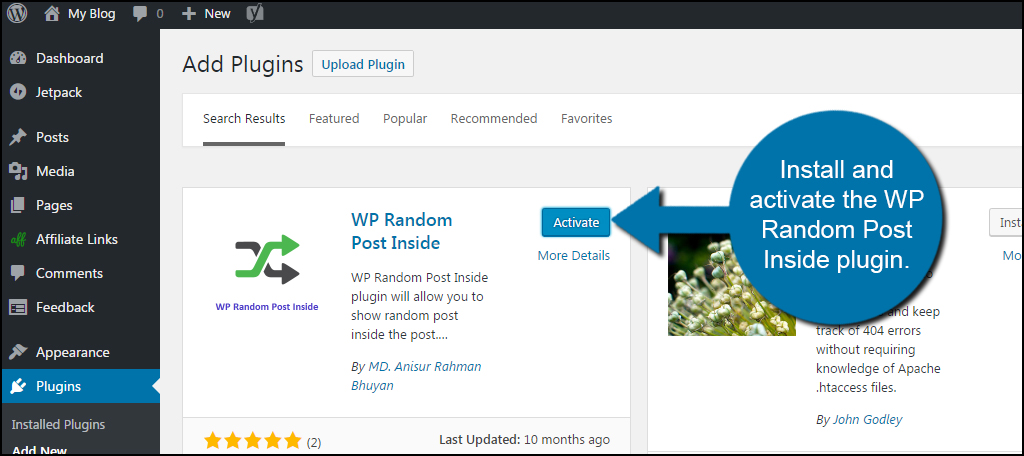
Step 1: Install WP Random Post Inside
Install and activate the WP Random Post Inside plugin.
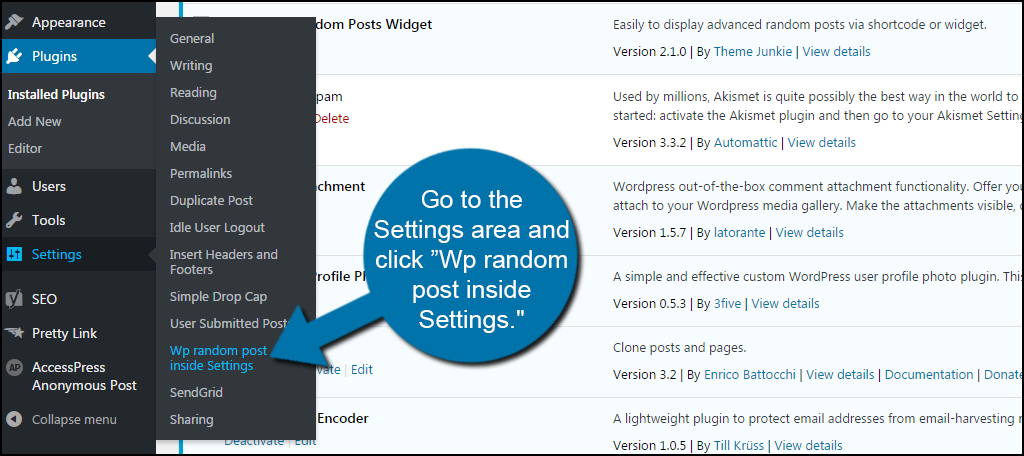
Step 2: Configure the Settings
Unlike the last plugin, this one has a dedicated settings section that you need to configure. It’s pretty standard, so you shouldn’t have any trouble.
Go to the Settings area and click “Wp random post inside Settings.”
From here, you can customize how the random post appears on your posts and pages. You can show it according to category and/or tags as well as display a catchy icon next to the link.
If you really want it to stand out, you can change the link color of the random post as well as its hover color. Otherwise, the system will just use the default settings.
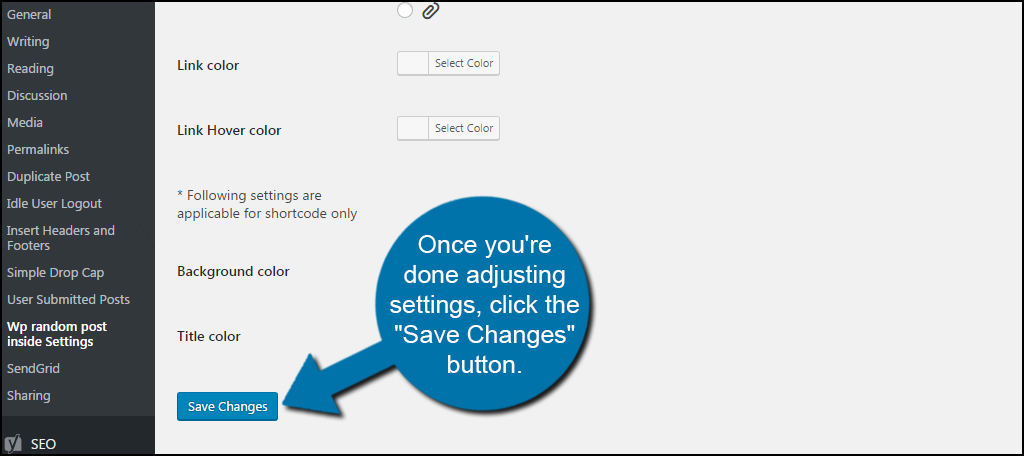
You can also include background and title colors to give it more flash and pizzazz.
Once you’re done adjusting settings, click the “Save Changes” button.
Step 3: Display Random Posts in WordPress
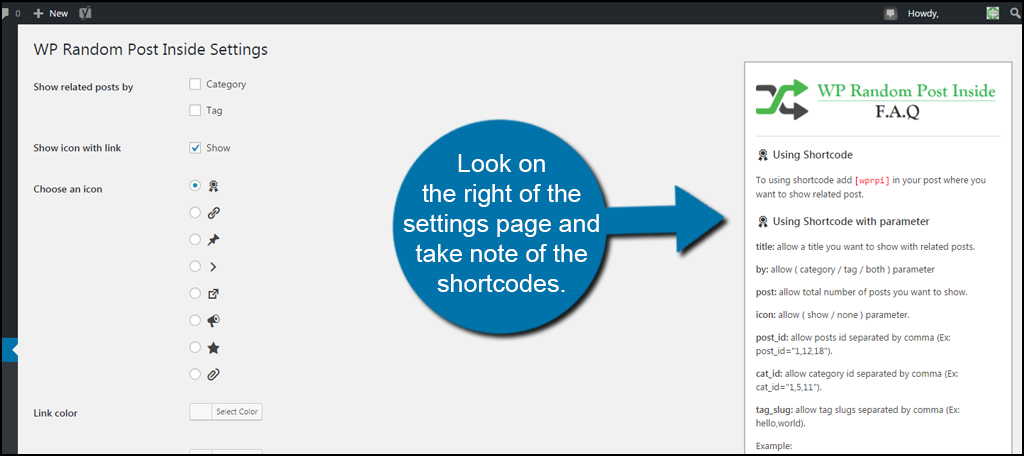
WP Random Post Inside provides a shortcode that will display a random article as a link. For this example, I’m just going to copy the primary code:
[wprpi]
Luckily, the developer included the different settings you’ll need to modify the code to suit your needs. Look on the right of the settings page and take note of the shortcodes.
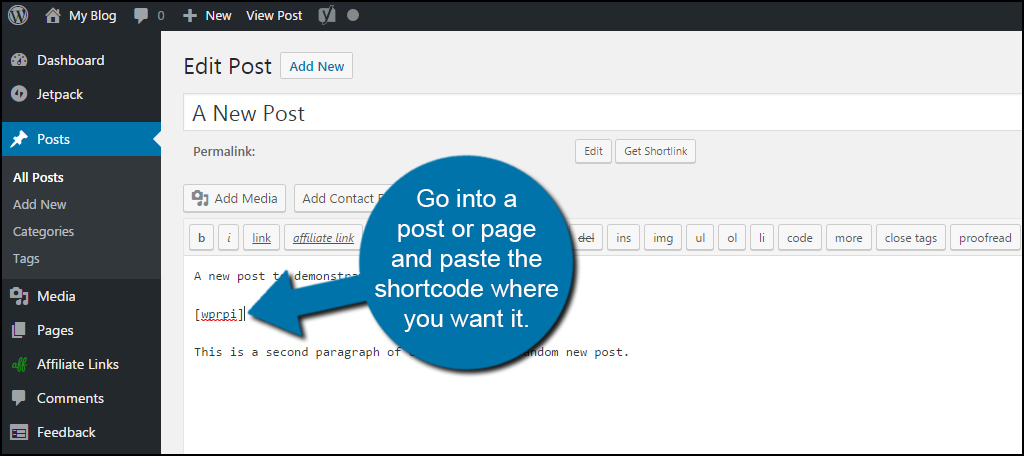
Go into a post or page and paste the shortcode where you want it. This will display random posts within the preferred location. For instance, you can place the link in between two paragraphs as a way to separate or break up the content.
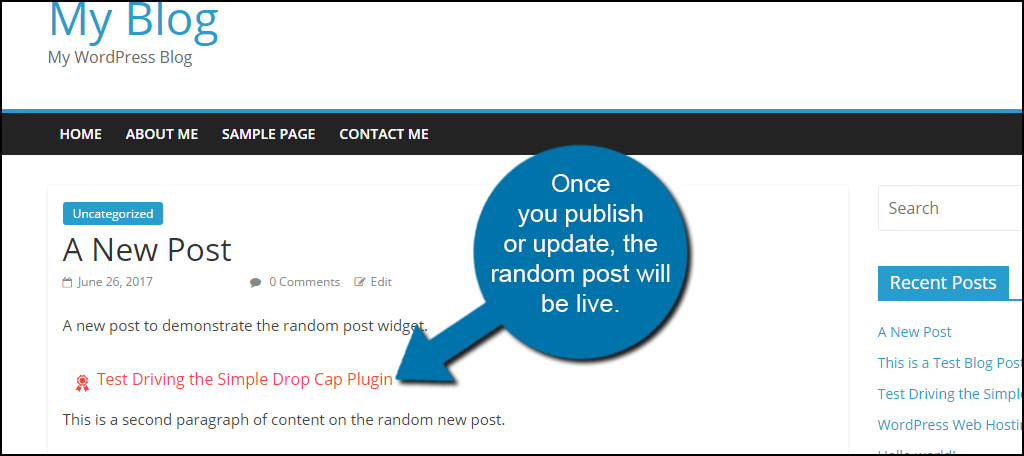
Once you publish or update, the random article will be live.
Adding More to Your Website
This is just one of many ways you can improve traffic and engagement of the website. Either of the methods above is easy to implement and may prove to be beneficial to reduce bounce rates and increase visitor time spent on pages.
The more interactive you can make the site, the better your statistics will become.
What kinds of things do you use on your website to engage the audience? What post upgrades do you use to accentuate your content?
Josh, thanks for the helpful article.
I have a question — my site pages include a sidebar with a random post widget. Each time a page is served a different set of random posts (excerpts) is displayed in the sidebar.
A problem is that Google indexes the pages and ‘sees’ the random post excerpts as content for the page. So in Google search, a page can show up as matching a search term only because one of the random post excerpts on the page matched the term (not the main content of page).
But, when a user clicks on the link in Google search results they will see the page with a different set of random post excerpts in the sidebar — no matching text.
Ideally i’d like to exclude the random post excerpts from Google index ie hide them from Google, but that doesn’t look possible (?).
If you have any suggestions I’d appreciate it! Thanks.