Do you have any major event or product release dates in the near future? If so, you may want to keep a live animated countdown timer running on your website. This will make visitors aware of the event or launch of the product and get them curious enough to check those out on your website.
An animated countdown plugin is a great way to remind loyal visitors when an event or product launch is going to happen. It also informs new visitors that the event or product launch exist in the first place. In addition, it’s a great way for physical businesses to display how long before they will close for the day or how long until they will open again. Today I will demonstrate how to add an animated countdown timer using the Countdown Timer Ultimate plugin.
Why Should Your Website Consider Using An Animated Countdown Timer
An animated countdown timer is an interesting tool that can give your website’s visitors a quick reminder. It has many uses that range from your physical store’s office hours to your Black Friday deal starting date. Depending on the nature of your website and whether you have a physical store as well, its uses are quite creative. Some reasons to consider adding timers to your website include informing your visitors of how long until your office opens or closes, how long until a deal starts or ends, how long until a new product is released, and much more.
For example, you run a small game store and have created a website for your store. A very popular activity for game stores is to pick up new video game releases at midnight. You could create an animated countdown on the games page so visitors know you are having a midnight release and how long till it comes out. Animated countdowns can benefit most websites if they are used in creative ways that don’t feel tacked on.
How to Setup An Animated Countdown Timer In WordPress
Today I will demonstrate how to add an animated countdown timer using the Countdown Timer Ultimate plugin. This plugin will add 4 timers to your post. You can tweak the first box for days, the second for hours, the third for minutes, and the last for seconds. One of the best parts is the countdowns can all have unique colors or be all the same color, which makes it easier for them to blend into your website’s color scheme.
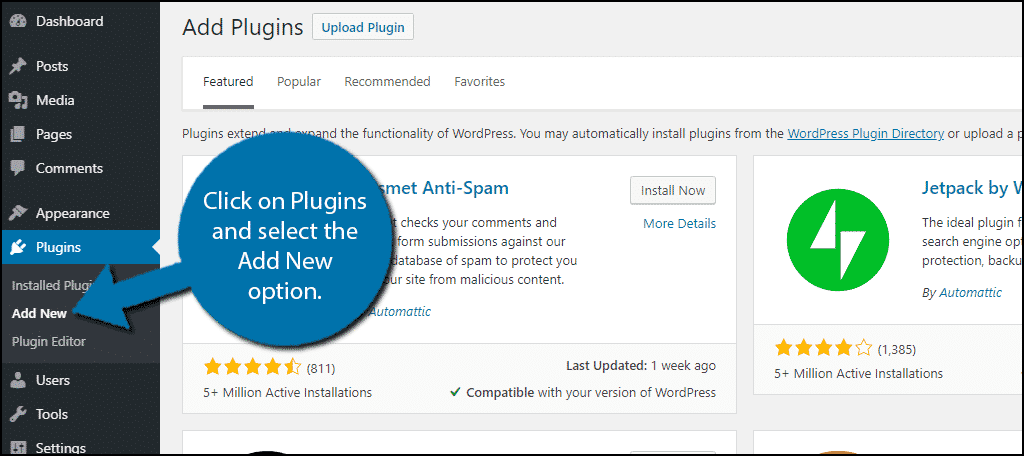
Start by clicking on Plugins and selecting the Add New option on the left-hand admin panel.
Search for Countdown Timer Ultimate in the available search box. This will pull up additional plugins that you may find helpful.

Scroll down until you find the Countdown Timer Ultimate plugin and click the “Install Now” button and activate the plugin for use.

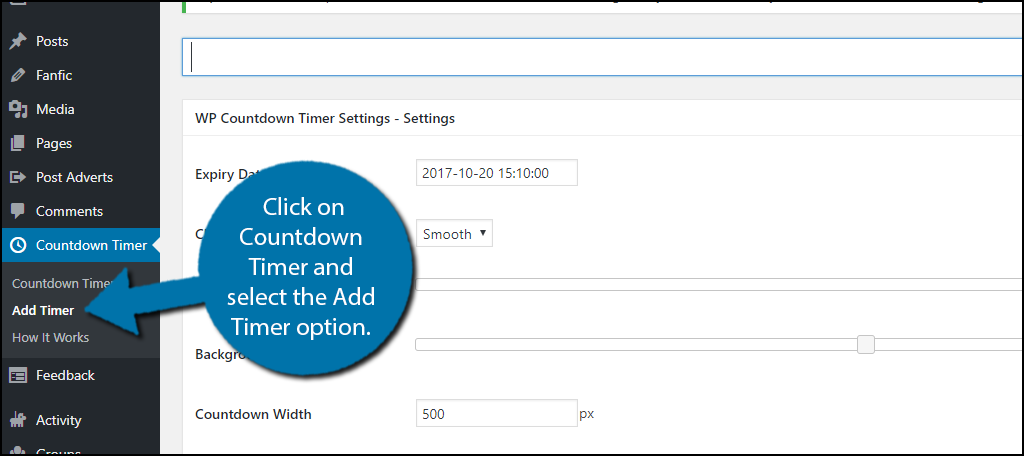
On the left-hand admin panel click on Countdown Timer and select the Add Timer option. This will pull up the main settings page for adding a timer.
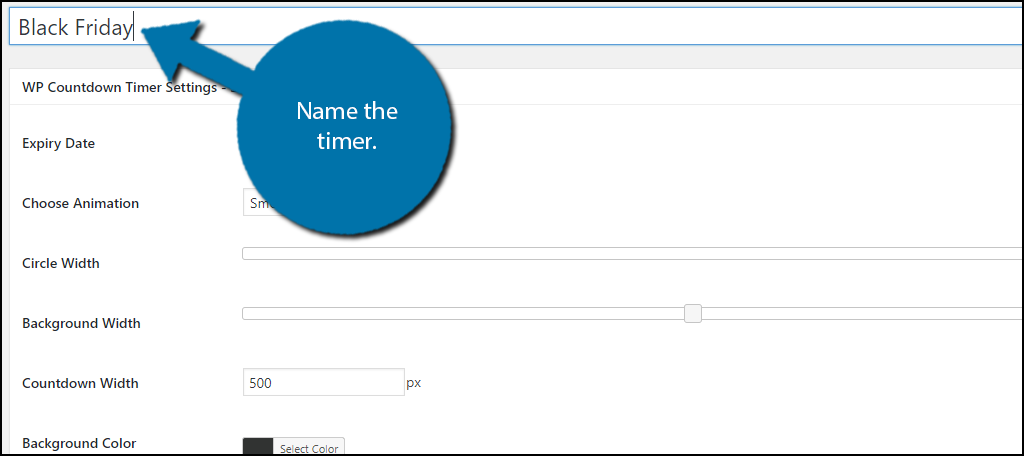
This page will allow you to create a new timer for your website. You will be able to choose the date and time as well as the design options. The first step when you create a timer is to name the timer. For example, if this is a timer for your Black Friday deals then you should name it Black Friday.
Now it’s time to choose the Expiry Date. This is the end point of the timer. For example, the 2017 Black Friday is on Friday, November 24th, the day after Thanksgiving. Pick the date and time your sale would begin. The hours, minutes, and seconds are adjusted with the sliders. Click on the “Done” button once you have selected the date and time.

All that’s left is to choose the colors for each bar and the background color itself. If you do not need a certain bar, uncheck the box. Rule of thumb is to keep it as concise as possible and have no extra bars. Click on the “Publish” button once you are done customizing the display.

You’re not done yet, clicking the publish button does not actually display it on your website. Click on the Countdown timer option on the left-hand admin panel.
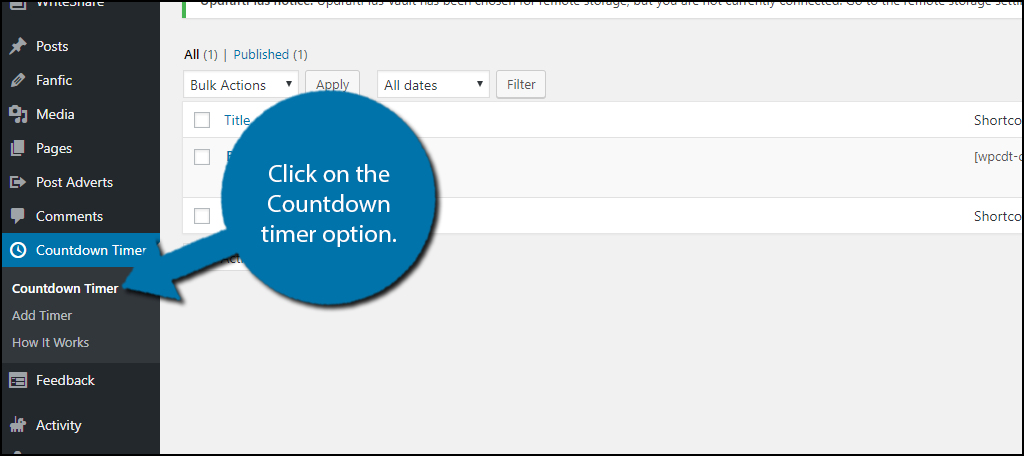
On this page, you will see all of your published timers. You will see a shortcode for each timer. Copy the shortcode and paste it into the content section of your page or post. Once you save the changes you will see your timer working. You can edit it at any time and you should make the effort to have it blend in with your website.

Congratulations, you have successfully added an animated timer to your website using a WordPress countdown timer plugin. You can freely edit the timer at any point and remember to be creative and complement your website’s color scheme or the holiday that you are counting down to.
Keep Your Visitors Informed
The main reason for adding a timer to your website is to inform people when something is going on in your store or on your website. Just think of your friends and relatives who seem to always end up showing late regardless of how many times they have been late. The timer may help those type of people and is great for people who just genuinely forget when a product it out of stock or cannot remember your office hours. It is easy to read office hours wrong, but it much harder to see a timer that says “closing in 30 minutes” and decide you have enough time to get there.
Remember, functionality is important, but making a website that looks good is also important. You can freely change the color scheme to match whichever theme you install on your website. Also, remember to not have the timer cover up other important content or widgets on your website.
What events, products, or other time sensitive content do you use timers for on your website? How hard or easy did you find it to customize the colors on the plugin?