Are you looking for a way to add some animation in WordPress? Why not try a CSS animation plugin for WordPress like the Animate It! plugin? Animated CSS is extremely popular on the internet because it quickly catches the attention of your visitors. This will help you keep visitors from quickly leaving your pages.
Most visitors will leave a page within the first minute if they do not see something that catches their eye. Use animation to entice your visitors to see what else your website offers. Today, I will demonstrate how to create CSS animations in WordPress using the Animate It! plugin.
Why Use Animations in WordPress
Animations are a great way to help your content stand out and it has advantages over other types of content. For example, videos are extremely popular, but they take much longer to load than a simple animation. Of course, you have many more options on the content you create with videos and they are much easier to share. All forms of media have advantages and disadvantages, it’s all about choosing what works best for you.
The animations you can create with the Animate It! plugin are quite similar to GIFs in WordPress but are made with CSS instead. While these animations can be created by using some code in your website’s stylesheets, you may not have the necessary knowledge to do so. Thankfully, the Animate It! plugin eliminates the need to do so and takes care of everything.
How to Create CSS Animations in WordPress
Today, I will demonstrate how to create CSS animations in WordPress using the Animate It! plugin. This plugin will allow you to add all kinds of crazy animation to your WordPress website without ever needing to write a line of code. This makes it the best way for beginners to add cool animation effects to their website. Keep in mind that while this plugin has a lot of options, learning how to do this manually can open up even more options.
Installing Animate It!
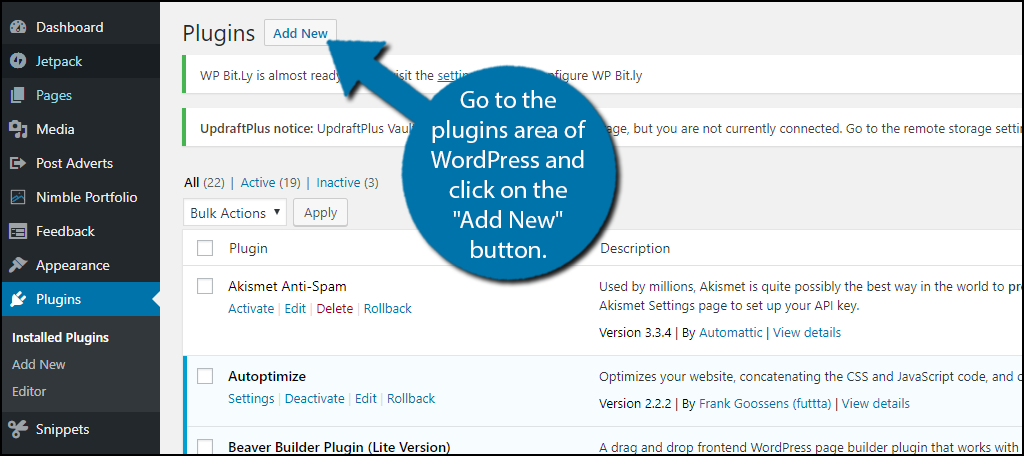
Let’s start by going to the plugins area of WordPress and click on the “Add New” button.
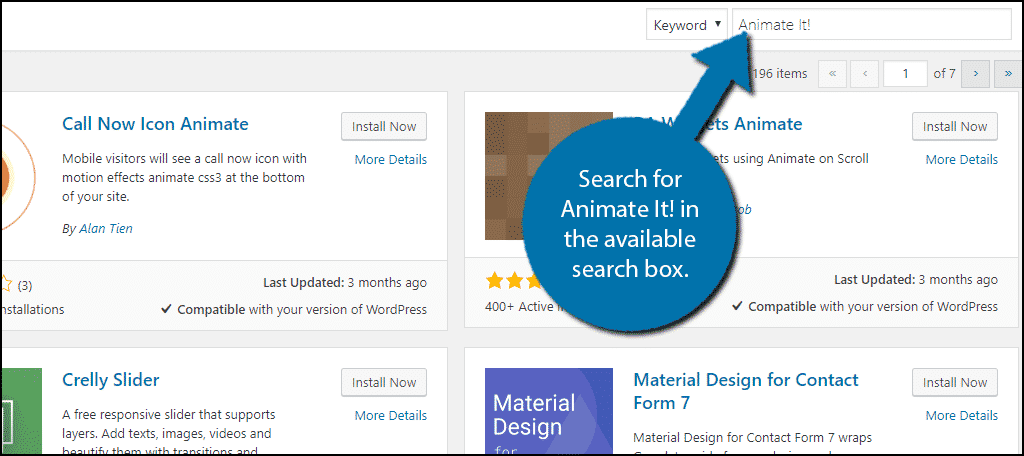
Search for Animate It! in the available search box. This will pull up additional plugins that you may find helpful.
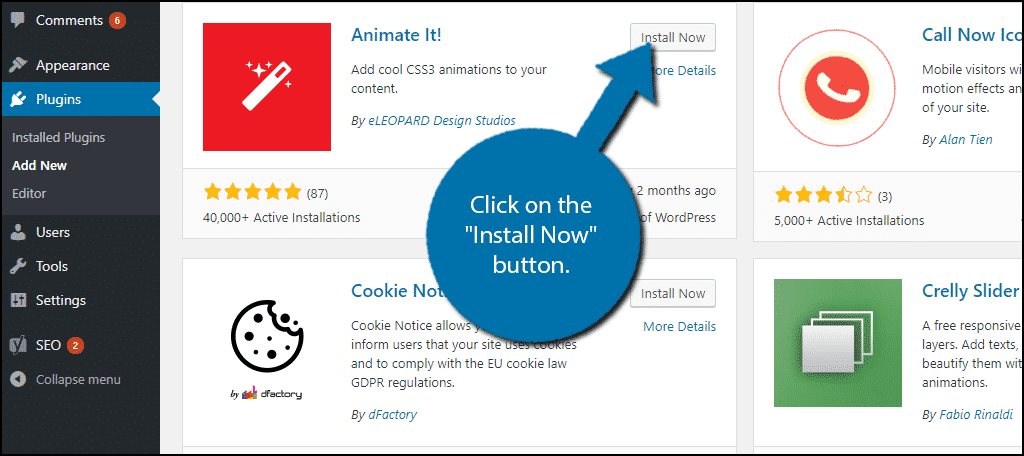
Scroll down until you find the Animate It! plugin and click on the “Install Now” button and activate the plugin for use.
Unlike most plugins, Animate It! works after activation. There are no plugin specific settings to alter.
Using Animate It!
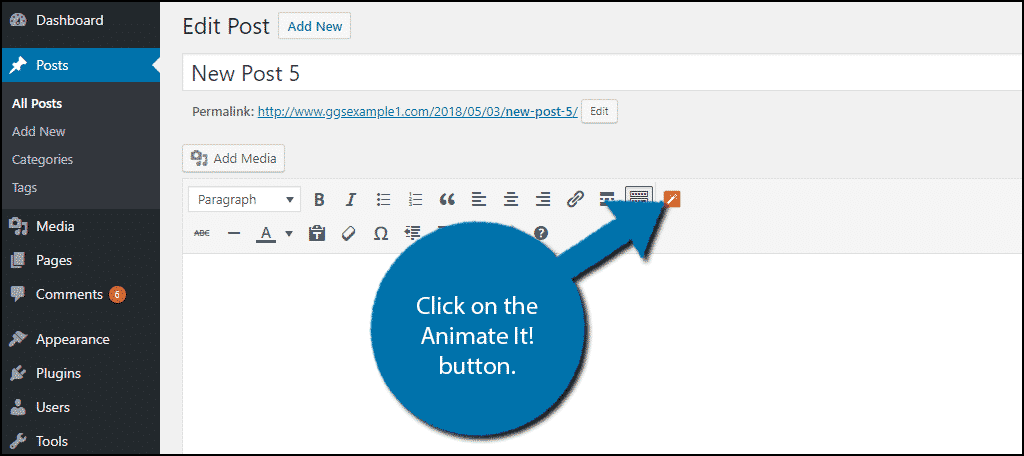
Go to any existing page or post on your website. You may also choose to create a new post or page to test out animation effects. Once you are on a page or post, select an image or something else to animate and click on the Animate It! button.
A popup window will now appear with all of the Animate It! features on it. The first thing to do is to actually decide what effect you want to use. You have a choice between an entry, exit, or entry and exit animation. This can be selected by choosing the appropriate tab.
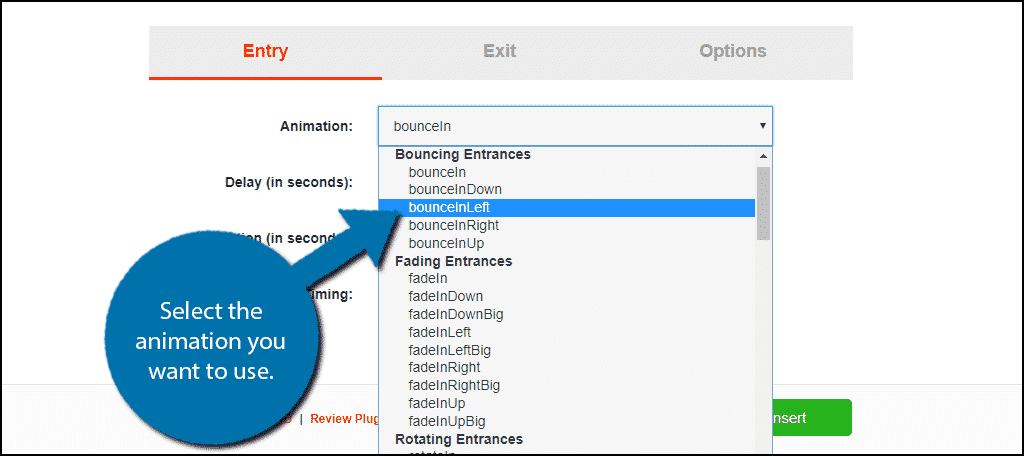
These effects range from bouncing entrances, fading entrances, rotating entrances, sliding entrances, zoom entrances, attention seekers, pulse, rotate, skew, wobble buzz, flippers, lightspeed, twirl, and special. Each of these has multiple sub-options to choose from.
Use the Animation drop-down box to select which animation to use. You can click on the “Animate It!” button at the bottom to see what each effect does.
Once you select the animation, you can alter the animation. You can choose to add a delay to the animation. You also have the option to change the duration of the animation. Lastly, you can change the timing that the animation will use.
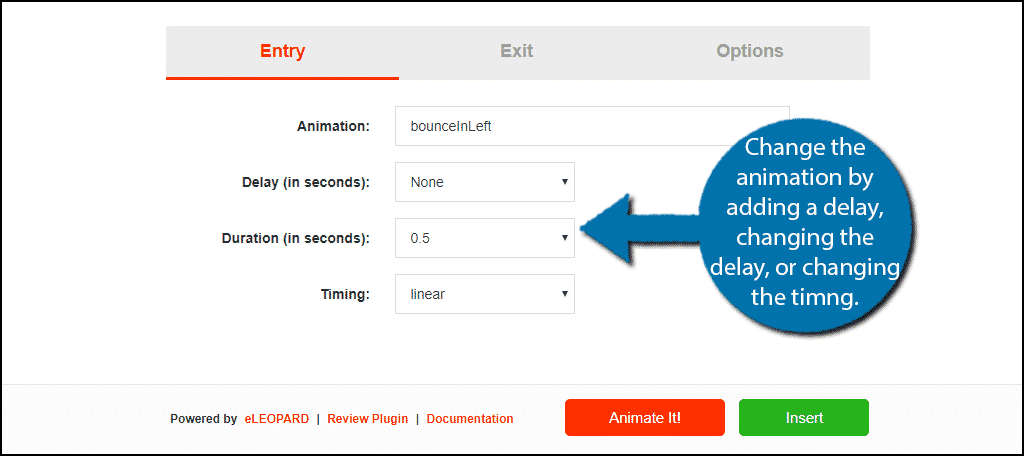
Once you are done selecting your animation and modifying it, click on the Options tab.
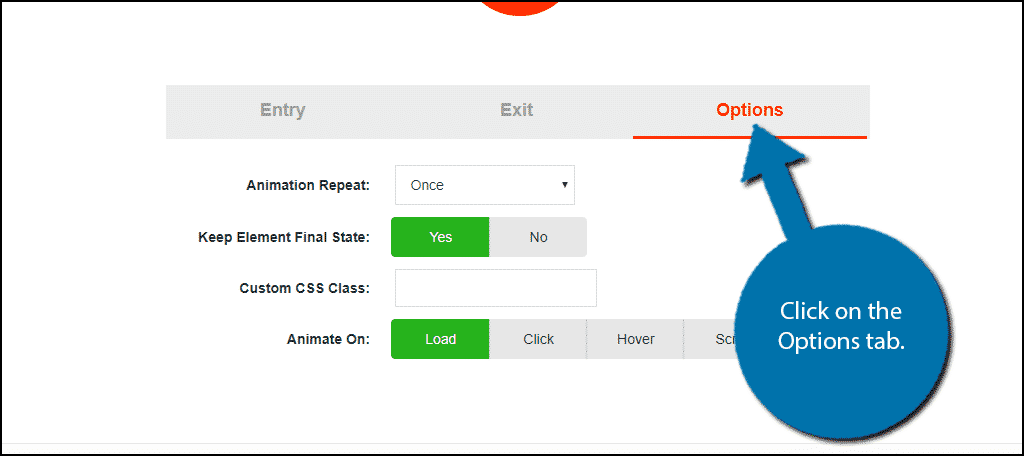
Here you can select how frequently the animation will repeat as well as a few additional options. Once you are done, click on the “Insert” button to add the animation.
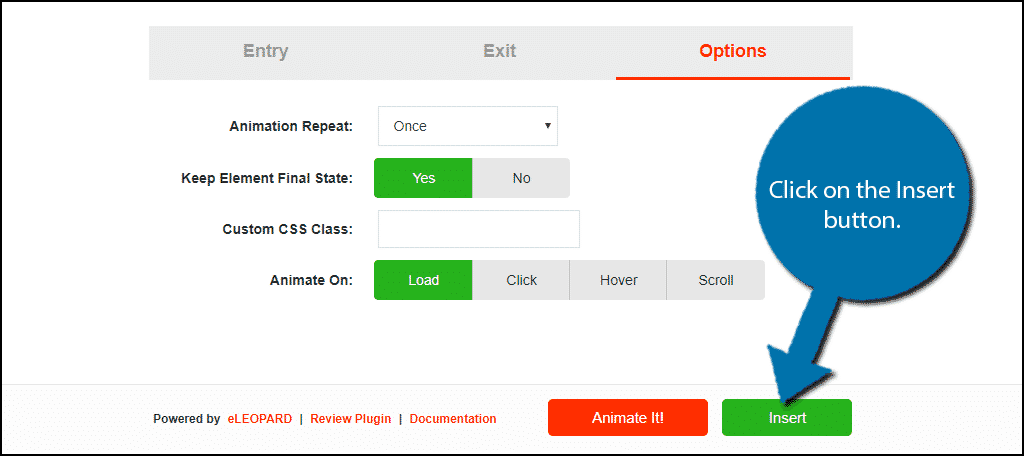
Congratulations, you have successfully added animations to your WordPress website with the Animate It! plugin. You can add multiple animations to every page or post on your website. However, make sure you don’t go overboard. While animations can help catch a visitors attention, they can also make your page a mess, so be cautious.
Use Animations to Improve Your Website
Catching a visitor’s attention is essential to reducing your website’s bounce rate. A bounce rate simply refers to the rate visitors leave your website without exploring any more of your website. For example, if a visitor lands on your homepage and then leaves the website, your bounce rate will increase, but if instead of leaving, they click on another article, then your bounce rate will improve. The lower the bounce rate, the better.
Have animations helped your website? How easy have you found the Animate It! plugin to use?