WordPress has a capable system when it comes to uploading various forms of media. However, wouldn’t it be nice to have certain fields available when uploading images, video and other attachments? In reality, adding custom fields to media in WordPress isn’t all that difficult.
If you need more server space, we offer unlimited storage space on our Pro and Premium WordPress Hosting plans.
The best part is you can do it without knowing a single line of code. With a few customizing options, you can add nearly any field you’d like.
In this tutorial, I’ll show you how to add those custom fields to media in WordPress.
Using Advanced Custom Fields
Don’t let the name mislead you. The “Advanced Custom Fields” plugin doesn’t require an advanced knowledge of development. It’s easy to use once you understand a few of the elements within the tool.
It’s a great tool and will handle everything from media to custom post types you create.
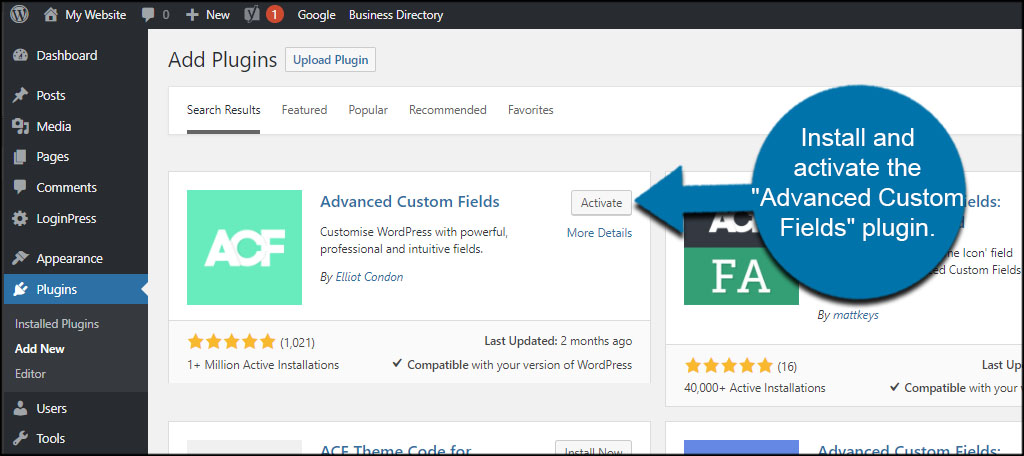
First, install and activate the “Advanced Custom Fields” plugin. You’ll notice that ACF has a lot of mods and add-ons you can use to expand what the plugin can do. You’ll need the main plugin created by Elliot Condon.
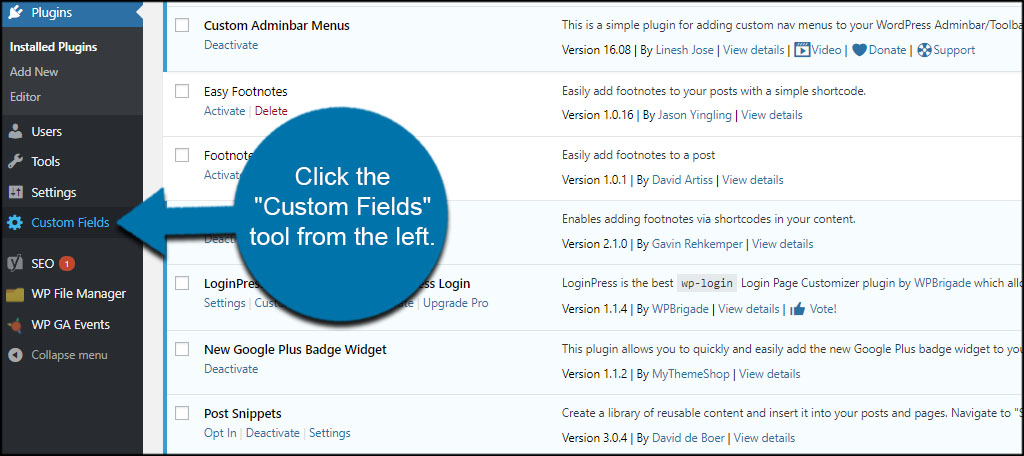
Click the “Custom Fields” tool from the left.
Adding a New Group
You can save fields in ACF according to groups. This is helpful if you want to keep things separated, such as fields for posts or images. Today, we’ll create one for the media library.
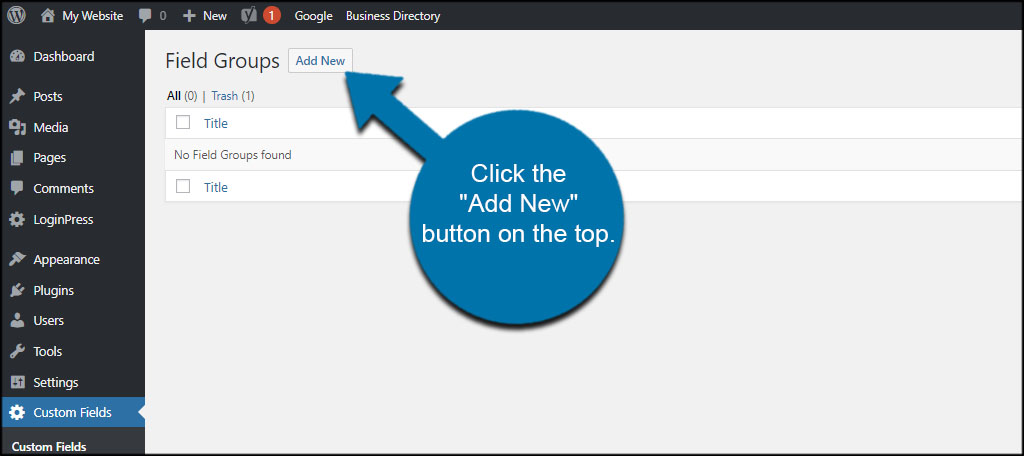
Click the “Add New” button on the top.
Now this next section may seem a bit overwhelming to beginners, but it’s really not that difficult to manage.
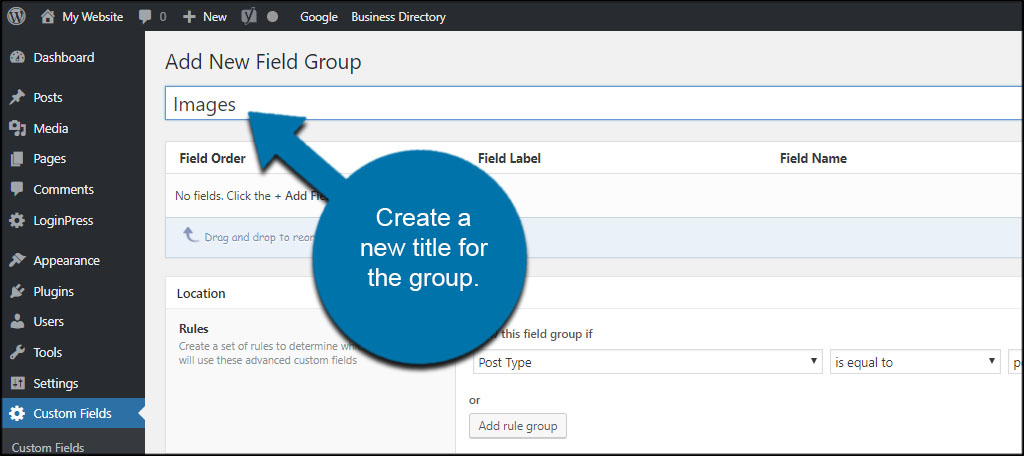
Create a new title for the group. I am going to call this “Images” because it’s what I am editing in WordPress.
For this tutorial, let’s say we want two new fields for media. One for “Photographer” and one for “Location.”
Creating Custom Fields for Attachments
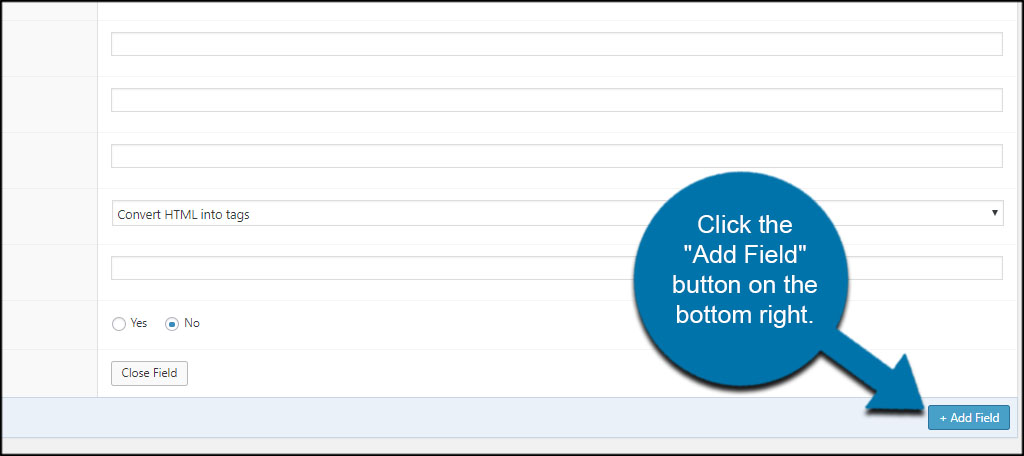
Click the “Add Field” button on the right.
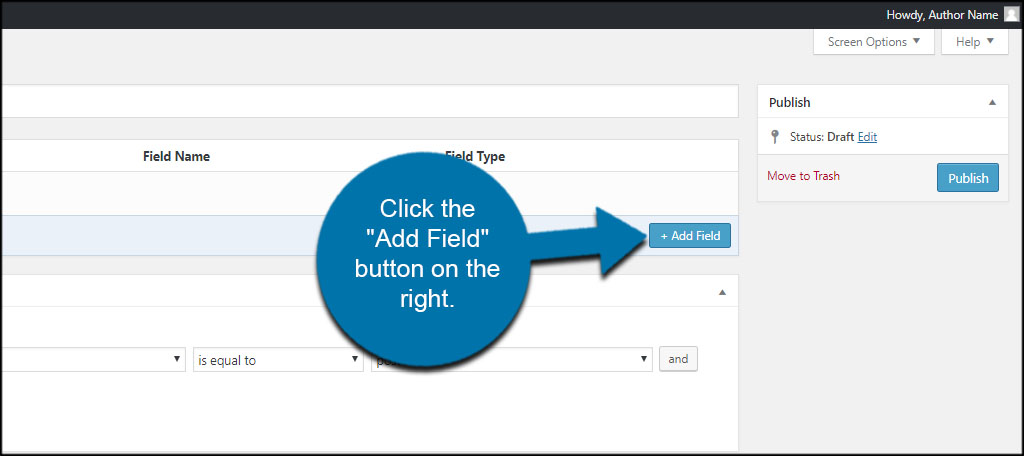
This will expand a whole new section to add your new custom field in WordPress.
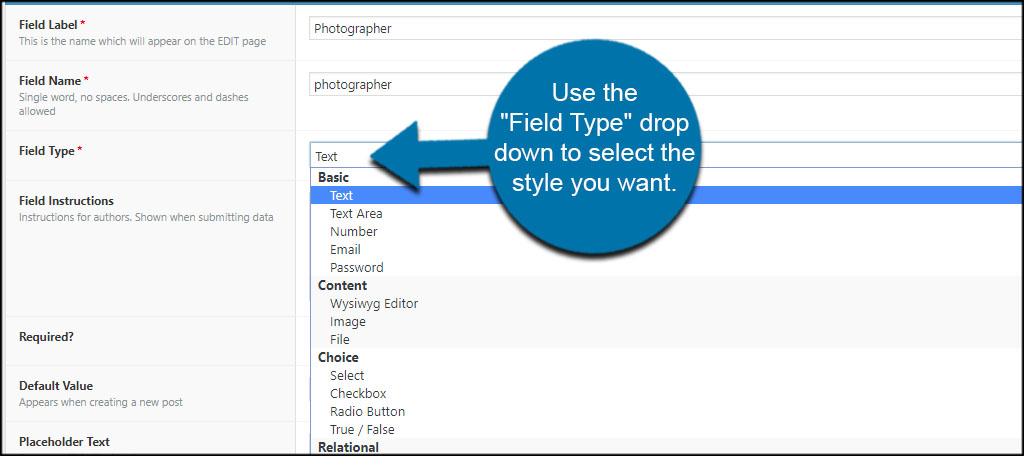
Input a “Field Label.” This is the text that is displayed when a file is uploaded or edited. For this example, I’ll use, “Photographer.”

Field Name will automatically change to reflect the label you entered. This is an identifier for the plugin, and you can make this whatever you want. I suggest keeping it as the default, though.
Next, use the “Field Type” drop down to select the style you want. Since this is a text entry of a name, I’m keeping it as “Text.” However, you have a variety of options to choose from to suit your needs.
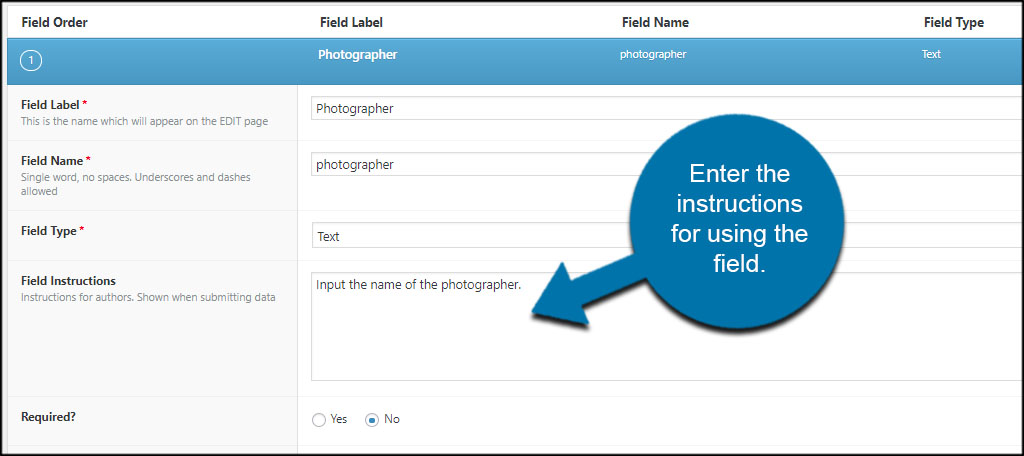
Enter the instructions for using the field. This is displayed when someone is entering data. I’m going to keep it simple and easy to follow.
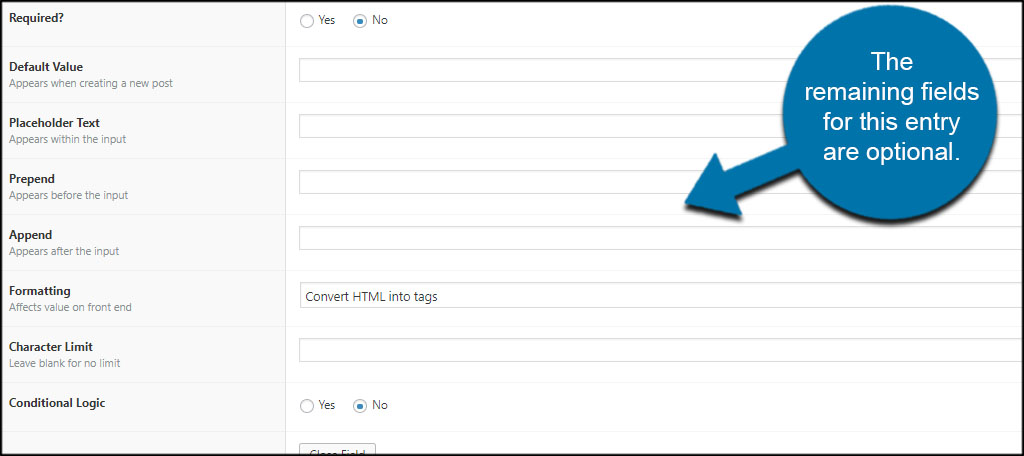
The remaining fields for this entry are optional. You can set the field to be required, what is displayed as default if data is not shown and text before and after the input.
For the sake of time, I’m just going to leave these as default for now.
What if you want to add a second custom field to the media manager? After all, I want to add “Location” to the file upload screen as well. Click the “Add Field” button on the bottom right. Another entry screen will show like the one above.
Create a new custom field like you did earlier. If you only want the one, you can skip this and move onto the rules.
Setting Up the Rules
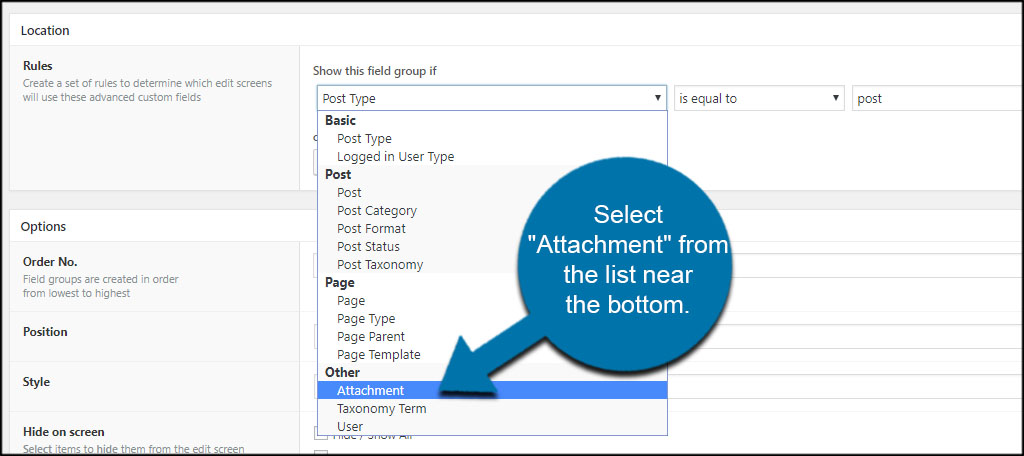
Below the custom field editor, you’ll see a section for Location and Options. This is how WordPress will use the new custom fields in your website.
Change “Show this field group if” to the type you want to use. Using the drop down, you can see all the different elements the plugin lets you modify. Because we are changing the media library, select “Attachment” from the list near the bottom.
Now, the Options below the rules are just that, optional. This lets you selectively hide the group from various areas of the website, the position of the fields and the order in which they appear.
For this sample, I’ll simply leave these settings as default. You can always come back and make adjustments at a later date.
Scroll back up to the top and click the “Publish” button.
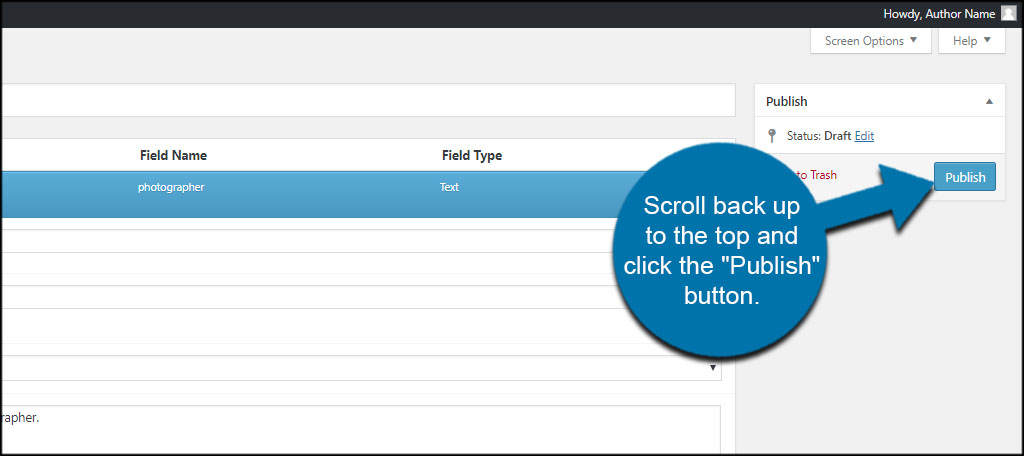
Now, all images will have the new fields available.

Are these new fields added to past uploads?
Yes. When you create a new custom field and group, any content related to it in the “Post Type” you select is affected. This means you can go back and add details to media you’ve uploaded to your website.
What is a practical use for creating custom fields?
Aside from better organization, you can use custom fields in media to support search functions. So in the example above, I could search for all pictures that were taken in a specific location or by a certain photographer. This is just one example of many for why you would put custom fields in media files.
Something else you may be interested in is how you can attach add-on plugins to expand what ACF can do.
For example, you can include an image crop feature that will let users shrink down the image to an exact size. This means you wouldn’t have to go into the media library to crop an image as users can do it during the upload.
These are all accessible from the WordPress “Add Plugin” section.
Custom Fields for a Custom Website
One of the reasons why so many people use WordPress is because of its flexibility. Creating custom fields for attachments in WordPress is only part of that versatility. Expand what you can do on your website. It may save you time and even money in some cases.
What kind of customizations have you put into your website? Have you ever thought about showing off an image gallery to engage your visitors?
How To display Those Field Values in The Gallery Or Post