The comment section is where you can engage the audience and build great relationships. It helps you connect to those who visit the site on a more personal level, which boosts retention and repeat visits. So, what can you do to customize the comment section in WordPress to add greater appeal?
The system has many comment plugins available which deliver higher engagement for readers. However, not all are capable of creating a custom appearance and layout.
In this tutorial, I’ll show you how to create custom comment forms in WordPress.
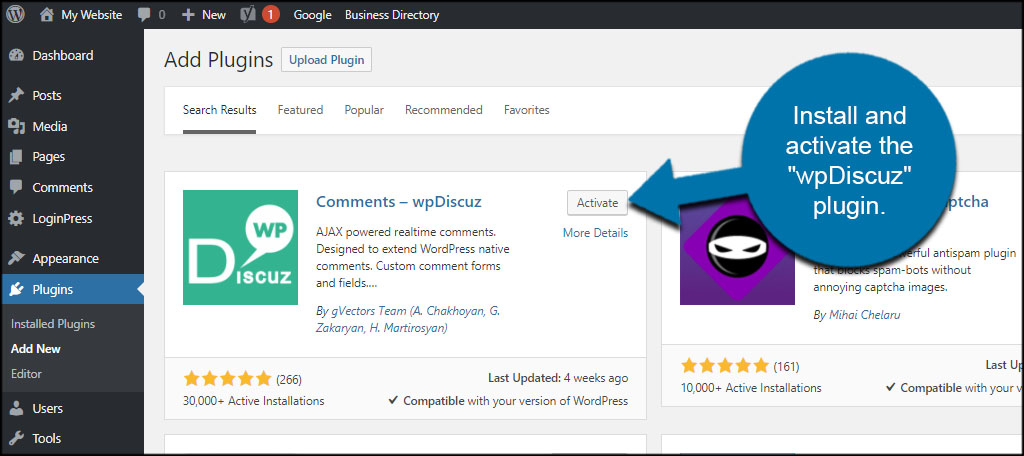
Installing wpDiscuz
Today, I’ll demonstrate the wpDiscuz plugin. It’s an exceptionally popular and high-rated tool that comes with a myriad of customizing options. It’s also easy to set up and use.
Install and activate the “wpDiscuz” plugin.
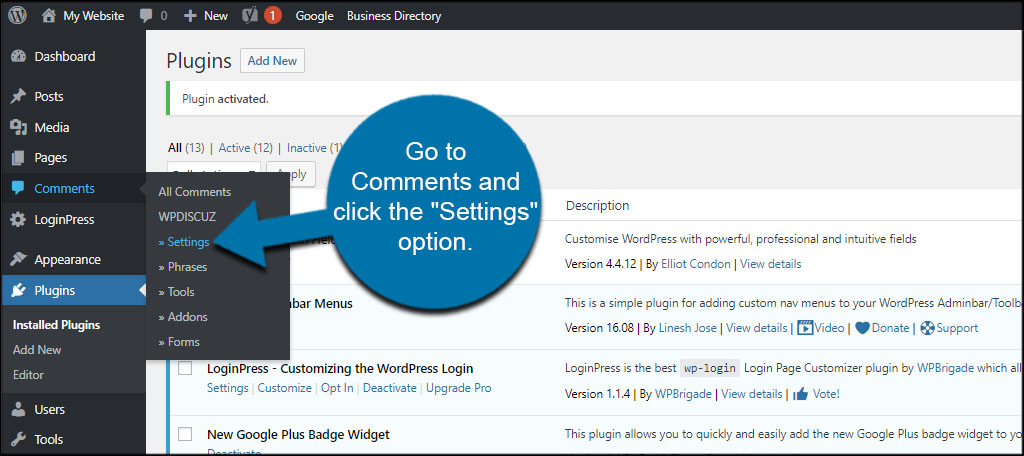
wpDiscuz Settings
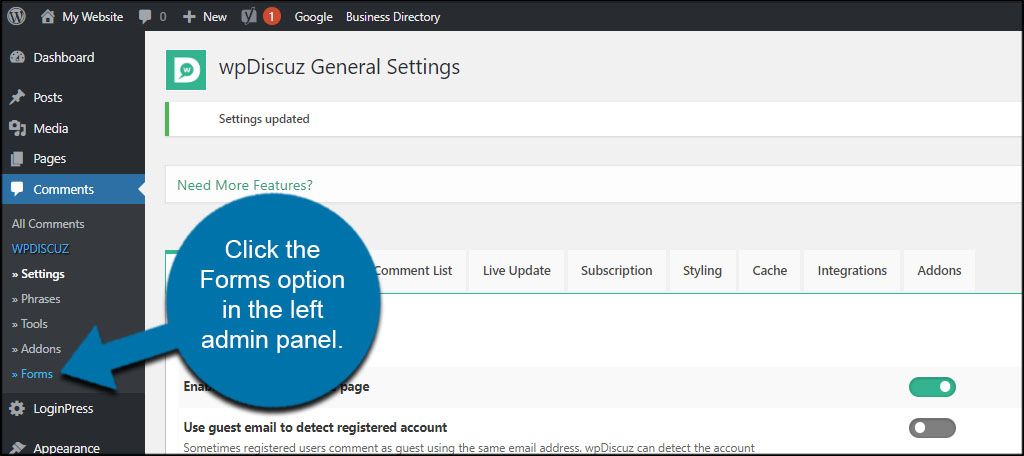
Before you start using wpDiscuz, go to Comments and click the “Settings” option.
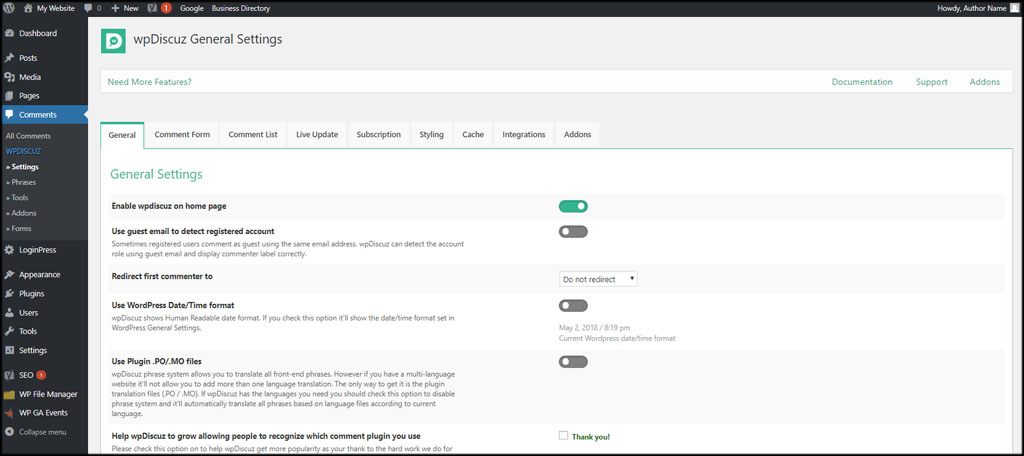
In these options, you can control how wpDiscuz operates on your site. For instance, you can change guest email options, the date and time format or use WordPress translations to help support a multilingual website.
Let’s briefly go over the other tabs available in the settings page.
Comment Form
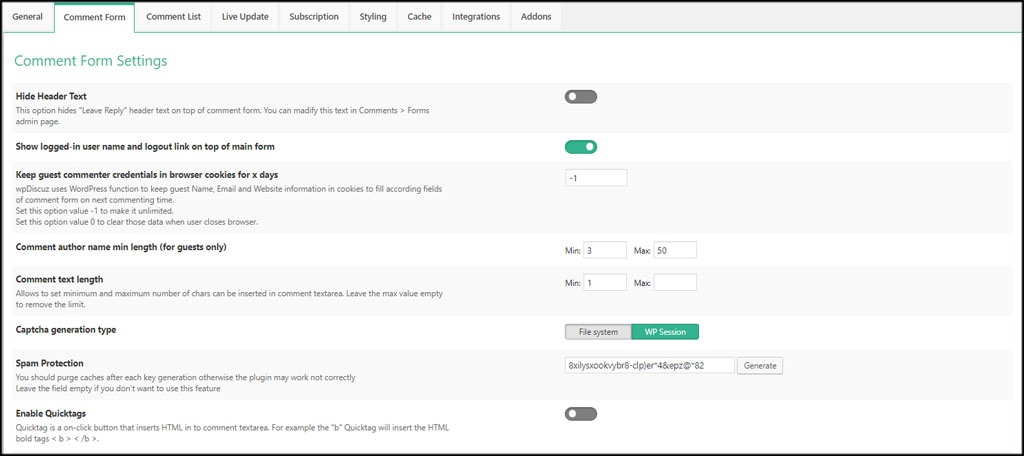
This is the basic settings of how comments work. You can hide header text, set comment lengths, assign spam protection, enable image URL to HTML conversions and give users editing abilities.
To help with spam, you can also set the author name minimum length. By default, this is set to a minimum of three and a maximum of 50 characters.
Comment List
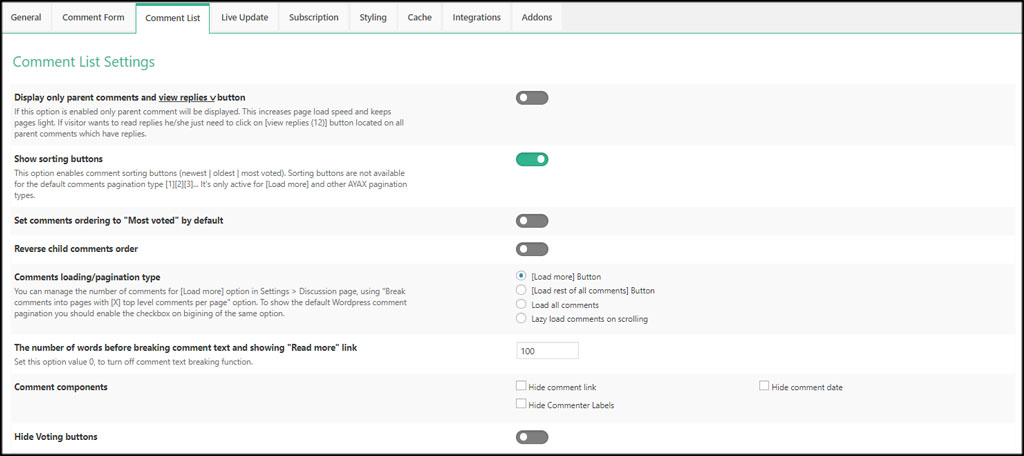
In this area, you can enable all kinds of various layout options. For example, you can assign how many characters are shown before adding the “Read More” tag. Hiding comment links, dates and commenter labels is also possible.
One feature that may pique your interest is showing share buttons from the comment itself. Five social media options are available including Facebook, Twitter and Google+.
Live Update
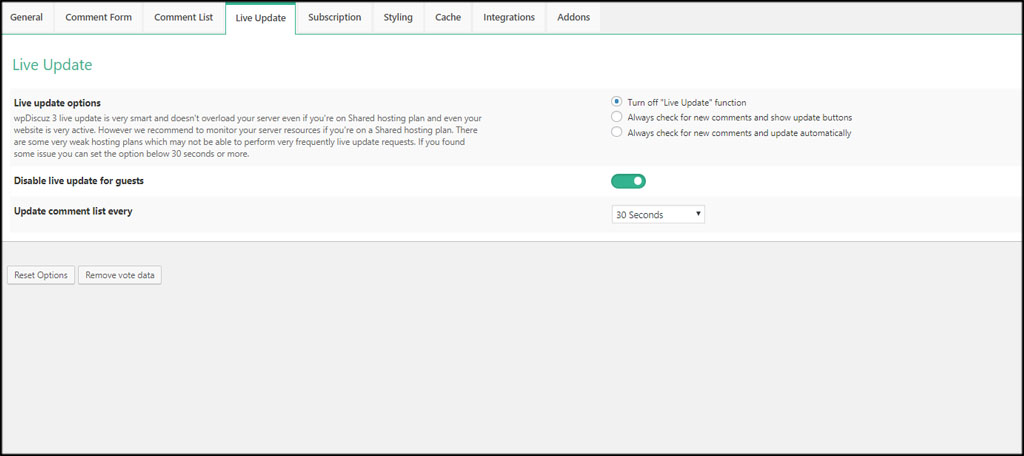
This area is just what you would expect, a way to enable live updates to the comments. However, this is “off” by default. You have the option to update the comments from every 10 seconds to 10 minutes.
The purpose behind this feature is to give visitors a sense of interactivity. When a new comment appears, it is displayed to the visitor, which is perfect for those who are looking for quick answers to questions.
Subscription

wpDiscuz comes with the ability to subscribe to the comment section. Users can determine when a notification is sent such as if a comment is approved or if there is a new message. It works similar to setting up email notifications in WordPress.
Subscriptions give you a platform to keep the visitor engaged and coming back to the website. In fact, you can allow post subscriptions which will notify visitors if there are changes made to the content itself.
Styling
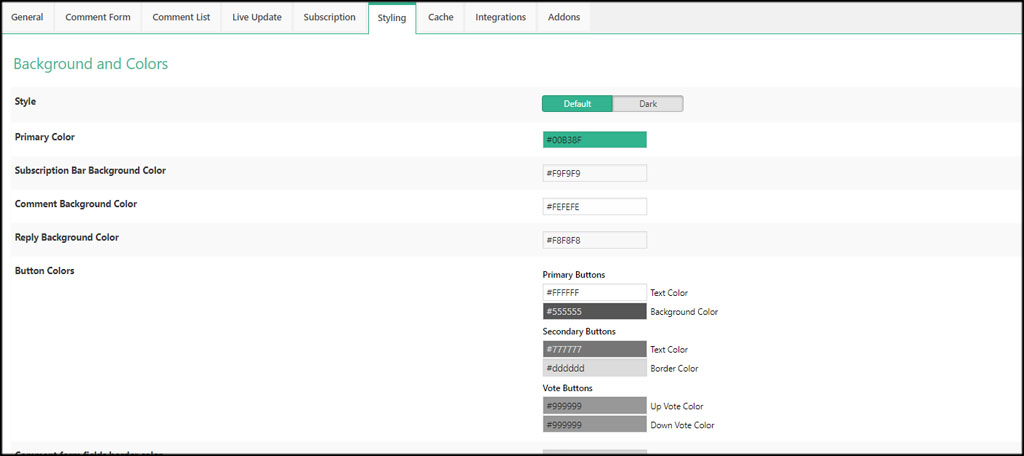
The Styling section gives you tools to customize the appearance of your comment section. For example, you can alter the background and button colors.
The best part is you don’t need to know the hexadecimal code for these colors. The wpDiscuz plugin gives you a color picker when you click into any of the styling options.
At the bottom of the section, you have access to a custom CSS coding window to add your own customizations.
This is excellent if you want custom comment styles but don’t want to modify files in WordPress using CSS or PHP coding elements.
Cache
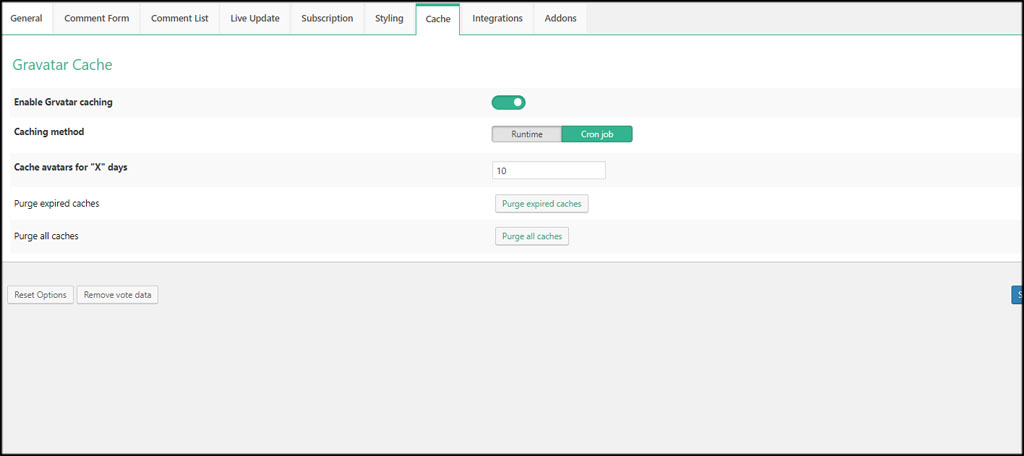
Gravatar caching is a feature in wpDiscuz that helps the performance of your site. If you use Gravatars as images for the comment section, this is a good option to have.
You can decide whether to use Runtime or Cron Jobs including how long avatars are cached on the system. If you’re unsure about these settings, it’s probably good to leave them as is.
Integrations

wpDiscuz supports a few different social building plugins for WordPress. It will give you the coding for things like BuddyPress you can add directly to the functions.php file so it all works seemlessly.
All it takes is a quick copy-and-paste and wpDiscuz is linked to your social plugin.
Addons

If you want to take your comment section even further, wpDiscuz has a long list of addons you can install. These are usually free additions you can install which have functions ranging from media uploaders to Google reCAPTCHA for security.
It may prove useful to take a look at what’s available to further expand what you can to include.
Creating Custom Comment Form Fields
Now its time to build a nice custom comment form for visitors. This will control what information users place on your posts and pages.
Click the Forms option in the left admin panel.
Click the “Add New” button from the top.

Input a new title for your form. To keep this simple, I’m just going to use “New Comments.” This is to help you find your form later if you need to make edits. You can make several different forms for other purposes as well.

Adjust your settings for the comment form. For instance, you can disable certain custom WordPress roles from accessing the comment section while changing the header text above the form.
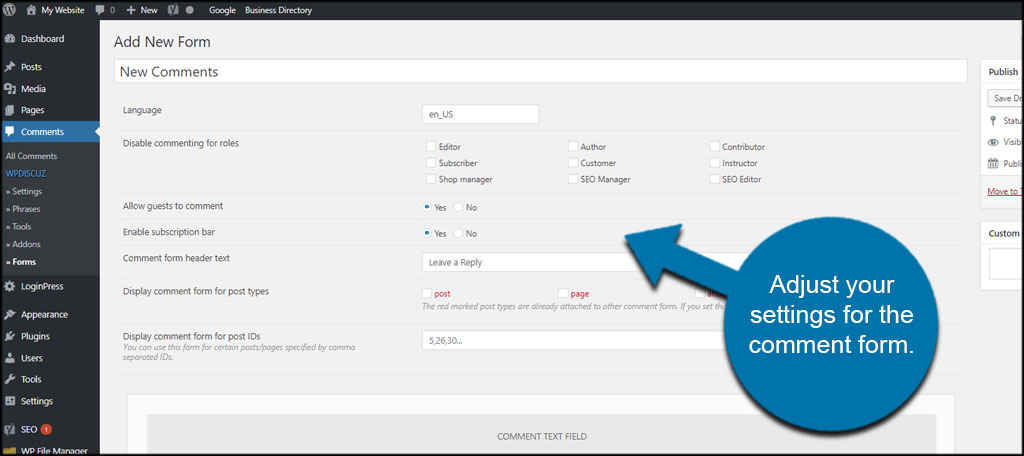
Make sure you check options where you want to show the form. The ones in red are controlled by other contact forms. Checking these boxes overrides that control.

Adding a Field
wpDiscuz gives you the ability to change around your comment form using drag-and-drop features. You can also include additional fields if you want guests to fill out certain information.
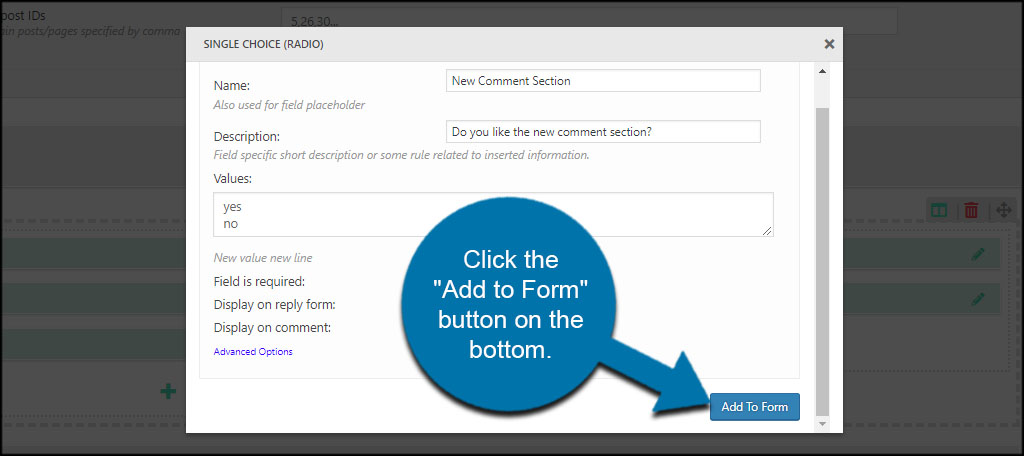
Let’s say we want to ask our guests if they like the new comment section. Click the “+” sign under your comment fields. This will depend on where you want the question to appear. I’m going to put my question on the right side.

As you can see, wpDiscuz has quite a few available options. Since we are making a “yes” and “no” question, we’ll click the “Single Choice” option.

Fill out the info for the new field. This will depend on the kind of field you’re adding to the comment form.

Click the “Add to Form” button on the bottom.
You can also add additional roles if you like and make an intricate and detailed form. However, we’re just going to call this one done. Click the “Publish” button on the top right.

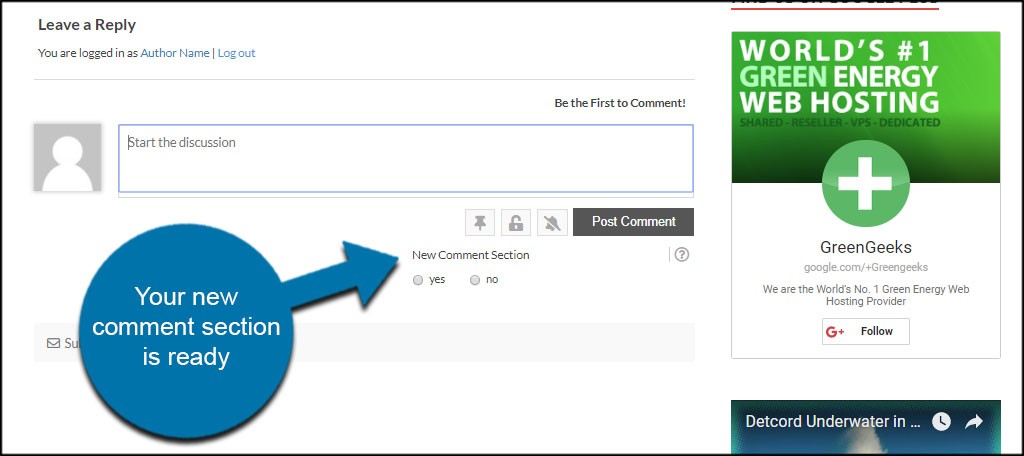
Your new comment section is ready with custom styling and fields.
Make Your Comment Section Engaging
Custom comment styles and fields add a bit more to the section. It helps set your site apart from others while offering a bit of interaction and engagement. With the right questions, you can learn a lot about your readers while making them feel more welcome.
What kind of additions do you use to engage your visitors outside of content? How often do people use your comment sections to ask you direct questions?
This is best plugin for comment modification with a lot features.
Thank you.