Are you having trouble displaying all of your recent posts on your website? Many websites will rely on the recent posts widget to display their most recent posts on their sidebar. The problem with this widget is it takes up a lot of room on your sidebar. A great alternative is to create a drop-down to display your recent posts.
Getting your new content the attention it deserves is not easy and you will need to think outside the box to do so. Regardless of your method, you need to advertise your newest content everywhere on your website. Just be careful about being too annoying about it.
Today, I will demonstrate how to create a drop-down that will display your recent posts.
Are There Other Ways To Display New Content?
Absolutely! Some of the most successful methods include sending your email subscribers alerts when new content is out and alerting your social media followers when content is released.
These seem like simple concepts that everyone can do, but building up your email subscriptions and social media followers is not an easy task. In fact, those are separate problems that require their own methods to grow.
If you have not started gaining email subscribers or social media followers, don’t worry, there are still methods you can use. Your website’s homepage should be an informational hub on your website that displays all of your newest content.
Properly maintaining your homepage is important. You can also create a navigation menu item to lead visitors to new content. There are plenty of methods to get the word out about new content. And many of them only take a few minutes to set up.
How to Display Recent Posts With A Drop-Down
To make a drop-down list in WordPress for the recent posts, you’ll need to edit the functions.php file. You can add the coding by opening FTP or cPanel‘s File Manager, and then editing the file with the specific code shown below.
Step 1: Locate the Functions.php File
This is one instance where you will not need any additional plugins to accomplish this.
Instead, you will need access to your website’s cPanel. The login information is provided by your web hosting provider when you create an account with them. Since you will be editing files in the backend of your website, it is a good idea to backup your website.
This will ensure that if a mistake is made, you can revert your website to the version before the mistake was made. And it is just good practice to keep one up-to-date at all times as a website owner.
I’ll show you how to make a simple drop-down menu for your new posts.
Let’s start by logging into the cPanel and clicking on the File Manager option. The File Manager will allow you to access all of the files related to your website.
![]()
You need to locate your theme’s functions.php file. Click on the public_html directory, then click on the wp-content folder. Inside of this folder, you will find all of the content related to your website. Click on the themes folder and enter the folder of the theme you are currently using. Finally, right-click on the functions.php file and select the Edit option.
![]()
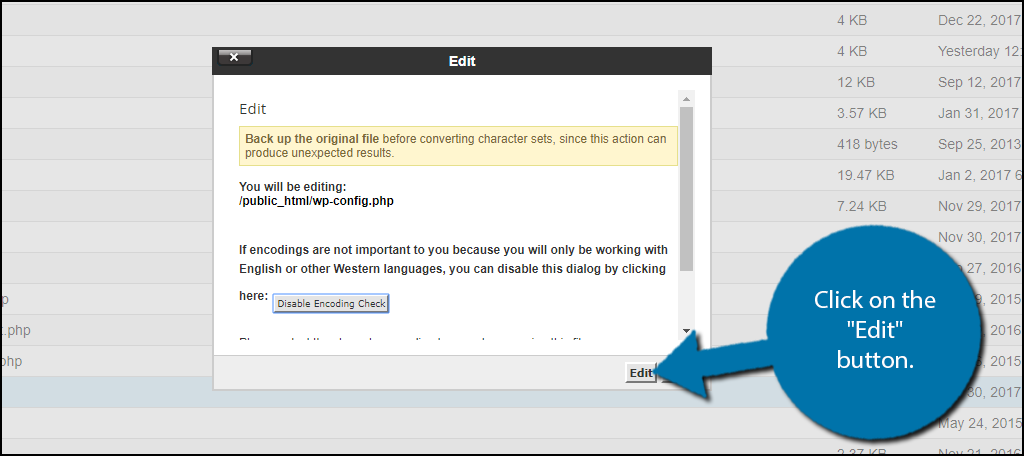
A pop-up window will show up. This box will warn you to create a backup of your files before editing anything. This will ensure that you can revert your website back to when it was working if something goes wrong. Click on the “Edit” button. A new tab will open containing all of the code from the file.
Step 2: Adding Custom Code
Don’t worry, you don’t actually have to do any code writing yourself. Instead, you can simply copy and paste the code located below. Thus, regardless of your coding knowledge, anyone can follow these steps.
Now it’s time to add the code to your functions.php file. Copy and paste the following lines of code into the file:[ht_message mstyle=”info” title=”” show_icon=”” id=”” class=”” style=”” ]function Simple_Recent_Posts_Drop_Down() {
$string = ‘
$args = array( ‘numberposts’ => ‘5’, ‘post_status’ => ‘publish’ );
$recent_posts = wp_get_recent_posts($args);
foreach( $recent_posts as $recent ){
$string .= ‘ ‘;
}
$string .= ‘
’;
return $string;
}
add_shortcode(‘Simple_Dropdown’, ‘Simple_Recent_Posts_Drop_Down’);
add_filter(‘widget_text’,’do_shortcode’);[/ht_message]
Note: If this is your first time adding code to your functions.php file, simply add it at the bottom. Make sure it is not inside of another function or else it could cause problems.
This will create a simple drop-down menu that will display the five most recent posts. You can change this by changing the number “5” to a higher number or a lower number. Once you have inserted the code into the functions.php file, click on the “Save Changes” button to finish.
![]()
You are now done with the coding part of the tutorial. All that’s left is to actually add the feature to your website.
Step 3: View the Recent Posts Drop-Down Box
The code you just added will allow you to use the shortcode [Simple_Dropdown] anywhere a shortcode can be used. This includes posts, pages, and text widgets.
The shortcode will simply add a drop-down that displays your recent posts. By default, the code will show the 5 most recent posts, but that can be altered in the code.
A great location is on your sidebar since it will be visible throughout your website. Once the shortcode has been placed, you can see it on your website.
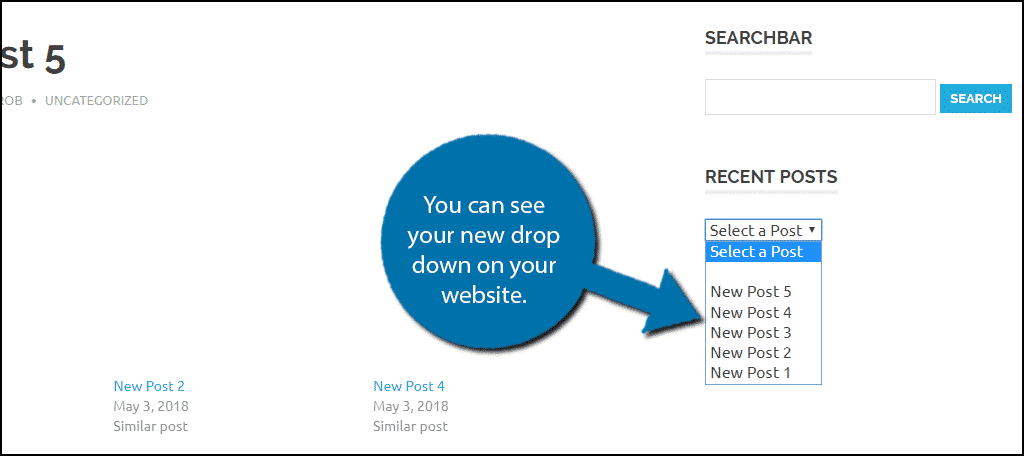
Another great area is right at the bottom of your posts. That way when visitor finishes reading an article, they can see the other new content you have produced. The same can be said about your social media buttons.
Congratulations, you have created a simple drop-down for your most recent posts. This drop-down menu will take up less space than the built-in recent posts widget. Sidebars are important for every website and taking up as little space as possible is important. This allows you to include other features.
Why Not Just Use the Recent Posts Widget?
I mentioned this earlier, but WordPress has a great option to show your newest posts, the Recent Posts widget.
Some websites might not have a problem with this widget. In fact, I think it’s a pretty strong addition to most websites. The main drawback is the amount of space it takes up and this can be made worse if you have very long titles.
However, if you have really interesting titles, it can be more effective at grabbing the visitor’s attention. Thus, getting the most out of the widget is different for every website.
Most sidebars typically contain a search bar, social media buttons and icons, calendars, and more. It becomes a balancing act that all website owners need to manage, so make sure you can justify the space a widget takes up.
If you can’t, then the widget might not be worth it.
Inform Your Visitors About New Content
Getting the word out about your new content is not easy and it is especially tough for new websites.
The moment your website is up and running should be when you begin creating social media accounts on Facebook, Twitter, Instagram, and any other platform you choose. Websites benefit tremendously from advertising and sharing their new content on these platforms.
However, displaying information directly on your website is still important. It helps all of the visitors on your website see your newest content.
How do you like the recent posts drop down? Do you think displaying five recent posts is enough?