Testimonials are perhaps the most sure-fire way to boost brand reputation. You see them everywhere online. Some platforms include Google, Facebook and even WordPress websites. Brand users connect with good testimonials and trust their peers, so it is important to have a customer review page on your website. To do this you want to add a WordPress testimonials plugin.
Why Add a WordPress Testimonials Plugin?
As we touched on a little, brand recognition and consistency is important. Remember, good or bad reviews can make or break you. If you continue to get good reviews, then you want to use a good customer review plugin for WordPress to showcase those praises.
Showing these solid reviews to other potential clients will help you boost your brand’s reputation, both online and through the community. There are several good client testimonials plugins for WordPress. I have narrowed it down to one solid one that will give you everything you need.
Strong Testimonials

Strong Testimonials is a customer review plugin for WordPress that provides you with all the tools you need to display client testimonials for your brand. The plugin gives you the ability to add and display client testimonials in several different ways.
You simply add your testimonials into the Strong Testimonials plugin and use the shortcodes provided to display them how you want on a post, page, or widget area of your WordPress website.
The plugin is packed full of features including:
- No complicated shortcodes
- A front-end form
- Custom fields
- Star ratings
- Slider & carousel with several navigation options
- Grids and Masonry
- Ready for translation with WPML, Polylang, and WPGlobus
And that is just the beginning. Other great features include the ability to sort, use categories and excerpts, pagination, and featured images with or without Gravatar.
Strong Testimonials provides you with everything a WordPress testimonials plugin should.
Let’s take a look at how to use it.
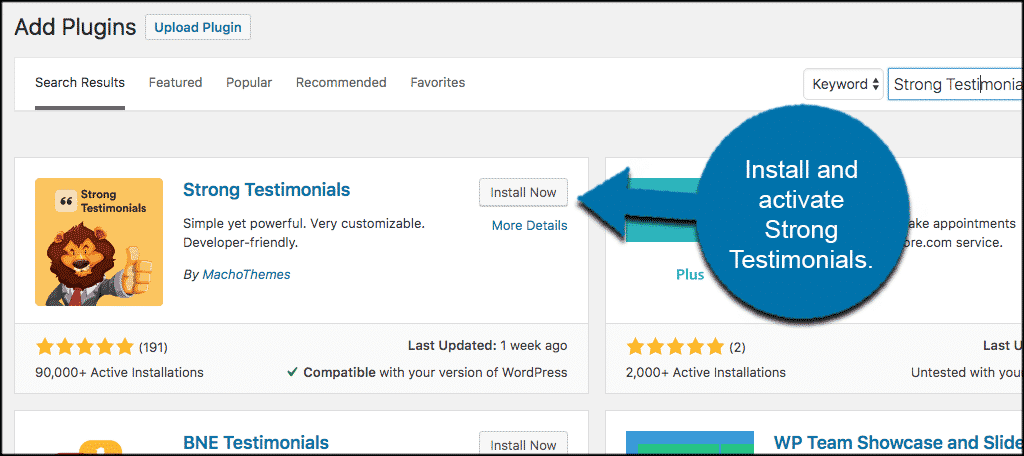
Install and Activate Strong Testimonials
In order to use this customer review plugin for WordPress, it needs to be installed and activated. You can do this from the admin dashboard of your WordPress website.
Once the plugin has been installed and activated, click on Testimonials > Settings, located on the left menu bar in your admin screen.
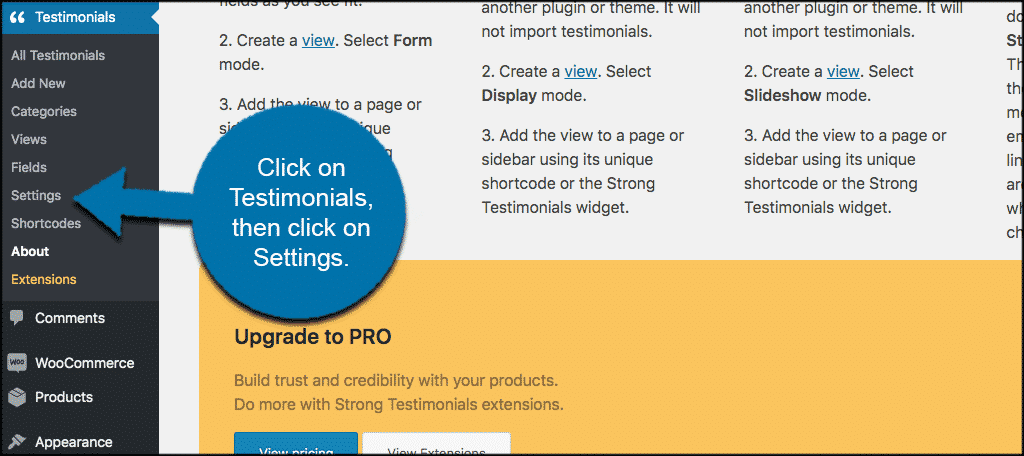
This will take you to the configuration and settings for the plugin.
Configuring the Testimonials Plugin
As is the case with most plugins, you can configure the settings for this WordPress testimonials plugin however you want. Let’s go over some of what you will see.
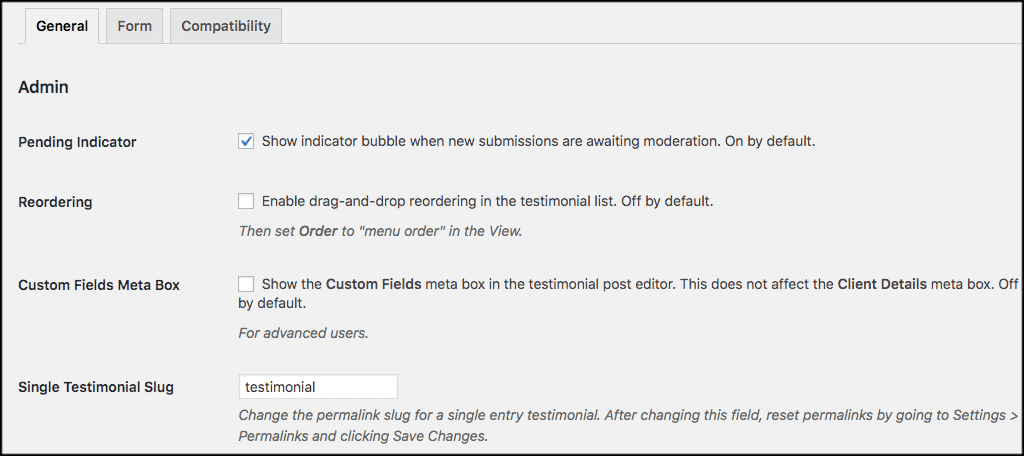
General
When you click on the “General” tab, you will see some admin and output settings. I recommend you keep anything that is checked by default the way it is. However, you can change it if you want. Here are some Admin options you will see:
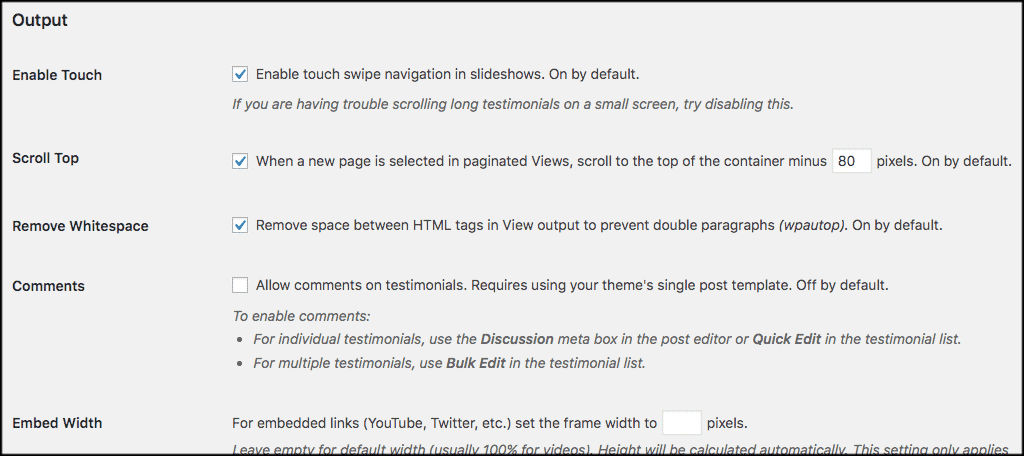
You can also choose certain output options for the plugin as well, so feel free to configure these how you would like.
Form
Now click on the “Form” tab. This is where you will configure the form that allows clients to submit their own testimonials to you. Again, configure this however you want your form to display.

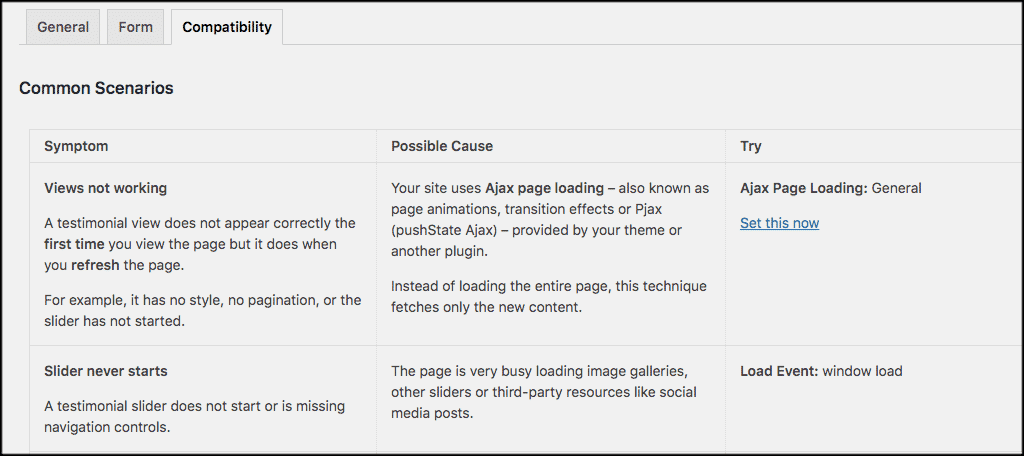
Compatibility
The “Compatibility” tab will show you some options for plugin compatibility, and will also suggest how to fix certain issue you may run into. Give it a look if you are having any issues with the WordPress testimonials plugin.
Adding a Testimonial
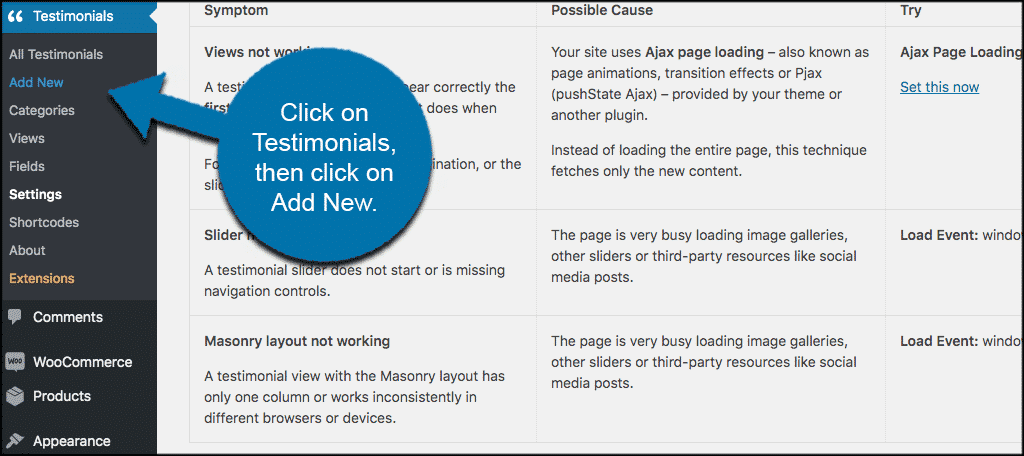
When you are finished configuring the customer review plugin for WordPress how you would like, click on Testimonials > Add New, so you can add a client testimonial.
The “Add New” section is presented to you in the form of a regular editor. Go ahead and fill out a title and description. The title will be the title of the testimonial, while the description will be the testimonial itself.
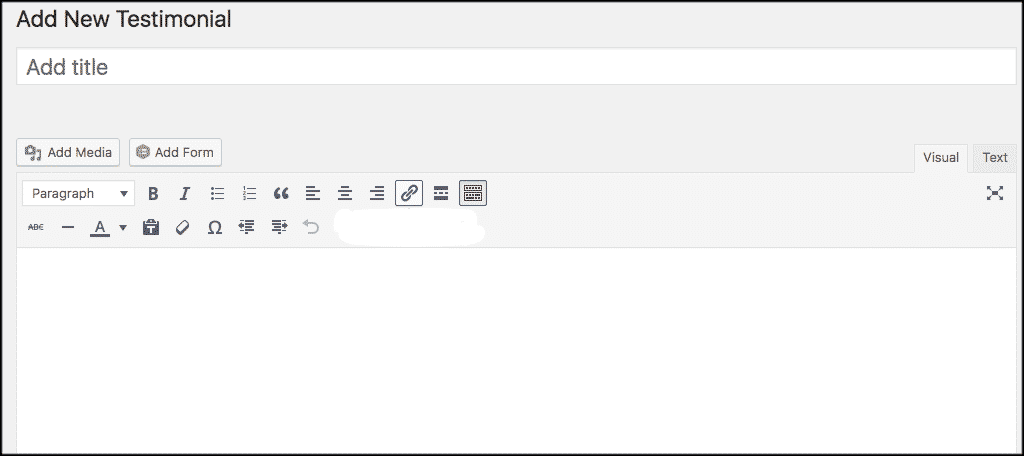
Note: if you want to add an image to the testimonial, simply use the featured image option.
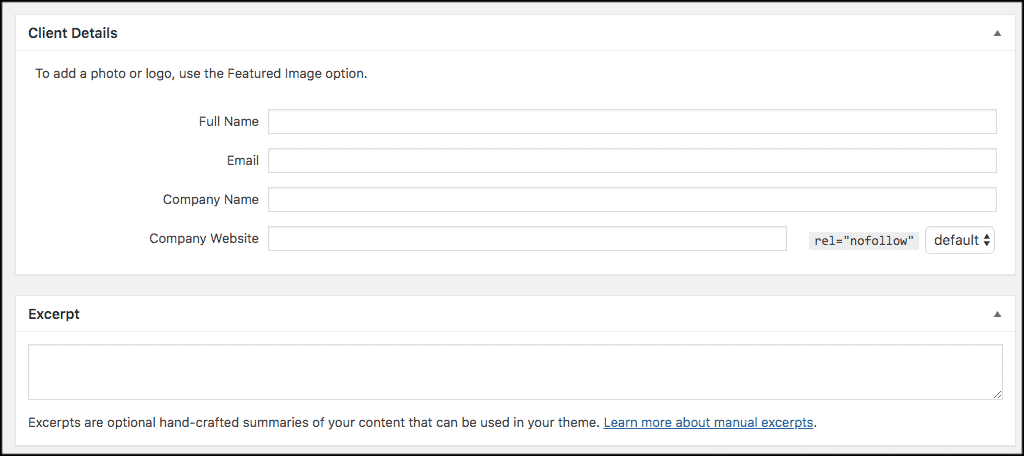
Now scroll down some until you see a section titled “Client Details.” This is where you fill in the actual client details that will display on the testimonial. You can include:
- Name
- Company Title
- Company Website
When you have finished filling out the info you want, click on the “Publish” button and the client testimonial will be published.
Displaying Client Testimonials
In order to display your added testimonials, you have a few different options. All of the display options are presented using shortcodes. Click on Testimonial > Shortcodes to access the shortcodes page for the plugin and view your options.
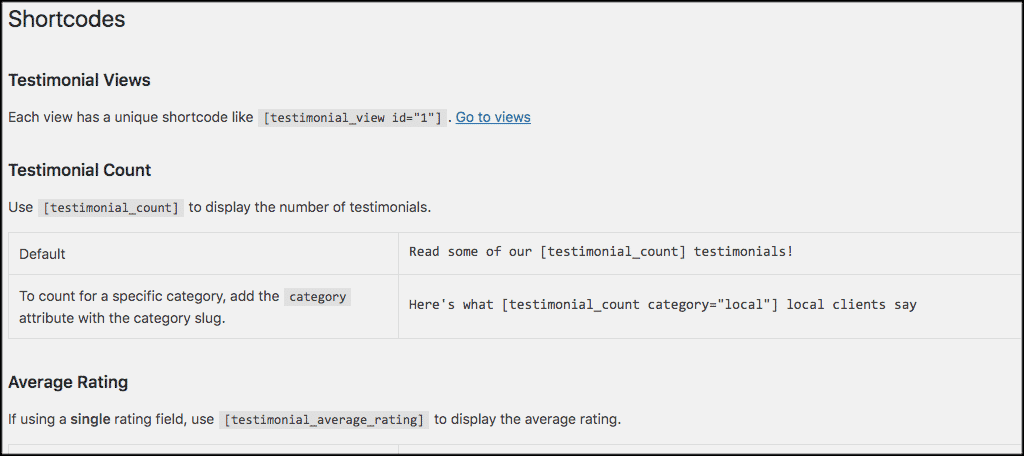
As you can see, you are able to display your testimonials a number of ways including:
- Single View
- Testimonial Count
- Average Rating
- Using Stars
- Titles
- Summary
Simply copy and paste the relevant shortcodes to display the WordPress testimonials plugin how you would like.
You can paste these shortcodes in pages or posts.
Final Thoughts
If you have a brand that you are trying to boost, then you will be hard-pressed to find a better way to do that than adding testimonials. Using a WordPress testimonials plugin is the perfect way to get reviews up and on your website and allow your brand to gain more traction via word of mouth.
Have you ever used a client testimonials plugin for WordPress? Have you used testimonials in a different way than just on your WordPress website?